So you want to plan a hiking trip, but you’re looking for ways to better prepare yourself. You’ve come to the right place.
I’ve been hiking for literally half of my life, and today I’m going to share with you 8 fundamental tips for your trip, then I’ll share 3 more clever and insightful tips I’ve picked up along the way that I guarantee you won’t find anywhere else.
Let’s get straight to it!
1. Check The Weather
I know I know, it’s common sense. But you’d be surprised how many people (myself included) have made this mistake. The best place to check the weather is on an app called All Trails.
Google is great too, but I’ve found All Trails to be more accurate, especially when it comes to forecasting subtle differences such as partly cloudy days.
Check for windy conditions, thunderstorms, snow, and the most overlooked weather villain of all: extreme heat. If you see any of these in the forecast you may want to postpone your trip.
If you see the possibility of a thunderstorm and you insist on going hiking, check out this guide I wrote about hikers getting caught in a thunderstorm by clicking here. It could save your life!
The danger of bad weather doesn’t automatically disappear because of a great forecast. Nasty weather is known to form very quickly in the mountains. Always keep an eye out for chances of rain or snow. The weather gods don’t always get it right.
2. Take a Map
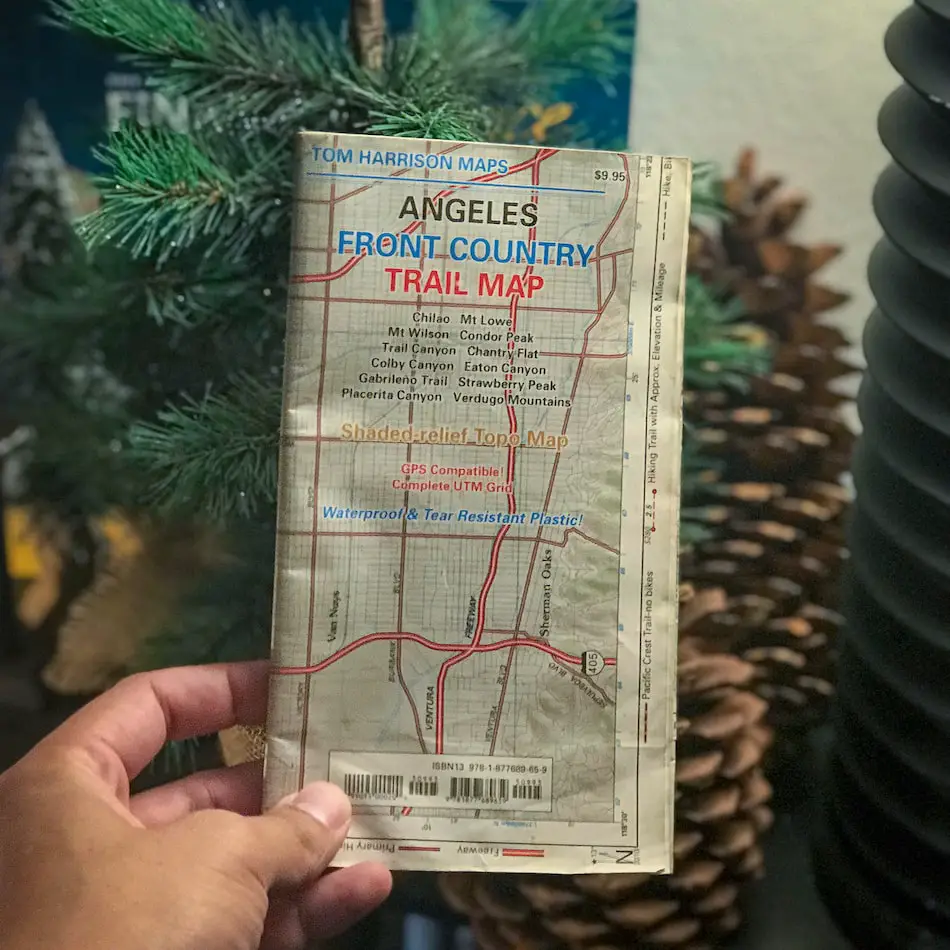
Unless you know the place like the back of your hand, I highly suggest you take a map. While the number varies every year, roughly 2000 hikers get lost on an annual basis, some of which are never found.
You can easily avoid the catastrophe of getting lost if you simply carry a hardcopy map. I love and suggest Topo maps. I’ve been using them since I was a teenager, but any type of map will do.
If you’re planning a short hike, you can use the app All Trails to record yourself while you’re on the trail using their GPS. This will make it very easy to find your destination.
If you’re planning a much longer hike you can still use the app, but take a hardcopy of a map just in case your battery runs out. Better safe than sorry.
3. Pack the Correct Amount of Food and Water
The rule of thumb is to carry about half a liter of water in decent weather (decent meaning 75 degrees give or take 10 degrees) for every hour you plan to be on the hike. If you’re going to hike in hot weather always take extra water; at least three fourths of a liter for every hour.
For day hikes, I suggest taking high calorie snacks. These include nuts, peanuts, granola bars, trail mix, dried or fresh fruit, energy bars, beef jerky, hard-boiled eggs, and seeds.
My personal favorite are peanut butter sandwiches because they contain a TON of calories, and I can hike the entire day without them spoiling. They just tend to get a little soggy and squished if you’re not careful. One sandwich plus snacks is enough for a hiking lunch.
For snacks I love caffeinated Clif Bars. They don’t have a whopping amount of calories like some of the other snacks I previously mentioned but the caffeine boost feels reeeeeal nice on the trail. I’ll usually take two bars and 2-3 other snacks.
4. Take a Flashlight
Even if you don’t plan on hiking in the dark, it’s good practice to carry a flashlight with you on every hike. You don’t know when an emergency might occur and you find yourself outdoors after the sun has set.
I prefer a headlamp instead of a handheld flashlight because it leaves your hands free incase you have to climb over obstacles or, in a worst case scenario, carry a loved one to safety.
5. Carry a Whistle
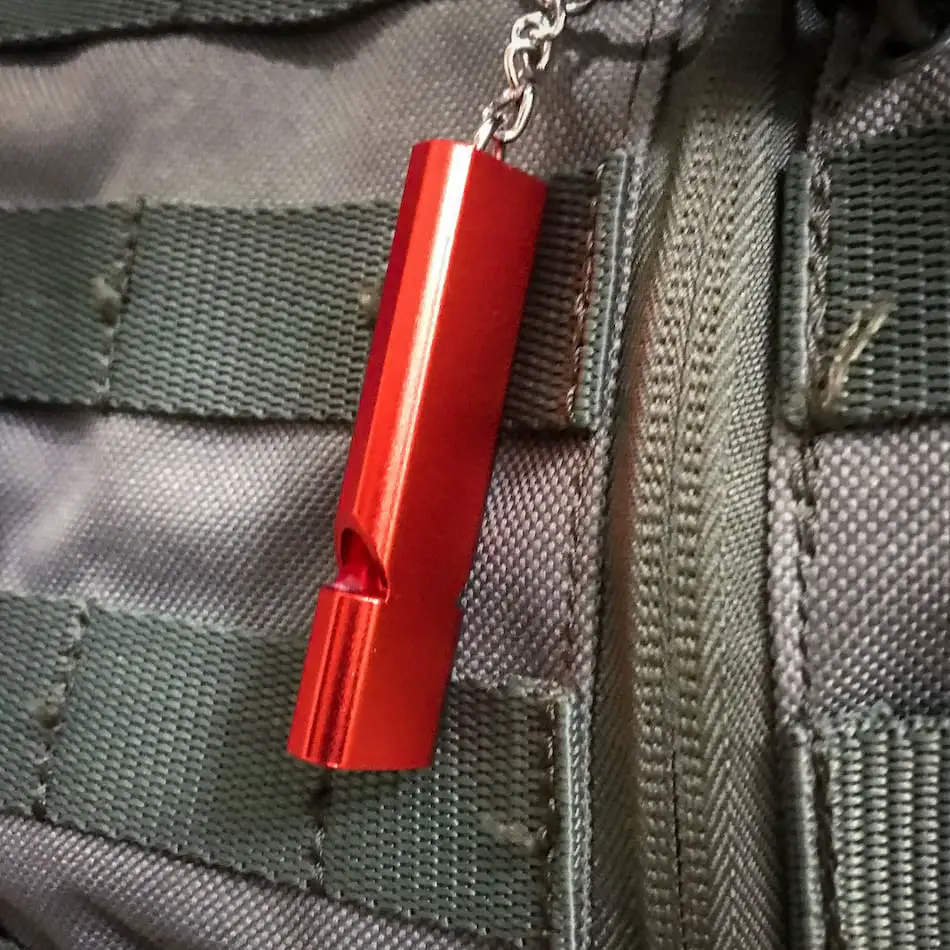
Whistles are extremely cheap and useful in warding off wild animals or calling for help in an emergency. If you’re injured or trapped, blow three consecutive rapid bursts and wait a few seconds for a response.
Three consecutive whistles is code for SOS.
I use the following whistle, which I bought from Amazon. I keep it hooked onto my backpack at all times.
It’s so small and lightweight I don’t even realize it’s there half the time, but I know if an emergency occurs, I’m ready to roll.
6. Use the Proper Shoes
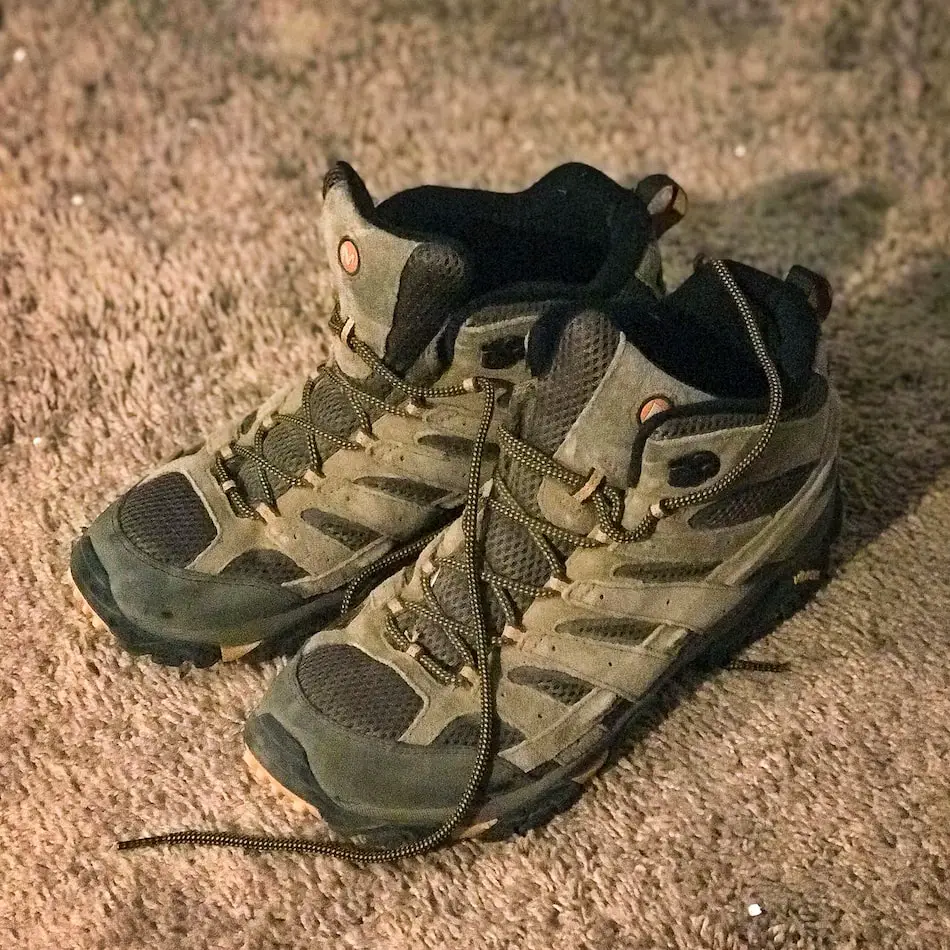
This is the most common mistake I see people make. Running shoes are rarely acceptable for hiking because they don’t provide the same amount of traction, support, or protection as hiking boots.
Ventilation
I highly suggest you invest in a good pair of hiking boots that are suitable for the terrain you plan on hiking.
If you frequently hike in the heat, such as myself because I’m in Southern California, focus on shoes with adequate ventilation. I own a pair of Merrell Moab 2 Vent and I’ve never looked back.
If you hike in cold or snowy weather you’ll want to invest in boots with more insulation to keep your feet warm.
Ankle Support
If you notice yourself constantly twisting your ankles on rocks, invest in boots with ankle support. Boots with ankle support are high-top shoes, but not as high as military boots and won’t allow you to bend your ankles in a lateral direction.
Sole Protection
This factor is so important but highly overlooked. My first pair of boots were Columbia. They were well ventilated, super light, and provided ankle support.
However, the soles were too soft, so I could feel every rock I stepped on. After a couple of hours of stepping on rocks without adequate protection my feet would hurt like hell.
The point is, look for hiking shoes with soles that aren’t too soft. They should be tough on the outside and comfortable on the inside.
My girlfriend also has a pair of Merrell boots, so both of us can honestly and accurately guarantee you won’t have an issue with these boots.
Please do yourself a favor and invest in a good pair of hiking boots or shoes even if you have to spend a little more.
I’ve taken the cheap route by purchasing hiking boots from Big 5, but the quality of those shoes doesn’t even come close to higher-end boots, and your feet will hurt sooner or later.
To avoid unbearable foot pain, never break your boots in on the hike. This was one of my first noob mistakes. Break your shoes in at home a few days before the hike.
7. Choose The Right Clothes

As I previously mentioned, the weather can change rather quickly outdoors. If there’s a small chance of rain in the forecast, take a jacket with you.
I use a lightweight Columbia waterproof jacket which I can easily stuff into my backpack without adding a ton of weight. It keeps me warm incase it gets a little chilly (which happens often at the summit), but it’ll also keep me dry if it rains.
If you think you’ll be hiking in the heat, I highly suggest you invest in a pair of convertible hiking pants. These awesome pants allow you to unzip your pants around the knee and convert them into shorts quickly and efficiently.
8. Tell Someone Where You’re Going
This tip is crucial if you’re hiking by yourself. By the way, if you plan on hiking alone, you can read up on the best tips I have for solo hikes here. It’s super important you know what you’re doing if you’re planning a solo hike.
This is how I like to go about informing someone when I’m planning a hike.
- Tell a reliable person the exact name of the hike you intend to visit. If possible, mention the names of the trails.
- Tell them you will text them by a certain time. For example, if you plan on getting back by 4pm, tell them you’ll text them by 7pm just in case you stay out a little longer.
- If they don’t hear from you by 7pm ask them to text you.
- If you don’t reply within an hour, have them call the police. You may be injured or lost.
That’s it! Simple but effective, and it can mean the difference between life or death.
Okay, now I”m going to share with you some awesome tips to ensure you have an amazing time on your hike. I’ve learned these unique tips on my own through personal experience so I know they will help you as well.
9. Look Up Recent Pictures on Instagram
Certain hikes are more ideal during different times of the year. For example, it’s usually best to visit waterfalls during mid spring to early summer to enjoy a waterfall with more water. This is how you can check your destination without actually being there if you have instagram.
- Login on your Instagram app and tap the search bar.
- Type in the name of the hike you wish to visit. I’ll use Bonita Falls as my example.
- Tap “see all results for Bonita Falls”
- Tap on the Places tab
- Tap on the correct location of your hike. In my case it’s “Bonita Falls in Ontario, CA.”
- Tap on the “Recent” tab on the right side of the “Top” tab.
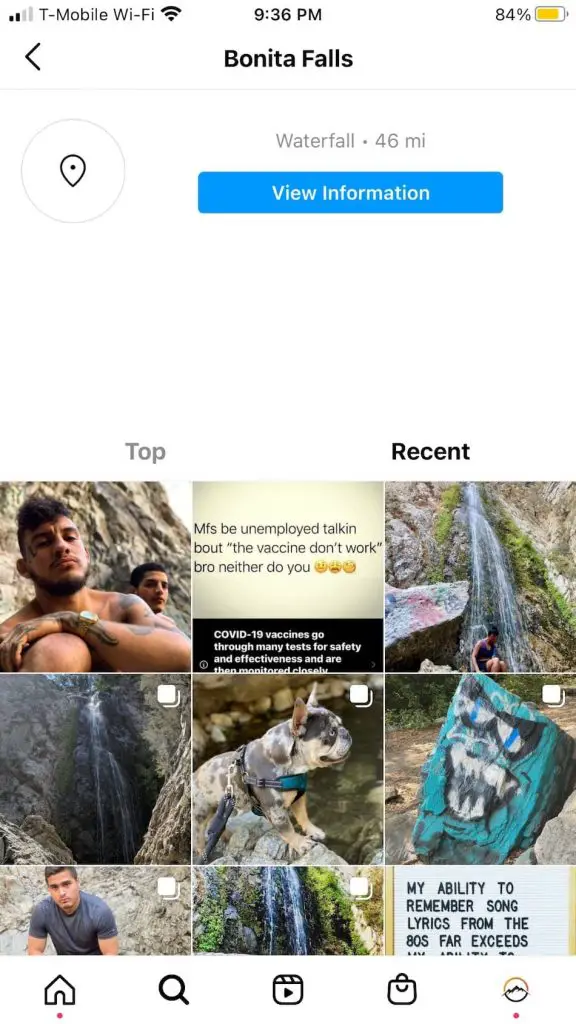
Now you will be able to see all the most recent images people have uploaded. In my case, I’m looking for pictures of a full waterfall.
However, don’t rely on just one image. People occasionally upload images they took weeks or months prior to uploading them.
Look through different images to verify what the location truly looks like. Continuing with my example, if the majority of the images display a full waterfall I can be sure it’s actually full.
If the location doesn’t exist you can repeat the procedure, but instead of tapping on “places” tap on “tags.”
10. Look Up Recent Reviews on All Trails
If you want to determine the condition of a trail or other details regarding the hike, you can check the reviews on all trails. I won’t add step by step directions for this section because it’s very easy and straightforward.
Here is a screenshot of Bonita Falls reviews on All Trails.
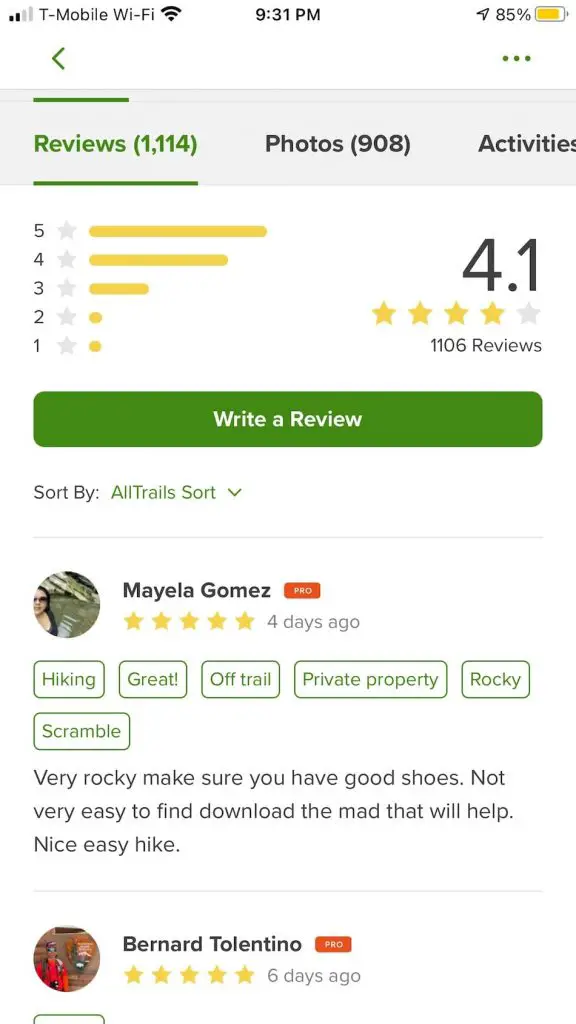
If it’s a popular hike, people will leave reviews almost on a daily basis. Thus, providing up to date information for you.
Sometimes trails are closed due to natural disasters or in recent times, COVID, so it’s good to do a quick search before you head out.
You can also read other stats on All Trails such as total distance, elevation gain, and more. If you’re in Southern California, you can check our site for stats on many of the most popular hikes.
11. Check the Position of The Sun
This tip is especially handy if you’re planning on taking really nice photos. Since I always take pictures on hikes, I like to check where the sun will be positioned in the sky and from which angle the light will be hitting my subject.
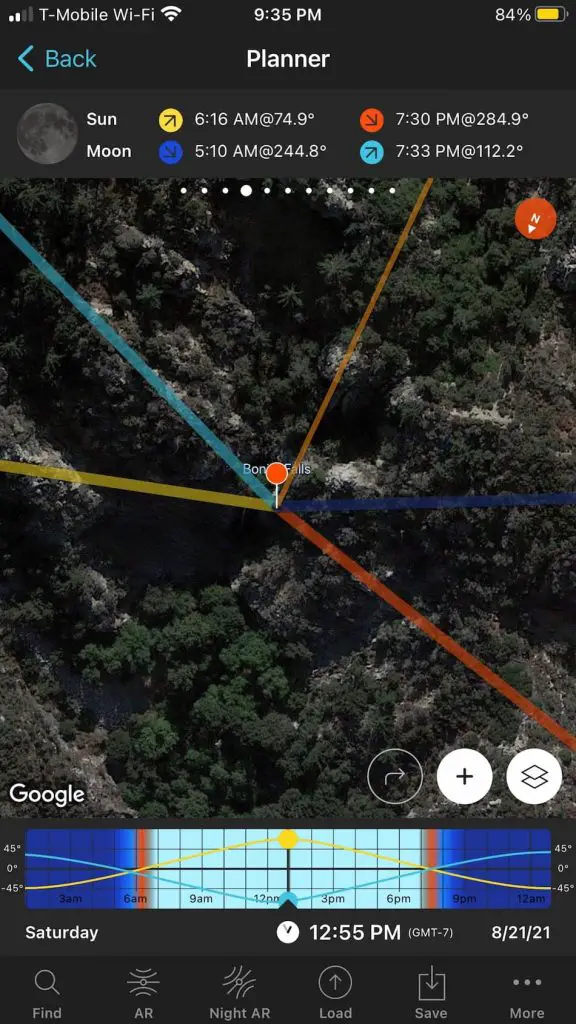
I use an app called Photopills to see exactly where the sun will be positioned at any given time to get the best possible shot. Unfortunately, the app requires a one time purchase of $10, but it’s totally worth it.
Don’t worry, if you don’t want to spend the money I got you covered. You can use Google Earth to find where your destination is located and what direction it’s facing.
With Google Earth, Instagram, and All Trails, you can form a pretty accurate idea of what your subject will look like and when the best time will be to visit.