Exploring The Cave Of Munits: Best SoCal Cave

Exploring The Cave Of Munits: Best SoCal Cave

  • Total Miles: 1.53
  • Time: 45 min
  • Difficulty: Easy
  • Best Season: All Year
  • Elevation Gain: 214 ft
  • Max Elevation: 1116 ft
  • Type of Trail: Out & Back
  • Parking Lot: Street Parking
  • Dogs: Allowed On A Leash
  • Restrooms: Available At The Trailhead
  • Trail Popularity: High
  • Pics Taken On: Nov 22, 2023

I’ve explored a few caves here in Southern California, but the Cave Of Munits in El Escorpion Park has been by far the coolest one.

From the outside, the entrance looks like a huge 30-foot slit in the canyon wall. It’s size and the strange but spooky sounds made by the wind leave you in complete awe as you walk up to it. Once inside, its high ceilings and dark crevasses give off an eerie vibe. If giants or Big Foot were real, their homes would probably look like the Cave Of Munits.

** The cave is part of Chumash history. Please be respectful by not leaving any trash or carving into the cave walls.

Cave Of Munits Trail Map

powered by Advanced iFrame

Cave Of Munits Elevation Profile

Download Printable PDF Map

Parking & Directions

To be redirected to the Cave Of Munits trailhead via Google Maps, click the following link 24501 Vanowen St, West Hills, CA 91307.

Helpful Links

Cave Of Munits Weather Forecast

Hiking To The Cave Of Munits

I parked on Sunset Ridge Ct where I was able to see Castle Peak, also known as El Scorpion Peak, towering above the neighborhood. An ancient Chumash village named Hu’wam was once located upstream from the peak.

It’s possible to access the rocky tower by exiting through the backside of the Cave Of Munits and ascending the hillside, but I saved that one for another day.

Castle Peak

The trailhead is marked by a sign with the park’s name, El Scorpion Canyon Park.

Cave Of Munits Trailhead

El Escorpion Trail, which leads into 2900-acre Upper Las Virgenes Canyon Open Space Preserve (formerly known as Ahmason Ranch) begins on what used to be an old ranch road but soon thereafter, converts into a hiking trail with beautiful views of the sun-lit hills and riparian vegetation in El Escorpion Creek.

El Escorpion Trail

I made a right at the roundabout to hop off El Escorpion Trail and onto a dirt road that crosses El Escorpion Creek.

Oaks and sycamores shaded the fork at the dry creek bed. I made a right.

A rutted path curved up into the entrance of the sandstone cave.

I was left completely mesmerized as I stared up at the cave from its base. It looked like something you’d see in a horror movie, and the sounds produced by the wind hitting the entrance were unlike anything I’d ever heard. Think about a soft whispering sound but much louder and very deep.

No rope or special gear is needed to get inside, but I did have to climb up about 6-8 feet. Those who can’t support their weight to get inside may have a tough time getting in.

Cave Of Munit

The formations inside looked even crazier than those outside. A large tunnel leads into a larger chamber in the back where light peers through from the high ceiling. In total, the cave goes in about 50 feet and measures roughly 40 feet high at its highest point.

This is LA so of course there’s graffiti.

Inside The Cave Of Munits

Here’s a closer look at the chamber, the highest point, and also the darkest.

I remember hearing something inside the cave which I believe may have been bats flying around.

Inside The Cave Of Munits

My favorite view, however, was looking at the gently rolling hills from inside the cave. It was stunning. I’ve yet to explore a more intriguing cave than this one.

Looking Out Of The Cave Of Munits

If you haven’t already, go check out this cave. It’s worth the long drive!

FAQs

What Is The History Of The Cave Of Munits?

The Cave Of Munits was once home to the Chumash tribe. According to their oral traditions, the cave is named after and was home to a mythical shaman who was killed by an eagle after murdering the son of a Chumash Chief.

Paradise Falls, Little Cave, Teepee, & Lizard Rock

Paradise Falls, Little Cave, Teepee, & Lizard Rock

  • Total Miles: 2.5
  • Time: 1 – 1.5 hrs
  • Difficulty: Easy
  • Best Season: Spring
  • Elevation Gain: 482 ft
  • Max Elevation: 707 ft
  • Type of Trail: Loop
  • Parking Lot: Fits ≈ 20 Cars
  • Dogs: Allowed On A Leash (may not be suitable for dogs in the summer)
  • Restrooms: Available At The Trailhead
  • Trail Popularity: High
  • Pics Taken On: Nov 22, 2023

70-foot Paradise Falls is the last thing you’d expect to see in the dry and hilly grasslands of Conejo Valley, but it’s there, and it’s not the park’s only attraction.

A roughly 20-foot wooden teepee stands in a little knoll just up the road from the falls and an ancient cave in a nearby canyon that was once used by the Chumash natives makes for an ideal water break from the sun’s harsh rays.

Last but definitely not least, a large rock formation resembling a lizard head can be seen from the trail without having to take a detour. There are so many awesome reasons to hike Paradise Falls. Get out there, you won’t regret it!

Paradise Falls Trail Map

powered by Advanced iFrame

Paradise Falls Elevation Profile

Click the link to Download The Printable PDF Map and view the markers with labels. 

Parking & Directions

Click here to be redirected to the Paradise Falls Trailhead and parking lot via Google Maps.

No fee or permit is required to park at the trailhead lot.

Helpful Links

Paradise Falls Weather Forecast

Wildwood Regional Park Info

Conejo Open Space Foundation

Hiking Paradise Falls

I started the hike via the Mesa Trail, a dirt road with no shade and amazing views of Mountclef Ridge, the serrated volcanic outcropping on the right side of the image. There is virtually no shade in the entire hike, so plan accordingly.

The rule of thumb is 1 liter of water for 2 hours of hiking.

Paradise Falls Parking Lot & Trailhead

I took the trail on the right at the first fork to remain on the Mesa Trail.

Mesa Trail

I didn’t grab a picture of the second fork but remember to turn left onto the North Teepee Trail, which also happens to be a dirt road.

Keep left at the third fork. The unnamed path on the right merges with the Stagecoach Bluff Trail which takes hikers past a giant rock formation called Lizard Rock.

Lizard Rock From North Tepee Trail

Since Lizard Rock could be seen across the grasslands from the North Teepee Trail, I decided to skip the Stagecoach Bluff Trail.

I’ve had pet lizards in the past, and I have to admit, Lizard Rock holds very true to its name.

Lizard Rock

Wildwood Teepee

The large wooden teepee can be seen looming on a peaceful knoll from the top of the hill.

Teepee At Paradise Falls Hike

It stands about 20 feet high and offers a much-needed shaded break.

Wildwood Park Teepee

I continued down the road and made a left onto a nameless bike path in Wildwood Canyon.

Then I made my way down to the falls. Make a mental note of the trail leading to the cave in the image below because this is the route you’re going to take after the falls to get to the cave.

By the way, the corner of the wall shown below is a viewpoint that overlooks the north fork of the Arroyo Conejo (Rabbit Creek in Spanish). More pictures on that in a bit. Back to the waterfall trail.

Wildwood Canyon Trail & Viewpoint

Here it is, the stunning Paradise Falls. The Arroyo Conejo plunges 70 feet off the ledge and into the enormous waterhole at the bottom of the canyon.

The volcanic rock has created rather interesting-looking formations, such as the little grotto on the left of the falls.

Paradise Falls

Paradise Falls

Unfortunately, swimming is not allowed at the waterhole as bacteria levels are very high.

It’s a shame because Paradise Falls probably has the second-largest pool in Southern California, the first being Cedar Creek Falls in San Diego.

Cattails that had become trapped below the pool allowed me to easily cross the creek and partly climb the right side of the canyon wall to get the best perspective. The sycamore trees to the left truly depict the enormous size of the falls.

Paradise Falls

You already know I busted out the drone.

After the falls I retraced my steps and hopped on the Wildwood Canyon Trail where the viewpoint is located.

Small waterfalls and pools right above Paradise Falls can be seen glistening in the morning sunlight.  I was also able to see the brink of the falls flowing off the cliff and into the pool below. Nothing beats Mother Nature’s beauty.

North Fork Of The Arroyo Conejo from Wildwood Canyon viewpoint

Wildwood Canyon Trail & Arroyo Conejo

The lush riparian Wildwood Canyon Trail is a bit more scenic, as can be seen by the many coastal live oaks and cottonwoods.

Note: Apparently, there’s another small waterfall past the oak trees that I missed during my visit. You may have seen it on the map. It’s called Little Falls, and you best believe I’ll be going back soon to update this post.

Coastal Live Oak

I continued straight at the following intersection. The dirt road to the left is the North Teepee Trail and leads up to the teepee.

The Little Cave Trail is very short (not a dirt road). I made a left at the fork below and an immediate right to hop on the Little Cave Trail.

Little Cave Trail

Little Cave (Indian Cave)

The Little Cave is propped up on the side of the hill with stairs leading up to the entrance. It was once used by the Chumash tribe who lived in the region.

Little Cave (Indian Cave) In Wildwood Park

Visitors are welcome to explore the inside. The cave is about 20 feet deep and has an exit on the other end where you can see the surrounding area below.

Want to explore an even cooler and much larger cave located just a little further down the 101 freeway? Check out the Cave Of Munits!

Indian Cave (Little Cave) In Wildwood Park

After exploring the cave, I  retraced my steps via Little Cave Trail but turned right onto the dirt road to begin the ascend.

One switchback later, I hopped onto the Moonridge Trail, the last section of the hike.

Moonridge Trail

The trail ends on the opposite side of the parking lot as the trailhead. That’s a wrap!

End of Paradise Falls Hike

FAQs

How Long Is Paradise Falls?

Paradise Falls is a total of 2.5 miles. However, it can be shortened or extended depending on one’s preference.

Can You Visit Paradise Falls?

Paradise Falls is currently open to the public.

Is A Permit Required To Hike Paradise Falls?

No type of fee or permit is required to hike Paradise Falls

How Do You Hike Paradise Falls?

  1. Begin the hike via the Mesa Trail from the parking lot.
  2. Make a left onto the North Teepee Trail
  3. Make a left onto an unnamed bike path (first trail after passing the teepee) until reaching the base of the falls.
  4. After exploring Paradise Falls retrace your steps and continue on the Wildwood Canyon Trail which follows the North Fork of Arroyo Conejo.
  5. Make a right onto the Little Cave Trail to explore the cave, then return the same way and make a right to hop back on the Wildwood Canyon Trail.
  6. Ascend the hill and make a right onto Moondridge Trail.
  7. Make a left to walk up the stairs and back into the parking lot.

Is Swimming Allowed At Paradise Falls?

Swimming and cliff jumping are not allowed at Paradise Falls as bacteria levels are dangerously high.

Hiking Potato Mountain: Home Of The Crazy Potatoes

Hiking Potato Mountain: Home Of The Crazy Potatoes

  • Total Miles: 4.42
  • Time: 2 Hrs
  • Difficulty: Easy – Moderate
  • Best Season: All Year
  • Elevation Gain: 1251 ft
  • Max Elevation: 3425 ft
  • Type of Trail: Out & Back
  • Parking Lot: Turn Out, Fits 10+ Cars
  • Dogs: Allowed On A Leash
  • Restrooms: Not Available
  • Trail Popularity: High
  • Pics Taken On: Nov 12, 2023

Unlike most peaks, the view is not the reason most people visit Potato Mountain. No, it’s the potatoes themselves. You read that correctly.

Potato Mountain is located in San Antonio Canyon and is a fairly easy hike consisting entirely of a fire road. Hikers from all over Southern California visit the mountain to drop off their potato, which they’ve taken the time to decorate and/or dress up, at the peak. Potatoes aside, the view includes the Santa Ana Mts, San Jacinto, San Gorgonio, and even as far as Catalina Island if the smog isn’t terrible. For a fire road, there is a decent amount of shade on the trail.

Potato Mountain Trail Map

powered by Advanced iFrame

Potato Mountain Elevation Profile

Download Printable PDF Map

Parking & Directions

Click here to be redirected to the Potato Mountain trailhead via Google Maps.

Important Note: Make sure to park in the turnout where the Angeles Forest sign is located (shown below) or any turnout past the sign to avoid a citation. You can find the exact coordinates of the turnout by clicking right here.

Potato Mountain parking

Helpful Links

Potato Mountain Weather Forecast

SoCal Adventure Pass (required to park in all SoCal mountains)

Hiking Potato Mountain

After parking in the same turnout as the Angeles Forest sign to avoid a citation, we made our way back down the road on foot until we spotted the gate located in another large dirt turnout. Do NOT park here or you will be given a ticket and possibly get towed.

Potato Mountain trailhead

Lots of vegetation adorned the beginning of the hike as we were on the canyon floor. The large oak trees in the image below were particularly stunning.

Since it was the end of November, the trail was covered by the oak’s abundant acorns, a staple food of the Native American tribes that once lived in the area.

Sycamore trees and their vibrant orange/yellow leaves popped out from among their green backdrop. If you’re not sure how to identify plants, it’s best not to touch them.

Poison Oak is also a bright yellow, orange, and red color.

The hike had two major switchbacks. The first can be seen below.

Immediately after the switchback, I was rewarded with amazing views of Turtle Beak and Cucamonga Peak.

When I got to the top, I found myself in a large clearing with a water tank where hikers place their potatoes.

As you can see, I’m not the best artist. I tried to draw Mr. Potato Head but it ended up looking more like Steve Harvey lol.

Kudos to the people who made Santa Claus, Where’s Waldo, and, if I’m not mistaken, Dona Florinda!

However, all the potatoes were awesome and fun to look at. I love this community!

I flew the drone to grab a shot of the ocean but unfortunately, too much smog prevented it.

Luckily, the shot with Mt Baldy in the back came out much better.

Potato Mountain is in the foreground, and multiple much larger peaks including Cucamonga Peak, can be seen towering above the potatoes.

If the gate at the trailhead was open, we’d be able to drive our vehicles completely around the peak’s concrete tower. Here’s a shot looking west from the dirt road that wraps around the peak.

Although it’s difficult to see, San Gorgonio and San Jacinto are in the background, and the dirt road is right below the place where I was standing.

Last but not least, the Cleveland National Forest looms high on the opposite side of the valley.

The two largest peaks in the Santa Ana Mts are collectively known as Old Saddleback, as they resemble a horse saddle. You can barely make them out in the distance.

Hope you guys enjoyed that post.

I highly recommend visiting, and if you do, make sure to stop by the grocery store so you can also decorate and leave a potato on the mountain, then take a picture and tag me on IG @cahikingadventures.

Until next time!

First Water Via Mount Wilson: Waterfalls Galore (Closed)

First Water Via Mount Wilson: Waterfalls Galore (Closed)

  • Total Miles: 3.25
  • Time: 1.5 hrs
  • Difficulty: Easy – Moderate
  • Best Season: All Year
  • Elevation Gain: 1149 ft
  • Max Elevation: 2034 ft
  • Type of Trail: Out & Back (Small Loop Included)
  • Parking Lot: Street Parking
  • Dogs: Allowed On A Leash
  • Restrooms: Not Available
  • Trail Popularity: High
  • Pics Taken On: Nov 18, 2023

Sierra Madre has always been one of my favorite go-to foothill towns, but after hiking First Water Via Mt Wilson my appreciation for it significantly increased.

First Water is a hike that begins in the foothills and quickly ascends up the canyon wall before dropping into the canyon in what used to be First Water Camp, a resort that was once located in the shady brook surrounded by green vegetation. There are at least two large waterfalls that can be seen about halfway up the trail to First Water, and the third I managed to capture on the drone, so be sure to check that out later in this post.

Want to explore more LA hikes including abandoned places, huge waterfalls, and amazing views? Check out the link below!

Los Angeles County Hikes

First Water Trail Map

powered by Advanced iFrame

First Water Via Mount Wilson Elevation Profile

Download Printable PDF Map

Parking & Directions

To be redirected to the trailhead via Google Maps, click the following link: First Water Trailhead

Helpful Links

First Water Weather Forecast

Lizzie’s Trail In & The Richardson House History

Hiking First Water Via Mt Wilson

I began the hike by walking up the street next to Lizzie’s Trail In & The Richardson House, two historical structures in Sierra Madre which are open to the public every Saturday from 10 am to 12 pm.

First Water Via Mount Wilson Trailhead & Lizzie's Trail In

The actual trailhead, which begins further up the street, is marked by a sign that says Mount Wilson Trail. Hence, the name of the hike.

The trail immediately ascended up the canyon. Thus, offering nice views of the valley below, even for a gloomy day. The Santa Ana Mts and Old Greyback are visible on clear days.

To the east, the Sierra Madre Dam sits at the mouth of the canyon. I was surprised to see so many houses literally right next to the dam, but then again, it was not holding back any water, at least not when I was up there.

The first fork on the trail was an interesting one. The left side takes you to First Water, but I was curious and first wanted to explore the path to the right of the fork. 

It took me to a ridge and ended abruptly in an area that was marked as hazardous. On the opposite side of the canyon from where the ridge ended was an enormous waterfall that was almost entirely dry and not worth the detour if you ask me. Remember, stay left to get to First Water.

You can see the waterfall I’m talking about in the image below. You’ll be able to see this waterfall without taking the detour, and if you use your phone to zoom in you’ll be able to see if it’s flowing.

I arrived at the trail’s second fork shortly after the first but stuck to the right instead of left this time. The trail to the left is called Charlie’s New Trail. I took Charlie’s trail on the way back as you’ll see in a bit.

During my visit, I saw a lot of construction equipment temporarily left behind by volunteers, which brought a smile to my face as it meant that people in this area were respectful and didn’t take what didn’t belong to them. Needless to say, there was ZERO trash or graffiti.

Yet another reason why I love Sierra Madre.

After the bridge, I spotted two large waterfalls in the canyon below. The bottom waterfall is curved like a waterslide while the top falls is nearly vertical and slightly larger.

Here’s a shot of the slide looking falls.

Here are two shots of the second waterfall a little further upstream. If I had to estimate, I’d say it’s at least a good 35-40 feet high.

A third waterfall which can’t be seen from the trail is located even further upstream. This one is the least vertical of them all, but nevertheless measures 20 feet in height.

After the waterfalls, I continued up the mountain and reached the second merge between the Mt Wilson Trail and Charlie’s new trail.

Remember this fork because this is where you’ll hop on Charlie’s Trail when returning from First Water.

The last fork takes you down by the stream where First Water Camp was once located.

Although there is no sign of a once lively camp, the sylvan glen is a sight for sore eyes.

Vibrant green vegetation adorns the majority of the landscape as the creek runs through the middle of the canyon, and orange western sycamore leaves pop out among the green backdrop.

Downstream from the glen is a little 5-6 foot waterfall and a rock shelter.

A bench is located upstream and is more than ideal for a quiet reading in the mountains.

According to my favorite author John W. Robinson in his book The San Gabriels, this is where First Water Camp was founded by Lee F. Tigh in 1919. He purchased three cabins and built a store, restaurant, and recreation hall.

Over the years, he continued to add to the camp until he had 23 cabins and could accommodate 100 guests. He sold out in 1928, but other owners ran the camp for an additional decade.

Upstream, the canyon narrows down to about 5 feet, marking the end of the glen. I highly regret not exploring past this section, especially after seeing the myriad of waterfalls throughout the hike.

Remember I mentioned taking Charlie’s trail on the way back? Well, this is where I hopped on the trail.

Charlie’s trail splits off from the Mt Wilson Trail but runs parallel to it for 0.2 miles before descending back down and remerging.

There’s nothing too out of the norm about the trail, but it does provide better views of the valley below, a bench overlooking the ridge, and the dry waterfall across the canyon (the one I recommended not taking the detour for).

Once I merged back onto the Mt Wilson Trail, I headed back exactly the same way until I got to my truck, and that was a wrap. If you haven’t already, I highly recommend hiking First Water. It’s a pleasant hike in a beautiful foothill town.

Pine Knot Trail To Grand View Point: Fall Is Here!

Pine Knot Trail To Grand View Point: Fall Is Here!

  • Total Miles: 6.89
  • Time: 3.5 hrs
  • Difficulty: Moderate
  • Best Season: All Year
  • Elevation Gain: 1213 ft
  • Max Elevation: 7709 ft
  • Type of Trail: Out & Back
  • Parking Lot: Fits ≈ 10 cars
  • Dogs: Allowed On A Leash
  • Restrooms: Available On The Trail
  • Trail Popularity: High
  • Pics Taken On: Oct 29, 2023

Pine Knot Trail to Grand View Point has become my favorite Big Bear hike for multiple reasons. It’s scenic, especially during the fall when many trees are vibrant orange and yellow, easy enough for most people, and the views from the top which overlooks Hwy 330 and the tallest peak in SoCal, San Gorgonio, are breathtaking, to say the least.

Pine Knot Trail isn’t the only stunning hike in Big Bear, however, so if you want to check out all the best trails in the area be sure to click the link below:

Best Hikes In Bear Bear

Pine Knot To Grand View Point Trail Map

powered by Advanced iFrame

Pine Knot To Grand View Elevation Profile

Download Printable PDF Map

Address & Directions

To be redirected to the trailhead via Google Maps, click the following link: Aspen Glen Picnic Area

Although the picnic area parking lot only fits about 10 cars, you can park on Mill Creek Rd. Just make sure to keep an eye out for signs on the side of the road that mark the end of street parking. My friend and I got a ticket for parking past an orange cone.

Helpful Links

Big Bear Weather Forecast

(Temperatures may significantly drop at Grand View Point )

SoCal Adventure Pass (required to park in SoCal mountains)

Big Bear Weather And More (My friend’s YouTube channel. He updates us on all things Big Bear within a few hours of the event, including weather changes).

Lastly, if you’re hiking shortly after Big Bear gets snow, crampons will be crucial. You can find the ones we use by clicking right here.

Hiking Pine Knot To Grand View Point

The hike began at the Aspen Glen Picnic Area, a large flats boasting many tall pine trees in what seems like all directions. The sunset in the fall here looks nothing short of amazing, as you’ll see later in this post.

Fun Fact: Aspen Glen Picnic Area is very popular during the winter time as it’s more than ideal for sledding (now you know how to save on tubing). You can purchase a sled from the Big 5 or Vons, both of which are located off of Big Bear Blvd.

Pine Knot To Grand View Trailhead

The trailhead was just further up the picnic area. Now, something to keep in mind is the seemingly many trails in all directions, especially at the beginning of the hike.

If you notice logs laid across on what looks to be a trail, it’s probably not a trail. 

Here’s an example of what I’m talking about. The image below shows the very first fork.

Shortly afterward, I arrived at another fork. This one is more tricky. Be sure to take the trail to the left.

The trail’s best feature is the bright orange and yellow fall colors. When the breeze blows, many leaves fall from the surrounding trees and make the place look like something out of a movie.

If you’re looking for a similar, woodsy-type hike that is child-friendly, check out Big Bear’s Interpretive Trail on the other side of the lake. It’s easy, fun, and safe for the entire family. Plus, it comes with a PDF guide to teach your kids about Big Bear’s great outdoors.


The brightest trees were just around the bend shown below, so get those cameras ready and pray for a little wind because it’ll be well worth it.

See what I mean? These Western sycamore trees made my day.

We visited early in the morning, which is why a lot of the sections of the trail could have looked a bit nicer had they been illuminated during the day.

If you don’t mind a bit of sunlight while you hike, plan your visit a little later in the afternoon and you’ll see what I mean. However, expect more people.

Benches are located throughout the hike should you need a break. Unfortunately, the bench below was positioned to face a tree that blocked the view. I’m guessing it was placed there when the tree was much smaller, so we just kept it moving.

I caught a few glimpses of the lake in the first half of the hike.

The following section is probably the most scenic. I could see and hear the creek running on the right side of the trail, and seemingly out of nowhere, I came across a small fern grove.

Thousands of bright orange ferns decorated the landscape and looked almost crystallized for the winter. On my previous visit, I passed by the ferns during sunset. I’ll never forget how amazing they looked.

To my surprise, I noticed off-road vehicles roaming around the forest. I hadn’t realized that dirt roads are accessible to the public. More on this a little later.

Make sure to continue on the dirt trail when you arrive at the dirt road shown below.

After crossing the road, we quickly arrived at Deer Campground. Unfortunately, I couldn’t take pictures of the campground as people were camping and I didn’t want to be disrespectful. You can see the smoke from their fire in the image below.

Bathrooms are located at the campsite. I can’t promise you they’re accessible, but they’re there for sure.

As soon as I passed the campground, I crossed an additional dirt road and continued forward onto Grand View Point.

The forest changes a bit from the campsite onward. It seemed to have opened up a bit more. Instead of climbing up a steep hillside, I traversed a densely forested flat.

And I finally arrived at the last stretch of the trail.

Fun Fact: You can drive your vehicle up to this point and park in the turnout shown below, then hike the last section up to Grand View Point, which is only 0.3 miles. Just keep in mind the roads are closed when it snows, and possibly all of winter.

The two pine trees signify the goalpost. Once you walk through them you’ve arrived at the destination.

The views were well worth it. I took a short break at the picnic bench but didn’t waste too much time as there was one last thing to explore.

I followed the red arrows in the images and arrived at a small rocky ledge facing San Gorgonio and the Santa Ana River in the valley below.

This is what the ledge looked like but watch your step. It’s slippery.

The hike’s best views were from this ledge—no doubt about it.

I labeled the peaks according to their height. San Gorgonio, also known as Old Greyback, is the tallest peak, not just in San Bernardino but all of Southern California.

Then I walked back up to the bench and got ready to launch the drone.

From the air I could clearly see Santiago and Modjeska peaks, collectively known as Old Saddleback, peeking above the clouds. Pun intended.

To the east, the two sugar mountains loomed high above the valley. I can’t even imagine how amazing the views must be after a good snow dump!

Lastly, to the north, I could see Big Bear Lake and Bertha Peak towering above.

By the way, another amazing Big Bear hike that I highly recommend is Cougar Crest, which takes you up to Bertha Peak’s west ridge, and offers the best lake views in the area.

After enjoying the views, I made my way back the same way and relaxed a little at the picnic area which was now vastly more illuminated by the afternoon sun.

Want to keep exploring Big Bear? Check out Castle Rock, a short 1.44-mile hike to an enormous boulder structure that resembles a building and can be climbed to the top for some amazing lake views.

11 Best Hikes For Kids In Los Angeles: Fun & Safe!

Get your kids to fall in love with the outdoors by tackling one of the easy hikes listed below. After digging through my website for the most kid-friendly hikes in Los Angeles, I came up with eleven trails that are primarily safe, but also easy and fun, so that you can focus on providing the most unforgettable experiences for your children.

Most of these hikes don’t exceed three miles, have no dangerous ledges, and have a gradual elevation gain. I also let you know which hikes are stroller-friendly, or whether only a part of the trail is stroller-friendly, should you decide to take really small kids.

11) Rose Bowl Loop Around Pasadena’s Iconic Stadium

Rose Bowl Loop

  • Total Miles: 3.08
  • Difficulty: Easy
  • Elevation Gain: 129 Ft
  • Time: 1.5 Hrs
  • Dogs: Allowed On A Leash
  • Restrooms: Available At The Parking Lot & Lawn
  • Stroller Friendly: Yes
  • Map, Directions, & Full Post: Rose Bowl Loop

To be completely honest, the Rose Bowl Loop is more of a stroll than a hike, but definitely still worth it. The trail, which is an extension of the paved road and therefore, stroller-friendly, encircles the Rose Bowl Stadium and Brookside Golf Course.

Throughout the walk, I enjoyed nice views of various peaks in the San Gabriel Mountains such as Mt Lowe, Mt Lukens, and Mt Wilson, and the surrounding hills made me feel like I was in a mountain town.

The trail is virtually flat, yet another reason why it’s a great hike for kids.

Fun Fact: You can order takeout from the Brookside Restaurant and pick it up near the end of the stroll.

10) Sycamore Canyon Trail: Outdoor Oasis In Whittier

Sycamore Canyon Trail

  • Total Miles: 3.3
  • Difficulty: Easy
  • Elevation Gain: 370 Ft
  • Time: 1.5 Hrs
  • Dogs: Not Allowed
  • Restrooms: Available At The Parking Lot
  • Stroller Friendly: No
  • Map, Directions, & Full Post: Sycamore Canyon Trail

Located in the Puente Hills Habitat Preservation, Sycamore Canyon trail is a nature oasis in the middle of a concrete jungle.

The hike begins on a dry and sunny dirt road but later transitions into a shady dirt trail with abundant vegetation.

If you keep an eye out, you might see bats flying around in the evening or early morning, as manmade bat homes were built for them near the trail.

Fun Fact: There’s a wooden swing in a very shaded section of the trail, and a creek running next to it that I know children will absolutely enjoy.

9) Big Dalton Canyon Trail: Scenic Trail In Glendora

Big Dalton Canyon Trail

  • Total Miles: 2
  • Difficulty: Easy
  • Elevation Gain: 286 Ft
  • Time: 1 Hr
  • Dogs: Allowed On A Leash
  • Restrooms: Available On The Trail
  • Stroller Friendly: No
  • Map, Directions, & Full Post: Big Dalton Canyon Trail

Big Dalton Canyon is a true gem in the foothills of the Angeles Forest. The trail features a flowing creek, wooden bridges, a campground with an amphitheater and fire pit, and a Coast Live Oak grove with a wooden swing that looks like something taken out of a movie.

The trail is virtually flat and lacks dangerous ledges. The only thing to look out for is poison oak, but the last time I visited there was none on the trail.

Additionally, most people seem to head back from the nature center as the trail gets quite overgrown from that point forward. Fortunately, the nature center, which has been permanently closed, is located toward the end of the hike, and you’ll only be missing out on the small waterfall.

8) Monrovia Falls (Temporarily Closed)

Monrovia Canyon Falls

  • Total Miles: 2
  • Difficulty: Easy
  • Best Season: Spring
  • Elevation Gain: 439 Ft
  • Time: 1 Hr
  • Dogs: Allowed On A Leash
  • Restrooms: Available At The Parking Lot
  • Stroller Friendly: No

Monrovia Canyon Falls is the most child-friendly hike in the Angeles Forest. It’s short with a low elevation gain, the interpretive trail is well-kept and features a nature center that used to host canyon tours for children before closing down in 2020 due to the Bobcat Fire.

At 30 feet high, the two-tiered waterfall is relatively small, but still a sight to see. The canyon is teeming with life from both plants and animals, and much of the trail is shaded.

Fortunately, Monrovia Canyon Park will open up once it’s deemed safe enough for the public.

Fun Fact: I requested the park ranger form from Monrovia Cn Park back in 2017 but had my friend not offered me a job, I probably would have been a ranger right now.

7) Paramount Ranch: Ghost Town Movie Set

PARAMOUNT RANCH

  • Total Miles: 2.53
  • Difficulty: Easy
  • Elevation Gain: 272 Ft
  • Time: 1-1.5 Hrs
  • Dogs: Allowed On A Leash
  • Restrooms: Available At The Parking Lot
  • Stroller Friendly: Somewhat (Explained Below)
  • Map, Directions, & Full Post: Paramount Ranch

Paramount Ranch is a studio set in the Santa Monica Mts that, before the Woolsey Fire of 2018, comprised an entire western town. Unfortunately, the fire reduced the ranch to the church and train station. However, it’s still worth a visit!

The loop begins near the train station building and loops around the nearby sunny hills. Although the loop isn’t stroller-friendly, the area where the structures are located definitely is, assuming you’re using an all-terrain stroller.

There are multiple trails splitting off in all directions. Hence, you can reduce or extend the loop’s total distance depending on your kids’ capabilities.

Make sure to take plenty of water and sunscreen as there is no shade on this trail and it can get extremely hot during the summer.

Fun Fact: American Sniper was filmed here!

6) Eaton Canyon Falls: LA County’s Most Popular Falls (Closed)

eaton canyon falls

  • Total Miles: 4.02
  • Difficulty: Easy
  • Best Season: Spring
  • Elevation Gain: 455 Ft
  • Time: 2.5 Hrs
  • Dogs: Allowed On A Leash
  • Restrooms: Available At The Trailhead
  • Stroller Friendly: No
  • Map, Directions, & Full Post: Eaton Canyon Falls

Ranked as the most popular waterfall in Southern California, Eaton Canyon Falls is a must-do for all children.

The hike begins on a dirt road that runs through the wash but transitions into a dirt trail at the mouth of the canyon. Although the trail is not steep, creek crossings may prove a bit difficult for really small children.

Remember, timing is everything when it comes to waterfalls. The 50-foot Eaton Falls roars the loudest in the late spring after the winter snow has melted, and tends to be no more than a trickle late by late summer.

Although sycamore trees and white alders adorn the sides of the creek, much of the hike is exposed to the sun, so take plenty of water and a hat.

5) Old LA Zoo: Relics From LA’s Past

Old LA Zoo

  • Total Miles: 2.63
  • Difficulty: Easy
  • Elevation Gain: 374 Ft
  • Time: 1-1.5 Hrs
  • Dogs: Allowed On A Leash
  • Restrooms: Available At The Merry Go Round
  • Stroller Friendly: Somewhat (Explained Below)
  • Map, Directions, & Full Post: Old LA Zoo

The Old LA Zoo is an awesome piece of the city’s history that your kids will absolutely love. The trail begins at the park near a Merry Go Round and ascends into the sunny hills where I was able to clearly see the Angeles and San Bernardino National Forests.

Although the zoo was closed down in the 60’s, the inside of many of the structures can still be safely explored. Cages for monkeys and birds and structures that once housed lions and bears can still be seen at the park.

The trail is not stroller-friendly. However, there is a parking lot in Spring Canyon that allows parents with strollers to access the structures within a couple minutes’ walk. Therefore, if you prefer not to hike, you can simply park right here.

4) Santa Fe Dam Recreational Area

Santa Fe Dam Recreational Area

  • Total Miles: 3.7
  • Difficulty: Easy
  • Elevation Gain: 75 Ft
  • Time: 1.5 – 2 Hrs
  • Dogs: Allowed On A Leash
  • Restrooms: Available Throughout The Park
  • Stroller Friendly: Yes
  • Map, Directions, & Full Post: Santa Fe Dam 

I grew up going to Santa Fe Dam every summer to swim in the lake. Although it got pretty gross over the recent years, it was cleaned up as of December 2021 when I last visited. I saw zero trash, and no homeless visiting or living at the park.

I was star-struck, as the park looked just like I remembered it when I was a kid.

The trail looped around the lake, and the views of the San Gabriel Mountains were amazing, to say the least. During the summer, part of the lake is open for swimming, as is a water park for kids.

The park has a relatively large sandy beach with a playground (one of many throughout the park), a rental store for bikes, boats, kayaks, and quadracycles, designating fishing areas, a pier, a weightless gym area, and an amphitheater.

Much of the park is shaded by large pine trees, and grills are provided for each picnic area. A large paved sidewalk cut throughout most of the park.

3) Sturtevant Falls: San Gabriels’ Most Scenic Cascade

  • Total Miles: 3.3
  • Difficulty: Easy – Moderate
  • Elevation Gain: 400 Ft
  • Time: 1 Hr 45 Min
  • Dogs: Allowed On A Leash
  • Stroller Friendly: No
  • Restrooms: Available At The Parking Lot

Sturtevant Falls has officially reopened! Even with all the fires in 2025, the trail remains open to the public as of August 2025. You can sign up and create an account to stay updated with important mountain news.

This hike may be the most scenic waterfall hike in all of Southern California. The trail began on a paved road but transformed into a mountain paradise as soon as I descended onto the canyon floor.

Private cabins on both sides of the creek, white alders, large ponds, green ivy, and large sycamores that shaded the trail all contributed to the trail’s beauty, and the waterfall didn’t disappoint either.

The creek flowed off of a fifty-foot ledge in a narrow section of the white granite canyon, and the dark green moss behind the cascade contrasted nicely with the cliff walls.

Keep in mind the paved road at the beginning of the hike is somewhat steep, and although it’s all good and dandy during the descent, it can be quite challenging for very small children on the way back.

2) Vanalden Cave: Secrets Of The Santa Monica Mts

Vanalden Cave

  • Total Miles: 2.65
  • Difficulty: Easy
  • Elevation Gain: 510 Ft
  • Time: 1-1.5 Hrs
  • Dogs: Allowed On A Leash
  • Restrooms: Available At The Parking Lot
  • Stroller Friendly: No
  • Map, Directions, & Full Post: Vanalden Cave  

This is such a cool hike simply because of the rarity of caves in LA County.

Most of the trail consisted of a dirt road with amazing views of the Angeles and San Bernardino National Forests, but towards the end, I hopped on a dirt trail that split off the right side of the road.

The trail took me down to the canyon floor where I very shortly arrived at the 25-foot cave hidden underneath the forest canopy.

This rare sandstone formation only goes in about fifty feet, but I clearly remember the temperature being significantly warmer inside and thinking how amazing it would be to have a campfire there (campfires are illegal so please don’t try it).

A short trail that begins next to the cave takes you to the ceiling, but make sure the kids don’t fall in through one of the holes.

1) Millard Canyon Falls: Altadena’s Gem (Closed)

Millard Canyon Falls

  • Total Miles: 1.3
  • Difficulty: Easy
  • Best Season: Spring
  • Elevation Gain: 308 Ft
  • Time: 45 Min
  • Dogs: Allowed On A Leash
  • Restrooms: Available At The Campground
  • Stroller Friendly: No
  • Map, Directions, & Full Post: Millard Canyon Falls

Millard Canyon Falls is more than ideal for kids. It’s easy, short, safe, and of course, very scenic.

The narrow canyon has always been teeming with animal and plant life, and during the spring and early summer, the place looks like a wild garden.

The fifty-foot cascade probably has the whitest granite walls out of all the waterfalls I’ve ever been to, adding to its uniqueness. It blows my mind that a place like this exists so close to the city.

Aside from a few creek crossings, which are small and shallow, and the four-foot ledge I had to climb at the beginning of the trail, there are no other obstacles or ledges. The only thing you may want to keep an eye out for is poison oak, which is sometimes located right off the trail.

This trail is a must-do and was not closed because of the Bobcat Fire, so get out there and enjoy the outdoors.

Rose Bowl Loop: Hiking Around Pasadena’s Iconic Stadium

Rose Bowl Loop: Hiking Around Pasadena’s Iconic Stadium

  • Total Miles: 3.08
  • Time: 1.5 Hrs
  • Difficulty: Easy
  • Best Season: All Year
  • Elevation Gain: 129 ft
  • Max Elevation: 905 ft
  • Type of Trail: Loop
  • Stroller Friendly: Yes
  • Parking Lot: Fits ≈ 100+ cars
  • Dogs: Allowed On A Leash
  • Restrooms: Available On The Lawn
  • Trail Popularity: High
  • Pics Taken On: Oct 19, 2023

Nestled in the heart of Pasadena, the iconic Rose Bowl Loop offers a picturesque journey through history, nature, and local charm. Every day, people of all ages, shapes, and sizes take to the loop to enjoy the benefits of the outdoors.

The trail is a virtually flat paved road that loops around the stadium, Arroyo Seco Creek, and Brookside Golf Course. Meanwhile, the San Gabriel Mts form a stunning backdrop and the hills surrounding the area give the area a mountain town type of feeling.

The Rose Bowl loop is one of the most popular trails in Pasadena, but it’s far from the best. To explore large waterfalls, abandoned gold mines, and epic mountain views, click the link below:

Top Hikes In Pasadena

Rose Bowl Loop Trail Map

powered by Advanced iFrame

Rose Bowl Loop Elevation Profile

Download Printable PDF Map

Parking & Directions

The Rose Bowl has multiple parking lots, and all are free, at least on the days when there are no events happening. Although it doesn’t matter where you begin the hike, the following link will take you to Lot I, which is across the street from the front of the Rose Bowl Stadium:

Google Maps Lot I Directions 

If the parking lots are full, there are additional dirt lots on the west side of the stadium off of West Dr. which you can view here.

Helpful Links

Weather Forecast

Rose Bowl Stadium Website

Rose Bowl Loop Hours

Monday – Sunday

6 am – 7:30 pm

Hiking The Rose Bowl Loop

The trailhead is located right over the Arroyo Seco, located on the southwest side of the stadium, as shown in the image below.

Fun fact, Switzer Falls is located in the Arroyo Seco deep in the mountains!

The trail is an extended part of the street for the vast majority of the loop. In this case, the trail is adjacent to West Dr. and is wide enough to be shared by hikers, joggers, and bicyclists traveling in all directions.

Notice the additional dirt parking on the left side of the road.

Here’s a shot of the west side of the stadium with the beautiful San Gabriel Mts forming the backdrop.

There is virtually no shade, so plan accordingly! As a rule of thumb, you should pack 1 liter of water for every 2 hours of hiking. Since hiking the loop takes about 1-1.5 hours, 1 liter of water should suffice.

To the north of the stadium is the stunning Brookside Golf Course. Mt Wilson loomed over the surrounding mountain ranges, and I was able to see the white telescopes and radio towers peaking above the ridge.

Check out this nearby waterfall hike. It’s Pasadena’s most popular waterfall.

Brookhurst Gold Course

I quickly arrived at the first bend where I made a right onto Washington Blvd.

I reached the Arroyo Seco once more and took a short break while admiring the golf course. I was really grateful that it happened to be a classic SoCal sunny day when I visited.

I made a right onto Rosemont Dr to complete the last part of the hike.

Although highly unlikely, this last section of the trail leaves people prone to getting hit by golf balls. Hence, the large nets in the image below.

I passed the Brookside Golf Club near the end, and noticed a restaurant in the building. Since they offer takeout, you can place your order shortly after starting the hike and pick it up when you pass by. It doesn’t get more convenient than that!

Here’s the link to their website: Brookside Restaurant. The phone number is (626) 585-3594.

I knew I was almost done with the loop after passing the restaurant and spotting the stadium once again.

The last section of the trail consists of a sidewalk that leads to the restrooms. Although difficult to see in the image below, the restrooms are in the small building on the lawn which is completely shaded by the Eucalyptus trees.

Loop completed!

Rose Bowl Loop

Various peaks can be seen from the lawn, including the famous Mt Lowe and Mt Lukens, both of which are named after the noble patriarchs of Pasadena, Professor Thaddeus Lowe, and ex-mayor Theodore Lukens.

Want to hike Mt Lowe Peak and enjoy amazing views? Check out the guide right here.

Lukens was responsible for creating a forest nursery in 1892 right above Eaton Canyon that is still! Click the following link to hike to the nursery and explore its museum.

Rose Bowl Loop

FAQs

How Long Is The Loop Around The Rose Bowl?

The Rose Bowl Loop is a total of 3.08 miles.

Can You Run Around The Rose Bowl?

Running is very common and by no means an issue while on the Rose Bowl Loop.

Can You Bike Around The Rose Bowl?

Many people can be found biking the Rose Bowl Loop.

What Are The Rose Bowl Loop Hours?

The Rose Bowl Loop is open daily from 6 a.m. to 7:30 p.m.

Is The Rose Bowl Loop Stroller Friendly?

The Rose Bowl Loop is very stroller-friendly. The entire trail is part of a virtually flat paved road.

Is The Rose Bowl Open During Events?

The Rose Bowl Loop sometimes closes depending on the event. The loop was closed on my first visit as Coldplay was performing the same day. To make sure the loop is open, check the website under Helpful Links near the top of this post.

9 Best Los Angeles Hikes For Dogs: Not Your Typical Trails

9 Best Los Angeles Hikes For Dogs: Not Your Typical Trails

I remember the first time I hiked with my dogs, Macy, a Pitbull and German Shepherd mix shown in this post’s featured image, and Mina, an enormous full-breed German Shepherd. I felt like I was walking in the mountains with two bodyguards, but I also seemed more connected to Mother Nature. Why the latter I can’t explain but it was awesome.

Therefore, I looked through my entire site and put together a list of the most dog-friendly hikes in Los Angeles. Many of these trails are wide to facilitate training your dog for hikes, overgrown vegetation that can contain harmful plants like poison oak or animals such as ticks, and are also less trafficked. I made sure not to include trails that everyone is already familiar with such as Eaton Canyon or the Echo Mt Ruins.

Here they are in no particular order.

1) Claremont Loop

Claremont Loop

  • Total Miles: 5
  • Difficulty: Moderate
  • Best Season: All Year
  • Elevation Gain: 944 Ft
  • Time: 2.5 Hrs
  • Dogs: Allowed On A Leash
  • Restrooms: Available At The Parking Lot
  • Map, Directions, & Full Post: Claremont Loop

The Claremont Loop is a sunny dirt road in, you guessed it, Claremont. The destination on the loop trail can be said to be the viewpoint at the top which allowed me to view the valley below and as far away as the Santa Ana Mountains, While the San Gabriel Mountain ranges towered directly behind me, illuminated by the golden sunset.

The loop’s west side is sunny more than the east so be sure to take a pair of sunglasses, a hat, and plenty of water for you and your dog.

The majority of the area is dry virtually all year except spring. If you can visit during the spring, please do so, you won’t regret it, as the greenery gives the entire area a more appealing look.

2) Mystic Canyon

Mystic Canyon Trail

  • Total Miles: 1.92
  • Difficulty: Easy – Moderate
  • Best Season: All Year
  • Elevation Gain: 707 Ft
  • Time: 45 Min
  • Dogs: Allowed On A Leash
  • Restrooms: Not Available
  • Map, Directions, & Full Post: Mystic Canyon Trail

Perhaps the Claremont Loop is too long of a hike? If so, head over to the Mystic Canyon Trail, a short out-and-back hike up to a viewpoint of Glendora and the valley below.

Unlike many hikes in this guide, the trail is a dirt trail and not a dirt road. Almost immediately from the start, the trail gets very steep and loose for a stretch of about fifty feet before reverting to a more gradual ascend.

Unless you have poor balance, you should be fine. Your dog will shouldn’t have a problem ascending the slippery section of the trail, as they’re what I like to call, four-by-four. I’m not kidding, I’ve seen my dogs run up near vertical canyon walls like goats.

Once at the viewpoint I felt surrounded by mountain ranges. I could even see the snow-covered Mt Baldy, the highest peak in the San Gabriel Mts, peeking above the smaller mountains.  I visited right after we had major storms, which is why it was so green.

To extend the hike, head up to the Top Of The Punk Out Trail or down to the canyon floor via Lower Monroe Rd, which runs through the viewpoint where the Mystic Canyon Trail ends. Otherwise, head back down the same route.

3) Henninger Flats (Closed)

Henninger Flats

  • Total Miles: 5.04
  • Difficulty: Moderate – Hard
  • Best Season: All Year
  • Elevation Gain: 1531 Ft
  • Time: 3 Hrs
  • Dogs: Allowed On A Leash
  • Restrooms: Available At The Flats
  • Map, Directions, & Full Post: Henninger Flats

Henninger Flats is a beautiful hanging basin in Pasadena, CA that has been used for the reforestation of mountains around the world since the days of Theodore Parker Lukens, Pasadena’s former mayor and one of the most important figures in the history of SoCal’s mountains.

I started the hike by descending onto the Eaton Wash, which, since we hadn’t experienced the massive storms of early 2023, was dry except for the small creek.

The majority of the trail is sun-exposed, and, due to the elevation gain, can feel like a workout. If your dog is old, has a medical condition, or simply hasn’t hiked in a long time, you may want to consider a different trail.

The picnic tables at the grassy flats are shaded by abundant pine trees. I also noticed a mountain museum, historical relics scattered such as cabins and prior fire lookouts, restrooms, and a much-needed water fountain.

From the flats, I was able to see the valley below and as far away as Palos Verdes and the glistening Pacific Ocean.

If you want to extend the hike, you can always continue heading up the Mt Wilson Toll Rd.

4) La Canada Teepee Trail

La Canada Teepee Trail

  • Total Miles: 4.63
  • Difficulty: Moderate
  • Best Season: All Year
  • Elevation Gain: 1003 Ft
  • Time: 2.5 Hrs
  • Dogs: Allowed On A Leash
  • Restrooms: Not Available
  • Map, Directions, & Full Post: La Canada Teepee Trail

Like Henninger Flats, La Canada Teepee Trail also ends at a flat where a teepee frame, rock labyrinth, bee farm, and lavender field can be found. Since the flats are private property, we must be very respectful by keeping our dogs leashed at all times.

The hike began at the Angeles Crest Fire Station and took me up to the teepee via the Mt Lukens Truck Trail, a wide dirt road with virtually no shade.

Once I arrived at the teepee, I could see the majority, if not all, of the San Gabriel Valley, and all the way to the ocean.

This trail is also very sunny, so be sure to plan accordingly.

5) Shoemaker Canyon Road

Shoemaker Canyon Road

  • Total Miles: 5.1
  • Difficulty: Moderate
  • Best Season: All Year
  • Elevation Gain: 1267 Ft
  • Time: 2.5 Hrs
  • Dogs: Allowed On A Leash
  • Restrooms: Not Available
  • Map, Directions, & Full Post: Shoemaker Canyon Road

During the Cold War, Los Angeles residents began building tunnels in the East Fork of the San Gabriel Canyon to facilitate the evacuation of the city should a nuclear holocaust begin. However, after budget problems and conservationist efforts, the project was abandoned, leaving two random tunnels seemingly in the middle of nowhere.

The tunnels have now become a popular destination among locals who hike to the tunnels via the dirt Shoemaker Rd. If you’re training a pup to learn how to behave while on a leash, this may be the most ideal place.

The road is very wide, allowing you to easily avoid contact with other dogs or people, and there are no sections of the trail that are overgrown. The downside is the lack of shade. The inside of the two tunnels are the only shaded sections of the trail, so don’t forget sunscreen, a hat, and plenty of water for you and your dog.

Lastly, a viewpoint at the parking lot overlooked the San Gabriel River below.

6) Paramount Ranch

PARAMOUNT RANCH

  • Total Miles: 2.53
  • Difficulty: Easy
  • Best Season: All Year
  • Elevation Gain: 272 Ft
  • Time: 1.5 Hrs
  • Dogs: Allowed On A Leash
  • Restrooms: Not Available
  • Map, Directions, & Full Post: Paramount Ranch Loop

Paramount Ranch is a famous studio set that has been used in countless Hollywood movies like American Sniper and The Great Outdoors. Unfortunately, in 2018 the Woolsey Fire burned down all the structures except the church and train station, but it’s still worth a visit!

The church and train station are located at the trailhead, so there is no need to hike to the set. The loop begins next to the train station for a total of 2.1 miles, but since there are so many trails in the area, you can easily shorten or extend the loop’s distance.

This hike is not on a dirt road but on a dirt trail. Although it looks very remote and scarce of wildlife, a coyote popped up right in front of my truck at the dirt parking lot the last time I visited. Hence, keep your dogs close, especially the small ones, as they can fall prey to a hungry coyote.

There is no shade on this trail, so plan accordingly.

7) Vanalden Cave

Vanalden Cave

  • Total Miles: 2.65
  • Difficulty: Easy
  • Best Season: All Year
  • Elevation Gain: 510 Ft
  • Time: 1.5 Hrs
  • Dogs: Allowed On A Leash
  • Restrooms: Available At The Parking Lot
  • Map, Directions, & Full Post: Vanalden Cave

It’s hard to believe caves exist in LA County, but it’s true. The Vanalden Cave is a roughly 25-foot-high sandstone cave in the Santa Monica Mountains.

Almost from the start of the hike, I found myself surrounded by breathtaking views. To the north, I could easily see most of the valley with the Angeles and San Bernardino Mountains towering in the background. To the south, the rest of the Santa Monica Mountains led the eye to the ocean.

For the last part of the hike, I descended to the canyon floor on a dirt trail. The setting quickly transformed from a dry landscape to a luscious woodland, and shortly afterward, reached the Vanalden Cave.

The cave only goes in about 50 feet, but it’s very fun to explore. The inside seems like the perfect place where natives would’ve spent the night while traversing the ranges.

The inside of the cave felt warmer than the air outside. I can only imagine how amazing a campfire would have been.

If you follow a short trail that begins next to the cave, it’ll lead you to the top, just be sure not to fall through one of the holes in the ceiling!

8) Dawn Mine (Closed)

DAWN MINE TRAIL

  • Total Miles: 4.66
  • Difficulty: Moderate
  • Best Season: All Year
  • Elevation Gain: 1175 Ft
  • Time: 2.5 – 3 Hrs
  • Dogs: Allowed On A Leash
  • Restrooms: Not Available
  • Map, Directions, & Full Post: Dawn Mine Trail

Want to take your dog on an adventure to an abandoned gold mine deep in the San Gabriel Mountains? I bet your dog does.

The Dawn Mine is further up the Millard Canyon from the popular Millard Falls.

The hike began on Mt Lowe Rd but quickly led me onto the canyon floor where the landscape completely changed from dry to full of life, mostly shaded, private cabins, and a flowing stream. Although there are no overgrown sections on the trail, poison oak is nevertheless present in the canyon.

Keep an eye out, and remember, leaves of three let it be.

The portal (mine entrance) was a bit difficult to find, but once I spotted the old water pump (in the featured image above), I knew I was at my destination. The portal is located to the left of the water pump, but it’s been closed for quite a few years now.

Water was flowing out of it, and when I shined a light inside, I could see about 50 feet into the adit (mine tunnel).

Fun Fact: If you check out the full post I’ll show you where an additional adit is located, but unlike the Dawn Mine, this portal was open. I was able to explore about 50 feet into the adit until I reached a dead end. Also, unlike most mines I’ve been in, the exploratory dig was very safe.

9) Topanga Lookout (Closed)

Topanga Lookout Trai

  • Total Miles: 2.26
  • Difficulty: Easy
  • Best Season: All Year
  • Elevation Gain: 348 Ft
  • Time: 60 Min
  • Dogs: Allowed On A Leash
  • Restrooms: Not Available
  • Map, Directions, & Full Post: Topanga Lookout Trail

Last but not least on this list is the Topanga Lookout Trail, a hike in the Santa Monica Mts that takes visitors to a concrete ledge with insanely jaw-dropping views.

The ledge was once the foundation for a fire tower but is now a very popular hiking destination that can be accessed via a rutted dirt road. Now, when I say popular, I mean very popular. Expect huge crowds on weekends, so keep that in mind if you or your pooch doesn’t appreciate being around a lot of people.

Since the ledge is elevated above the road and way above the mountain ranges that are directly beneath it, people standing near the edge will get the sensation of flying.

The valley, Angeles, and San Bernardino Mountains can be easily seen on a clear day. Needless to say, sunsets on the lookout are amazing.

Aside from the occasional shrubs on the sides of the road, there is no shade whatsoever. I got the worst sunburn in my entire life the last time I hiked to the lookout.

It’s a short trail, but regardless, plan accordingly, and I hope you have a blast hiking with your dog!

12 Best Waterfalls I’ve Hiked In Los Angeles: 2026 Update

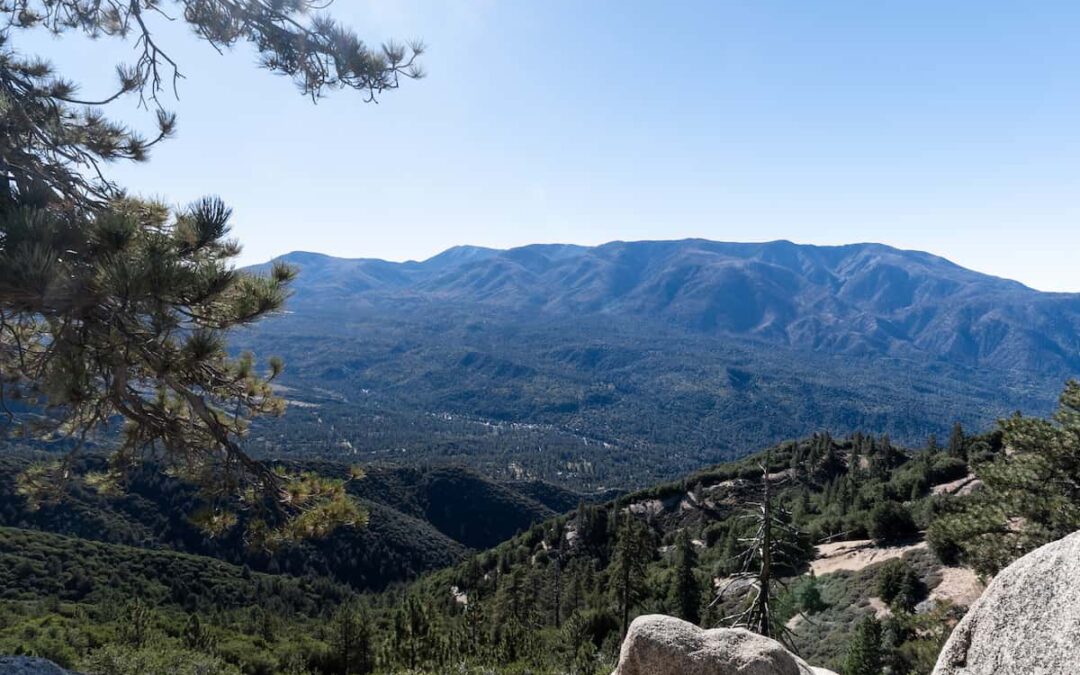
Contrary to popular belief LA is not only a dry concrete jungle. Every spring I see dozens of waterfalls come back to life, incentivizing thousands of Los Angelinos to trade the usual screen time for their hiking boots and some fresh air.

I grew up and still live very near the foothills of the Angeles National Forest where I’ve spent literally half my life hiking, biking, and snowboarding. I know which waterfall hikes have the most scenic trails, flow longer than others, offer the best views, and have additional secret waterfalls that most people have no clue exist. Now, I’m going to share them with you.

Here is a list of the best waterfalls in the County of Los Angeles.

Best Waterfalls In Los Angeles

I organized the following list from least amazing to most amazing. Lastly, please remember to pack out everything that you pack in. Many plants and animals depend on it. Thank you.1

10) Brown Mt Dam Falls: 80 Ft Man-Made Cascade

Brown Mountain Dam Falls

  • Total Miles: 1.45
  • Difficulty: Moderate
  • Best Season: Mid Spring
  • Elevation Gain: 663 Ft
  • Time: 45 Min
  • Dogs: Allowed On A Leash
  • Restrooms: Not Available
  • Map, Directions, & Full Post: Brown Mt Dam Falls

Brown Mountain Dam Falls is an 80-foot man-made cascade in the Arroyo Seco Creek. There are two trailheads for this hike, the 1.45-mile hike that I talk about in this section, and an 8.46-mile route, which you can see by clicking the link to the full post.

I hiked the 1.45-mile route which began on a turnout off the 2 Hwy, right across the street from the Angeles Crest Fire Station. Since the goal was to get to the canyon floor in less than half a mile, you best believe it was steep and loose. Hiking boots are not an option on this trail, they’re a necessity.

However, once I got to the creek, White Alders, Western Sycamores, and large cabin ruins transformed the landscape.

After walking past a wooden hitchrack (for tying horses), and crossing the creek a couple of times, I found myself at the base of the falls. The falls are stunning, and the fact that it was man-made made no difference to me. If anything, it was more unique and interesting.

Fun Fact: Brown Mt Dam Falls is located on the same creek as Switzer Falls, the latter just happens to be located much deeper in the San Gabriel Mts.

9) Monrovia Canyon Falls (Officially Open!)

  • Total Miles: 2
  • Difficulty: Easy
  • Best Season: Spring
  • Elevation Gain: 439 Ft
  • Time: 1 Hr
  • Dogs: Allowed On A Leash
  • Restrooms: Available At The Parking Lot.

Monrovia Canyon Falls is officially open! This trail was my go-to as it was so close to where I grew up. I’ve hiked it many a times and will continue to do so because of its peaceful and lush landscape.

This trail is a must-do for kids. It’s easy and even offers an interpretive experience. During some of my visits, I’ve seen park rangers doing guided tours of the canyon and nature center specifically for small children.

The scenic trail is mostly shaded and surrounded by plant life. If you’re lucky (or unlucky depending on how you see it), you might come across a bear. I haven’t been lucky while on this hike yet, but I’ve seen multiple bears strolling around the town of Monrovia, once while delivering for Uber Eats.

The two-tier waterfall is roughly 30 feet high and surrounded by luscious vegetation.

8) Switzer Canyon Falls & Bonus Secret Falls (Closed)

Switzer Falls

  • Total Miles: 4.6
  • Difficulty: Moderate
  • Best Season: Spring
  • Elevation Gain: 695 Ft
  • Time: 2.5 Hr
  • Dogs: Allowed On A Leash
  • Restrooms: Available At The Parking Lot
  • Map, Directions, & Full Post: Switzer Falls Trail

Switzer Falls is a beautiful multi-tiered cascade located in Bear Canyon. In my opinion, the trail was very scenic, and I love the fact that it’s located far away from the city.

The trail began on the canyon floor, ascended the canyon wall to bypass a massive drop in the Arroyo Seco Creek, and then descended back down to the canyon floor before making its way upstream to arrive at the falls.

Throughout the hike, the creek would occasionally widen and flow over barren rock as it hugged the canyon wall, creating the illusion of little rock slides. I was in paradise.

I crossed the creek quite a few times throughout the trail. Some creek crossings required balancing on logs and others on boulders. I felt like I was in an obstacle course.

Switzer Falls has two tiers, measuring roughly 50 feet high, and is very elegant looking. Unlike most waterfalls in SoCal, which roar off a ledge in a loud and violent manner, Switzer Falls graciously flows down the rocks, forming a slight curve that resembles a slide. But it’s not a slide so please don’t try.

Fun Fact: If you climb up the east side of the Switzer Falls and continue making your way upstream, you’ll arrive at a second secret waterfall. More info info in the full post.

7) Eaton Canyon Falls: LA’s Most Popular Waterfall (Closed)

eaton canyon falls

  • Total Miles: 4.02
  • Difficulty: Easy
  • Best Season: Spring
  • Elevation Gain: 455 Ft
  • Time: 2.5 Hrs
  • Dogs: Allowed On A Leash
  • Restrooms: Available At The Trailhead
  • Map, Directions, & Full Post: Eaton Canyon Falls

Eaton Canyon Falls is located in Pasadena in a canyon with narrow and steep walls, dubbing it the name, The Precipice Canyon by the Spanish.

I found the first section of the hike to be somewhat dull as it consisted of a dirt road weaving its way through the sun-exposed Eaton Wash. However, once I entered the canyon, the scenery quickly changed to a more woodland look and the road became a dirt trail.

The hike required crossing the creek quite a few times (around 10) some of which were pretty large but luckily not deep. Other than the creek crossing, there were no additional major obstacles.

The base of the falls is a wide section of the canyon, free of trees, and with boulders scattered throughout.

Eaton Falls is a decent fifty feet high, with a shallow pool, and dark walls which vandals have incessantly gratified. If you’re planning to visit the place, make sure to arrive very early, as it gets ridiculously crowded on weekends.

Fun Fact: A secret waterfall is located right up the canyon. Unfortunately, it’s no longer accessible, but those who’ve visited tell stories of great times at a huge rockslide and pool.

6) Trail Canyon Falls: Oasis In Big Tujunga

Trail Canyon Falls

  • Total Miles: 4.54
  • Difficulty: Moderate
  • Best Season: Spring
  • Elevation Gain: 1067Ft
  • Time: 2.5 Hrs
  • Dogs: Allowed On A Leash
  • Restrooms: Not Available
  • Map, Directions, & Full Post: Trail Canyon Falls

Trail Canyon Falls is not what you’d expect to see in the dry canyon of Big Tujunga.

The trail began on a dirt road but quickly converted into a dirt trail before ascending the west side of the canyon. The trail itself isn’t the most scenic, but the waterfall is more than worth it.

Fun Fact: Multiple seasonal waterfalls on this trail only flow during or after heavy rain, one of which is larger than Trail Canyon Falls. You can see pictures of the seasonal waterfalls in the full post. They’re dry, but at least you’ll know what to look for.

I had to use a rope left behind by the locals to get down to the base of the falls. It wasn’t too difficult, but people who have a hard time sustaining their weight while on a rope may struggle.

Most waterfalls are thin streams flowing off a ledge, but after decent rainfall 40-foot Trail Canyon Fall’s two streams merge into one broad cascade, giving it a powerful look and strong roar.

Additionally, for those who have trouble with heights or climbing, the top of the falls can be explored without climbing down via the rope.

5) Millard Canyon Falls: Scenic Hike To 50 Ft Falls (Closed)

Millard Canyon Falls

  • Total Miles: 1.3
  • Difficulty: Easy
  • Best Season: Spring
  • Elevation Gain: 308 Ft
  • Time: 45 Min
  • Dogs: Allowed On A Leash
  • Restrooms: Available At The Campground
  • Map, Directions, & Full Post: Millard Canyon Falls

Millard Canyon Falls is a gem located in the foothills of Altadena. The trail is as scenic as they come, almost entirely shaded, and easy enough for the entire family.

I began the short hike at Millard Campground and headed upstream to the waterfall, but not before crossing the creek a few times. There is one very shallow and shaded pool toward the end of the trail where I’ve continuously seen hikers rest and cool off. Maybe you can get to it before others.

The waterfall is 50 feet high and surrounded by white granite walls, probably the whitest I’ve seen, giving Millard Falls a very captivating look.

This is the waterfall hike which I highly recommend for beginners as the only major obstacles are a four-foot ledge at the beginning of the hike and a few easy creek crossings. If you decide to visit, make sure to arrive extra early as it gets super crowded!

4) Hermit Falls: Cliff Jumping Paradise (Closed)

Hermit Falls

  • Total Miles: 2.5
  • Difficulty: Moderate
  • Best Season: Spring 
  • Elevation Gain: 715 Ft
  • Time: 1 Hr 15 Min
  • Dogs: Allowed On A Leash
  • Restrooms: Available At The Parking Lot

Hermit Falls is located in Santa Anita Canyon, and, in my humble opinion, is the best spot for cliff jumping in the San Gabriel Mts. Unfortunately, it was closed after the Bobcat Fire of 2020, which is why I don’t have the full post. However, I’ve hiked this trail many times.

I started the hike on a steep paved road descending from Chantry Flats where the parking lot is located, then hopped on a dirt trail which led me down to the canyon floor.

The setting turned into green paradise, and the forest canopy provided plenty of shade. I made my way downstream, admiring the multiple waterfalls flowing off the check dams, until reaching Hermit Falls.

Fun Fact: Hermit Falls has TWO large waterholes, one at the top of the falls and the larger at its base, which are deep enough for cliff jumping.

I jumped into the larger swimming hole from a roughly thirty-foot ledge. It was paradise. The barren granite cliffs on both sides seemed to close in on me as I swam out of the pool.

Unfortunately by my last visit, which I believe was in early 2020, every reachable spot on the canyon walls seemed to be covered in filthy graffiti.

To get back to the ledge at the top of the falls, I had to climb up a near-vertical wall using a rope left behind by others. I’ve seen cliff jumpers scramble up a very steep and loose trail which begins at the base of the falls and ends at roughly fifty-foot ledge, but I’ve yet to try it myself.

After calling it a day, I made my way back up to the Chantry Flats where I enjoyed a delicious meal from Adam’s Pack Station.

3) Lewis Falls & Bonus Secret Waterfall

Lewis Falls

  • Total Miles: 0.73
  • Difficulty: Easy – Moderate
  • Best Season: Spring – Fall
  • Elevation Gain: 328 Ft
  • Time: 35 Min
  • Dogs: Allowed On A Leash
  • Restrooms: Not Available 
  • Map, Directions, & Full Post: Lewis Falls

50-foot Lewis Falls is one of those trails that makes you feel like you’ve completely left California.

The trail is easy, teeming with luscious vegetation, and full of water! Unlike most waterfalls which dry up by the summer, Lewis Falls tends to flow late into the fall and sometimes winter!

Virtually the entire trail is shaded thanks to the giant incense cedar trees which tower 100 feet above the canyon floor. Hence, the reason why it feels like you’ve left CA.

Fun Fact: A second smaller waterfall is located about halfway through the hike, but most people miss it because it can’t be seen from the trail. Check out the full post to learn its location!

Once at the falls, part of the canyon was flowing with water from wall to wall. The cascade flowing off the cliff almost looks like its coming from a huge pressurized hose as vegetation surrounds it on all sides.

2) Sturtevant Falls: (Officially Open)!

  • Total Miles: 3.3
  • Difficulty: Easy – Moderate
  • Elevation Gain: 400 Ft
  • Time: 1 Hr 45 Min
  • Dogs: Allowed On A Leash
  • Restrooms: Available At The Parking Lot

Like Hermit Falls, Sturtevant Falls also begins from Chantry Flats, is located in Santa Anita Canyon, and was also closed due to the Bobcat Fire. But, unlike Hermit Falls, Sturtevant Falls is officially open once again!

When I hike Sturtevant Falls, I take the paved road from Chantry Flats down to the creek where it becomes a dirt road (when both waterfalls are open, you can descend toward Hermit falls from the paved road then head upstream until reaching Sturtevant Falls to shorten the trail).

In my opinion, the ivy-covered cabins with stone walls and wooden bridges make this the most scenic (and probably greenest) trail in the San Gabriel Mts. Additionally, the white alders, western sycamores, and the occasional oak tree provided a thick canopy that shaded much of the trail.

The creek forms small shallow pools and is home to the Coast Range Newts which I’ve spotted a couple of times during and shortly after the rain.

The dirt road ended with the last cabin, and a dirt trail took me the remainder of the way to the roaring falls where the forest canopy opened up. As I got closer I could see the moss clinging to the wet walls, contrasting with the white granite.

While resting at the waterfall, hikers on the narrow Gabrielino Trail 50 feet above the canyon floor made their way over the top of the falls, and get dangerously close to the ledge to peek down on us and the falling stream.

When it rains a lot, the canyon is filled with mist from the falls, making it look like you’re in a dream state.

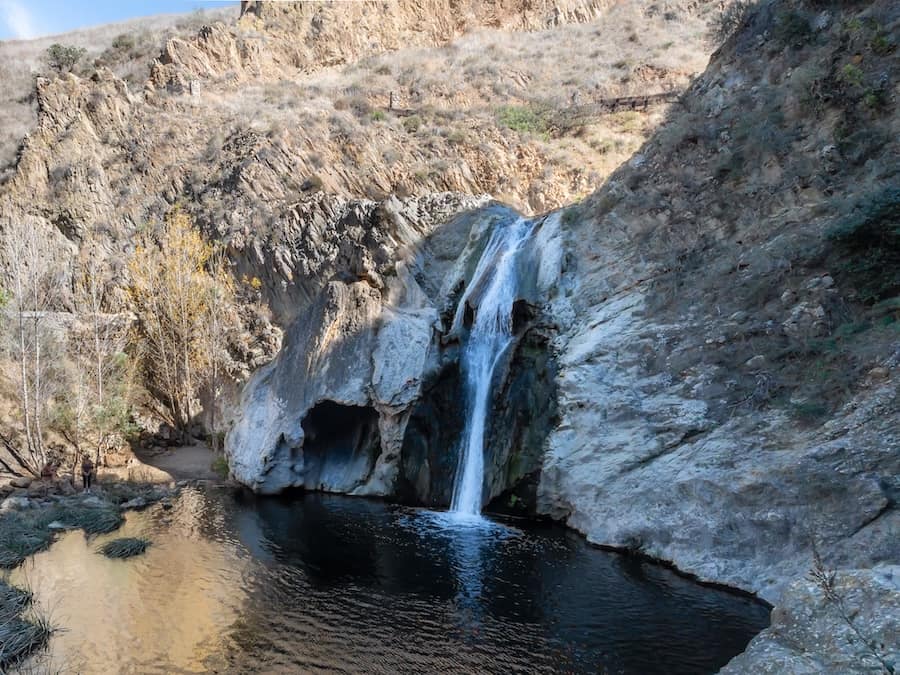
1) Escondido Falls: Best Waterfall In The County

Escondido Falls

  • Total Miles: 3.49
  • Difficulty: Easy 
  • Elevation Gain: 507 Ft
  • Time: 1.5 Hrs
  • Dogs: Allowed On A Leash
  • Restrooms: Porta Potty At The Parking Lot
  • Map, Directions, & Full Post: Escondido Falls

If you’ve read this post before, you know I had previously rated Sturtevant Falls as the best waterfall in LA County. Don’t get me wrong, Sturtevant won’t let you down, but I’ve officially found a waterfall that supersedes it (Sturtevant Fall’s trail is greener and more scenic).

Not so hidden in the Malibu wilderness is a set of three amazing cascades called Escondido Falls. Lower Escondido Falls is roughly 50 feet high, the middle falls about 20 feet, the upper falls, however, is a whopping 150 feet. I was left breathless at its enormous size and power as it plummeted off the coastal cliff.

The lower falls, sometimes referred to as the “limestone falls” is broad, unlike most waterfalls in LA County. Its raging torrent creates a pocket of nature’s paradise among a dense forest of sycamores and coastal chaparral.

All three waterfalls are dry throughout most of the year, which is why it’s crucial to visit as soon as possible following a decent rainstorm or wet winter. A drizzle will do virtually nothing for the falls.

The trail is very beginner friendly, requires a handful of creek crossings, and is fun for the family to enjoy.

Waterfalls Near LA County

The following two waterfalls are no longer considered Los Angeles County, but are still located within the Angeles National Forest, specifically the Mount Baldy area, which happens to be very close to the border between LA and San Bernardino Counties.

2) Stoddard Falls: Rockslide & Pool

Stoddard Canyon Falls

  • Total Miles: 0.75
  • Difficulty: Easy
  • Best Season: Spring – Mid Summer
  • Elevation Gain: 160 Ft
  • Time: 35 Min
  • Dogs: Allowed On A Leash
  • Restrooms: Not Available
  • Map, Directions, & Full Post: Stoddard Canyon Falls

Stoddard Canyon Falls is one of the very few waterfalls in the San Gabriel Mts that has a rockslide and pool.

I started the hike on an abandoned paved road that gradually descends alongside the crystal clear San Antonio Creek. I’m not exaggerating when I claim the water in this creek is the clearest and bluest I’ve ever seen in Southern California.

Finding the section of the hike where a dirt trail descends perpendicularly away from the paved road is very tricky, so make sure to view the full post for pictures.

The dirt trail is very loose and steep, so people who have poor balance or small children may require assistance from other people or trekking poles.

Luckily, the dangerous section is very short, and I was at the canyon floor within a couple of minutes. From here onward I made my way up the creek by boulder hopping.

Stoddard Canyon Falls is roughly 40 feet high and has recently blown up in popularity thanks to TikTok and Instagram. It gets very crowded, so be sure to arrive early on weekends.

Lastly, the waterfall is virtually graffiti-free at the time of writing this post (Oct 3rd), let’s hope the popularity doesn’t change that. If you spot someone vandalizing our mountains, do not engage, but please report it to the authorities.

 1) San Antonio Falls: Huge Breath-Taking Waterfall

San Antonio Falls

  • Total Miles: 1.33
  • Difficulty: Easy
  • Best Season: Spring – Fall
  • Elevation Gain: 277 Ft
  • Time: 45 Min
  • Dogs: Allowed On A Leash
  • Restrooms: Not Available
  • Map, Directions, Drone Video, & Full Post: San Antonio Falls

Located further up the road from Stoddard Falls is the largest waterfall on this list, San Antonio Falls, which also had me strolling along a paved road before switching over to a dirt trail.

However, this paved road offered amazing views of the canyon below as well as the pine-filled mountains towering around me.

Fun Fact: San Antonio Falls gets snow! Check out the full post to view a stunning short video of the falls covered in snow.

A viewpoint located on the paved road where the dirt trail begins allowed me to see a few more of the waterfall’s tiers in person.

If I recall correctly, only the bottom tier can be seen from the base of the falls, and only a drone can capture all tiers, but from the viewpoint I was able to see the two bottom tiers which happen to also be the largest.

Fun Fact #2: It’s possible to access some of the top tiers, and those who do are rewarded with a refreshing crystal clear pool.

The agreed-upon size of the falls is 75 feet, but after examining my drone shots, I’m almost 100% positive the waterfall is much larger.

Fun Fact #3: Like Lewis Falls, San Antonio Falls also flows virtually year-round!

FAQs

Does Los Angeles Have Waterfalls?

Los Angeles County has hundreds of waterfalls.

What Is The Largest Waterfall Near LA?

The largest waterfall near LA is San Antonio Falls. There are many claims stating the waterfall is 75 feet high, but that is only true of the bottom tier. When all tiers are taken into consideration, the waterfall’s height is closer to 200 feet.

What Is The Easiest Waterfall Hike In Los Angeles?

The easiest waterfall hike in LA is Monrovia Canyon Falls, but unfortunately, it’s been temporarily closed. The next easiest waterfall hike is Millard Canyon Falls, which aside from a 4 foot ledge that must be climbed over at the beginning of the hike, is short, relatively flat, and very scenic.

Do Los Angeles Waterfalls Flow All Year?

Most LA waterfalls dry up during the summer. However, Lewis Falls typically flow all year.

10 Spooky SoCal Hikes Plus Bonus Haunted Places

10 Spooky SoCal Hikes Plus Bonus Haunted Places

Just because summer is over doesn’t mean you have to stop hiking. Simply hit the trails that fit in with the season, such as the following ten spooky hikes. These trails include various abandoned ruins, many of which hold very dark secrets, while others gave me eerie vibes during my visit.

**As a bonus, I’m going to provide multiple SoCal locations which aren’t hikes, but are also in the outdoors and known for their many paranormal activities. So be sure to get to the bottom of the post because they’re going to blow your mind! And here is a video I made (my first YouTube video) about Crystal Lake Campground in the Angeles National Forest.

Lastly, I realize all hikes are creepier at night. However, I highly discourage visiting some of these trails (especially those in the San Gabriel Cn) after sunset, as people who don’t have the best intentions may pose a huge risk to your safety.

10) Paramount Ranch: Ghost Town Set On Fire

PARAMOUNT RANCH

Paramount Ranch was once a complete ghost town movie set. However, many of the structures burnt down in the Woosley Fire of 2018.

Although only the church and train station remained standing, it was enough to produce an eerie feeling in the place, almost like I was in a real ghost town.

You’re allowed to walk up to the structures and peep inside. Both the emptiness of the church and the train station reminded me of a zombie apocalypse.

9) Dawn Mine: Abandoned Mine Deep In The Mts (Closed)

DAWN MINE TRAIL

The Dawn Mine is an abandoned gold mine deep in the San Gabriel Mts. It’s a must-do and is frequently combined with Millard Falls as it’s located further down the canyon.

The mine has 2 portals, one at ground level and the other located about 30 feet above the ground. I was only able to see about 30 feet into the bottom adit, which has running water flowing out.

The old water pump system you see in the featured image is the only relic left of the mine. The Dawn Mine was worked up until 1954, much more recently than most mines.

Although you can’t walk inside the Dawn Mine, there’s an exploratory tunnel further up the trail that goes in about 50 feet. Check out the full post to learn how to get there.

8) Tin Mine Canyon: Corona’s Eerie Hike

TINE MINE CANYON

The Tin Mine is a glimpse into Corona’s past. Like the Dawn Mine, the Tin Mine has two known portals, one above the ground and the other at ground level, both of which have been closed.

This was one of those trails that I found to be very eerie, a feeling I rarely get in the mountains. Although I visited on a holiday, I was the only one in the canyon.

Vibrant vines adorn the sides of the bottom portal, giving it a spooky autumn look. Someone told me there’s a way inside the adit, but I’ve yet to find it.

7) Car Wreck Trail: No One Knows What Happened

CAR WRECK TRAIL

Car Wreck Trail takes you to the mysterious ruins of a 1940’s vehicle. There are many theories online that attempt to explain the wreck, but none have provided sufficient evidence to satisfy the public.

The trailhead is located in Laguna Beach where the famous, Top Of The World hike ends. Hence, you can enjoy an amazing view along with a car wreck.

6) Shoemaker Canyon Rd: Armageddon Tunnels

Shoemaker Canyon Road

During the Cold War, Los Angelinos feared a nuclear attack from Russia, so they built two tunnels in the East Fork of the San Gabriel Canyon to provide faster access to the high desert and Nevada.

Due to conservationist efforts and unexpected costs, the tunnels were abandoned and now end abruptly in what seems like the middle of nowhere.

Although they were never used for vehicles, they’ve become extremely popular with hikers.

5) Murphy Ranch: Abandoned Nazi Ruins (Closed)

Murphy Ranch Trail

During World War 2, a family who lived in the Santa Monica Mts believed Hitler would win the war and would invade the US. Therefore, they began building Murphy Ranch as a self-sustainable ranch complete with a watchtower and library.

Unfortunately for them, Hitler lost the war, and according to the legend, police occupied the compound the day after Pearl Harbor was attacked.

Nowadays, many of the structures are still located in the canyon. Although they’re boarded up, it was still worth a visit.

It’s strange to see a place that was once full of life now turn into a pile of ruins.

4) Old LA Zoo: The City’s Dark Past

Old LA Zoo

  • Total Miles: 2.63
  • Map, Directions, & Full Post: Old LA Zoo

The LA zoo that operates today is not the city’s original zoo. The original zoo, which is also located in Griffith Park, operated from 1912 to 1966, when it was closed because of the animals’ inhumane living conditions.

However, many of the structures are still located there today and can be explored via a fun hike through the hills.

There are rumors which claim the old zoo is haunted, and that animals can be frequently heard at night crying out in distress.

Whether that’s true or not, park rangers have stated that animal sacrifice, satanic cults, and murder are not uncommon in Griffith Park.

3) Echo Mt Ruins: Pasadena’s Haunted Forest (Closed)

ECHO MT RUINS

  • Total Miles: 5.3

Echo Mt is home to the most popular ruins in Southern California. In the late 19th century, Professor Thaddeus Lowe built a world-famous attraction which included The Great Incline and the Mt Lowe Railway.

Both attractions took visitors up the Echo Mountain House, a resort that now lies in ruins and is the destination for this trail.

The trail begins at the Cobb Estate, which was once owned by the Wright Brothers and also lays in ruins, in what is now known as the Haunted Forest. To venture into the estate, I had to walk through a Victorian-style gate, making me feel like I was walking through a Halloween movie set.

The Echo Mt ruins at the end of the trail include the foundation of the Echo Mt House, the wheels and frame of the Mt Lowe Railway, and many scattered stoned ruins to name a few.

2) Pumpkin Rock: SoCal’s Favorite Fall Trail

Pumpkin Rock Trail

This trail might not be spooky but it’s nevertheless ideal for the season.

The giant boulder which has been painted like a pumpkin by Norco’s locals has been one of SoCal’s most famous Halloween hikes.

Although people with nothing better to do vandalize constantly the boulder, the locals are generous enough to re-paint it every autumn to prepare it for the thousands of visitors who enjoy taking pictures with the landmark.

1) Big Horn Mine: Spookiest Hike In SoCal

BIG HORN MINE

The Big Horn Mine is SoCal’s most famous abandoned mine and for a good reason.

The mine was founded in 1895 by Charles T. Vincent while hunting for Big Horn Sheep. Charles, who was known as a hermit, built a cabin about a mile away from the mine, which still stands today!

The mine is roughly 300 feet deep and contains 2 miles of underground passageways, most of which can no longer be accessed due to cave-ins. However, most of the building’s ruins located at the portal can still be explored along with a good portion of the inside of the mine.

A friend of mine who has explored the San Gabriels better than anyone else I know told me there is an underground lake located inside the mine.

I don’t recommend exploring the inside of the mine as it can be unstable but definitely visit the ruins and Vincent’s cabin.

Bonus: Paranormal Activity In The Outdoors

The following are not trails necessarily, but places in the mountains or outdoors still within SoCal where people have had strange experiences. All cases are true to the best of my knowledge.

I highly dislike false paranormal stories for the sake of clout or money. I truly believe the public must be informed of the thousands of strange occurrences, many of which have roots in Native American lore, and have occurred much more frequently and closer to home than we’d like to believe.

Woman Records UFO In San Gabriel Mountains

I’ve seen these types of UFOs both in the city and the mountains, and I actually managed to get it on video! You’ll be able to see my video in the Big Bear section below within a few days.

Anyways, this lady recorded a UFO hovering over the San Gabriels for roughly 10 minutes. It had been flying extremely fast, and came to a complete stop unlike any human aircraft, before flying away in a southwardly direction. I don’t know what they are but they’re out there, especially in our mountains.

Gates Of Hell In Turnbull Canyon

The gates of hell in Turnbull Canyon are rumored to be ruins of a sanatorium that was shut down due to malpractice.

Although the area is now private property, many claim to have seen apparitions of children who were taken from orphanages and sacrificed by satanic cults long ago.

To make matters worse, a plane once crashed at Turnbull and killed 29 people.

But once again, it gets crazier. After doing more research I found out that the Gabrielino Tribe used to call Turnbull Canyon “Hutuknga” which means “The Place Of The Devil.”

They believed that the spirits of their ancestors who were killed by the first Spanish settlers for refusing to convert to catholicism wandered there.

Galster Park: My Friend Saw Apparitions Of Children

Let me tell you a crazy story that a friend of mine shared with me many years ago. This is NOT a fictional story, as my goal is to build a large archive of all the mysterious places in California, which I want to be trustworthy. It goes like this.

At the time, him and the girl he was dating went to Galster Park for a walk. Since it was winter time, the sun set early, but he didn’t think anything of it because he didn’t have a clue about the park’s atrocious past.

When they got back to the car, he jumped inside, started the engine, turned on the headlights, and this is where it gets crazy. As soon as the lights turned on he saw multiple children standing in front of the car.

He remembers them so clearly that he recalls them wearing polo shirts.

They began walking toward his car, but he wasted no time putting it in reverse and flooring it out of there. The girl he was dating was non-stop screaming, and he said he was so terrified, that he ran every red light until he got to the freeway.

He later found out that a crazy psychopath had killed multiple children at the park many years ago.

This is a close friend of mine who I’ve known since we were in high school. He’s not a liar, and every time I try to convince him to go with me to the park, he adamantly refuses, saying he’s never going back there ever again.

Also, a man was found hanging in the park back in 2013, which only adds to the park’s dark history.

Crestline: Satan’s Castle

Story Of The Castle

Ted Gunderson, the former head of the FBI in LA, blew the whistle on a HUGE discovery. He found out that very powerful and demented people were using tunnels underneath Manhattan Elementary School to kidnap children, transport them to a helicopter, and fly them to an actual castle in the mountain town of Crestline.

There are other stories around the castle, but I heard this one directly from Ted’s mouth via a Youtube video. Unfortunately, all his videos seem to have been removed from Youtube (shocking I know), but a quick search on Rumble.com for the query “Former FBI Chief Ted Gunderson Exposes Horror,” will show a 1 hour and 13 minute video where he exposes the evils conducted by many satanic cults, including the one in this story.

Once in the castle, the children were abused and killed, more than likely for satanic rituals. Hence, why the locals dubbed the place, Satan’s Castle.

The castle mysteriously burned down twice. Some say the locals ignited the fire, while others claim the owners of the property burned it down to destroy all evidence, but no one truly knows.

Only some ruins remain, but they cannot be visited because it’s private property. Here’s a video of the peeps at Barrier Beyond exploring the castle.

Devil’s Gate Dam, Missing Child, & JPL’s Satanic Beginnings

I’m about to tell you something that probably no one else has ever told you. I highly suspect the dam, missing child, and JPL’s beginnings may all be connected, which would make sense as they’re all located in or very near the Hahamongna Watershed Park in Pasadena.

Devil’s Gate Dam

Before I knew anything about a missing child or JPL, my mountain biking friends had told me the Devil’s Gate Dam was haunted. After looking into it, I found many stories and legends around the dam including portals and occult rituals. The latter I can confirm from an eye witness that I met at Mt Lowe Peak. His testimony goes like this.

Occultic History

While waiting for the sunset, I sparked up a conversation with another young man who was an avid local hiker. He told me that many years ago he was hiking El Prieto trail which is located on the east side of JPL late at night when a man who seemed to be homeless but stable, told him to turn back, as the people in robes had spotted him. He wasted no time, and headed back immediately.

A few years later I was having a conversation with a friend of mine who was employed at JPL when he mentioned the JPL founder was an occultist. Therefore, the founder would plan certain events on very specific dates, like the testing of their first rockets on Halloween. Don’t believe me? They admit it themselves on their JPL website.

Missing Child

Then I bought David Paulides’ book, Missing 411, which details many mysterious disappearances in the outdoors, a few years later and learned about the story of Thomas Eldon Bowman, an 8 year old little boy who went missing in 1957 while on a hike near the Devil’s Gate Dam with his dad. What makes Tommy’s story strange is the fact that he told his dad he was going to run ahead to the parking lot, but when his dad arrived only a few minutes later, Tommy was no where to be found.

SAR and volunteers searched the area for weeks, but Tommy had sadly disappeared, never to be seen again.

Point of the story is, after learning about so many strange cases revolving that area at different times in my life, I have no doubt there is something extremely paranormal and evil going on there.

Check out this video by my awesome friends Oddity Odysseys if you’d like to learn more.

Black Star Canyon: Massacre, Big Foot, & Dwarfs

Black Star Canyon makes the Devil’s Gate Dam look like a walk through the park.

Probably the most notorious story about Black Star Canyon, previously known as Canon De Los Indios or The Canyon Of The Indians in English, is the massacre of multiple Native Americans.

However, hikers and hunters have also reported strange voices, growls, chanting, drums, crying, and evidence of occultic rituals.

Death In The Canyon

Sadly, this is not a fictional story. It goes like this. In 1831, when California was still part of Mexico, the Californios (Mexican ranchers who lived in California and wished to be an independent country) hired American frontiersman William Wolfskill to hunt down a group Shoshone Native Americans for stealing their livestock (a common occurrence at that time).

William found the thieves eating horse meat around a campfire in Black Star Canyon. This is where the story may deviate from the truth. Supposedly, the Shoshone men were also eating human flesh, which is why William ordered their massacre and mutilated the bodies before leaving the canyon.

The massacre is not the only case of murder. In 1899, James was shot to death by owner of Rancho Escondido (Hidden Ranch) Henry Hungerford over monetary issues.

Additionally, multiple people died in the canyon due to a mudslide that was triggered by the heavy rains of 1969.

The second most popular Black Star Canyon story involves a bus wreck (the bus has been removed from the canyon) that was believed to be the site where a bus driver lost control of the bus, resulting in the death of multipe children.

Big Foot

A man by the name of Isaac Arjonilla claims to have spotted Big Foot on four different occasions back in 1995. He also recalls seeing a man dressed like a miner, a ghostly apparition, which is most likely connected to the Black Star Mine.

La Llorona (The Weeping Woman)

When the Spanish possessed the land, rumors of a weeping woman who dwelled in the canyon quickly spread and remained alive until this day. I’ve also heard stories of the weeping woman being heard in Trabuco Canyon, which makes sense as both Trabuco and Black Star are located in the Santa Ana Mts.

She is sometimes described as wearing all white, and quickly disappearing before being fully spotted.

Black Star Dwarfs

Yup, Black Star Canyon is home to small entities which measure roughly two feet tall, walk with a waddle, and a dark complexion. Sightings were first reported in 1995, and have continued since then.