Huntington Central Park: HB’s Best Local Park

Huntington Central Park: HB’s Best Local Park

Huntington Central Park is an expansive, 350-acre park located at 18000 Goldenwest St in Huntington Beach. This dog-friendly park features Talbert Lake, a library, cafe, gardens, and an abundance of wildlife. It’s the largest city-owned park in all of Orange County, with plenty of space for recreational activities such as bird watching and bike riding.


Huntington Central Park Map


Looking for more FUN things to do in OC? Check out these hikes!

Huntington Central Park East

Split in half by Goldenwest St, Huntington Central Park East side is arguably the most popular. Due to all the attractions, I’m not at all surprised! Let’s take a walk together while I share a bit more about the aforementioned key features.


Key Features

  • Central Library
  • Secret Garden
  • Thomas Ridley Bandstand
  • Park Bench Cafe
  • Talbert Lake

Central Library

Let’s begin at the Huntington Beach Central Library where the primary parking lot is located.

There are 4 parking lots, one on each side of the park, but this one is by far the largest.

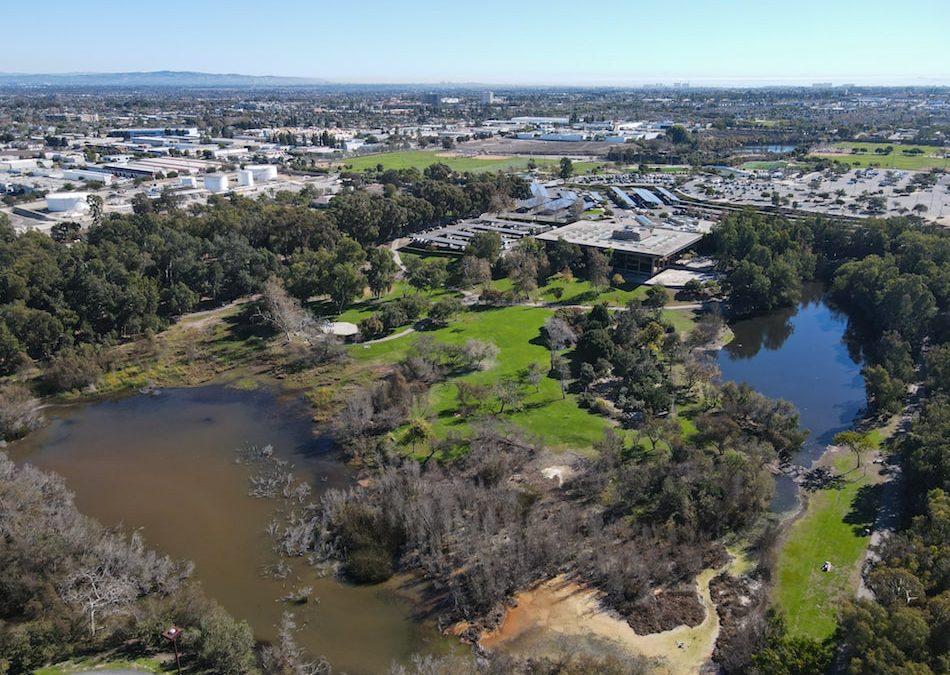
There’s also a sports complex across from the parking lot which you can see in the drone shot below.

FUN FACT: The Central Library has the largest children’s library to the west of the Mississippi!

The beautiful and large library is very spacious, has a 300-seat theatre for rent, and indoor fountains.

The hours of operation are:

  • Tues-Thurs: 9 AM to 9 PM
  • Fri-Sat: 9 AM to 5 PM
  • Sun: 12 to 5 PM
  • Mon: 1 to 9 PM


We began our walk through the park by heading left when facing the library and down a short dirt path that connects with the walkway.

The largest section of Talbert Lake can be found on the lefthand side of the library.  It’s less murky than other more stagnant sections and adds to the beautiful scenery.

You can expect plenty of ducks swimming around and lots of photographers taking snapshots of the lake.


Secret Garden

Our next stop is the Secret Garden located immediately to the right of the lake and north of the library.

Not sure why they call it the Secret Garden because it’s not much of a secret.

However, it’s definitely a pretty garden with a walkthrough area showcasing lots of beautiful plants and squirrels roaming about.

The abundance of colorful plants and trees that attract many of the animals make it the perfect location for taking pictures and birdwatching.

Fun Fact: This garden was built to show off many drought-tolerant plants!


Thomas Ridley Bandstand

After exploring the Secret Garden, we hopped back on the walkway and made our way towards the Thomas Ridley Bandstand, which is popularly known for hosting annual summer concerts for the community.

Join the fun from late June to early September on Sunday afternoons for a free concert.

You can enjoy a wide variety of music and live performances such as jazz, swing, show tunes, and more!

The concerts are perfect for families and people of all ages. So, be sure to mark your calendars for next year’s summer concerts!

To the left of the stage, you’ll find a large field ideal for soccer matches or playing catch with your pet.


Amphitheatre

Accross from the stage, you’ll find a shady and almost hidden amphitheater.

The wooden benches seat around 200 people.

The amphitheatre is reserved for special events and activities ONLY. Unfortunately, it can’t be rented by the public or used for social gatherings.


Strolling Through the Rest of the Park

Continuing with the walk, you’ll find lots of wooden benches to the right and another large field, perfect for family gatherings

I’ve seen many people throw birthday parties and other events in this area.

If you enjoy bike riding or are teaching your kids how to ride a bike, you should consider this park. The walkway at the park is wide and flat.

Heading towards the northeast section of the park, you’ll run into trees showing off their beautiful fall colors.

The red, brown, and orange leaves add the perfect touch to an otherwise sea of green grass and trees.

Here’s an arial view of the fall trees.

(Can you spot Catalina Island in the distance?)

Passing the trees, you’ll come to a small garden section that’s off to the left of the walkway where cement curbs line the path.

This area is blooming with colorful plants and butterflies during the spring months.

To the right, there’s a small pond with lots of ducks. The American Coons like to hang out here in large groups.

We caught a friendly squirrel that kept following us. It probably wanted food and is definitely used to humans.

There are lots of squirrels that will come up to you hoping for a snack. Please do not feed the animals.

*This squirrel was a paid actor*

Restrooms and a playground are located in the north side of the park as well as a small parking lot to the right of the restrooms (not shown) along Slater Ave.

From the restrooms, the walkway follows a creek and parallels Goldenwest Ave.


Park Bench Cafe

This neat little restaurant is open from Wed-Thurs. During open hours, they set up tables and umbrellas on the lawn for the public. The best part is it’s dog-friendly. They even include a doggie menu!

It’s the best place to enjoy a delicious breakfast or brunch meal with your family and furry friend!

As we got close to completing the loop around the park, we found ourselves on the opposite side of the lake where we first began, and a scene that is superb to most local parks.

And… that was the loop around the east side of the park!

HB Central Park West

HB Central Park West side is the second half of the park. Although it doesn’t attract as many visitors as the East side, it still includes a wide variety of unique attractions.


Key Features

  • HB Central Park Equestrain Center
  • Disc Golf Course
  • Kathy May’s Lakeview Cafe
  • Lake Huntington
  • Senior Center
  • Gated Dog Park
  • Shipley’s Nature Center

Let’s take a stroll through the park and take a closer look at all the attractions.


HB Central Park West Map


We began our walk here, at the parking lot off of Goldenwest. However, you can find an additional parking lot on the opposite side of the park by the cafe and another off of Edwards.


Shirley’s Nature Center

Immdiately upon entering the park, you’ll notice the 18 acre Shipley’s Nature Center.

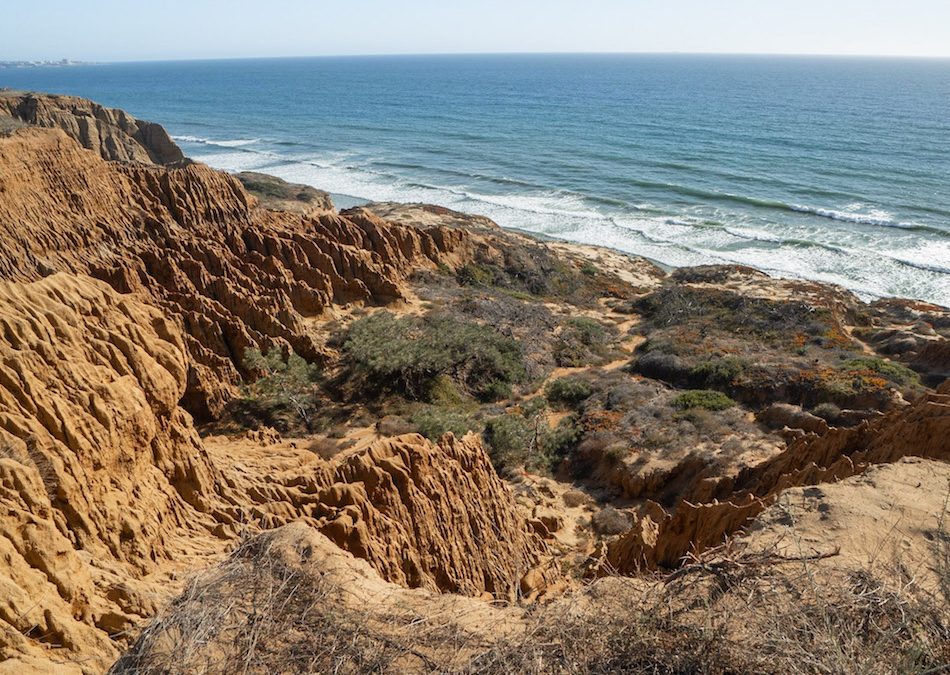
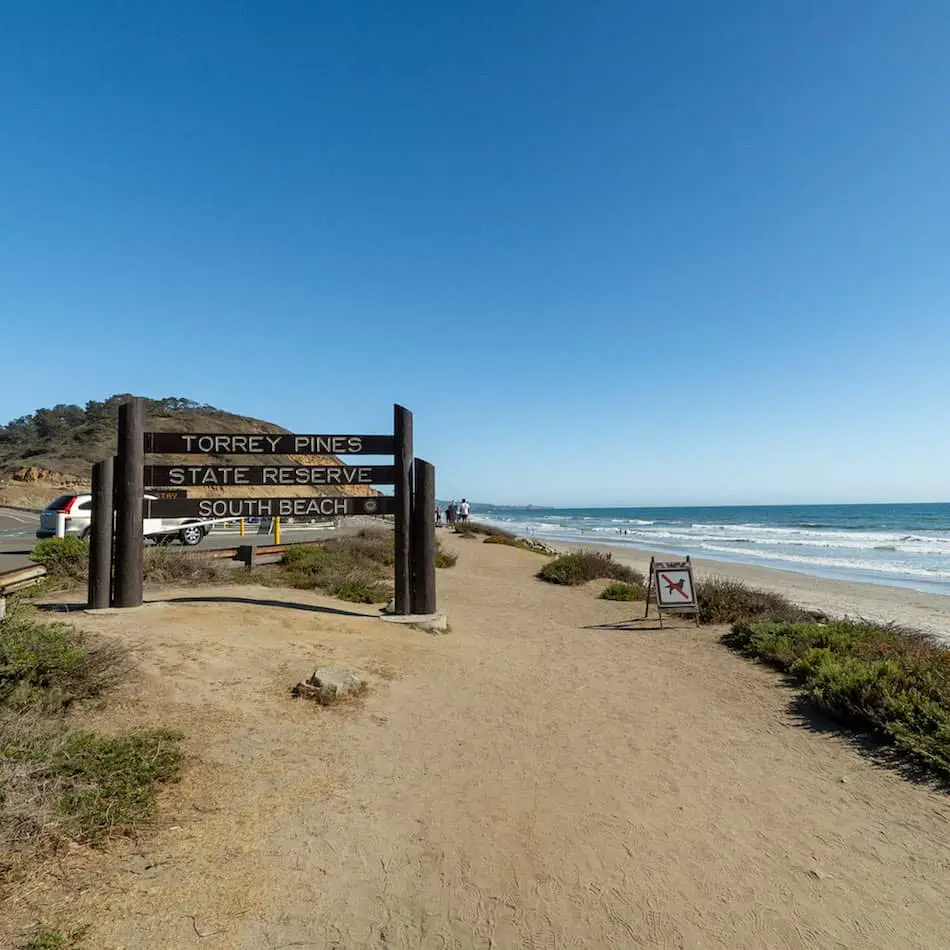
Much like an arboretum, Shipley’s Nature Center is organized by native habitats including oak woodlands, meadows, Torrey Pines (native to only Torrey Pines State Reserve in San Diego), and fresh water wetlands with sycamores and willows.

They are currently open Fridays and Saturdays from 9 am – 1 am. If you would like to donate or learn more about Shipley Nature Center, click the link here.

The park is also home to multiple large open fields ideal for sports. The field below is located right in front of the Shipley Nature Center.

We visited this park the weekend after the Santa Ana winds, so we got to witness the awesome power of mother nature.


Kathy May’s Lakeview Cafe

A few minutes later we reached the city famous Kathy May’s Lakeview Cafe.

They’re open 7 days a week from 8 am to 3 pm.

Kathy May's Lakeview Cafe

They boast an outdoor patio under red canopies surrounded by a white picket fence.

However, they have an additional patio adjacent to the the first which is even closer to the lake and provides the best views. Here is a view of the opposite side of the cafe with the lake in the background.

To get to the south side of the lake we walked along the side walk located to the right of the cafe.

The people who live in these lakefront houses must be have the best sunset views in the neighborhood.

Here’s another beautiful view of the cafe from across the lake.

This section of the park, which is located off of Edwards St, offers a kids playground, restrooms, and the famous dog park.


HB Central Dog Park

The gated dog park is the perfect place to train your pups or simply let them run around. Tennis balls litter the area, and the city has been nice enough to install a drinking station.

If the park alone wasn’t impressive enough, the park boasts a self serve dog wash for either a quick rinse or a complete shampoo and air dry session. You can find more info here.


HB Central Equestrian Center

To the right of the dog park is a large, 25-acre equestrian center. Who knew you could get a little taste of the countryside just two miles away from the beach?

You can spot horses in their stables or catch students and trainers galloping around on these amazing animals.

If you’re interested, they offer lesssons for beginners to advanced riders.


Playground Coming Soon

As we completed the loop around the lake, we came across a massive kids’ playground currently in construction as of Nov 29, 2021 and a small pier.

Fishing is allowed at the park. However, everyone over the age of 16 is required to have a fishing license. Unfortunately for me, the ducks called dibs on the pier.

The adventurous playground looks more like an obstacle course than a playground. It was supposed to be completed by the end of Nov 2021. However, it seems like they may need a few more days or weeks.


Disc Golf Course

Adjacent to the playground is the disc golf course, which takes up a considerable amount of space in the park.

2 fields located up the hill from the lake are designated for disc golf.

I highly recommend HB Central Park for everyone. For children’s safety, homeless people are not allowed to setup shelters in the park. The park is exceptionally clean and the people are friendly.

If you want to check out more fun things to do outside, such as hikes in Orange County, be sure to check out the recommendations shown below!

La Canada Teepee Trail: Bee Farm, Lavender Fields and Views

La Canada Teepee Trail: Bee Farm, Lavender Fields and Views

Distance 

4.62 Miles

Time

~2.5 Hrs

Difficulty

Moderate

Season

All Year

Elevation Gain

1003 Ft

The Teepee trail is a really easy and fun hike within the foothills of the San Gabriel Mountains. You’ll be able to experience fall colors during the autumn months, a fun teepee, outstanding sunsets, and more!

Teepee Trail is a 4.62-mile, roundtrip hike located within the Los Angeles National Forest near La Cañada Flintridge. It’s an easy hike that features a bee farm, a small lavender field, a rock labyrinth, and a teepee. Dogs are allowed on this trail as long as they are leashed.

Map of Teepee Trail

powered by Advanced iFrame

Download Printable PDF Map

Directions and Parking

The Teepee Trail is located at 5864029001, La Cañada Flintridge, CA 91011. 

You can park right across the USFS Angeles Station 11: 34.233970, -118.183552

Parking is free but limited. It’s usually not too busy.

Hike to Teepee

I was so excited about this hike. The weather was perfect, yet slightly cool. There were hardly any people on this particular Sunday afternoon which made it that much more peaceful.

We had to walk through this fire station road and keep straight in order to get to the actual trailhead.

Notice the “Stop Do Not Enter” sign? That only applies to the actual fire station and gate on the right side. Don’t worry, as long as your not entering that section you are fine to proceed forward.

The majority of the hike is on Mt Lukens Truck road. The sign to the right says 7 miles, but it’s more like 5 miles roundtrip.

It’s a nice ascent that isn’t too steep. You’ll definitely get a little workout from it though. I was starting to break a sweat after the 1-mile mark.

Quick Tip: Bring a light jacket on cooler evenings!

From the trail, we could spot Strawberry Peak!

You’ve probably heard of it if you’re an avid LA hiker. It’s a much more challenging hike, but the sunsets there look amazing (stay tuned for that one).

You’ll be able to spot autumn colors like these if you hike the Teepee trail from about mid-October to early November! Trust me, it’s even more gorgeous and vibrant in person.

The crunchy, warm-colored leaves under my feet and crisp air made this otherwise bleak trail so much more exciting. It screamed fall!

There are a few switchbacks in the first half of the trail. The final switchback has a bench and lookout.

From here, you can see a little bit of Altadena and Pasadena.


After taking in the views, it was time to hit the trail again.

We continued on this straight dirt path until we reached the mailbox.

This is where we got off of Mt Lukens Road and onto this private property.

The owners are kind enough to allow the public on their property. Please be extra respectful.

Heads up, there are lots of bees beyond this point.

I wouldn’t recommend doing this hike if you are dangerously allergic to them as they are flying around everywhere. One of them chased us around and would not give up!

It’s no surprise as there’s a bee farm off to the side of the dirt path.

There’s also a small lavender field up ahead.

I could smell the sweet and floral fragrance from these vibrant plants. The bees were happily buzzing around them.

Right before the teepee, there’s a rock labyrinth.

These can be used to mediate and are treated as mazes. It can be relaxing to walk alongside the curved rock paths.

The Teepee

The Teepee is located right around the corner of the rock labyrinth!

It’s much bigger in person than what these pictures make it out to be. If I had to guess, it’s about 15 feet tall.

There’s usually a canvas covering that drapes around the teepee, but the owners remove it when the wildfire warnings are high.

Can you spot the rock labyrinth and bee farm?

Here’s an amazing drone shot that gives you a totally different perspective. You can see Glendale, Pasadena, and more. The smog was a bit heavy that day so we couldn’t see the ocean in the distance.

Overall, I had a really fun time hiking to the Teepee. There was so much to see and explore! On top of that, we got a taste of fall in sunny LA.

la canada teepee

I hope you get inspired to visit this one. As always, leave no trace.

Don’t forget to check out some of the other LA hikes we’ve done and tag us on Instagram @cahikingadventures. See you on the next adventure!

Dripping Cave Trail: Secret Hideout for Robbers in 1800s

Dripping Cave Trail: Secret Hideout for Robbers in 1800s

Distance 

5.1 Miles

Time

~2.5 Hrs

Difficulty

Easy

Season

All Year

Elevation Gain

400 Ft

Within the canyons of Laguna Niguel, you’ll find a cave known as Dripping Cave with a shocking past pertaining to 19th-century thieves! You’ll love this Orange County hike that’ll take you to not only one unique cave but two.

Dripping Cave Trail is a 5.1-mile hike located in Aliso and Wood Canyons Wilderness Park near Laguna Beach, CA. It features two caves as well as biking and hiking trails. Dogs are not allowed on this trail. This is an easy, family-friendly hike.


Dripping Cave Trail Map

powered by Advanced iFrame


Directions

The wilderness park and trail are located at 28373 Alicia Parkway Laguna Niguel, CA 92677. You can access the parking lot via Awma Road.


Parking

The parking lot near the visitor’s center is open daily from 7 AM – sunset. The parking fee is $3.

The Adventure

To get to the actual trail, we walked past the Visitor Center.

I recommend going inside if you can! This newly re-opened center has exhibits like a small model of the Dripping Cave, archeological displays, and more. There are restrooms here as well.

To the left, we stopped to check out this crazy-looking contraption.

This historical relic dates back to the 1940s. The windrower was used to harvest hay and grass.

After that shortstop, it was time to continue.

About half of the hike is walking along this asphalt road. It’s a popular road for bicyclists.

Although it’s a bleak surrounding, we saw some gourds on the side of the road.

These buffalo gourds are native to the Southwestern US and Northern Mexico. Their seeds are high in protein!

FUN FACT: Native Americans used the gourd’s roots and leaves for medicinal purposes, such as applying them on the chest for chest pain.

We finally made it to Wood Canyon Trail where the fun begins.

There’s a porta-potty and plenty of shaded benches to the left if you want to stop for a snack break.

Before heading to the Dripping Caves we took a detour to Cave Rock.

Be aware of the signs to the left so you don’t miss this one!


Cave Rock

When walking to Cave Rock, there will be a junction.

Be sure to keep right where the wooden planks are.

We then shortly arrived at Cave Rock!

They’re pretty fun to explore!

You can find a lot of these cave formations in the Aliso & Wood Canyon Wilderness Park, but I have never seen one as cool as this one.

After hanging out inside, it was time for the main attraction!

To get back on Wood Canyon Trail, we walked on top of Cave Rock and followed the path back out to the main trail.


Dripping Cave

Not long after, we reached the sign that directed us to the Dripping Cave!

This cave is also known as “Robbers Cave”.

Sounds intriguing? Well, that’s because it definitely is! (You can find the crazy history and legend behind this cave at the bottom of the post.)

It might be hard to tell, but this cave can easily fit plenty of people.

I can definitely see why this was the perfect place to shelter in.

Here’s the opposite side from that previous angle.

If you look closely, you can see some of the peg holes that were most likely used to hang gear and other things.

This is definitely an amazing cave with a very interesting backstory. We not only got to see one awesome cave but two on this hike.

Who knew you could find such a gem nestled in the canyons of Laguna Beach?! I highly recommend visiting this family-friendly place.

As always, keep these places clean and graffiti-free. Catch us on our next adventure!

Dripping Cave History

In 1842, a man by the name of Juan Avila was granted over 13,000 acres of land, with Aliso & Wood Canyons Wilderness Park being part of that large property.

Over the years, there were established routes and even a trading post amongst the park boundaries.

An even more interesting piece of history takes part in this place. Between 1856-1857, an outlaw by the name of Juan Flores and his outlaw gang used the Dripping Cave as a hideout and shelter. They were infamously known to be livestock and stagecoach thieves, hence why the place is also known today as “Robbers Cave”.

You can still find some evidence to back up that legendary story, such as peg holes in the ceiling and even wagon tracks in certain parts of the landscape.

Photo and Historical Info Credits: Aliso & Wood Canyons Wilderness Park

Are dogs allowed on Dripping Cave Trail?

Dogs are NOT allowed on the Dripping Cave trail and in other parts of the Aliso & Wood Canyon Wilderness Park.

7 Best San Diego Hikes: Slot Canyons, Beaches, & Views

San Diego is one of the most beautiful counties in SoCal. Not only does it have amazing coastal beaches, but there are tons of amazing hikes both by the ocean and in the mountains of Cuyamaca Rancho State Park. You can wait to experience the snow in the winter months (yes, you read that right) or waterfalls in the spring!

Here are my 7 personal favorite hikes to explore in San Diego, which are in no particular order.

1. Annie’s Canyon Trail

Annie's Canyon Trail

  • Miles: 1.4
  • Difficulty: Easy
  • Elevation Gain: 100 Ft
  • Estimated Time: 1 Hr
  • Best Time to Visit: All Year
  • Hours of Operation: 24/7

Annie’s Canyon Trail is a favorite, family-friendly hike in San Diego. Not to mention, this one is super close to the beach!

This trail features walking through a narrow slot canyon, climbing up fun metal ladders, and views of the beach and San Elijo Lagoon at the top.

I recommend coming on a weekday to avoid crowds. Afterward, you can head to Tide Beach Park for a refreshing dip!

Here are more fun pictures of Annie’s Canyon

2. Torrey Pines Beach Trail

Torrey Pines Beach Trail

  • Miles: 3.1+ 
  • Difficulty: Easy
  • Elevation Gain: 338 Ft.
  • Estimated Time: 2 Hrs
  • Best Time to Visit: All Year
  • Hours of Operation: 7 AM – 7 PM Daily

My oh my did I love the views here. This beach hike screams Southern California!

Torrey Pines Beach Trail is an amazing hike that takes you through the beach and up along the cliffs. It offers tons of small trails throughout the loop with stunning views of the ocean. It’s a gorgeous beach and trail with many different viewpoints.

If you’re looking to escape the heat or just want to experience a true beach hike, be sure to explore this one. Trust me, you will love it!

Here’s a more in-depth guide to Torrey Pines Beach Loop Trail

3. Three Sisters Falls

Three Sisters Falls

  • Miles: 4.1
  • Difficulty: Moderate – Hard
  • Elevation Gain: 980 Ft.
  • Estimated Time: 3.5 Hrs
  • Best Time to Visit: Late March – Early June
  • Hours of Operation: 24/7

One of the best waterfalls in SoCal is here in San Diego! Three Sisters Falls is a 3-tier waterfall that’ll take your breath away!

Each waterfall tier has its own pool that’s oh-so refreshing in the warmer months. After a wet and snowy season, this waterfall is roaring with water. It’s so big you can see it from a distance as you get closer along the trail.

Be aware that there is little to no shade and gets extremely hot in the late spring and summer months. Come prepared with plenty of water and a sun hat. I don’t recommend bringing your pets on any of the hot days.

Want to see the other waterfall tiers? Click the link Three Sisters Falls

4. Kitchen Creek Falls

Kitchen Creek Falls

  • Miles: 4.8 
  • Difficulty: Easy-Moderate
  • Elevation Gain: 813 Ft
  • Estimated Time: 2.5 Hrs
  • Best Time to Visit: April-June
  • Hours of Operation: 24/7

This one is lesser-known but is quickly becoming popular and for obvious reasons.

Kitchen Creek Falls is one of the most amazing hikes to do in San Diego. Personally, this one is definitely a favorite.

It has multiple swimming holes and a great waterfall at the end. I took a dip in one of the pools and had a great time exploring the area! There’s a lot to see here.

It gets extremely hot and dry in the late spring and summer months. I recommend coming here in the mornings or evenings if you venture during the warmer seasons. The heat feels very dry and uncomfortable if you’re not prepared.

Want to see more of this amazing place and the waterfall? Click the following link Kitchen Creek Falls

5. Stonewall Peak

Stonewall Peak

  • Miles: 3.9
  • Difficulty: Easy
  • Elevation Gain: 830 Ft.
  • Estimated Time: 2 Hrs
  • Best Time to Visit: All Year
  • Hours of Operation: 9 AM – 8 PM Daily

Snow in San Diego? Yup! The small town of Julian gets plenty of snow in the winter.

Stonewall Peak looks amazing after snowfall! The trail is super fun to hike in the snow. Once you reach the top, you get views of Lake Cuyamaca and the surrounding area.

You don’t need to reserve this hike for snowy winter months. You can experience it all year round. I recommend coming for sunsets or sunrises for the best views.

There is a rich history of the place and even has Stonewall Mine nearby. You definitely won’t feel as though you’re in San Diego.

For history, details, and tips, check out the article I wrote titled Stonewall Peak

6. Potato Chip Rock


  • Miles: 7.3 Miles
  • Difficulty: Moderate
  • Elevation Gain: 2,119 Ft
  • Estimated Time: 3-4 Hrs
  • Best Time to Visit: Fall – Spring
  • Hours of Operation: 24/7

Everyone knows about Potato Chip Rock! It’s the most popular hike on the list. Not surprisingly, it gets its name from the potato chip-like rock that protrudes from the mountain.

It is also the longest hike on this list, but is definitely doable. The views are very nice and the destination is worth visiting because it’s so unique! I don’t think you’ll ever come across a thin potato chip-looking rock like this one.

This hike does get brutally hot in the summer, so come prepared! Expect high traffic on the trail most days of the week.

7. Iron Mountain Trail


  • Miles: 5.2 
  • Difficulty: Moderate
  • Elevation Gain: 1,102 Ft
  • Estimated Time: 2.5 Hrs
  • Best Time to Visit: Fall – Spring
  • Hours of Operation: 24/7

Last on the list, but certainly not least, is Iron Mountain Trail in Poway.

This very popular hike offers amazing views all around. The entrance itself is very breathtaking, to say the least.

It can be a bit challenging for the non-avid hiker because of some rocky and slightly steep sections but isn’t so bad.

Once a the top, the views are so worth it! You’ll be able to spot San Vicente Reservoir and other landmarks. There are also picnic tables and a telescope to look through, in case you’re interested.

If you visit Iron Mountain Trail or any of the other fun San Diego hikes on this list, be sure to tag us on Instagram @cahikingadventures!

3 Best Hikes in Laguna Beach [Prior OC Resident]

3 Best Hikes in Laguna Beach [Prior OC Resident]

As a current resident of Huntington Beach, I can assure you that some of the best hikes in Orange County can be found at Laguna Beach, more specifically Aliso and Woods Canyon Wilderness Park.

Due to the stunning views of the ocean and downtown Laguna Beach, the 4500 acres of beautiful hills attract a myriad of hikers every weekend, offering a chance to reconnect with wildlife including deer, bobcats, quails, and coyotes.

The following three hikes may be located within the same wilderness park, but each one offers a completely unique destination, which is why they are, in my opinion, the best hikes in Laguna Beach.


1. Top of The World

top of the world

Total Distance: 2.2 miles

Type: Out & Back

Elevation Gain: 862 ft

Restrooms Available: Yes (At the park)

Parking Lot Available: No, only residential parking

Dogs Allowed: Yes On a Leash

Best Time to Visit: All Year

Read Full Post, Map, & Directions: Top of The World Laguna Beach

The Top of The World hike is the most popular hike at Laguna Beach. It begins in a residential area next to a tiny jump line built by the local bikers.

I love this hike for two reasons, its views and the weather. You can see all the way to Catalina Island and downtown Laguna Beach to the south and the Santa Ana Mountains with their highest point, Santiago Peak towering to the North.

The weather is unbeatable. Unlike the extreme heat in most mountain ranges, the weather at Laguna Beach rarely exceeds 80 degrees Fahrenheit. Most of the hike is exposed to the sun, but due to low temperatures and elevation gain, you won’t even notice the heat.

However, I still recommend wearing a hat and taking plenty of water! The last time we hiked this trail it was closer to sunset, and we had the lucky experience of running into a quail flock.

Back when I used to downhill bike, my buddies and I used to session a trail called Telonics, which cuts in and out of the hiking trail, so keep an eye out for mountain bikers, especially in the mornings. This place is well known in the biking community because it’s been sessioned by former world downhill champion Aaron Gwin.

I highly recommend this trail for beginners and hikers of all ages.

2. Car Wreck Trail

Total Distance: 3.4 miles

Type: Loop

Elevation Gain: 836 ft

Restrooms Available: Yes (At the park)

Parking Lot Available: Yes (At the park)

Dogs Allowed: Yes On a Leash

Best Time to Visit: All Year

Read Full Post, Map, & Directions: Car Wreck Trail

The Car Wreck Trail begins at the Top of the World hike, but begins by descending north toward the Santa Ana Mountain range. This trail is perfect for anyone trying to venture deeper into the Aliso and Wood Canyons Wilderness Park.

The hike begins on a wide dirt road which quickly becomes a single track with steep and slippery rocky sections. Right before you reach the canyon floor you’ll come face to face with a 1940’s car wreck precipitously laying on its side.

Many believe it’s a 1946 Dodge Coup, but it’s still up for debate. As for how the car reached its current destination, no one truly knows.

I prefer this hike over the Top of the World because I enjoy the feeling of being in the woods. As you probably already know, the vegetation becomes dense on the canyon floor. Although only a very small section of this hike involves being in the canyon, I still enjoyed it very much.

The last time we hiked here, we got the chance to see a doe grazing on the hillside. Deer are very common here, you just have to keep a very keen eye out because they camouflage extremely well.

If you enjoy steeper and more technical hikes as well as hiking in the woods, I recommend this trail for you.

3. Dripping Cave

dripping cave trail

Total Distance: 5 miles

Type: Out and Back

Elevation Gain: 400 ft

Restrooms Available: Yes

Parking Lot Available: Yes

Dogs Allowed: Yes On a Leash

Best Time to Visit: All Year

Read Full Post, Map, & Directions: Dripping Cave

The Dripping Cave trail begins on the north side of the Aliso and Wood Canyons Wilderness Park. This hike has a lower elevation gain than the Top of The World or Car Wreck Trail, making it very beginner-friendly for most people.

One of the things that I like best about this hike is the neat little side tour to another set of caves. About halfway into the hike, you’ll reach a split. If you take the left side you’ll run into a set of small caves called Cave Rocks (I know, the names aren’t very creative).

Keep your eyes peeled throughout the hike, as there are many other caves in this area. The Dripping Cave is famously known for its use as a hideout by Juan Flores, a notorious bandit who was popular from 1856-1857.

Although it’s called the Dripping Cave, don’t expect much dripping. Only during or after decent rainfall will you see water dripping from the caves.

This cave is actually much larger in person. You can fit dozens of people inside, but as per usual, pictures don’t do justice.

I highly recommend the Dripping Cave for hikers who want to avoid steep and rocky hikes, but still want to venture deeper into the outdoors.

Suggested Gear For Laguna Beach Hikes

I wouldn’t consider the hikes at Laguna Beach to be extreme or dangerous. The weather is relatively cool, and the trails are pretty short and safe. Nevertheless, you should take the following basic necessities:

  • Hat: Although it’s usually not too hot at Laguna Beach, the majority of the trails are exposed to the sun. If you’re hiking during the day, take a hat or you will get sunburned, which leads me to my next item.
  • Sunscreen: I like to use SPF 50 for high protection levels, but any type of sunscreen is better than none.
  • Trekking Poles: The only hike that may require trekking poles is Car Wreck Trail. However, if you’re young, fit, and/or have a good balance you’ll be fine without them.

By the way, if you’re in the market for low-cost, high-quality trekking poles click the link here. I used Trailbuddy trekking poles for a year before writing this review.

  • High Traction Shoes: You don’t need hiking boots for these hikes, but you should still use some type of outdoor shoes with more traction than your average sneaker.
  • Water: Take plenty of water with you, even if it’s not a long or hot hike. The rule of thumb is half a liter of water for every hour of moderate activity.
  • Backpack: Do yourself a favor and invest in a backpack that holds hydration bladders for your water. They’re so convenient because they hold all your items while allowing you to sip on the water without taking off your backpack. Trust me, you’ll thank me later.

That’s it! those are all the basic necessities for hiking in Laguna Beach. Now, get out there and explore the amazing hikes this place has to offer.

Torrey Pines Beach Trail Loop: This SD Hike is a Must!

Torrey Pines Beach Trail Loop: This SD Hike is a Must!

Distance 

3.1+ Miles

Time

~2.5 Hrs

Difficulty

Easy

Season

All Year

Elevation Gain

338 Ft

Torrey Pines State Beach has some of the most breathtaking beach views and beach trails in SoCal. Escape the warm weather and treat yourself to a very breezy and dreamy adventure!

Torrey Pines State Beach Loop to Yucca Point and Razor Point is a 3.1-mile beach hike along the coastal beach within San Diego. It features various trails and lookouts. It’s rated as an easy hike with an elevation gain of about 338 feet. Dogs are not allowed at the beach or trails.

Did you know Torrey Pines is one of the best hikes in all of SoCal? It made it to my list of top trails. Click the link below to view 500 ft waterfalls, nuclear armageddon tunnels, nazi ruins, and more: 

Best Hikes In Southern California

Map of Torrey Pines Beach Trail Loop

powered by Advanced iFrame


Torrey Pines Beach Parking & Directions

Torrey Pines State Beach is located at 12600 N Torrey Pines Rd, La Jolla, CA 92037.


Parking Information

The parking fee at Torrey Pines State Beach is $10 per vehicle. It’s open from 8 AM to sunset daily.

Click here for directions to the parking lot. You can also find free parking nearby Tower 3 & Tower 4.

Restrooms are located at the North Beach Lot.

The Adventure

Torrey Pines Beach trail is considered a loop, so you can either start walking up on the cement road and through additional parking lots or you can start the hike on the sandy beach.

For reference, check our guided map above!

QUICK TIP: You’ll need to check the tide levels ahead of time!

We started off at the beach since it was later in the day and we knew the tide levels would rise and make it more difficult to walk through.

We walked along the cliffs and enjoyed the nice views. I was surprised to see there weren’t too many people for a Saturday.

It really fascinated me to see the different striations and grooves on the rocks and cliffs. They are really colorful and beautiful in person!

Read More: 11 Best Hikes in SoCal

Before heading up to the trails, we made a stop at this very popular area known as Flat Rock.

There is a pool of water towards the center that’s about 5-6 feet deep. I don’t recommend swimming in it!

It was really fun to walk along this paved pathway against the beach bluff. Around the corner, I could see the neighboring beach.

I was able to feel the splashes of water when the waves crashed against Flat Rock.

Read More: 80ft Cedar Creek Falls & Huge Swimming Hole in SD County

We then headed up the stairs and to the beach trails.

As you can see, the sand looks dark and wet. The water does reach the very edge of these cliffs, which is why it’s important to check the tides beforehand!

This section reminded me a lot of Annie’s Slot Canyon trail, which is not too far from this place.

This is the main beach trail that leads up to the top of the cliffs.

There’s hardly any shade so I recommend wearing a sunhat and sunscreen.

The next two trails are located at the top of the cliffs!

Read More: Ho Chi Minh Trail: Slot Canyon + Falls in SD

Yucca Point Trail

Yucca Point trail is the first stop at the top.

During the late winter and spring months, you can see the Yuccas in full bloom.

 FUN FACT: Yucca plants often bear edible flowers and fruit!

This was one of my favorite views! You can see the trail that we came up from and even Flat Rock to the right.

It is an extremely beautiful sight.

Read More: 7 Best San Diego Hikes You MUST Explore!

Razor Point Trail

Razor Point Trail has a completely different viewpoint that is also super beautiful and interesting!

The sunsets must be so epic here!

I loved this part. The ridges on these rock formations are absolutely astonishing. These formations look a lot more red-orange in person.

It is crazy to think that we have such breathtaking beach trails so close to home.

There are a ton of more trails that we walked through along the loop trail. But, Razor point and Yucca point have the best beach views.

I HIGHLY recommend spending the day in this part of San Diego. You’ll be able to enjoy amazing views and super fun trails! You can even hit the water right after.

Read More: Cowles Mountain: #1 Trail in San Diego County

Is Torrey Pines Hike Dog-Friendly?

Dogs are not allowed on the Torrey Pines State Reserve trails or beach area, even if they are leashed. This is to protect the natural reserve and resources within the park.

10 Best Hiking Apps Everyone Needs

One of the most crucial aspects of hiking is the planning. Hiking apps can help you check the weather, distance, elevation, parking information and so much more.

However, as technology has progressed, hiking apps have become increasingly sophisticated to the point where they can identify peaks and constellations.

As a weekly hiker, I use various apps to ensure my hiking trips run smoothly, and also to provide the best possible content for my readers.

Here are few amazing features you can expect from the following 10 best hiking apps for Android and iPhone:

  • record your route using GPS
  • hike details (distance, elevation gain, etc)
  • direction of sunlight & moonlight at any given time
  • identify peaks, planets, stars, and constellations
  • share real time location offline
  • send emergency notifications to family and friends


Best Trail Apps For Hiking: 

  • All Trails
  • Gaia

Best Free Hiking Apps

  • All Trails
  • National Park Trail Guide


Checkout the links below for more posts on hiking guides and gear!


1) All Trails

Price: Free Version or $29.99/year

If you only download one hiking app, make sure it’s AllTrails. The free app offers specific info for each hike including elevation gain, distance, type of hike, accurate weather forecast and more.

The information for its 100,000 trails is provided by 10 million users from over 100 countries. Once you make an account, you too will be able to record and share new and existing hikes with others on the platform if you choose to make your information public.

All members can upload images for others to see.

Once you’ve completed the hike, you can leave a review with your thougths and rate it 1 to 5 stars. The reviews are shared at the bottom of the page and the average is shown on the featured image for everyone to see.

By clicking on the directions button at top lefthand side, All trails provides directions to the trailhead via your choice of Apple Maps or Google Maps.

Once you’re at the trailhead, you can begin to record your journey on the GPS map.

AllTrails also helps you track your activities and organizes the performance data for each month.

The Pro version, which costs $29.99 per year, allows you to download offline maps and sends you notifications if you go off the trail.

  • Play Store
  • App Store

Pros of AllTrails:

  • Free
  • Design, save, and create custom maps
  • User-friendly interface.
  • Preloaded trails are available.
  • Record and save hikes
  • Off-roading trails available
  • Information for planning
  • Reviews

Cons of AllTrails:

  • Must annually subscribe to access the offline maps


2) Cairn

Price: 30 days free, then $4.99 for 1 month or $2.25 for 12 months 

Cairn is considered one of the best hiking safety application, which is why it always stays on my phone. 

Cairn allows you to share your plans with family and friends via a feature called your “safety circle.” Your safety circle is a list of contacts that the app will notify if you fail to report by a certain time.

The app also allows you to find spots with cell coverage, download offline maps, and track your location and share it with contacts. The location is NOT shared when you’re offline. Instead, it’s updated every time your phone gets signal.

The free version allows full access to all features for 30 days.

  • Play Store
  • App Store

Pros of Cairn:

  • Live tracking
  • Safety contacts are notified when you’re past due
  • Rescue advice
  • Download maps
  • Find cell coverage on maps
  • Hike details (distance, elevation gain, etc)
  • Record and save your trail
  • Send status updates

Cons of Cairn:

  • Monthly subscription required after 1 month


3) Adobe Lightroom

Price: Free Version & $9.99/month

You’re probably wondering why I named Lightroom as the third app, but trust me, this app is a must.

Lightroom allows you to enhance your photos to a much higher degree than the editing tools in your phone or social media. The free version allows you to use the majority of the key functions, with the exception of masking.

The paid version cost $9.99 per month and also includes Photoshop.

When you look at really nice shots on Instagram, I’m willing to bet there’s at 99% chance they were edited with Lightroom.

Don’t believe me? Check out this before and after shot I took of a secret mine in Pasadena, California.

The app is fairly simple to use and understand. It’s knowing how to combine certain edits that requires practice.

However, if you’re not in the mood for manual editing, Lightroom offers an auto feature that does a phenomenal job at editing the images for you.

Pros of Lightroom:

  • Professional editing
  • Offers presets
  • Cloud storage
  • Auto editing feature
  • Free version offers most features

Cons of Lightroom:

  • Requires a bit of practice


4) Peak Visor

Price: Free Version & $29.99/year or one $74.99 lifetime payment

PeakVisor is a really neat application that can identify peaks, and help you plan your hiking routes. 

It uses a combination of location tracking, a phone camera, and an accurate 3D mountain panorama to recognize the mountains. The app also offers a compass.

You don’t have to physically be in an area to explore it on Peak Visor. The app allows you to search mountain ranges worldwide from a 3 dimensional point of view.

You can also see the peak’s detailed information, such as the topographic prominence, altitude, national parks, reserves, and mountain range.

Unfortunately, the free version is limited to 1 location a day. For unlimited daily searches, PeakVisor offers a $29.99/year package or a lifetime deal with one payment of $74.99.

  • Play Store 
  • App Store

Pros of PeakVisor:

  • 3D map navigation 
  • Peak identification & details
  • Compass
  • Plan hiking routes
  • GPS tracker
  • Offline service
  • 3D maps for winter resorts

Cons of PeakVisor: 

  • No live data tracking feature 
  • Free version offers only 1 free search per day


5) PhotoPills

Price: $9.99 

Have you ever been super excited about hiking to a beautiful destination, only to get home and realize all your shots look terrible? That’s because photographers know it’s all about timing.

Light is a huge factor when it comes to taking amazing pictures, and PhotoPills allows you see see the exact location of the sun and the moon at any given time and place as well as the direction of the light they emit.

You don’t have to be a professional to use PhotoPills, but it’s nice to know for example, if you show up at a waterfall at 4 pm when the sun is lighting up the falls, that your pics are going to look significantly better. The same goes for peaks and ruins.

The app also shows you the location of the MilkyWay in 3D augmented reality, the exact time of sunrise, sunset, twilight hour, golden hour, moonrise/set, and so much more.

PhotoPills is without a doubt one my favorite and most useful tools for the outdoors.

  • Play Store
  • App Store

Pros of PhotoPills:

  • Calculates long exposure, timelapse, spot stars, star trails
  • 3D augmented reality of Sun, Moon, Milky Way, Celestial Equator, Polaris 
  • 2D map planner for the sun, moon, and Milky Way
  • Location scouting tool
  • Photo plans manager
  • Key info: sunrise/set, moonrise/set, blue hour, golden hour, supermoon dates, moon calendar

Cons of PhotoPills:

  • One time payment of $9.99
  • A bit complex to use


6) National Park Trail Guide

Price: Completely FREEEE

You’re going to love this app because of the comprehensive information it provides about your favorite national parks. It offers inside tips on campsites, permits, food, and so much more.

Unlike many other apps, NPTG lets you see all the data and GPS map offline…for FREE! 

Many of the app’s features are similar to those of All Trails such as tracking your hikes and the hike details.

However, unique features include a list carefully selected family hikes, creating your personal to-do list, gems and sending your exact location in case of an emergency.

The app is super easy to navigate and extremely helpful.

Pros of National Park Trail Guides :

  • Completely free
  • Live position on satellite or terrain map
  • Can be used offline
  • List of family friendly hikes
  • Create personal to-do list
  • Share location incase of emergency
  • Hike details and ratings
  • Track hikes
  • Visiting tips
  • Camping and lodging info
  • Easy to use

Cons of National Park Trail Guides:

  • None


7) PictureThis

Price: Free Version & $29.99/year

Have you ever wished you could easily identify various plants during your hikes? Well now you can.

PictureThis is an educational app that help 70 million users identify over 1 million plants, flowers, and tree species with a 98% accuracy. It’s super useful, especially for differentiating between safe and poisonous plants.

All you have to do is snap a picture of any plant with their easy-to-use built-in camera. After taking the shot, you’re provided with the plant’s info and the option of saving your photo on your phone. 

The premium version offers unlimited ID’s, plant care guides, and access to expert botanists.

Pros of PictureThis:

  • Easy to use 
  • Identify 1,000,000+ plants 
  • Save photos with plant info on phone
  • Diagnose plants
  •  One on one conversations with botanists
  • Keep notes and records
  • Bird and insect identification

Cons of PictureThis:

  • Identification is not always accurate
  • Must pay to get full access to get all of the features 


8) Google Earth

Price: Free

I was planning on keeping this a secret, but I’m completely committed to providing you with the best hiking apps. So, here it is.

Google Earth is the app I use to find hidden gems. The app allows you to see the entire world from a 3D point of view similar to PeakVisor.

However, Google Earth allows you to see more detail in the terrain. You can also tilt the map so that you’re looking at a mountain range from a more face-to-face point view.

These advantages can help you spot waterfalls and long forgotten ruins that are sometimes located near your favorite trails.

  • Play Store
  • App Store

Pros of Google Earth: 

  • Completely free
  • 3D map of the world
  • Detailed terrain
  • Great for finding hidden gems

Cons of Google Earth:

  • None


9) Gaia

Price: Free Version & $39.99/year

Gaia GPS is another app similar to All Trails. The two provide very similar features. 

Gaia allows you to track your speed, provides the highest points, elevation graphs, and supports road maps, satellite maps, and topographic maps. A premium membership is required to download maps for offline use.

The GPS tracking feature can be used offline. Most people use All Trails, but they both have their pros and cons.

For example, I find the All Trails interface easier to use, but Gaia’s trail information is more accurate because it doesn’t crowdsource its information. All Trails offers more hikes because it has more users. 

  • Play Store
  • App Store

Pros of Gaia GPS:

  • Hike details (distance, weather, etc)
  • Maps online & offline
  • Info for hunting, camping, mountain biking, & more
  • Accurate information
  • GPS tracking
  • User reviews

Cons of Gaia GPS:

  • Subscription required to download maps
  • Less trails than All Trails App


10) Skyview Lite

Price: Free Version & $2.99

Skyview Lite is a free application that identifies planets, constellations, and galaxies in the night sky.

With 27 million downloads, Skyview is undoubtedly popular among the outdoor communities. Its easy-to-use interface allows you to stargaze via augmented reality by simply holding your phone up to the sky. 

Other features include reminders for celestial events and daily sky tracks for the sun or the moon. You can do all this without Wifi.

The paid version cost $2.99 and includes more stars, constellations, planets, and satellites. 

  • Play Store
  • App Store

Pros of SkyView Lite

  • Identify stars, satellites, constellations, planets, galaxies
  • Get notified about stargazing events
  • Easy to use
  • See the sky as it was in the past or future
  • Infrared display allows you to conserve your natural night vision
  • Track trajectory of any celestial object

Cons of SkyView Lite:

  • Free version is limited in the # of identifiable objects


Why You Should Use Hiking Apps

You can technically hike without using apps, but believe me, they’ll enhance your outdoor experiences.

Here are just a few reasons why I think you should become accustomed to using hiking apps:


Navigation

When you’re in the outdoors, there’s always the possibility of losing the trail or worse, getting lost. Wether you’re online or offline, hiking apps’ advanced GPS can easily help you stay on-course, and potentially avoid a life threatening situation.

I still suggest carrying a physical map incase your phone battery dies, but it’ll only be for backup.


Information

Nowadays, a smartphone isn’t just a phone, it’s a mobile encyclopedia. Make the most of your hikes by identifying plants, animals, constellations, and nearby peaks.

We have the potential to become outdoor experts with the help from a device that fits in our pockets.


Save Metrics

Some of the hiking apps that I discussed feature tracking options that record your performance metrics and allow you to share this data with other outdoorsmen and outdoors women. It’s a fun way to encourage friendly competition, and self improvement.


Convenience

Apps are great for planning. Instead of Googling and memorizing nearby hikes, you can conveniently create lists on All Trails or Gaia consisting of your favorite trails. 

Not to mention the various books you’d have to carry to identify plants, wildlife, and constellations. You simply can’t beat the conveniency.


Emergencies

If you happen to get lost or injured, certain hiking apps will notify your specified contact list. The apps also provide detailed instructions regarding what to do in various emergency situations.

All Trail’s Pro feature, Lifeline, allows you to share your real time location with loved ones wether you’re online or offline. Yep, they’re that amazing.


FAQ’s


Is There a Difference When Using The Same App on iPhone or Android?

The difference between apps on these phones is actually a highly debated topic. Most would agree that iPhone apps are better and tend to have better or more features than Android apps.

That’s not to say that Android apps are not good, but it’s definitely something to keep in mind.


All Trails vs Gaia

I prefer All Trails for two reasons. First and foremost, I find the interface easier to use. Second, it contains more trails because it has more users.

Gaia’s information is more accurate because it doesn’t rely on crowdsourcing. However, I’ve rarely encountered incorrect information on All Trails (one time to be exact, the city was incorrect).

If those two reasons aren’t enough, All Trails now offers their amazing (and paid) Lifeline feature, which keeps you and your loved ones connected in REAL TIME, should an emergency occur.


Which Apps do You Recommend as Necessities? 

If you wanted to download the least amount of apps, I recommend All Trails (preferably the paid Pro version). This app alone provides everything you need including:

  • Online maps
  • Offline maps (Pro)
  • Lifeline (Pro)
  • Hike details (distance, elevation gain, etc)
  • Performance tracking
  • Weather forecast
  • Reviews & images
  • GPS

This is definitely an essential app I use EVERY single time I plan a hike.


Which App Offers The Best GPS For Hiking? 

Gaia has the best GPS features for hiking. Gaia’s trail information is more accurate because it doesn’t crowdsource its information and instead provides the user with more accurate and researched guides. 


Can I Use Google Maps For Hiking? 

You can use Google Maps to search for certain locations and to get a general idea of the area. However, I don’t recommend using Google Maps as a complete guide to a trail because it doesn’t give you a detailed outline of the hike like other apps offer.

Mt Rubidoux Trail: #1 Hike In Riverside County

Mt Rubidoux Trail: #1 Hike In Riverside County

  • Total Miles: 3.13
  • Time: 60 min
  • Difficulty: Easy
  • Best Season: All Year
  • Elevation Gain: 551 ft
  • Max Elevation: 1323 ft
  • Type of Trail: Out & Back
  • Parking Lot: Fits 30+ Cars
  • Dogs: Allowed On A Leash
  • Restrooms: Available At The Parking Lot
  • Trail Popularity: Very High
  • Pics Taken On: Nov 9, 2021

Mt Rubidoux is the most popular hike in Riverside County, and I can totally see why. The views from the top are amazing. To the north you can clearly see the Angeles and San Bernardino mountain ranges, and to the south, the Santa Ana mountains.

Mount Rubidoux Trail is a 2.7-mile hike in the city of Riverside, California. It’s an easy hike with only 393 feet of elevation gain. The Peace Bridge and cross at the summit are park relics. 

Mt Rubidoux is one of many amazing hikes in SoCal. To explore 500 ft waterfalls, an abandoned zoo, nazi ruins, and more, check out the post below: 

Best Hikes In Southern California

Mt Rubidoux Trail Map

powered by Advanced iFrame

Mt Rubidoux Elevation Profile

Download Printable PDF Map

Mt Rubidoux Trail Directions

Click the following link to be redirected to Ryan Bonaminio Park via Google Maps.

You’ll have to walk down San Andreas Ave to get to the trailhead. 

Helpful Links

Weather Forecast

City Of Riverside Website

Open From Dawn To Dusk

Mt Rubidoux Trail

Arriving at the trailhead, you’ll notice the large sign (shown below) and a water station, which is nice considering you might get hot and thirsty on this hike.

This hike is definitely a sunny one! I recommend bringing a hat, water, and sunglasses to keep cool.

At the very beginning of the hike, you’ll notice the road splits left and right. Be sure to take the left road.

Most of the trail will be out in the open with little to no shade.

You’ll definitely get some awesome views of the surrounding city, though!

We eventually reached another split. You can choose to take the left and walk over the bridge if you’d like, but we chose to take the path on the right.

The road on the right curves and leads to to the tower first.

Here’s an awesome view of the Santa Ana River and the surrounding area. This is also a boundary between Riverside and Jurupa Valley.

The Santa Ana River is usually dry. The nice thing is you can see all the lush green trees from the water that occasionally flows through.

World Peace Bridge and Tower

This is one of my favorite parts of the hike.

This monument was built back in 1925, making it almost a century old!

It was actually inspired by a famous Roman bridge in Spain known as the Alcantara Bridge.

Here’s another angle with city views.

The tower reminds me of princess Rapunzel.

Our next stop before the cross was the flag.

It’s positioned next to the Peace Tower and Bridge and located straight across from the Summit.

Last stop was the summit and cross!

The cross is HUGE. So big in fact, that we were able to spot it from the freeway.

Can you spot the flag and tower in the back?

Want to see more cool structures in Riverside County? Check out this giant Halloween pumpkin boulder!

Pumpkin Rock Trail

We’re those tiny little ant-sized humans sitting on the bottom left side of the stairs.

The aerial views give you such a different perspective. It’s a truly amazing sight.

I hope we made you want to visit this place! It’s highly recommended and worth the drive.

Brief History of Mt Rubidoux

The famous cross that sits atop the Mt Rubidoux summit is far from new. It actually dates back to 1907, which was built to commemorate Father Junipero Serra.

They then developed the Peace Tower and bridge in the year 1934.

In 1946, the Mt Rubidoux property (formerly known as Puchappa Hill) was purchased by Henry E. Huntington, Frank Miller, and Charles M. Loring.

They had named it Huntington Park but later changed it to Frank A. Miller Mount Rubidoux Park after the park was donated to the city of Riverside in 1955.

Fast-forward to 2012, there was a legal battle and controversy over the cross being on city-owned property. This caused the top part of the property (including the cross) to be sold.

With the help of Riverside’s lovely community, they banned together in an organization known as Totally Mt. Rubidoux. It was a success and the cross is now a preserved historical monument that can be enjoyed by all!

Don’t you just love a happy ending?!


How Old is Mount Rubidoux?

The Mt Rubidoux land, formerly known as Huntington Park, was first purchased in 1906, making it over 100 years old. The property was donated to the city of Riverside in 1955.


Who Owns It?

A majority of the Mount Rubidoux Park property is owned by the city of Riverside. About 0.43 acres, including the cross, is owned by Rivers and Lands Conservancy.

13 Crucial Hiking Tips to Consider for Seniors

Hiking is fantastic for physical and mental wellbeing, and it’s an activity any age group can enjoy. Seniors can get just as much satisfaction from hiking as younger people – it just takes a little more pre-planning. I’m here to help you along your hiking journey.


Seniors should check with their doctor before starting hiking and consider going out with a friend or in groups. Carefully researching the route beforehand is also essential, and bringing trekking poles will make it easier to navigate challenging terrain. 


Top 13 Hiking Tips for Seniors and Older Adults


1) Check-in With Your Doctor First


Let your doctor know before you start hitting the trails. You may think it’s unnecessary and that you’re in tip-top condition, but it doesn’t hurt to get a clean bill of health. Your doctor will most likely support you in taking up a new physical activity. They may even have some helpful information to share.


If you have a pre-existing condition, your doctor will want to know before you start a demanding new physical activity. They may have advice on just how much your body can handle and help you understand your limits.


Perhaps you take medication that doesn’t usually pose any problems but may cause side effects if you’re under strain or sunlight. You don’t want to start feeling nauseous or dizzy when out on a hike. Hiking at altitude could exacerbate these issues.


2) Research Beforehand


An unplanned hike is all very well until it turns out to be much longer or tougher than anticipated. Thankfully, there are some great resources nowadays to help you map out your hikes.


My personal favorite is the AllTrails app. With the free version, you can discover all the awesome trails in your area and find out just how suitable and difficult they all are. It provides the length of the trail and reviews of the hike so you better understand the recent conditions. 


AllTrails can also be used to map out customized routes and to keep a record of any hikes you’ve completed.


3) Bring a Light Sweater or Jacket


Hiking may get the body moving and the blood flowing, but you might still get a little chilly!


When out and about in any other season than summer, pack a light-weighted sweater or jacket so you don’t get caught cold mid-hike. Even in the summer months, packing a jacket is a sensible precaution for seniors when hiking at high altitudes.


Light clothing is important for multiple reasons. Firstly, bulky clothing will just weigh you down and make you overheat. Secondly, you have limited space in your bag and should aim to keep things as condensed as possible.


Lugging a big old sweater around will weigh you down, and take up vital space that could be filled by other items.


4) Pack an Emergency Kit


Hopefully, you won’t need it, but packing an emergency kit is like taking out personal insurance. Seniors need to be extra cautious with their bodies. If you do take a fall in the middle of nowhere, you’ll be grateful you brought some first aid.


Let’s go over what a good emergency kit should contain:

  •       Adhesive tapes
  •       Antiseptic wipes
  •       Bandages
  •       Elastic bandages
  •       Emergency blanket
  •       Emergency contact information/medical information
  •       First aid manual
  •       Gauze roll and pads
  •       Gloves
  •       Instant cold pack
  •       Safety pins
  •       Scissors
  •       Thermometer
  •       Triangular bandage
  •       Tweezers


That’s a lot of stuff! But it all fits into a neat and compact box, and most emergency kits weigh around 1lb or less. 


5) Use Trekking Poles for Stability and Support


Trekking poles are a senior hiker’s best friend. What would once have been awkward terrain becomes much more navigable with the assistance of these stabilizing and supportive poles.


Trekking poles are excellent when going downhill and even uphill, helping you balance your weight evenly and taking pressure off your knees. If you suffer from joint pain, trekking poles are a must-have.


You can also use trekking poles to brush away shrubbery and plants blocking your path, to check how deep puddles are, and to probe for quicksand. They also offer protection against any unfriendly wildlife you may encounter on your hikes.


I recommend TrailBuddy trekking poles, which you can buy check out here. These poles are lightweight and made from aluminum, which is stronger than carbon fiber. 


6) Wear Comfortable and Grippy Hiking Shoes


Comfortable shoes are vital whether you suffer from foot pain or not. Hiking for long distances takes its toll on your feet and will leave them battered, bruised, and blistered if you don’t wear comfortable and supportive shoes.


Good hiking shoes will provide ample support to your ankles and feet, eliminating the risk of a twisted ankle while traveling through tricky terrain.


Grippy shoes are vital and give you permission to hike with confidence over all surfaces. Good hiking shoes have deep traction on the soles, and hiking-specific grooves and patterns. These specialized tread designs play a vital role when hiking on wet ground or snow.


If you can’t afford to invest in a new pair of shoes right now, you could modify some existing shoes to make them more hiking-friendly. Scoring the bottoms and scuffing the soles will help reduce slippiness. These adjustments will bail you out of a jam, but don’t treat them as a long-term fix. 


7) Wear Loose-Fitting and Breathable Hiking Pants


Prevent chafing and make your hikes more comfortable by wearing loose-fitting and breathable pants. Loose-fitting pants shouldn’t feel overly baggy, but they should allow you to move freely. The importance of wearing suitable hiking pants is often underestimated, but without them, you’ll quickly start overheating and sweating.


Seniors should weigh up the benefits of standard and convertible hiking pants. Standard pants are much like regular pants and will keep you warm when hiking in colder climates. Convertible pants can be turned into shorts for extra breathability.


Standard pants work great if you mostly hike in cool temperatures. But if you like to get out in all weathers, you may prefer the versatility of convertible hiking pants.


8) Wear Hiking Socks for Support, Comfort, and Moisture Control


Seniors should always wear hiking socks. Regular socks simply do not offer the level of support and comfort you need for long hikes, nor can they cope with moisture. Wearing the wrong socks makes hiking more difficult and leaves you liable to blisters.


In contrast, thick, high-quality hiking socks provide ample cushioning for your feet – and they are very durable! Remember that hiking isn’t like regular walking. When navigating hilly, rocky terrain, you’ll appreciate the extra comfort hiking socks offer. In the winter months, you’ll be grateful for the extra warmth, too!


Hiking socks also keep your feet dry, reducing the risk of blisters. As your feet perspire, the socks will suck up all the moisture, keeping your feet bone dry. Standard, thin socks can’t keep up with the perspiration, and the inevitable rubbing at the back of your feet will cause blisters.


9) Bring Headlamps for Evening Hikes


Evening hikes require more awareness than daytime walks. Bringing headlamps will help you spot any obstacles blocking your path, and alert you to any potential danger.


Headlamps are preferable to flashlights for seniors. If you’re using trekking poles, you need to keep both hands free for stability and support. A firmly fixed headlamp will light up the night, and allow you to stay fully focussed on the route ahead.


Good headlamps should weigh no more than 2oz, have a minimum 30-lumen brightness, and have a battery life of 40 hours or more. Your chosen headlamp should also be waterproof and have at least a 10-meter beam.


10) Tell a Family Member, Friend, or Neighbor Where You Plan to Hike


Seniors should always let somebody know where they are going before setting off on a hike. Hopefully, all of your hikes will be drama-free. But if you get into trouble, a family member, friend, or neighbor knowing where you are will act as a safety net.


Informing somebody where you’re hiking is even more important if hiking alone. Let them know what trail you’re going on, what time you are setting off, and what time you plan on getting back. If you’ve driven to the starting point, tell them where you’ve parked your car.


In a nutshell, find somebody you can trust and brief them with the key details about your hike.


11) Bring an Emergency Rescue Whistle 


An emergency rescue whistle is a great item to have on you – it could even save your life. These are much louder than regular whistles or the sound of your voice. If you get into difficulty, your best chance of alerting someone is with an emergency rescue whistle.


Amazon stocks several emergency rescue whistles suitable for hiking – good whistles reach over 120 decibels and can be heard from a mile away. Make sure you buy a durable and water-proof whistle.


12) Hike with a Partner or in a Group


For seniors, hiking with a partner or in a group might be a better option than going solo – even more so if you’re new to hiking. Going with others is often more fun, it’s safer, you get to meet like-minded people, and you can pick up new tips.


Joining a hiking group will put you in contact with more experienced hikers, who will keep you safe. You’re less likely to get into danger or have an accident when hiking with a partner or in groups.


Hiking with a partner or in a group may also be cheaper. If there are no hiking spots in your area, you’ll have travel costs to pay, and you might have to shell out for a hotel. Hiking with others keeps these costs as low as possible.  


13) Stay Active Daily (For Stamina and Preparation)


Keeping active on a daily basis will pay dividends for seniors when hiking. You don’t need to hit the gym, but regular walking and cardio exercises will help build up your stamina and stay in an active frame of mind.


Going on a big hike after weeks or months of lounging around could be a daunting prospect and will be tougher on your body. Staying active builds heart strength and keeps your joints in good condition. You’ll also feel fresher and more motivated.


If you suffer from joint pain, low-impact exercises are best for easing discomfort and keeping healthy. Try upping your daily step count (10,000 is a great target) or taking up cycling or swimming in your spare time.

7 Tips for Staying Cozy and Dry While Hiking in the Rain

No matter how well you’ve planned a hike, the weather is one variable out of your control. But even so, you can still avoid getting drenched when the rain starts coming down while out on the trail. I’ve got lots of tips and tricks to share with you today on staying cozy and dry while hiking in the rain!


Pack waterproof clothing, like a rain poncho, rain pants, and shoe covers to stay dry while hiking in the rain. Bring a thermal mug with a hot beverage or soup to keep warm. Leukotape helps prevent blisters, which are more prone to occur in wet conditions.


Let’s get straight into the top 7 tips!


1) Bring a Waterproof Rain Poncho


A waterproof rain poncho will help keep you dry when the rain arrives. Ponchos are lightweight, super compact, and a brilliant option for hikers on a budget. When lugging around a backpack for miles and miles, you need a poncho that won’t weigh you down and doesn’t take up much space.


High-quality rain ponchos are typically made out of silicone polyester or nylon and are, of course, 100% waterproof. Cuben fiber, polyethylene, and PVC are also common poncho materials.


Your rain poncho should be durable, breathable, comfortable, go down to the knees, and be fully taped at the seams to keep you dry in the harshest conditions. Bonus points for ponchos that have pockets.


Here’s a rain poncho from Amazon under $25: Multifunctional Rain Poncho Waterproof Outdoor Raincoat (Unisex)


2) Take Waterproof Shoe Covers or Gaiters


Waterproof shoe covers and gaiters are a low-cost and effective way of keeping your feet dry while hiking in the rain, especially when walking through puddles and muddy terrain. Covers also protect your shoes from damage and will leave you with less cleaning to do when you get home!


You can use disposables, but it’s well worth spending a few bucks on some genuine shoe covers or gaiters. Disposables do not offer the same level of grip and are made from thin materials that easily tear.


A proper waterproof shoe cover will protect your whole shoe and come with a zipper so you can get a tight fit. Ensure that you buy shoe covers with slip-resistant features. Silicone waterproof shoe covers are lightweight and foldable – so you can always keep them in your backpack as a precaution.


By giving your shoes some external protection in the rain, your shoes and socks have less work to do to keep your feet dry.


Definitely check these out if you plan on getting some: Hikenture Leg Gaiters with Waterproof Zipper, Anti-Tear Water-Resistant Hiking Gaiters


3) Wear Waterproof Clothing (Rain Pants, Jacket, and Shoes)


Dealing with a rainstorm while hiking is much easier if fully kitted out in waterproof clothing. I recommend wearing a rain jacket, rain pants, and waterproof shoes to keep your hiking enjoyable in wet weather.


Your waterproof jacket should be lightweight and foldable so you can keep it stuffed in your bag – hopefully, that’s where it will mostly stay!


The jacket should be fitted with ventilation zips under the armpit and zippered pockets, and the hood should fit tightly and snugly. Invest in a quality waterproof jacket, as they tend to lose effectiveness over time.


Rain pants for hiking should fit securely around the waist but be loose around the legs to allow fresh air to circulate. Without ventilation, the gap between your rain and hiking pants will become a haven for sweat and end up leaving you soaked.


Your rain pants should be big enough to fit over your regular clothing and hiking pants. And naturally, they should be lightweight and compact enough to store easily in your bag when you aren’t using enough.


Waterproof shoes also serve as a solid defense against the rain. Wet feet are more likely to blister, so you must wear shoes with high water resistance in wet conditions. However, your shoes still need breathability. Sure, you don’t want water leaking in, but you need to allow moisture to get out.


4) Bring a Thermal Mug with Warm Tea or Water


When it rains, the temperature usually drops, too. Within minutes, a beautiful, warm day out hiking can turn chilly and unpleasant. The cold hits even harder if you haven’t packed a sweater or jacket.


But a vacuum-insulated thermal mug will help keep you cozy while out on the trail in the rain. You could fill it with coffee, tea, hot water, or even soup!


A thermal mug will keep your beverage or soup piping hot for several hours or until you break the seal. Once opened, cool air will start getting in, chilling down the contents of the mug. It’s worth mentioning that thermal mugs will also keep drinks ice-cold – this is handy in the summer season.


Good thermal mugs are durable and able to handle wear and tear. Make sure your chosen mug has a solid lid that forms a tight seal – this is the part most likely to fail. On that note, the mug should be leak-proof, or the fluid will spill out and spoil the other contents in your bag.


Thermal mugs come in a variety of sizes – choose one based on the size of your bag. You don’t want a mug that’s too heavy and takes up too much space. But equally, you want a mug big enough to hold a decent amount of coffee or whatever you like to drink.


5) Use Trekking Poles with Mud Baskets


Trekking poles with mud baskets are essential for all age groups hiking in the rain. The extra stability and support offered will compensate for the slippery and wet conditions – the poles are really useful when navigating hills.


Many hikers use trekking poles in all weathers, but the mud baskets are a must-have add-on in the wet. If you’re planning on hiking over muddy ground, snow, or sand, mud baskets will make your life a lot easier and reduce the strain on your knees and calves.


Mud Baskets will stop your trekking poles from sinking too deep into soft ground, which would slow you down and cost energy. They will help reduce the amount of mud that flings up and gets your clothes dirty.


Good trekking poles are lightweight, sturdy, and durable. Nowadays, the best trekking poles are made from either aluminum alloy or carbon fiber – both are great and lightweight. Cork, foam, and rubber (or a combination) all work well as the grip material. Other crucial trekking pole qualities include adjustability, shock absorption, and foldability.


6) Pack Extra Socks


Hikers always need to take care of their feet, but it’s even more important to do so in the rain. It doesn’t matter how much waterproof clothing you wear, if you’re hiking in torrential rain, your feet will get wet – hence the need for extra socks.


Hiking in the rain means plodding through mud, puddles, and streams. Accepting that you won’t keep all moisture out is the first step. Managing the moisture build-up is the second.


If you have spare socks on hand, you can take breaks every so often to dry your feet and replace your soaked socks with a fresh pair. Not only will this make your feet more comfortable, it significantly reduces your risk of blisters.


You should always wear hiking socks. Everyday socks are too thin and unable to absorb the level of moisture produced by your feet when out hiking. In the rain, specialized hiking socks will also soak up any moisture that breached the defenses of your shoes and shoe covers.


When hiking, protecting your feet should be your number one priority – this applies even more in the rain. Bring extra bags to place your wet socks in when you switch them.


7) Leukotape for Blisters and Blister Prevention (helps if feet blister due to wet socks & shoes)


Let’s talk more about preventing blisters while hiking in the rain and about the benefits of Leukotape. Suppose the rain is hammering down and your shoes and socks cannot stop your feet from getting wet and causing blisters. Leukotape offers another line of defense.


Leukotape is a sticky and breathable tape that you can apply to blistering hotspots, such as the backs of your feet. Made with strong, durable zinc oxide adhesive, Leukotape will stay firmly in place even in the wettest weather.


However, Leukotape cannot be used to stop an existing blister from becoming further damaged. When removed, the sticky tape will rip off any loose or broken skin, creating an even bigger problem.


The big rolls Leukotape comes in are not ideal, given you have precious little space in your backpack. Instead, cut off a few strips of Leukotape and attach them to release paper (the shiny paper you peel stickers off).


Is it Safe to Hike in the Rain?


It’s safe to hike in the rain if you are prepared with the right clothing and gear, such as waterproof shoes with grippy soles. It can become unsafe if the trail becomes slippery and you’re not wearing the right shoes and gear.


My Final Tip to You


It may be tempting to press on with a hike, whatever the weather. But sometimes conditions will get the better of you, and it’ll simply become too dangerous to keep going. In these situations, don’t be afraid to turn back!


Hiking in torrential rain, thunderstorms, or high winds is asking for trouble. Numerous things could go wrong, and persisting in such weather could lead to injury or worse. Heavy rain makes the ground slippery, increasing the risk of falls. 


When the weather gets rough, assess the conditions and your physical capabilities, and then make a judgment call. Sometimes Mother Nature will have her say and stop your hike in its tracks – that’s a battle you can’t win.