No Results Found
The page you requested could not be found. Try refining your search, or use the navigation above to locate the post.
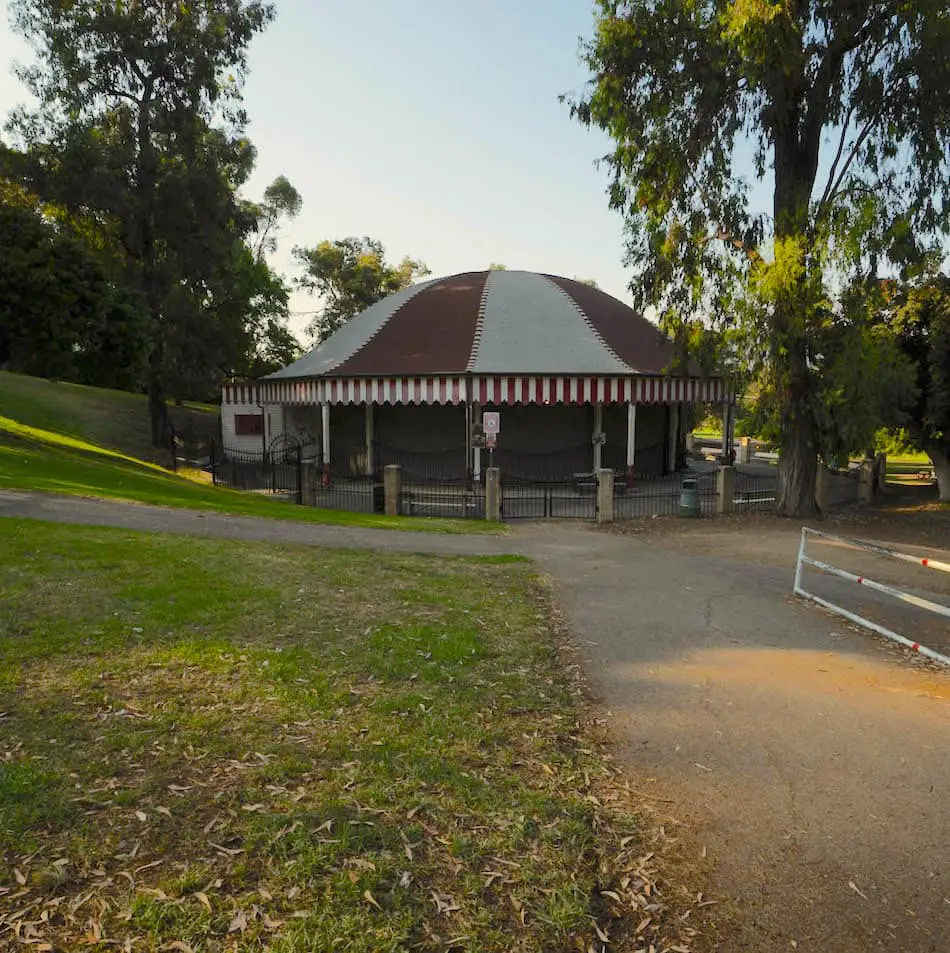
If you’re looking for something spooky and exciting to do, the Old LA Zoo is most certainly perfect for you! Check out the ruins of this once very popular attraction.
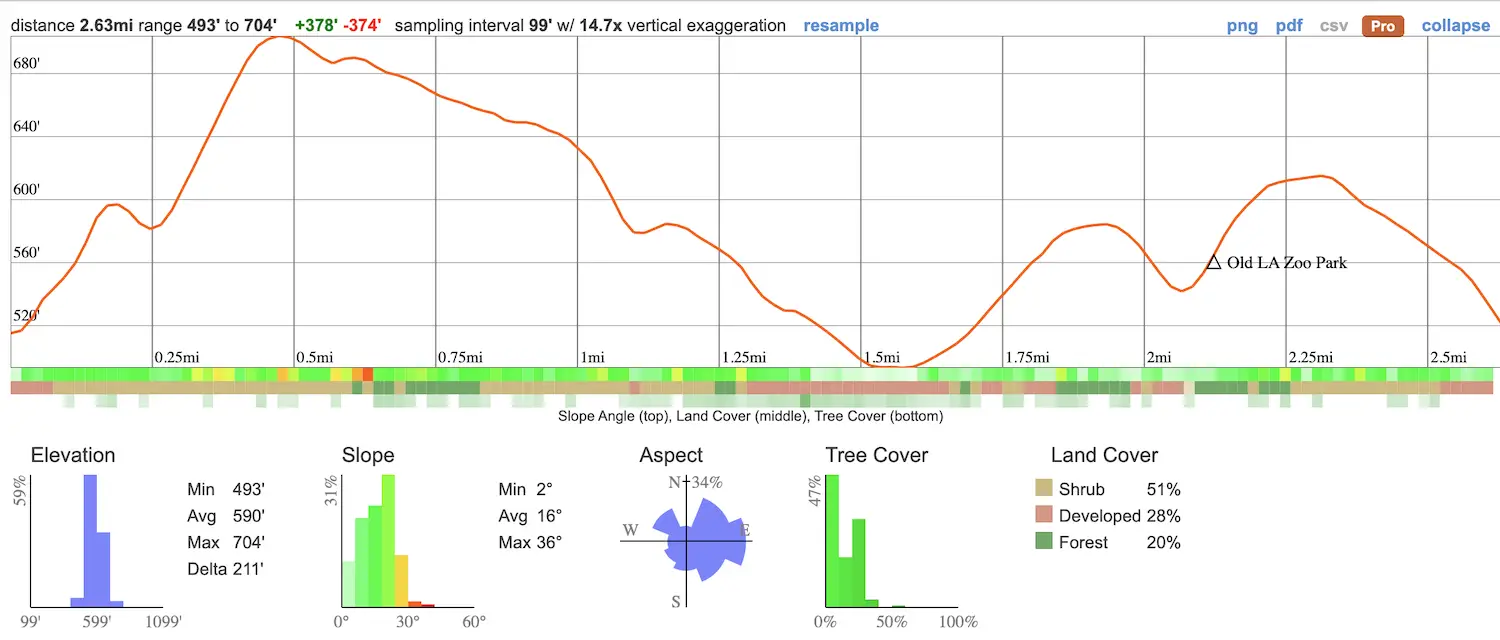
The Old LA is an easy 2.63 mile hike located within Griffith Park in Los Angeles. It features an abandoned zoo, an operating merry-go-round, and a park. The elevation gain is about 374 feet. Bathrooms are located near the parking lot. Dogs are allowed on leashes.
The Old LA Zoo is one of the best hikes in SoCal because it’s so unique and eerie. However, there are man more amazing places which you can view by clicking the link below:
Best Hikes In Southern California
Click the following link to be redirected to the Old LA Zoo via Google Maps: Merry Go Round Lot One
Parking is free and can be found in the Griffith Park area near the merry-go-round.
Daily Hours: 5 AM-10 AM.
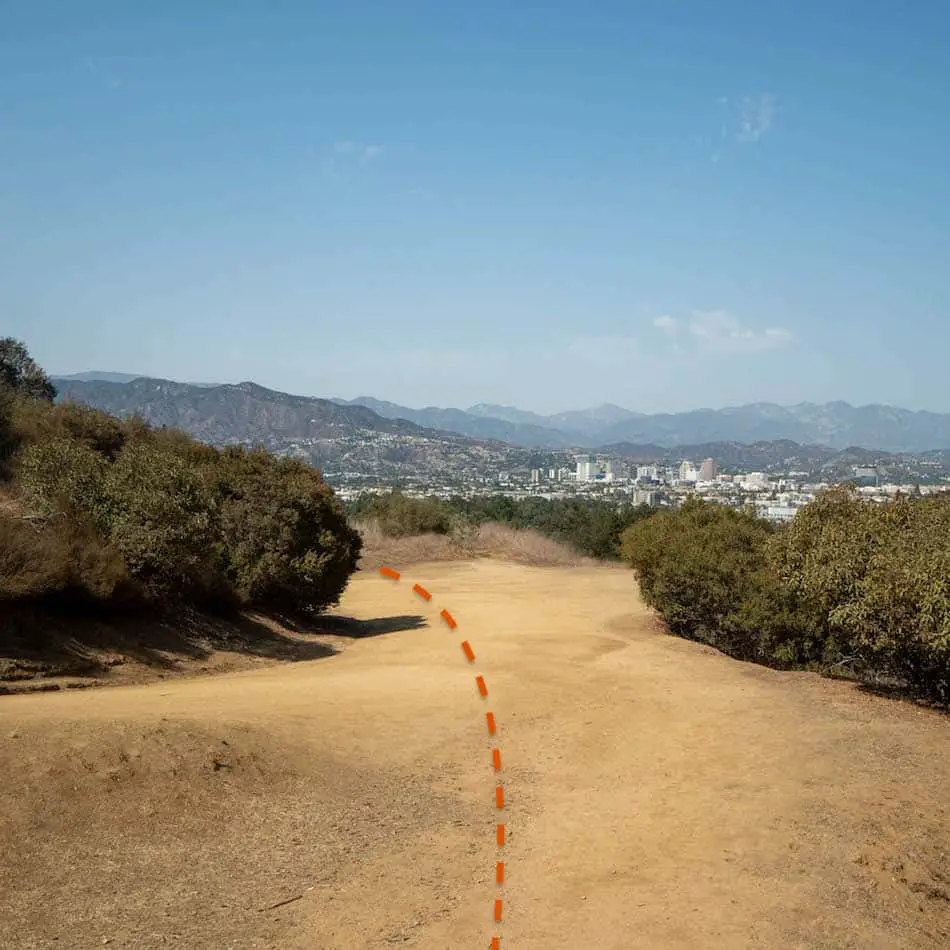
The trail begins on the Upper Old Zoo Trail. You need to cross the road on the south side of the Merry Go Round to get to the trailhead.
If you’re a little confused, be sure to open the map shown above.
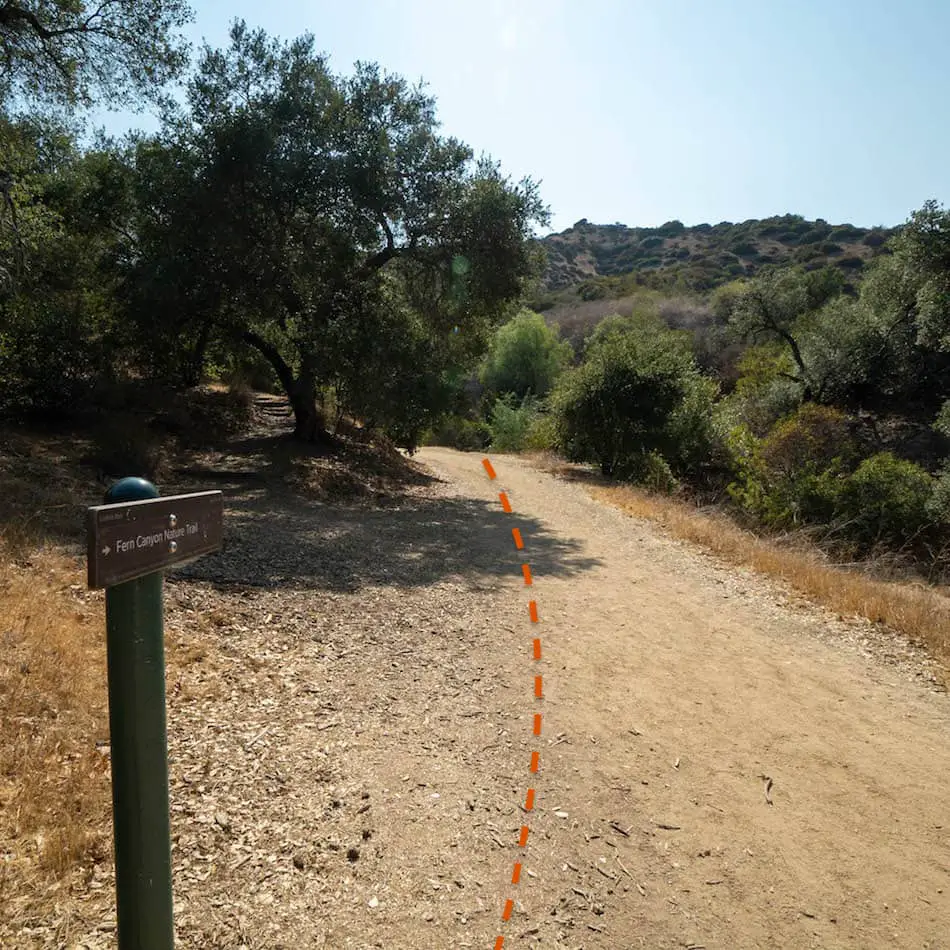
It’s a bit hard to see in the picture shown above, but there’s a split to the left underneath the tree. Make sure to stay on the right side of the split.
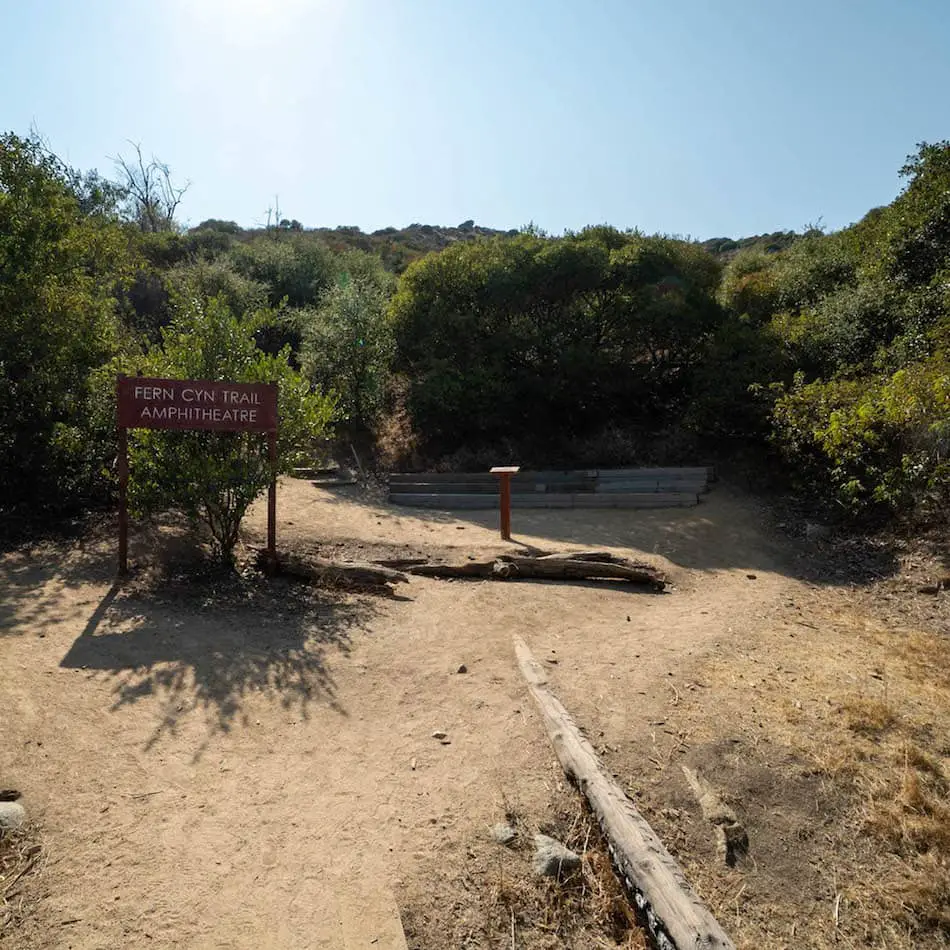
Shortly after I came across Fern Canyon Amphitheatre.
The Old LA Zoo probably hosted events here because I couldn’t find any current info on it. Head up the stairs.
The next split leads either away from the city or towards the city. Be sure to head straight (as shown below).
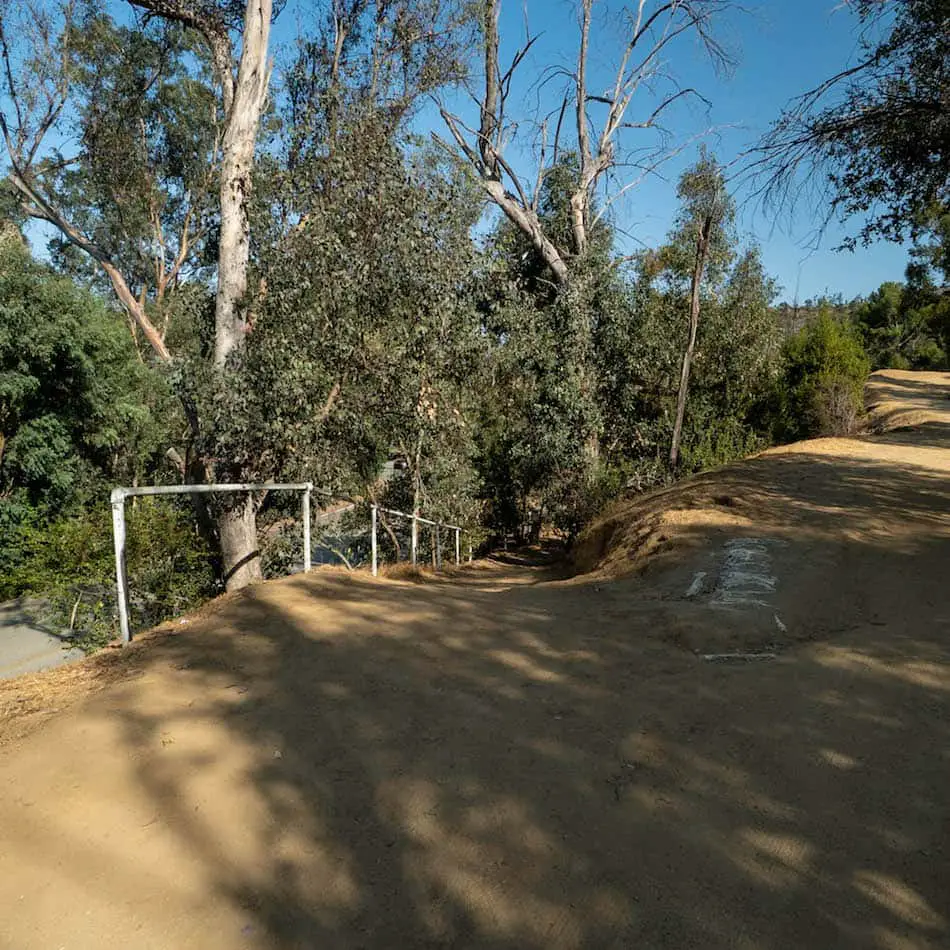
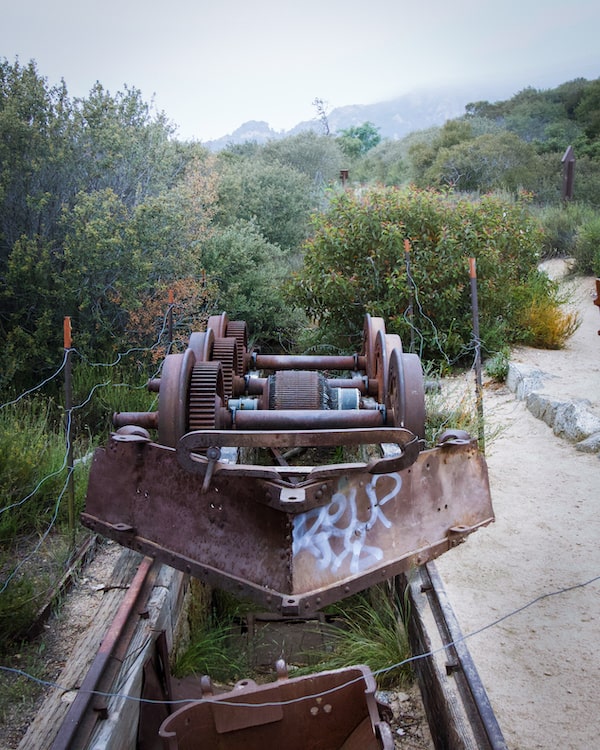
Eventually, I reached this point with the metal rails that leads down toward a small street. Be sure to go down that way.
(This will be close to the Bee Rock Trail, but do not take Bee Rock).
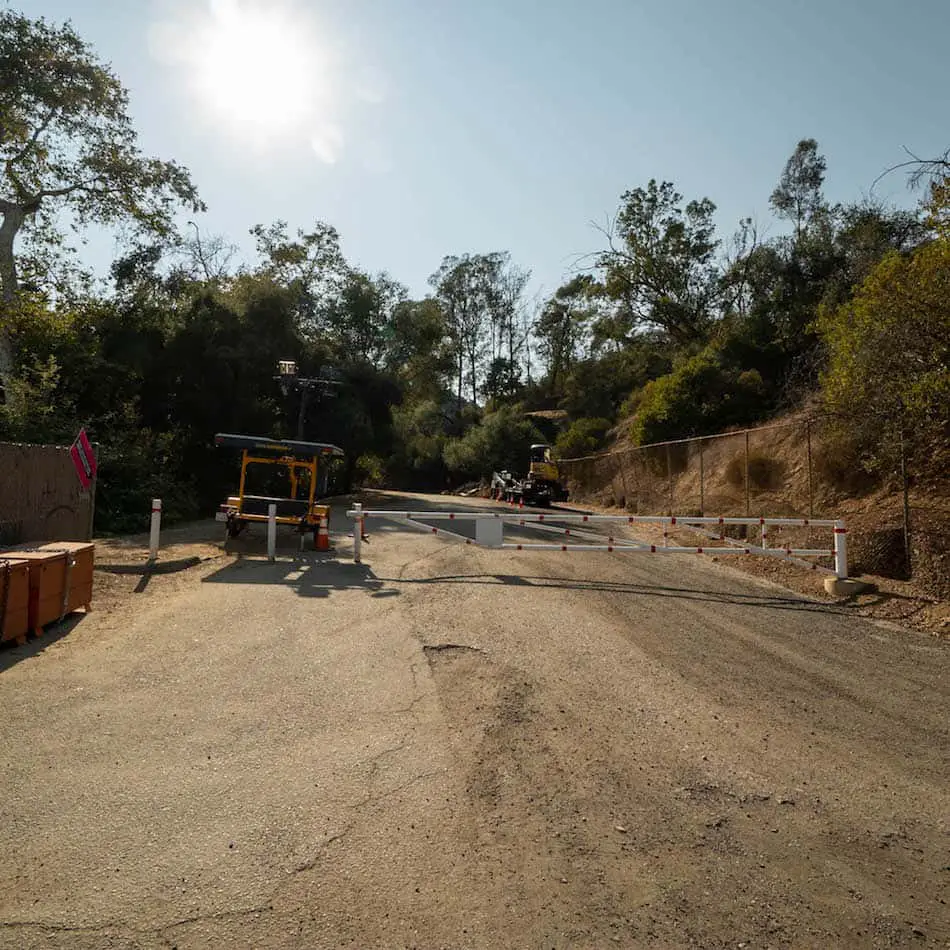
After walking through the parking lot, I reached this gate near the park and continued through it.
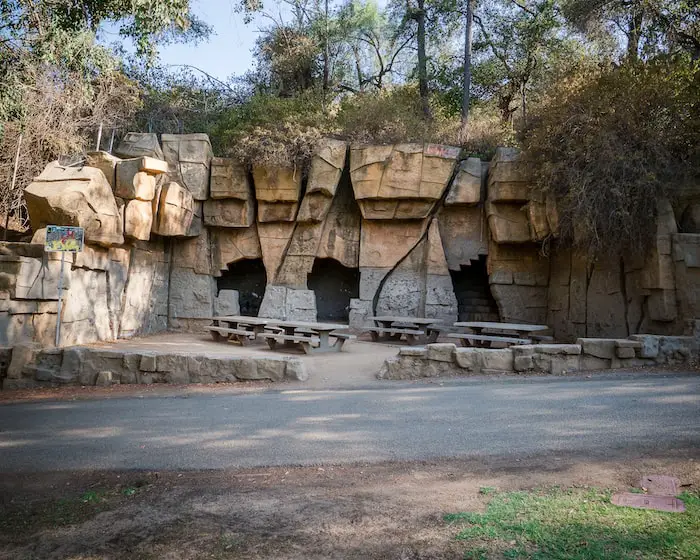
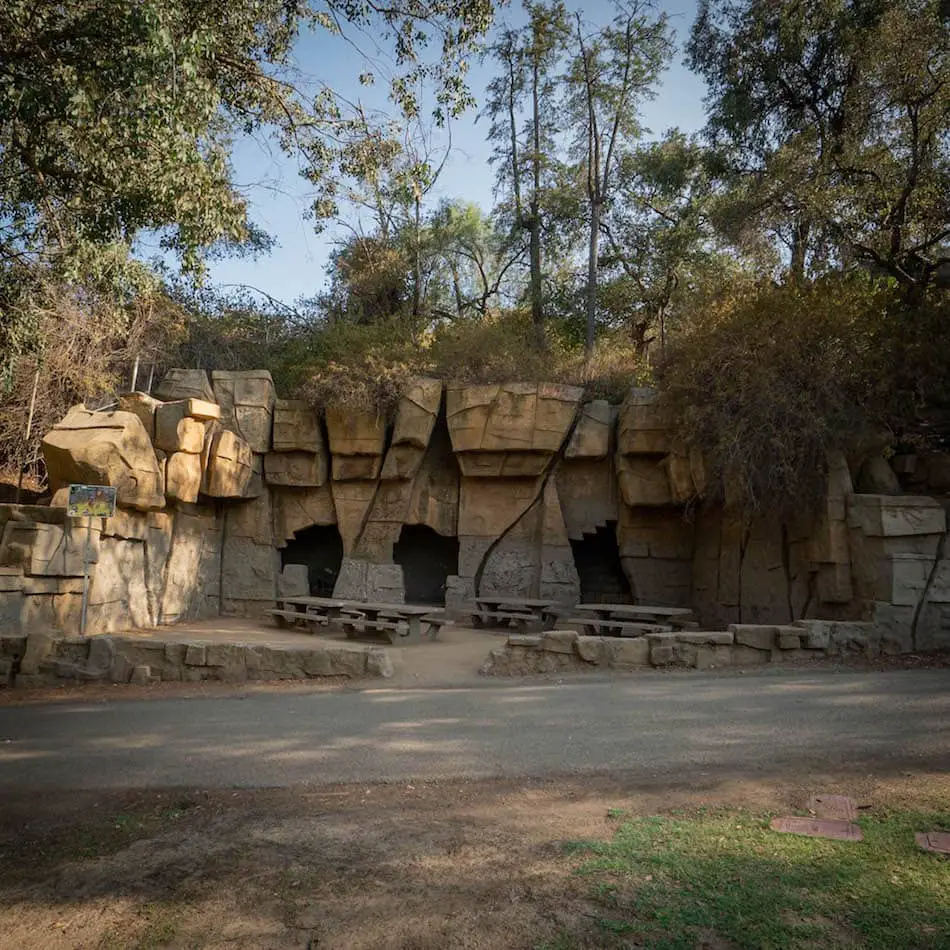
Not long after, I arrived at the ruins!
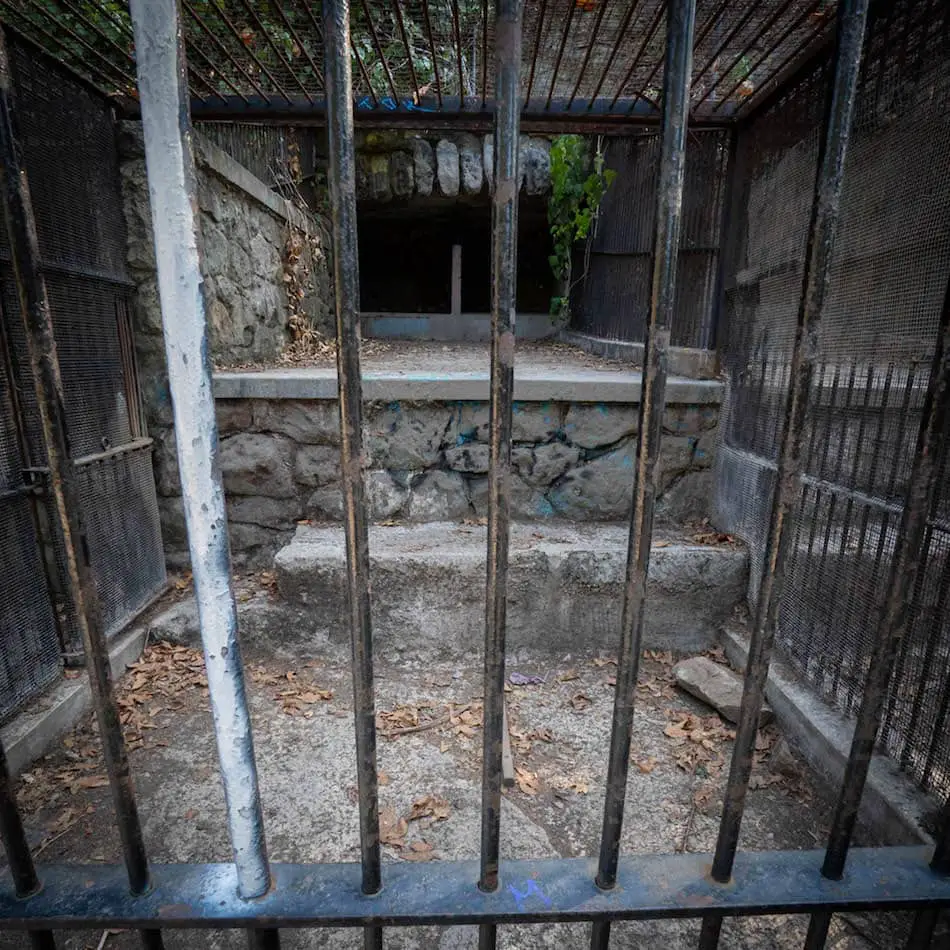
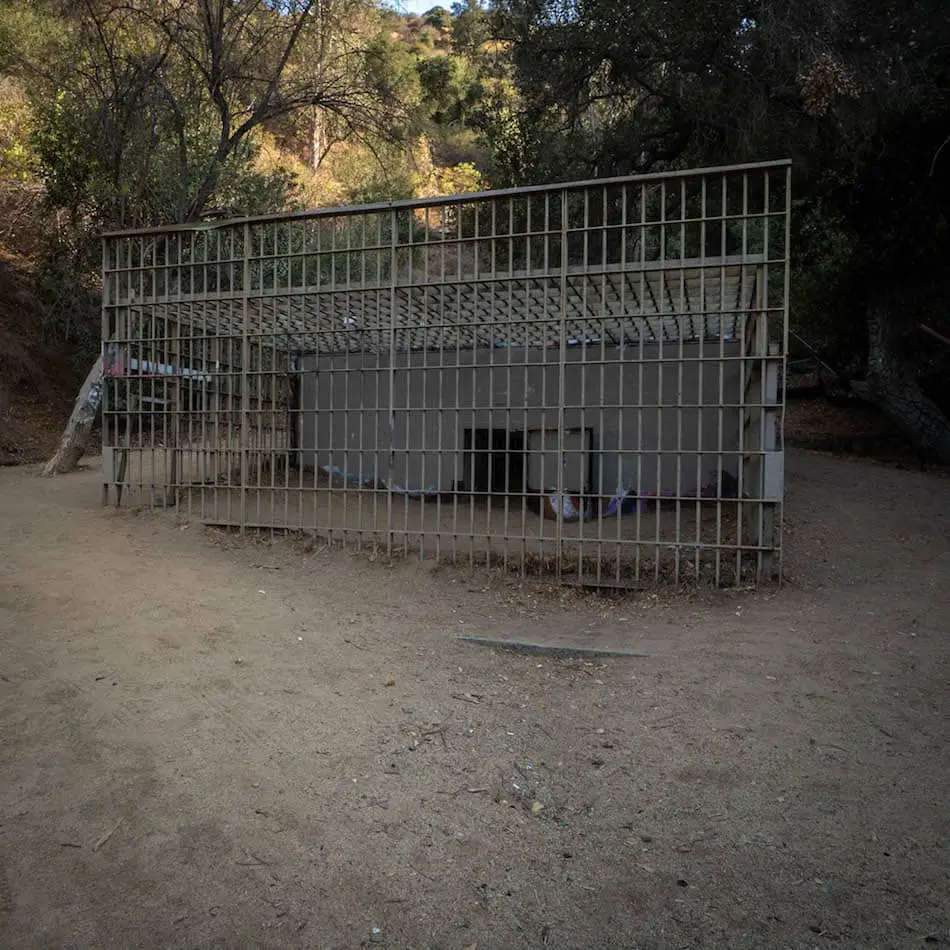
My first stop was at the animal cages. Unfortunately, you can’t go inside these.
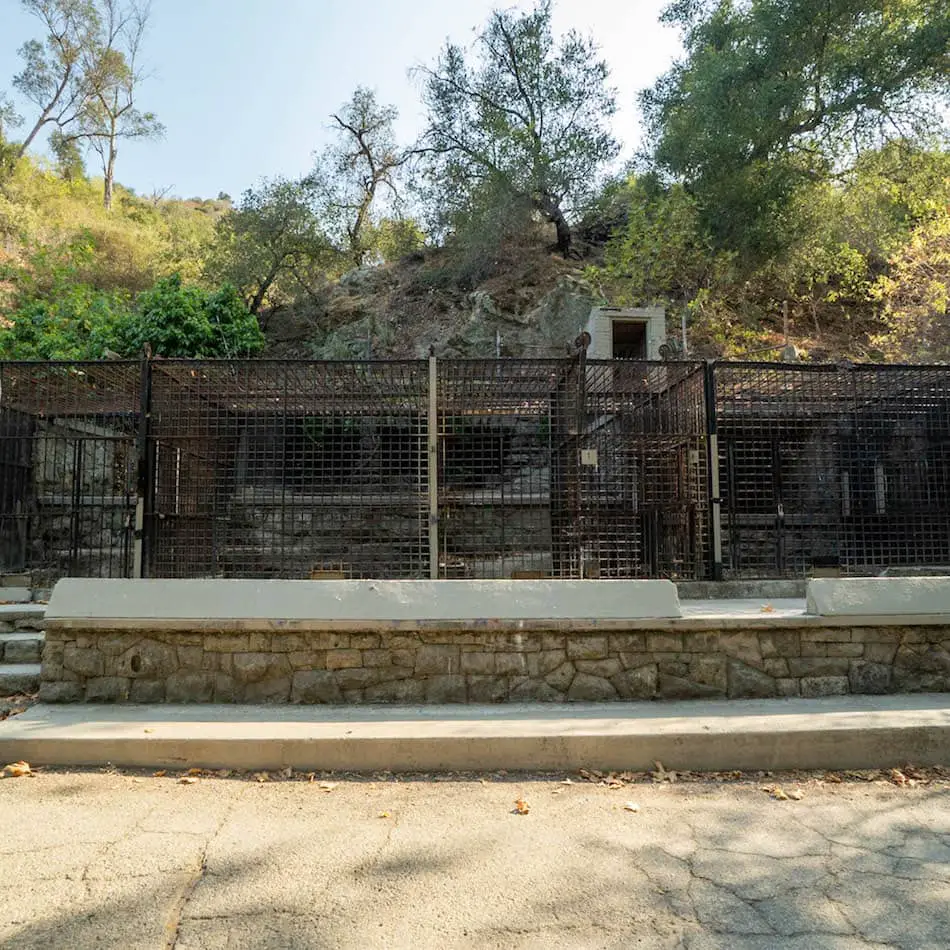
Not sure what animals were housed here, but if I had to guess, it would probably be felines or large primates.
Unfortunately, the Old LA Zoo had a negative reputation of housing large animals in confined places.
The next small building seems to have housed parrots or other birds, but I’m not sure because it lacks windows.

When you go inside there’s a small room that’s empty and trashed.

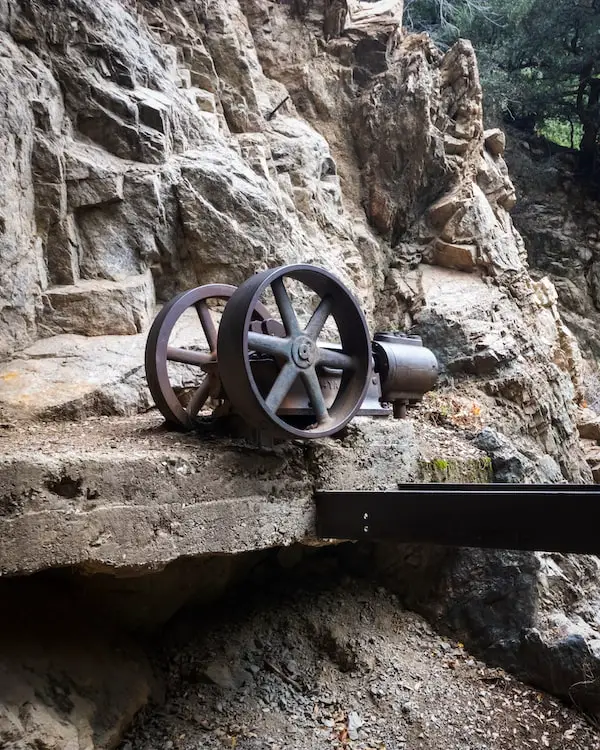
The following buildings were used to house all the polar bears.
All the structures had pits in the front (which are now filled in) and a roughly 4-foot fence that kept people from falling in. Those fences are now gone as you can see.
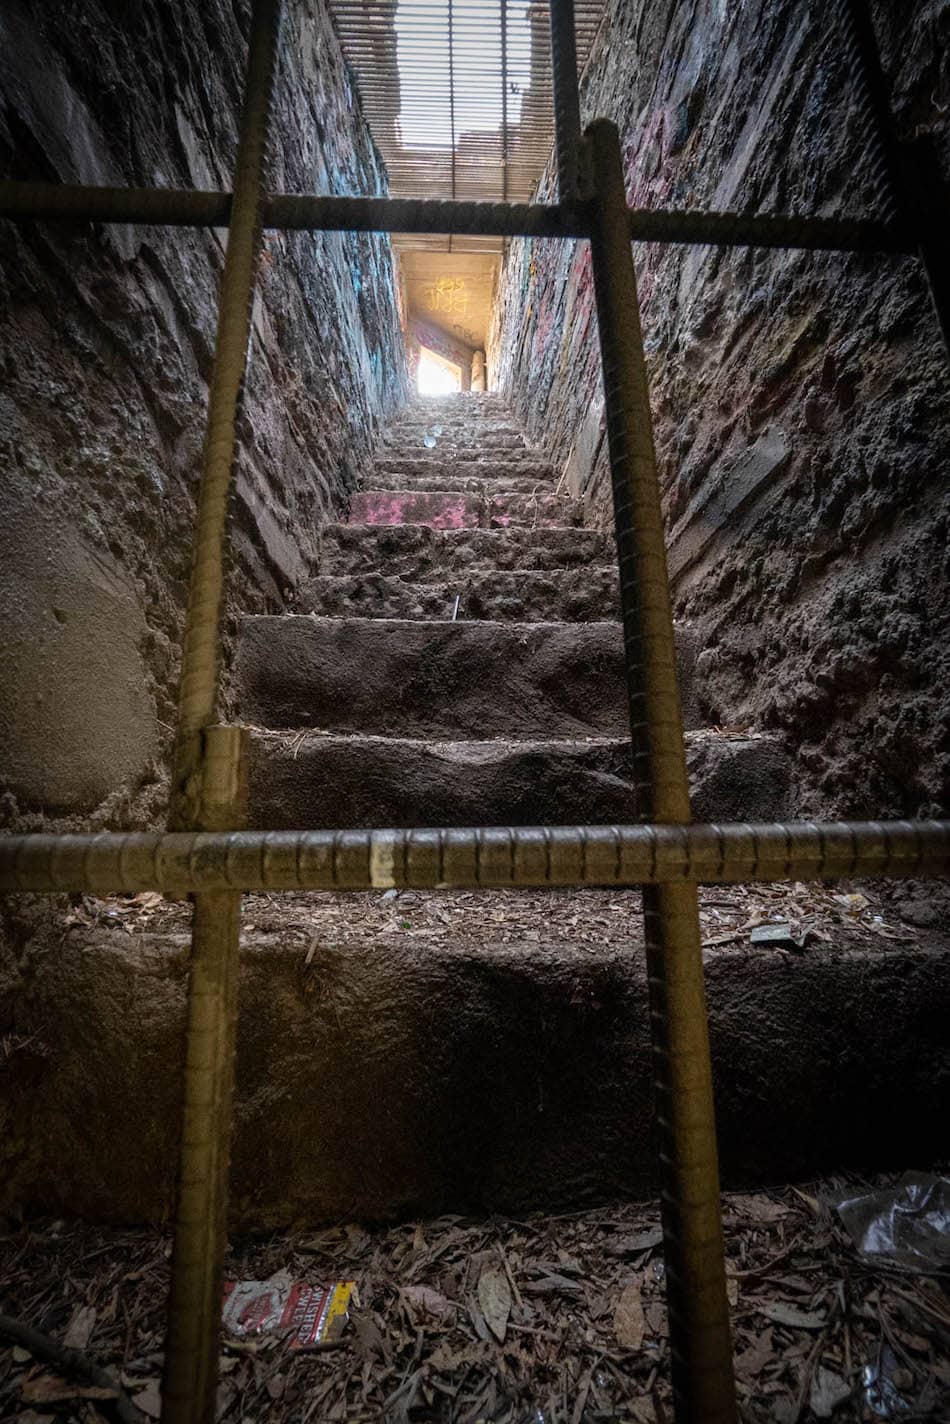
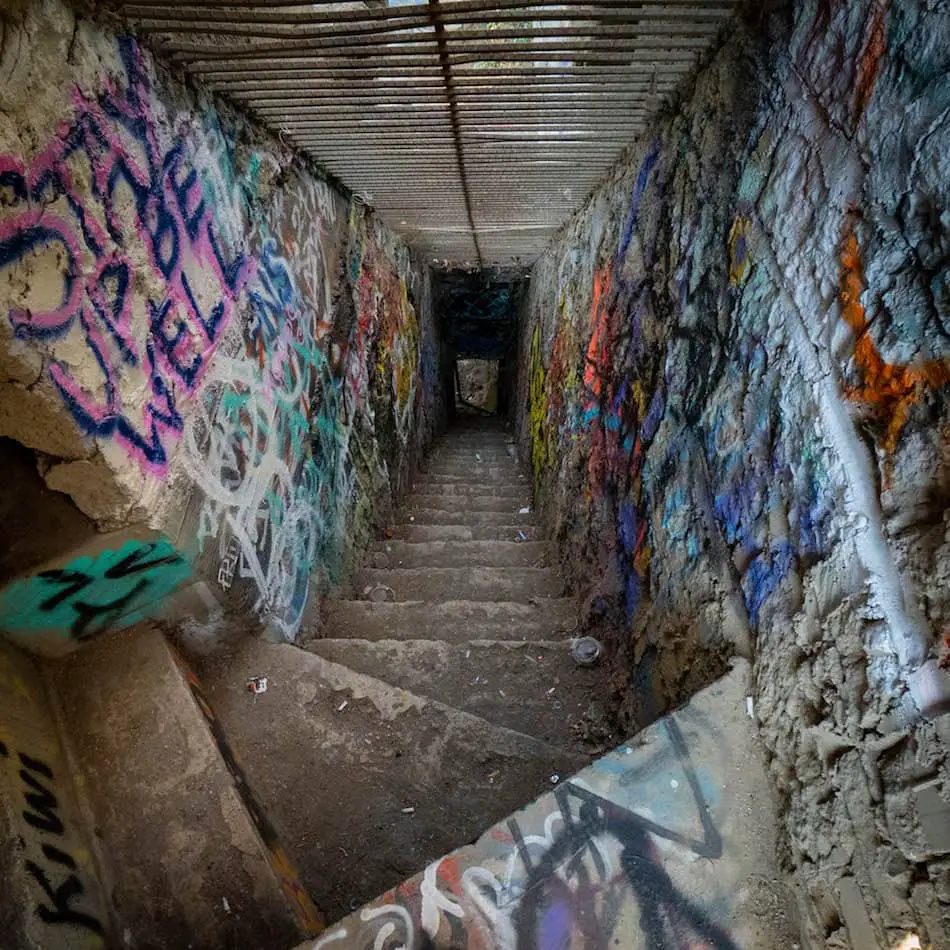
From the inside, I could look up these stairs.
I thought I wouldn’t be able to access the inside, but there is a way!
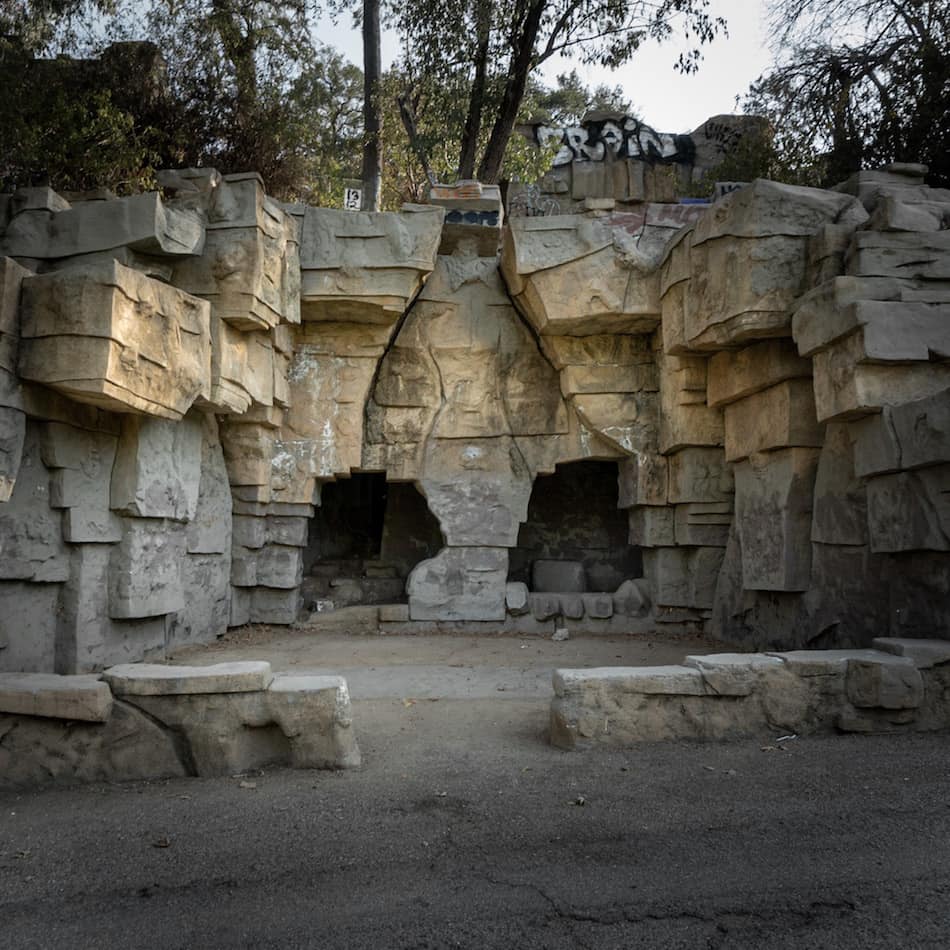
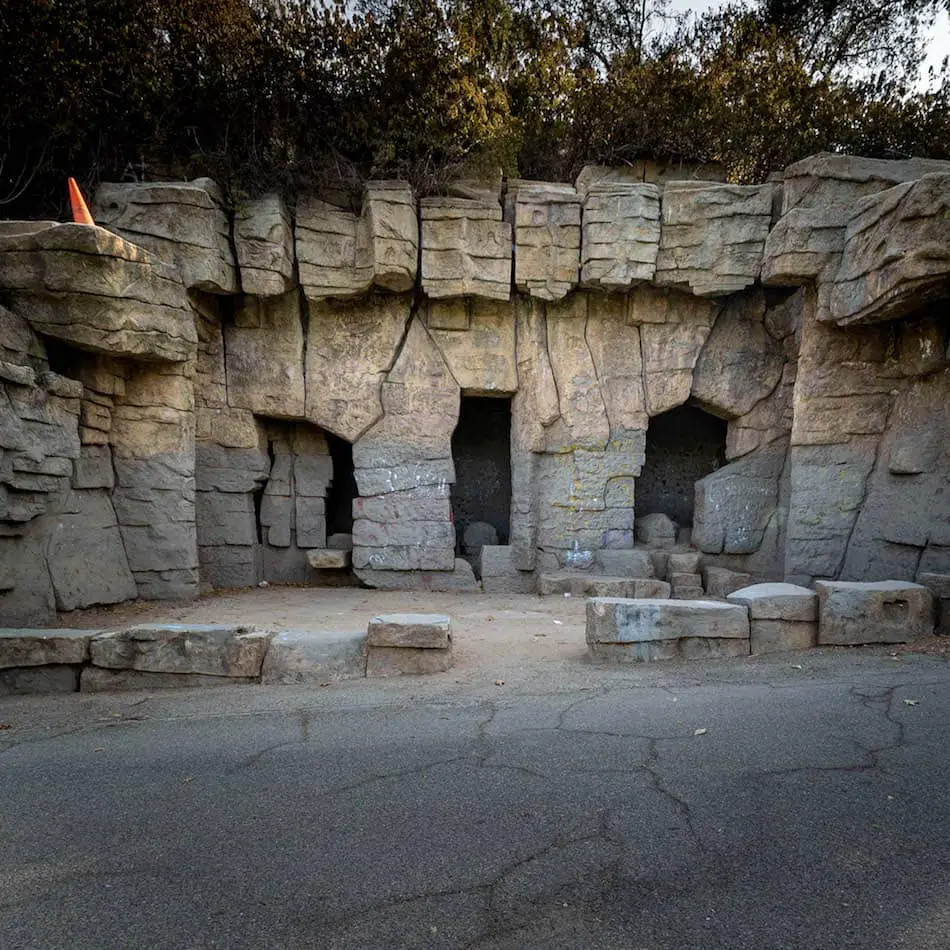
The next stop is my favorite! These temple-looking animal exhibits remind me of a deep jungle somewhere!
This specific one has benches to relax and enjoy.
Fun Fact: A scene from the movie Anchorman was filmed in one of these exhibits. There are also other movies that have been shot at this old zoo.
After the structure shown above head back the same way you came and “bust a u-turn” to start heading up the hill behind the polar bear ruins.
As you make your way up, you’ll notice the top of the ruins is fenced off…
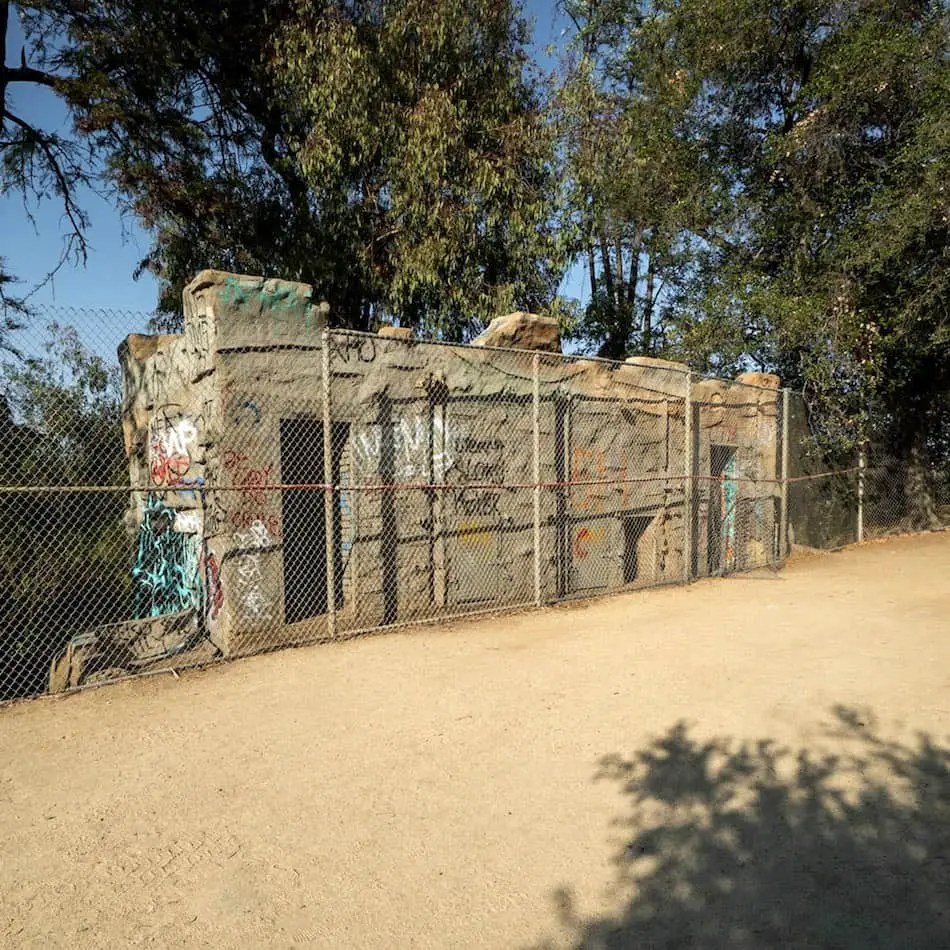
But you can still go in and walk down!
As I continued up the dirt road, I came across another animal cage.
Any guesses as to what animals lived inside? It’s pretty small and has a tiny door. This was the last of the ruins.
The final stop was the merry-go-round near the parking lot.
You can ride this iconic gem on Saturdays and Sundays from 11 AM to 5 PM.
Fun Fact: It was built in 1926 and was actually Walt Disney’s inspiration for Disneyland!
I hope you have fun walking around this infamous abandoned zoo that was once a hub for tourists and locals alike.
Don’t forget to tag us on Instagram @cahikingadventures.com when you make a visit!
The Old LA Zoo was first constructed in 1912 on a very low budget. This was a sign that the zoo would later have many issues and mishaps throughout its time.
It was said to have housed about 15 animals, ranging from bears and bobcats to ostriches and monkeys.
Some of the issues of the zoo were that animals would escape and there were also drainage issues that almost got the pace shut down. They had also fed the bobcats horse meat, which made a lot of them die.
Throughout the decades, there would be more funds to expand the zoo. In 1949, there were over 1,000 animals. Cages were crowded and it was difficult to build on such a bad platform.
There were always rumors of animal mistreatment, which constantly put them in a bad spotlight.
In 1958, there was a lot of support to fund a new zoo. The Old LA Zoo didn’t end up being as great as it was supposed to be after all.
The Old LA Zoo was abandoned in August of 1966. The new Los Angeles Zoo opened in December of 1966 with more than 2,000 animals and is currently a popular destination.
The Old LA Zoo was abandoned because of issues such as overcrowded cages, animal mistreatment, and other structural flaws. It was officially closed in 1966.
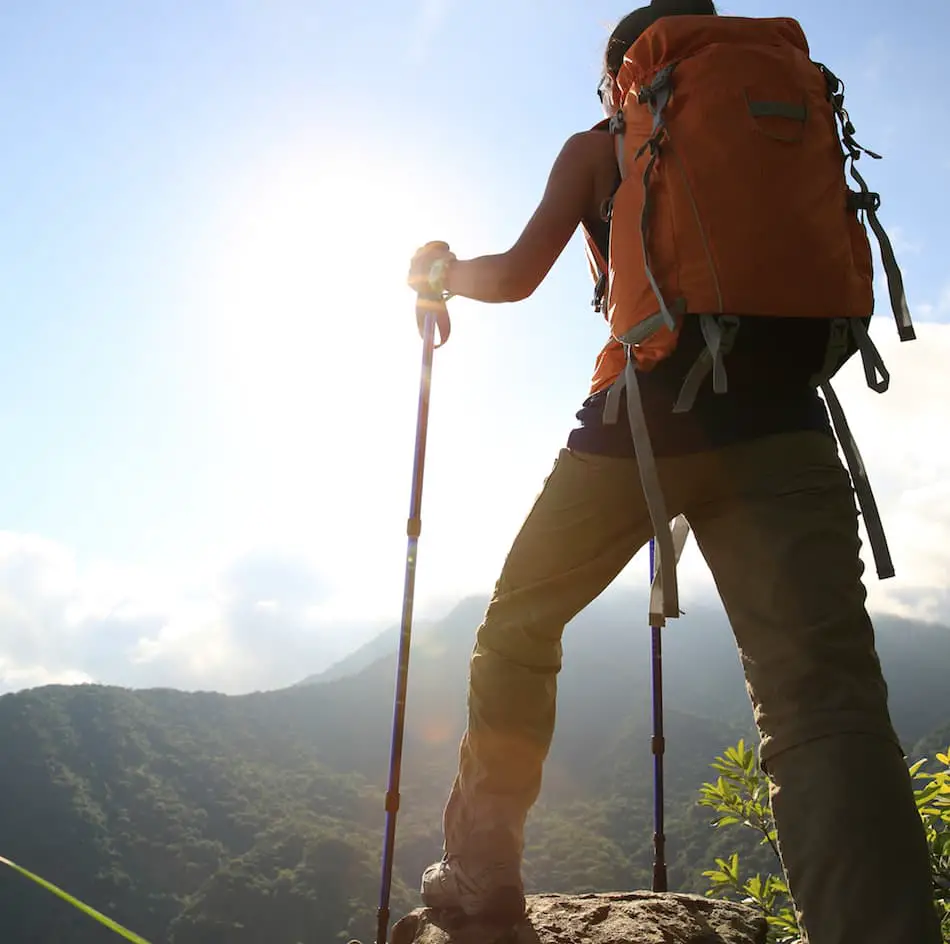
Sometimes, you need a helping hand on some of the more strenuous and difficult terrains. To me and thousands of others, TrailBuddy Trekking Poles are just that and more. I’ve been in situations throughout my hiking journey that would have turned out pretty bad if I didn’t have these bad boys with me.
TrailBuddy Trekking Poles are used for extra stability and support on hikes and walks. They are perfect for snowy, wet, and rocky terrains. They are made of tough and light aluminum, making them durable and long-lasting walking sticks.
Here’s my experience and thoughts on the super popular trekking poles from Amazon.
I’ve been using these trekking poles for well over a year now, and they haven’t disappointed thus far.
These have been my buddies on snowy and sketchy trails. Trust me, they have saved me from scary situations.
Here are some of the good things I can say about these affordable trekking poles.
The TrailBuddy trekking poles are highly functional. They come with accessories and parts for all types of terrains. They are made from tough, yet lightweight aluminum which helps with extra support and durability.
Another function I like is how easy it is to adjust the height of the poles. Lastly, its cork handles make them really grippy and comfortable to hold!
I really enjoy how simple, easy, and lightweight they are.
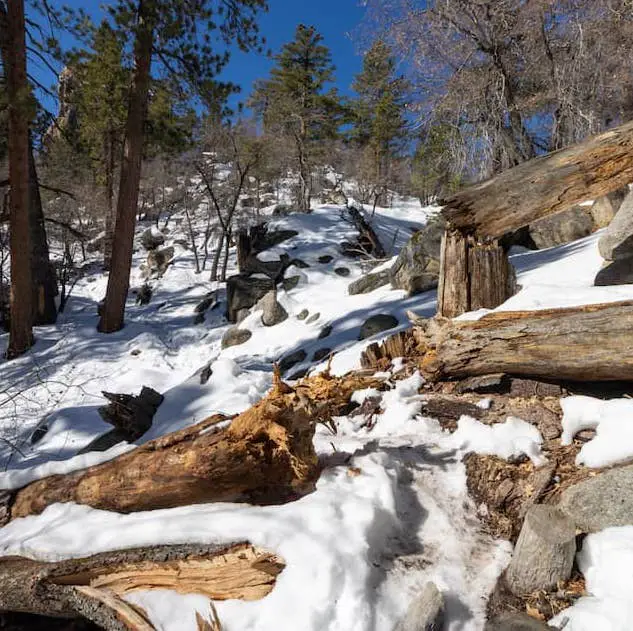
You can pretty much use them for all terrains and situations. Snowy, muddy, and rocky terrains are where the TrailBuddy trekking poles shine at what they do.
The TrailBuddy Trekking Poles are super affordable, considering the fact that they’re good-quality walking poles and come with tons of accessories.
This also makes them a perfect gift for those who are just getting into hiking or who need extra support when going on walks.
I really love how light these trekking poles are in comparison to other brands.
The TrailBuddy website mentions that both poles together weigh 19.4 oz. If you only use one, that’s only 9.7 ounces.
If you plan to use the baskets and rubber tips for snowy or hard terrains, each pole will weigh 10.2 oz.
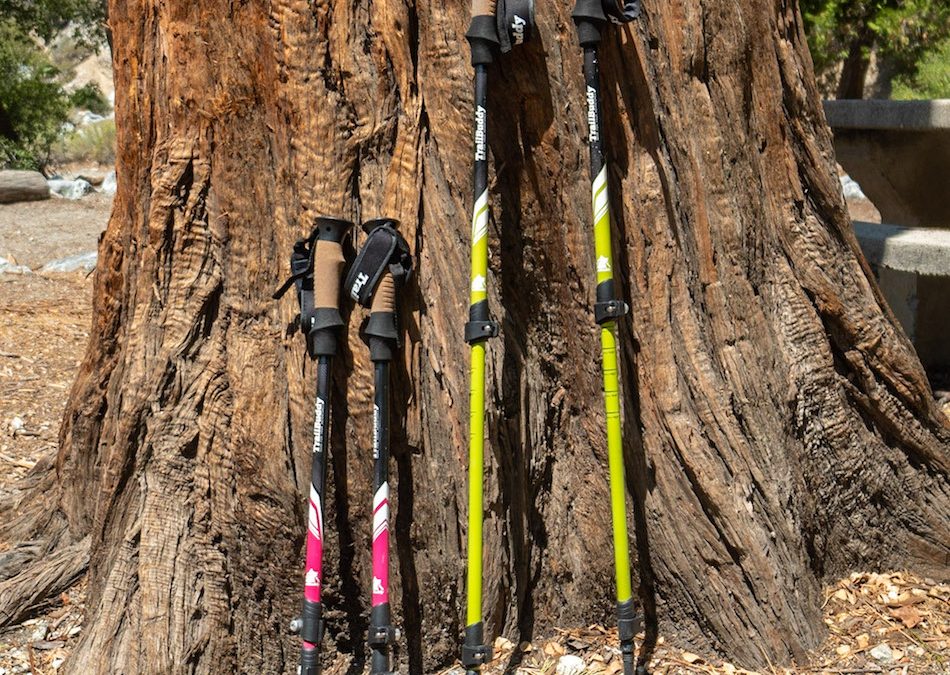
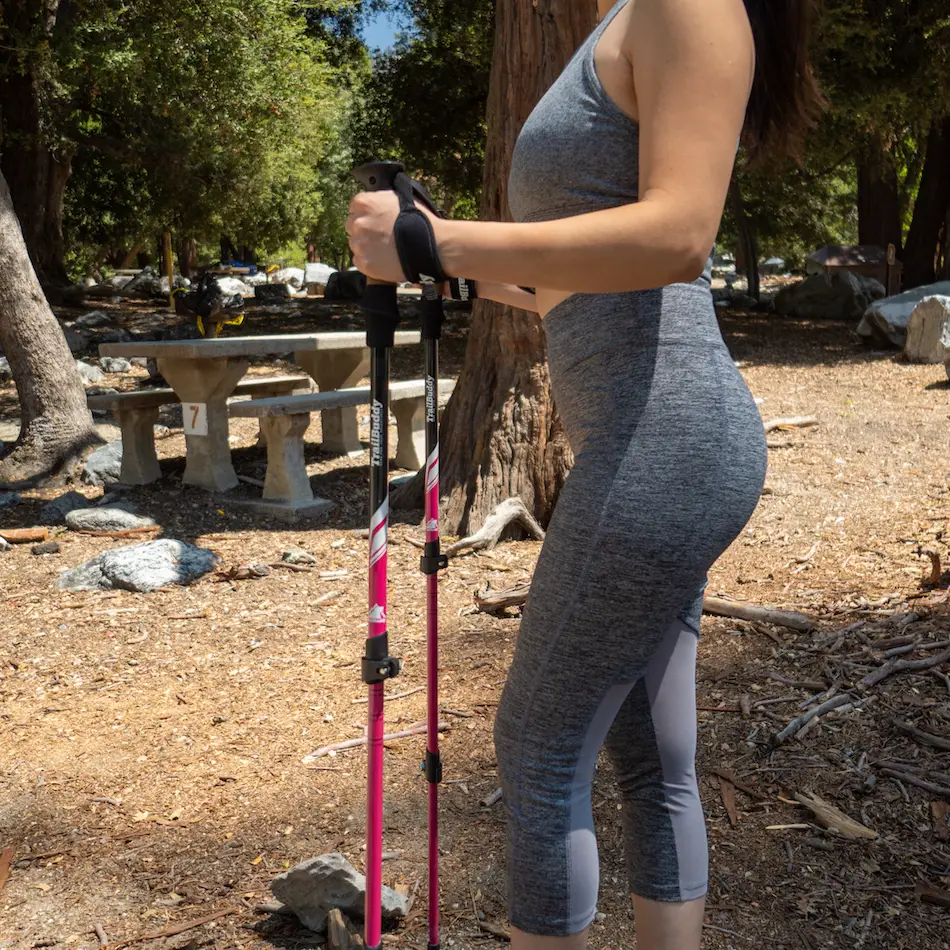
The color variation of these trekking poles is another thing that makes them stand out.
You have the option of choosing 8 different fun colors, although some of the colors are sometimes out of stock on Amazon.
I chose to go with the vibrant pink color and my partner was kindly gifted the green ones.
Of course, no product is perfect. There are a few issues to note that I’ve seen others complain about. Although I haven’t had these issues, it’s good to know about them.
Although it hasn’t happened to me, some users have mentioned that their locks become loose at times. This can get really annoying to have to keep readjusting on trails.
Another person mentioned that although they are lightweight, they snap a lot easier. This specific person mentioned they were on the heavier side and that too much pressure and weight made it break.
This could possibly be an issue, but I’ve seen backpackers lug around tons of weight for hours with these poles.
However, if this concerns you, you might want to look around for stronger built trekking poles.
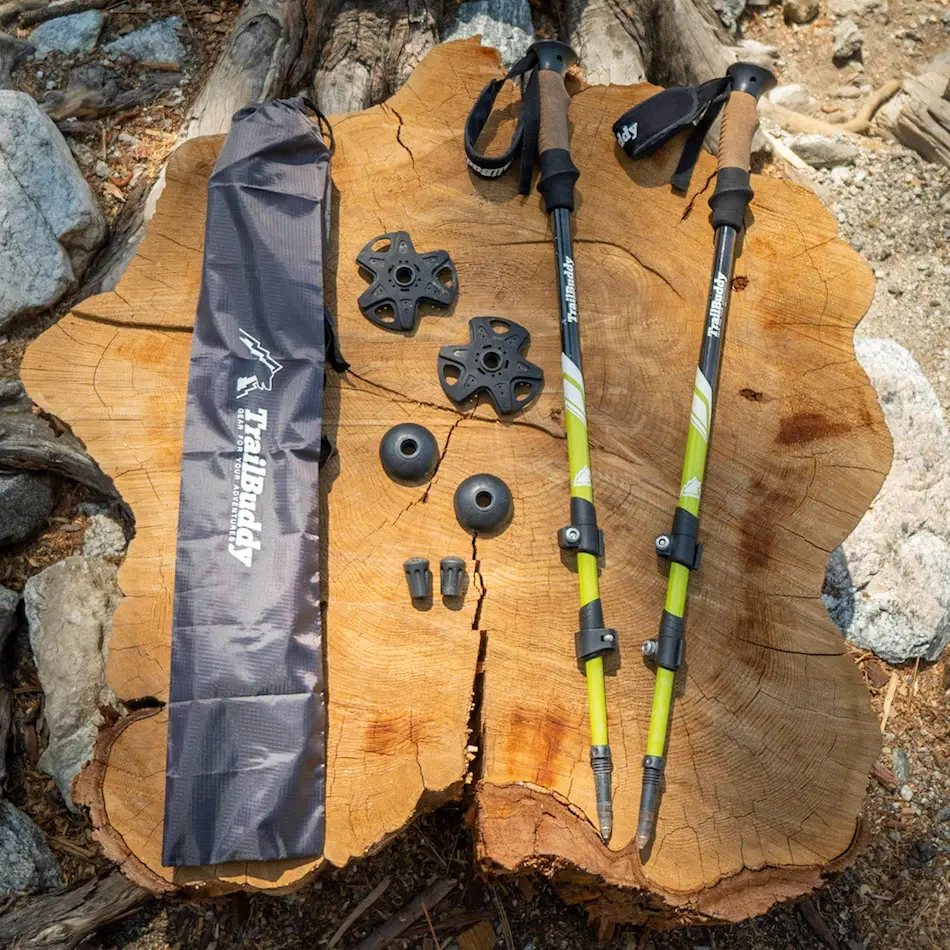
I really do appreciate all the different accessories that come with these trekking poles. There are a total of 11 accessories and parts in this set.
Here’s what my Trailbuddy Trekking Poles set came with:
(As an Amazon Affiliate, I receive a small commission if you purchase from the links above. However, I do personally own and recommend these products.)
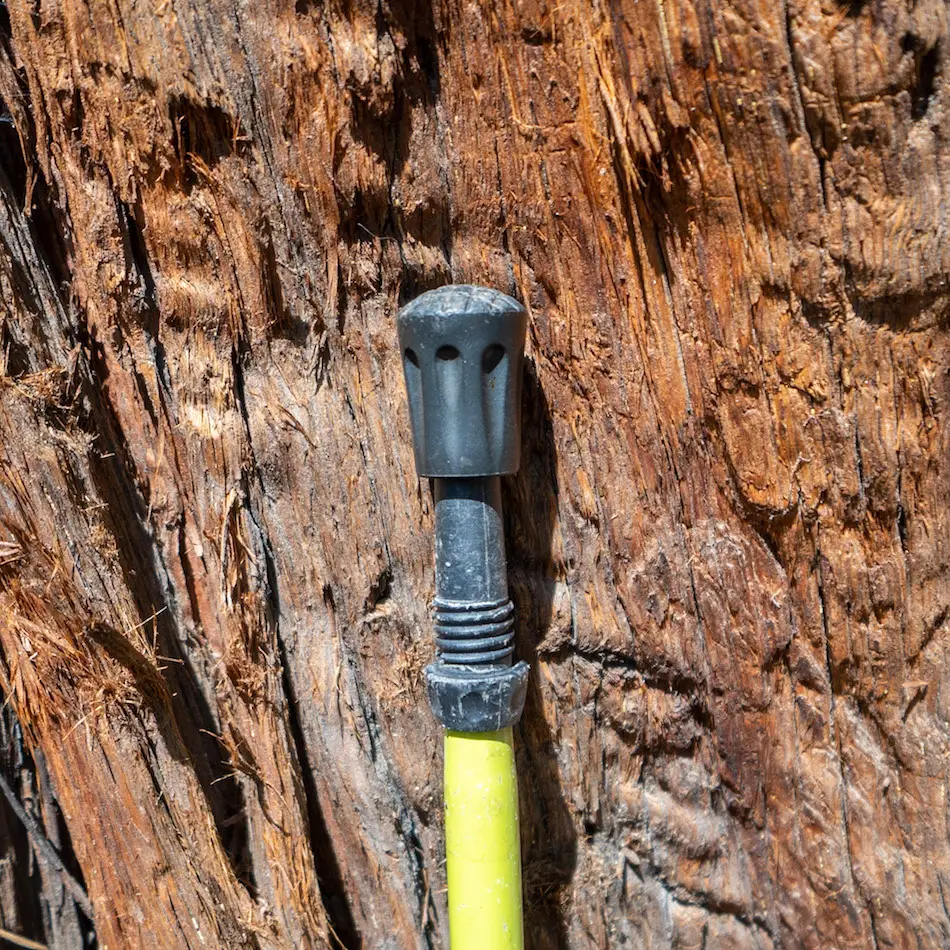
(Rubber Tips)
I use two rubber tips when I’m walking on hard terrain, like those that are rocky or on the pavement.
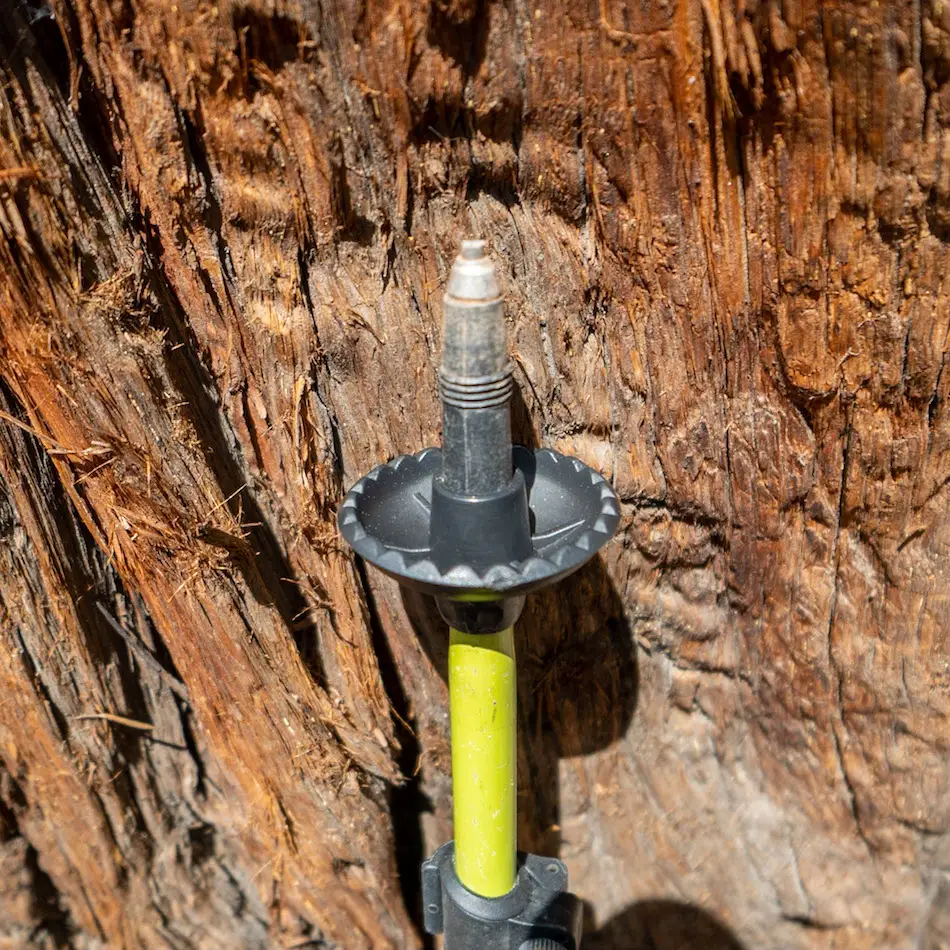
(Mud Baskets)
When walking on muddy terrain or areas with deep grass that might have soft soil, I use circular-shaped mud baskets.
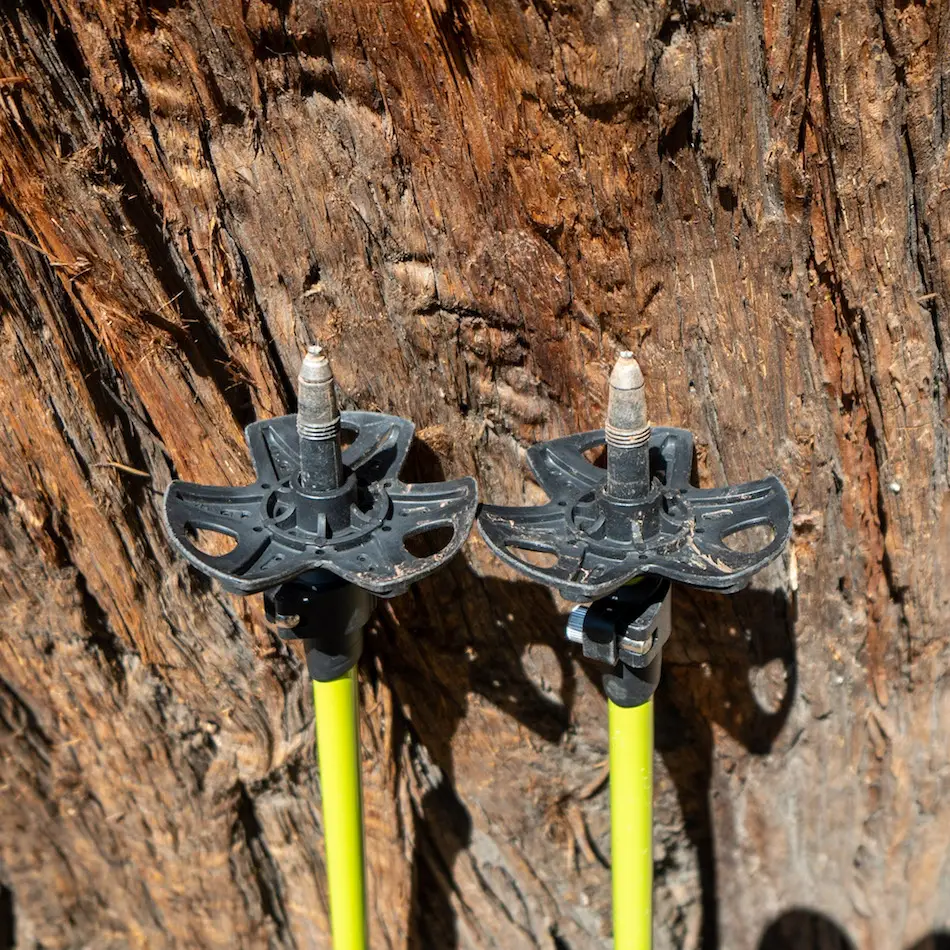
(Snow Baskets)
Lastly, the snow baskets definitely come in handy on snowy and icy terrain. However, thicker layers of snow will require extra gear, such as snowshoes and possible shoe chains.
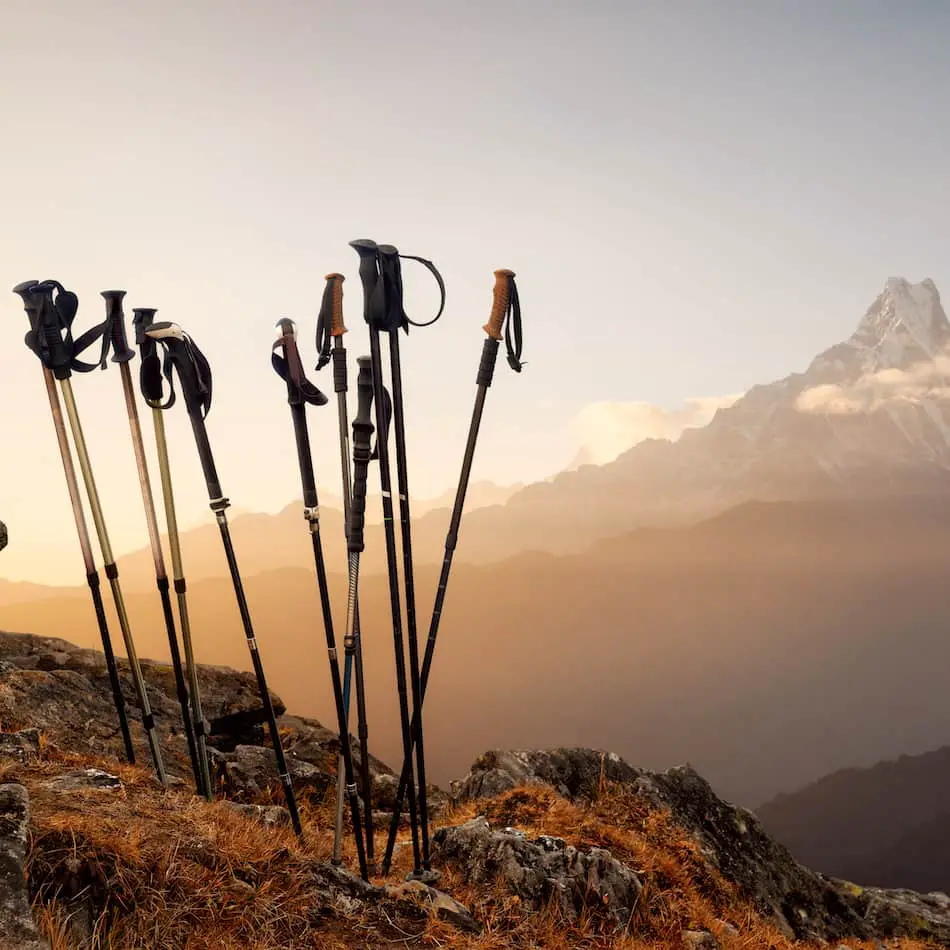
The TrailBuddy Trekking poles extend to 54 inches and collapse down to 24.5 inches.
Now, that’s pretty good. However, I wish they could collapse to be even smaller. They won’t fit in most suitcases and don’t exactly fit in most backpacks either unless you’re carrying a pretty long backpack.
This is why I only take my trekking poles on hikes that I know I will truly need them on.
Step 1: Unlock the top and bottom clamp levers.
Step 2: Put your hands through the pole’s straps. Adjust the pole straps so that they are tight enough to support and slightly roomy for movement.
Step 3: Make sure your elbow is bent at a 90-degree angle. The tip of the poles should be next to your feet.
Step 4: Adjust the top and bottom sections of the poles so that they are evenly proportioned. This keeps one section from having too much pressure and allows your trekking poles to last longer.
Step 5: Lock the cam levers in place.
TIPS: If you’re going uphill, shorting the length of the pole by about 5-10cm. For downhill, adjust the poles to be 5-10cm longer. These are general tips. Adjust according to what works for you.
Although some hikers are hesitant about carrying extra weight, carrying trekking poles on your next backpacking adventure can be helpful for the following 3 reasons.
Helps with your knees. Carrying lots of weight for hours or days can really put a strain on your knees. The trekking poles would help transfer some of that weight off.
Useful for crossing creeks and other terrains. There’s no doubt that carrying a large backpack with lots of essentials can throw your balance off a bit once you become more tired. The trekking poles will make the journey easier.
Poles can help you examine the ground for proper footing. Let’s say you’re backpacking through thick snow, it can be pretty difficult to know how deep that snow really is. The trekking poles would help prevent you from sinking in. (This is just one of many possible scenarios.)
Of course, there are a lot more uses for trekking poles on backpacking trips. I’d personally take trekking poles for extra support if I knew the trail conditions would be a bit harsh and difficult.
Make sure you understand the terrain, possible weather conditions, as well as your personal endurance and stamina to better decide if it’s worth carrying or not.
I think the TrailBuddy trekking poles are perfect for newbies and even those who have been hiking for a long time.
They come in handy for all different terrains and situations. Unless you’re a hardcore hiker and have mastered hiking in tough terrains without any type of support, then you might not find the need to buy one now.
But, for the rest of us, these are just one of those hiking accessories that almost every hiker I know owns or has owned at some point.
Hope this review has been helpful!
Hiking is a rhythmic activity. It’s about putting one foot forward and then the next and repeating the step again and again. To keep up this rhythmic pattern, hiking songs can be an excellent way. After all, music plays a pivotal role in all of my adventures. In long-distance hiking, music has always massively combatted boredom for me.
In addition, by choosing the best hiking songs, you can boost your mood during the journey and keep yourself entertained. It also takes your mind off the mountain steep that is deemed to be difficult. There are services like Apple Music or Spotify that provide a unique list of playlists created by other people who are involved in similar activities.
Still, I prefer creating my own hiking playlist to avoid any distractions. Since music can elevate your mood, I select the music carefully especially for hiking, trekking, or backpacking. Keep on reading to discover my favorite hiking songs so far.
I’ll be sharing my favorite hiking songs that you can include in your playlist and listen to on the go to keep yourself motivated, and entertained throughout the journey.
The list of my favorite hiking songs include:
The choice of music always depends on individuals. However, there are similarities in the type of music everyone listens to who are involved in similar activities. Therefore, the hiking songs have to be of a specific type to help you rejuvenate and motivate yourself. It’s always better to listen to both slow and fast music while hiking on the trails.
If you keep listening to slow music, it may end up sounding too depressed for you especially when you’re hiking solo. Alternatively, if you always listen to fast music, it won’t help you to soothe and rejuvenate yourself which is the primary purpose of hiking. Furthermore, I hope you enjoy listening to the list of my favorite hiking songs so far.
It’s backed by studies that music helps you to become more focused and determined on a given task. Since it releases dopamine, a chemical that assists in keeping up your mood, goal-oriented behavior, and motivation, listening to music can significantly help you to regulate your mood throughout the journey.
Nevertheless, the music should be wisely picked. If you pick any songs that stimulate your negative memories of the past, it could be a massive distraction while you’re hiking. Therefore, I listen to songs that keep me focused and motivated while I’m hiking in the mountains. There are a few reasons to listen to music while you’re hiking.
The reasons that I figured for listening to music while hiking is:
Motivation
The thought of getting up early in the morning or at midnight and going hiking can be daunting. However, if you start a good playlist after pulling yourself out of the bed, you won’t hesitate to become determined with your activity. Besides, walking upon the difficult trails and sweating involves a lot of physical effort.
Sometimes, your mind will trick you to give up easily and take a rest. Nonetheless, if you listen to good music, it will prevent your mind from thinking lethargically. Instead, it will boost you to keep going and motivate you to keep up the pace. This is the primary reason why I prefer listening to music while on the go.
Pace Regulation
It’s important to decrease or increase the intensity at different points of the mountain while hiking. Hence, I create my hiking playlist by combining both slow and fast music to help me regulate my pace. Playing fast songs while hiking briskly helps to stay motivated and finish off the task quickly.
Alternatively, when you’re resting in the woods with picturesque scenery surrounding you, then listening to slow and reverb music can help you rejuvenate yourself. You can also switch between both slow and fast songs to keep your pace up during the entire journey.
Performance Tracking
Performance tracking is crucial while hiking. You should know the number of hours or minutes you have walked, the distance covered, and many more. The majority of these tasks are done with hiking apps. Still listening to the music and tracking your performance through this is a fun way.
You can create a playlist of 30 minutes or one hour and keep a track of your hiking while listening to the music. This way you can focus on the trails instead of focusing on the numbers and live data of the apps.
These are the few reasons behind listening to music while hiking. Personally, music helps me in all of my wild adventures including hiking.
We all want to lose weight, but going to the gym can easily become extremely repetitive. Sooner than later, the gym becomes more of a chore than a goal, and we quickly lose all motivation.
Overall, hiking is a great form of exercise that can help you lose weight. The inclined trails force your body to burn more calories than walking on flat ground and primarily target adipose tissue (fat). When combined with a proper diet, fat loss is accelerated.
Allow me to explain in further detail.
When I was in college, I was a pre-med major. My goal was to be a general practitioner. However, for my undergrad I was studying Exercise Science in order to get my BS and then transfer to med school.
In the end I chose an alternative route, but many of the concepts I learned in those courses can be applied to this post. One specific topic I clearly recall was the effects of low intensity exercise, such as walking and hiking, on body fat.
As you can see in this study, individuals successfully reduced body fat levels by walking for 30 minutes on a daily basis for 12 weeks. If you can reduce body fat by simply walking, you can do it as well while hiking.
However, there’s a catch. You must combine hiking with an adequate amount of calories. Which I will explain in the next section.
There’s a few terms you need to learn to understand how hiking can help you lose weight.
I will define the following terms according to Michael Matthews in his amazing book Bigger Leaner Stronger (which I personally use for strength training).
In order to burn fat you must maintain your body in a caloric deficit on a daily basis. If you do, your body will target and burn adipose tissue (body fat) to provide you with sufficient energy to survive.
The opposite is also true, if you remain in a caloric surplus for extended periods of time, you will store the extra calories as fat and therefore gain weight.
Hiking increases your TDEE and thus, makes it much easier for you to remain in a caloric deficit.
I know that was a lot to take in in one section, but I promise I will make it easier for you. If you want to calculate your TDEE all you have to do is click on this link right here and it will take you to a calculator which will do all the work for you.
Once you’ve calculated your TDEE all you have to do is eat less calories, and here’s the best part, you don’t have to adhere to any strict diets! You don’t have to use the keto diet, or the zero carb diet, none of those fads.
You can eat WHATEVER you want and still lose weight as long as you remain in a caloric deficit everyday!
Michael suggest a calorie deficit of 25%. For example, if your TDEE is 3000 calories, your daily target would be 2250 calories. At 25% you can put a significant dent in your body fat levels without feeling like you’re starving.
I get this question quite frequently because most of us can only hike on the weekends. The short answer is yes, as long as you remain in a caloric deficit throughout the week.
Allow me to share a quick story about a friend whom I used to mountain bike with. This guy was roughly 30 years old at the time, and he used to ride circles around me.
In a day, I’d complete about 6 runs down the mountain at the Snow Summit bike park while he’d easily complete 10-12, but he was still overweight.
I wondered for so long why that was the case. Then it hit me. His stamina was amazing because he’d bike like a madman once a week, but he would eat excessively the rest of the week.
The same holds true for hiking only once a week. If you’re constantly in a caloric surplus, it doesn’t matter how intensely you exercise, especially if it’s only once a week.
Yes, hiking will help you lose belly fat. Just keep in mind, hiking will not help you lose ONLY belly fat. That’s not how fat loss works.
When you begin to lose weight, your body will burn fat stored throughout your entire body. Unfortunately, you can’t burn only fat in your arms or legs and keep it in your butt (sorry ladies).
Depending on your genetic makeup, you will store body fat more easily in certain parts of your body. Some of us store more fat underneath our chin, others in their pecs, but generally speaking, belly fat, especially lower belly fat, is very stubborn and will require extra effort to burn.
But don’t give up. Maintain a caloric deficit and you will acquire the body you’ve always wanted.
This is such a difficult question to answer because everyone’s body is completely different, but I will do my very best to provide you with the most accurate response possible by once again referencing author and personal trainer Michael.
In his book he writes about a study at the University of Jyvaskyla. In this study two groups of sprinters were observed for 4 weeks. One group maintained a 12% calorie deficit while the second group maintained a 25% calorie deficit.
After 4 weeks, the first group lost very little fat and muscle. However, the second group lost on average 4 pounds.
If you maintain a 25% calorie deficit, add the calories you burn while hiking, and take into consideration the fact that you’ll easily burn more fat because you’re (probably) not a high level athlete, it’s safe to conclude that you can burn AT MINIMUM (not average) 4 pounds, but more like 4-6 pounds per month.
However, the more often you hike the more weight you’re likely to lose.
It may not seem like a lot. But multiply 5 x 12 months and you get a total weight loss of 60 pounds in one year. That’s a very radical transformation for any individual.
Once again, this question does not have a universal answer, but we can get a pretty accurate understanding of how many calories a person burns based off of their total body weight.
I borrowed the following table from Healthline, which takes into consideration how many calories a person burns an hour according to their respective weight and the steepness of a trail.
| 1–5% grade | 6–15% grade | |
| 120 pounds (55 kg) | 292 | 440 |
| 150 pounds (68 kg) | 360 | 544 |
| 180 pounds (82 kg) | 435 | 656 |
| 210 pounds (95 kg) | 504 | 760 |
| 240 pounds (109 kg) | 578 | 872 |
| 270 pounds (123 kg) | 652 | 984 |
If you want to increase the quantity of calories you burn when you go hiking, try the following tips.
I hope this post has helped you grasp a good understanding of the correlation between hiking and weight loss. If you have any questions, feel free to email me at info@cahikingadventures.com. I’ll get back to you ASAP!
Also, feel free to check out this other post I wrote regarding hiking and muscle building.
The page you requested could not be found. Try refining your search, or use the navigation above to locate the post.
The recent ramifications of the pandemic have been tough for all the travelers like me. I know it’s difficult for a mountain lover and wandering heart to be stuck at home due to any reason. I’ve figured the best way to cheer up is to watch hiking movies.
Although, there is no proper substitute for spending your time outdoors. If you enjoy hiking, climbing, camping, or any other outdoor activities that involve passing long hours in the wilderness, you know how addicting and restorative it is.
I’ll be sharing the top hiking movies that you can thoroughly enjoy if you love hiking! You’ll undoubtedly love the scenery and riveting plots.
If you want to indulge in the wilderness and live through the main character of a movie, hiking movies can be a great choice.
The captivating stories mostly take place in beautiful locations and the theme is centered around the journey of mountaineers overcoming hardships. It could be a great way of boosting and lifting your spirit.
Here are my favorite 15 hiking movies:
Youtube: Universal Pictures
Friday the 13th is an American slasher film, written by Mark Swift and Damian Shanon. It was directed by Marcus Nispel. Basically, it’s a reboot of the 1980’s Friday the 13th franchise.
It shows that a group of teenagers set their tent near an abandoned summer camp known as Crystal Lake (sound familiar?) where some gruesome murders took place in 1980.
If you’re looking for a camping adventure and crime thriller, then you will undoubtedly fall in love with this movie.
Youtube: Movieclips Classic Trailers
This movie tells the true story of a man named Christopher McCandless. It was nominated for Golden Globes awards two times and won an award once.
Into the Wild was written, directed, and co-produced by Sean Penn. It’s adapted from a non-fiction book written by Jon Krakauer. The book is also renowned by the name Into the Wild.
Christopher McCandless left all the material possessions after graduating from Emory University and hiked into the Alaskan wilderness across North America in the 1990s. He gave all his savings to the charity and decided to live in the wilderness. Along his journey, he encountered several characters that helped to shape his life better.
The film captured the heart of every wanderer, adventurer, and lost soul who’s not sure where they’re heading to but determined to find everything they have been looking for. You can argue that this isn’t a type of hiking but I would say it inspires me as it’s a true story of Christopher McCandless who survived in the wilderness of Alaska.
Youtube: Movieclips Trailers
Wild is another movie based on the true events of Cheryl Strayed who hiked the Pacific Crest Trail and found her path to heal. It’s an American biographical drama and adventure film directed by Jean-Marc Vallee. The role of Cheryl Strayed was played by Resse Witherspoon, a well-known Hollywood actress.
The movie is an inspiration for all the hikers who’re looking forward to getting their foot out on the longest hiking trails in Ontario. It describes the mental anguish, physical struggle, and personal growth of a hiker through the journey. Cheryl’s journey wasn’t a smooth one as she was an inexperienced hiker who was mentally devastated.
After years of destructive and reckless behavior, she made a rash decision to hike a thousand miles of the longest hiking trail, the pacific crest, all alone only with sheer determination. The wild captures the young woman’s pleasures and terrors and leads her to the ultimate healing of her mental and physical health.
Youtube: Movieclips Trailers
Tracks is another favorite hiking movie based on the true story of a woman who embarked on an almost 1700 mile journey only with her pet dog and four camels. This drama film was directed by John Curran. The two main characters were played by Adam Driver and Mia Wasikowska. It’s adapted from the memoir of Robyn Davidson.
The movie garnered huge popularity and was shown as a special presentation at the 2013 Toronto International Film Festival and in the official competition at 70th Venice International Film Festival 2013. It’s a true story of the nine-month journey of a woman across the Australian desert. She trekked across the harsh desert to reach the ocean.
The purpose of this woman Robyn Davidson was to reach the ocean to find herself on a unique journey of self-discovery. If you love popular hiking movies like the wild, into the wild, then be ready to enthrall with Tracks.
It’s definitely t the top of my list.
Youtube: MOVIE PREDICTOR
127 Hours is the true and riveting survival story of a rock climber who was trapped by a fallen boulder in the remote Utah canyon. The biographical survival and drama film was produced, co-written, and directed by Danny Boyle. It starred James Franco, Amber Tamblyn, Kate Mara, etc.
The movie shows the survival story of Aron Ralston who saved himself after the fallen boulder crashed his arm and trapped himself in the isolated canyon in Utah. He was trapped for the next five days during which time he examines his life, recalls his friends, family, lovers, and other hikers who he met before the accident.
He tried to summon the courage to survive by any means necessary. The film shows the unstoppable spirit of Aron. It could be an inspiration for all the hikers like me because you never know what may happen when you’re going out to taste the wilderness.
Youtube: Movieclips Trailers
The Way is undoubtedly one of the top hiking movies. It shows the powerful relationships between people and families around the world. It’s an American-Spanish drama film, produced, directed, and written by Emilio Estevez. The movie starred Martin Sheen, James Nesbitt, Deborah Kara along with other actors.
It tells the story of a father who’s not an experienced hiker but decides to start his historical pilgrimage in order to honor his son. His adult son was killed while hiking the Camino De Santiago in the Pyrenees in the storm.
It’s an inspirational story about the challenges, friends, families while navigating the complicated and ever-changing world. Being an inexperienced trekker, the father couldn’t believe the incredible impact this journey would leave on his entire life.
Youtube: MOVIE PREDICTOR
The Way Back is a true-story-based hiking movie. Still, it’s more like a survivalist trekking movie than a straight hiking movie. Somehow it got negative press after release but it’s one of the best movies that I have seen. This American film was directed by Peter Weir.
Although it was inspired by Slawomir Rawicz’s memoir, three other men attempted to flee communist Russia in 1941. The movie tells their story along with the four others who tried to escape with them.
Slawomir Rawicz and other prisoners of war escaped from the Soviet Gulag to freedom after walking almost 4,000 miles. Along the way, they faced countless dilemmas throughout their journey towards ultimate freedom.
If you’re a hiker or mountaineer, there will be a lot of survival tactics to learn from this movie.
Youtube: Movieclips Trailers
A Walk in the Woods is based on a bestselling book by Bill Bryson and directed by Ken Kwapis. It starred Nick Nolte, Robert Redford, and Emma Thompson. In this comedy adventure, the travel writer Bryson decides to challenge himself and hike in the Appalachian Trail.
It’s over two thousand miles of America’s spectacular, unspoiled and rugged countryside. Bryson decides to reconnect with the country by spending time in the wilderness with his oldest friends. This gives you the real feel of hiking through the woods endlessly for months on end.
The movie shows more about the friendship between the oldest friends after they have stepped out of their daily lives. Both of them had a different definition of “adventure”. It depicts the real struggle and mental dilemmas while traveling for months and how it can lead to healing and recovery.
Youtube: Arrow Films
Edie is a British drama film, written by Elizabeth O’Halloran and directed by Simon Hunter. It starred Sheila Hancock, Paul Brannigan, and Kevin Guthrie. It’s one of the most inspiring movies on the list as it shows how an 83-year-old woman packs her bag and climbs Mount Suilven in Scotland.
Edie always dreamed of climbing mountains but her husband never allowed her to pursue this dream. In her late 80s after her husband passed away, her daughter recommends living in a retirement home, but Edie thought it was never too late to pack her old camping bags and embark on a new adventure.
Even though it’s a fictitious movie, it teaches you about the power of your thoughts. You will learn that age is just a number and it doesn’t limit your capability.
Youtube: Universal Pictures
Everest is one of my all-time favorite hiking adventure films. It’s based on true events that took place on Mount Everest in 1996, leaving the hikers in unbelievably harsh conditions. This adventure film is produced and directed by Baltasar Kormakur, and the story was written by Simon Beaufoy and William Nicholson.
The movie stars Jason Clarke, Josh Brolin, Jake Gyllenhall, and other renowned actors. It focuses on the attempts to survive by two commercial expedition groups who started their final ascent towards Everest’s summit. It shows mother nature in its fiercest form.
There was little warning, but a violent storm struck the mountain, leaving the hikers in the harshest conditions ever imaginable. It was the fiercest blizzards encountered by mankind. The team endured freezing temperatures, blistering winds, and an epic battle to survive in this nearly impossible situation.
Youtube: National Geographic
Free solo is an award-winning documentary movie about a rock climber named Alexander Honnold. He tried to be the first-ever person to climb the El Capitan solo. The El Capitan is the vertical rock formation found in the Yosemite National Park. This American documentary film was directed by Jimmy Chin and Elizabeth Chai Vasarhelyi.
You’ll discover how precisely a filmmaker captures the video and the audio without even distracting Alexander during the dangerous activity.
If you’re looking for a movie that will leave you at the edge of your seat with sweaty palms, you’ll love this one!
Youtube: Movieclips Indie
Wildlike won over 100s of awards for its presentation and storyline. This American feature film was directed and written by Frank Hall Green. It was shot in Alaska in locations like Palmer, Juneau, and Denali National Park. The movie starred Ella Purnell, Brian Geraghty, and many more.
The story represents a daring young girl who was sent to live with her uncle by her struggling mother after her father’s death. Mackenzie was determined to make her way to Seattle to find her mother but she went deeper into the Alaskan interior as she crossed paths with another backpacker.
It turned out to be a lifetime adventure for Mackenzie. The story can make you crave to embark on an Alaskan adventure. There are so many different angles that teach you how to deal with struggles that life throws at you.
Youtube: Netflix
The Ritual is a British horror film, written by Joe Barton, directed by David Bruckner. It stars Rafe Spall, Robert James-Coller, and others. If you’re up for having some goosebumps and fun at the same time, play The Ritual on your screen.
The movie shows a group of friends planning a vacation after reuniting. They decide to experience the taste of wilderness, so they plan a hiking trip to Sweden. But, one of the friends gets badly injured along the way, leaving the others with no choice but to look for a lodge that’s a few hours away.
During the raging rainstorm outside, they experienced the unexpected in the abandoned and spooky house. This is a perfect movie for a horror-loving hiker.
Youtube: IFC Films
Have you ever wondered about the journey of the first summit to Mt. Everest? This docu-drama will show you the hurdles faced by Sir Edmund Hillary and Tenzing Norgay who are known for their historical climb to Mount Everest for the first time in 1953. The best part is that the movie includes original photographs and footage from the expedition.
You can also check out the audio clip of the interview with Hillary that was recorded by the leader of that British expedition, John Hunt. It garnered positive reviews at several film festivals but overall it will show you the real struggle of climbing towards the summit of Mount Everest- the world’s highest point!
Youtube: Movieclips Indie
Meru is one of the best documentary hiking movies that I have watched so far. It shows the struggle of three elite climbers who find their way to climb Mount Meru through several losses and obsession. Mount Meru is considered the most coveted climb in the Indian Himalayas.
The documentary film showed the first ascent of the Shark’s Fin route on the Meru peak. After a failed attempt to summit Meru virtually in 2008, Jimmy Chin, Conrad Anker, and Renan Ozturk returned to the mountain to conquer the peak, a footwall known as “Shark’s Fin”. It was co-directed by Elizabeth Chain Vassarhelyi and Jimmy Chin.
Well, I hope you give some of these movies a try when you’re not hiking. If anything, they can be a source of motivation, thrill, adventure, and entertainment!
The page you requested could not be found. Try refining your search, or use the navigation above to locate the post.
As much as we all want to avoid the thought of a snake bite while out on a hiking adventure, the reality is it can happen to anyone. The best way to respond to such a situation is to be prepared and take action immediately.
In this post, I’m going to share with you, based on the advice from snake expert Dr. Tim Erickson, exactly what to do and what not to do if you get bitten by a snake. Let’s get started!
Not freaking out after getting bitten by a snake is much easier said than done. However, try to remind yourself that the odds of you surviving a snake bite are in your favor.
It’s actually quite possible (up to 30-40% chance according to Dr. Erickson) you experienced a dry bite, and you’re not at all envenomated.
Most deaths from rattlesnakes occur between 6-48 hours. and if anti-venom is provided within 2 hours of the bite you have more than 99% chance of recovering.
Once you gather yourself let other hikers get help while you remain situated. You want to restrict movement as much as possible to decrease your heart rate.
It’s okay to drink water or other oral fluids as you wait.
If you’re hiking alone, don’t stay put. You have roughly 4-6 hours before you’ll begin to notice swelling in the arms or legs. Head back to a location where you can find help as soon as possible.
One of the few things you can do yourself, besides calling 911, is to lower the wound below the level of the heart to decelerate the distribution of the poison in your body.
Dr. Erickson emphasized this point by stating that the human mouth contains more bacteria than the snake’s mouth and could potentially cause more harm to the wound. We see this a lot in the movies, but it’s not helpful. It’s a tactic to dramatize Hollywood scenes.
This is another common myth for treating snake wounds. If you use a knife to cut around the wound, you may sever vitaly important structures such as arteries, tendons, ligaments etc that could have much more serious consequences than the snake bite itself.
Applying ice to the wound, also known as cryotherapy, was at one point believed to be helpful. While it may still provide benefits for treating bee or spider bites, it’s actually discouraged for treating snake bites because it will do more harm than good.
Dr. Erickson debunks the myth which claims it’s necessary to capture the snake that bit you and take it to the emergency room for identification purposes. Please do not try to capture the snake.
The professionals at the nearest hospital will be able to identify the snake based on the habitat you were hiking in the moment you were bitten.
Suction devices were originally thought to be effective by allowing a small amount of the injected venom to be removed from the wound. More recent studies have concluded that such is not the case.
Using a suction device will not necessarily hurt you, but it’s useless to say the least.
Because hospitals and clinics are fairly close to almost any location, Dr. Erickson states you should refrain from using a tourniquet. However, the only exception to this rule is if you’re located somewhere extremely remote.
Only then, will a tourniquet be necessary to risk a limb to save your life. Additionally, if you must apply a tourniquet, do so loosely. You can use a rag, clothing, or the tubing from your camelback.
In most situations a tourniquet will result in more damage to the afflicted area via over constriction of the limb, and reduce healing.
Anti-venom, also known as antivenin, possesses its own set of risks. Anti-venom is taken from animals such as horses and sheep, and when administered to humans, the person may experience an allergic reaction.
Hence, it’s best to give anti-venom to people at a hospital setting. Once again, he reiterated, the best thing you can do if you get bit in the wild is to dial 911 and/or get to the hospital immediately.
However, if you insist on utilizing an anti-venom, Crofab, an anti-venom distribution company, has created a much more purified type of anti-venom that has successfully decreased the possibility of an allergic reaction.
Dr. Erickson recommends looking for evidence of envenomation by checking for swelling (usually occurring in the arms), blistering, or lab abnormalities that reflect a systemic or total body envenomation prior to applying the anti-venom.
Unfortunately, Crofab is quite pricey, costing as high as a few hundred dollars per dose.
When administering Crofab, the objective is to treat the venom not the individual. In other words, a child would receive the same dosage of antivenom as an adult because the snake releases the same amount of venom regardless of the size of the person.
If you see a snake on the trail or near it, make sure to give it plenty of space. They can strike at a distance of half their body length.
The best thing you can do is wait for it to slither away or go around it if it’s possible.
A rattlesnake will NOT always rattle before it strikes. This means you should be extra careful where you place your hands and feet when scrambling up any steep sections on a trail.
If you wish to see Dr. Erickson speak about snake bites, you can do so here.
So you want to plan a hiking trip, but you’re looking for ways to better prepare yourself. You’ve come to the right place.
I’ve been hiking for literally half of my life, and today I’m going to share with you 8 fundamental tips for your trip, then I’ll share 3 more clever and insightful tips I’ve picked up along the way that I guarantee you won’t find anywhere else.
Let’s get straight to it!
I know I know, it’s common sense. But you’d be surprised how many people (myself included) have made this mistake. The best place to check the weather is on an app called All Trails.
Google is great too, but I’ve found All Trails to be more accurate, especially when it comes to forecasting subtle differences such as partly cloudy days.
Check for windy conditions, thunderstorms, snow, and the most overlooked weather villain of all: extreme heat. If you see any of these in the forecast you may want to postpone your trip.
If you see the possibility of a thunderstorm and you insist on going hiking, check out this guide I wrote about hikers getting caught in a thunderstorm by clicking here. It could save your life!
The danger of bad weather doesn’t automatically disappear because of a great forecast. Nasty weather is known to form very quickly in the mountains. Always keep an eye out for chances of rain or snow. The weather gods don’t always get it right.
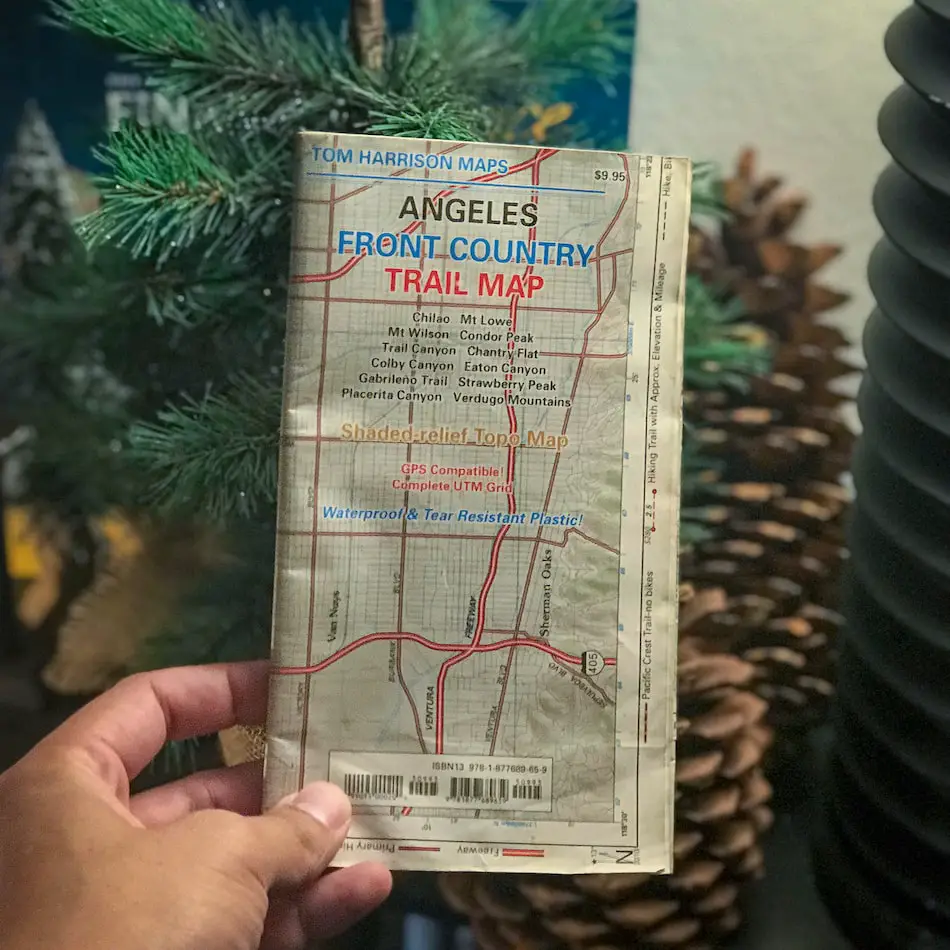
Unless you know the place like the back of your hand, I highly suggest you take a map. While the number varies every year, roughly 2000 hikers get lost on an annual basis, some of which are never found.
You can easily avoid the catastrophe of getting lost if you simply carry a hardcopy map. I love and suggest Topo maps. I’ve been using them since I was a teenager, but any type of map will do.
If you’re planning a short hike, you can use the app All Trails to record yourself while you’re on the trail using their GPS. This will make it very easy to find your destination.
If you’re planning a much longer hike you can still use the app, but take a hardcopy of a map just in case your battery runs out. Better safe than sorry.
The rule of thumb is to carry about half a liter of water in decent weather (decent meaning 75 degrees give or take 10 degrees) for every hour you plan to be on the hike. If you’re going to hike in hot weather always take extra water; at least three fourths of a liter for every hour.
For day hikes, I suggest taking high calorie snacks. These include nuts, peanuts, granola bars, trail mix, dried or fresh fruit, energy bars, beef jerky, hard-boiled eggs, and seeds.
My personal favorite are peanut butter sandwiches because they contain a TON of calories, and I can hike the entire day without them spoiling. They just tend to get a little soggy and squished if you’re not careful. One sandwich plus snacks is enough for a hiking lunch.
For snacks I love caffeinated Clif Bars. They don’t have a whopping amount of calories like some of the other snacks I previously mentioned but the caffeine boost feels reeeeeal nice on the trail. I’ll usually take two bars and 2-3 other snacks.
Even if you don’t plan on hiking in the dark, it’s good practice to carry a flashlight with you on every hike. You don’t know when an emergency might occur and you find yourself outdoors after the sun has set.
I prefer a headlamp instead of a handheld flashlight because it leaves your hands free incase you have to climb over obstacles or, in a worst case scenario, carry a loved one to safety.
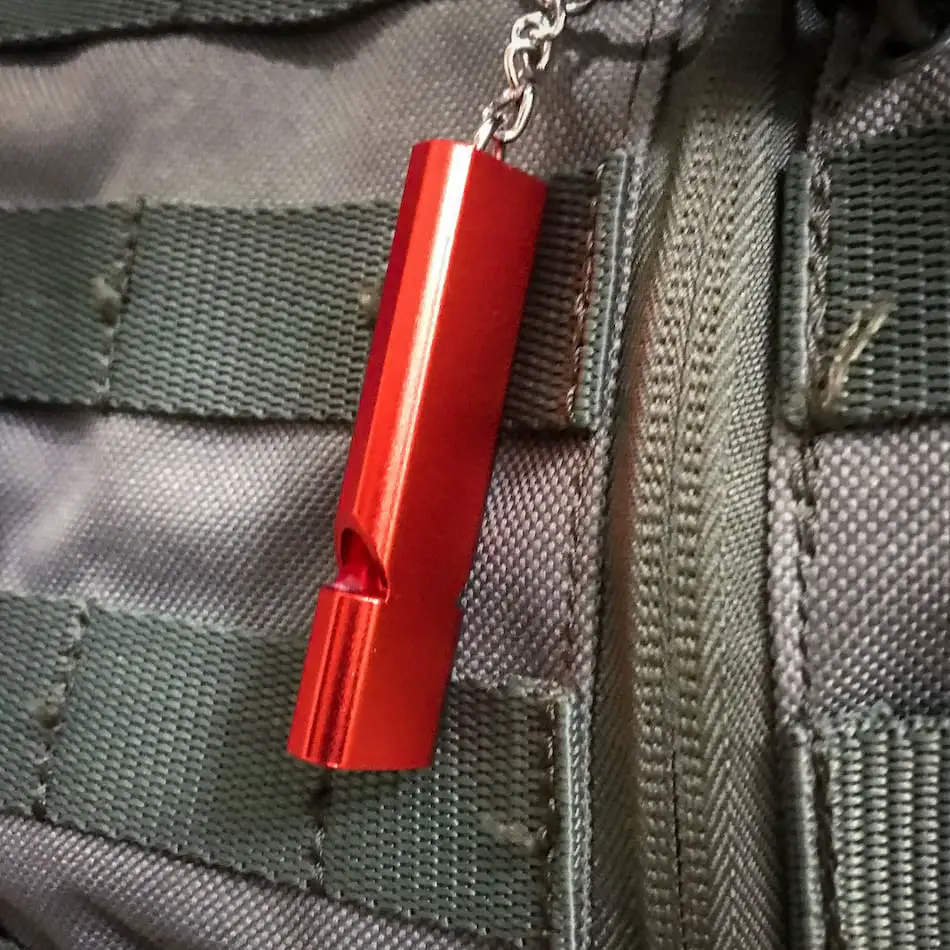
Whistles are extremely cheap and useful in warding off wild animals or calling for help in an emergency. If you’re injured or trapped, blow three consecutive rapid bursts and wait a few seconds for a response.
Three consecutive whistles is code for SOS.
I use the following whistle, which I bought from Amazon. I keep it hooked onto my backpack at all times.
It’s so small and lightweight I don’t even realize it’s there half the time, but I know if an emergency occurs, I’m ready to roll.
This is the most common mistake I see people make. Running shoes are rarely acceptable for hiking because they don’t provide the same amount of traction, support, or protection as hiking boots.
I highly suggest you invest in a good pair of hiking boots that are suitable for the terrain you plan on hiking.
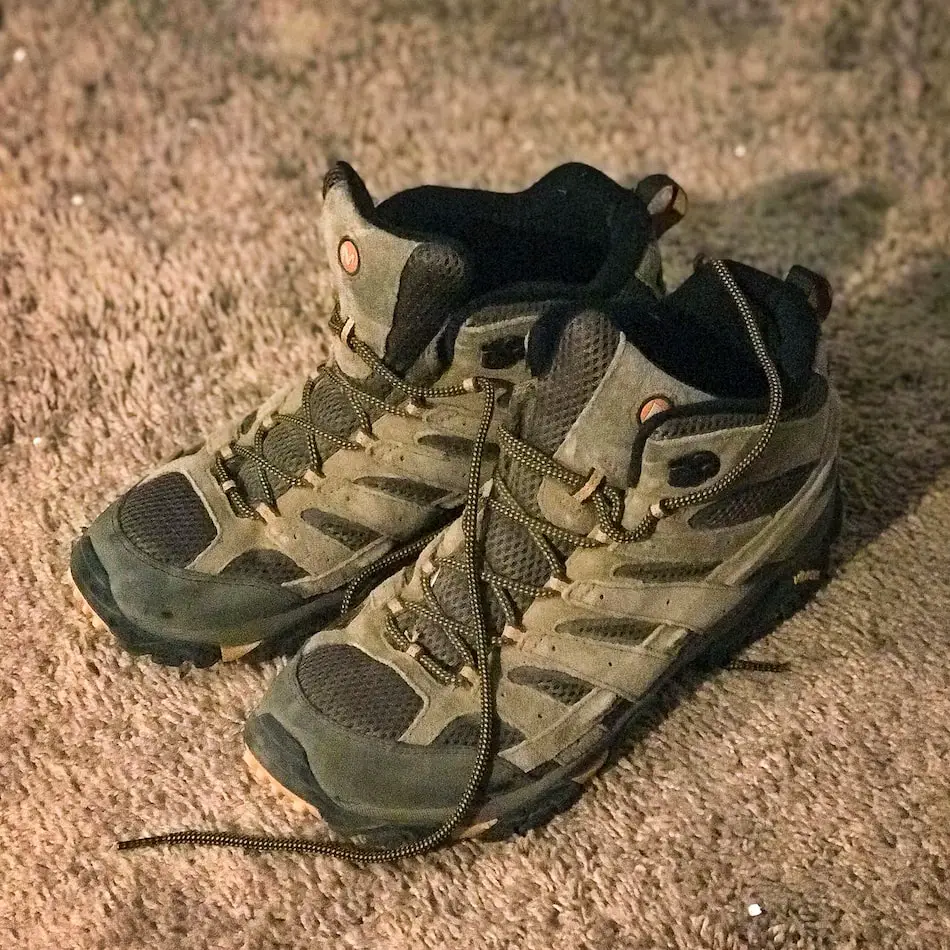
If you frequently hike in the heat, such as myself because I’m in Southern California, focus on shoes with adequate ventilation. I own a pair of Merrell Moab 2 Vent and I’ve never looked back.
If you hike in cold or snowy weather you’ll want to invest in boots with more insulation to keep your feet warm.
If you notice yourself constantly twisting your ankles on rocks, invest in boots with ankle support. Boots with ankle support are high-top shoes, but not as high as military boots and won’t allow you to bend your ankles in a lateral direction.
This factor is so important but highly overlooked. My first pair of boots were Columbia. They were well ventilated, super light, and provided ankle support.
However, the soles were too soft, so I could feel every rock I stepped on. After a couple of hours of stepping on rocks without adequate protection my feet would hurt like hell.
The point is, look for hiking shoes with soles that aren’t too soft. They should be tough on the outside and comfortable on the inside.
My girlfriend also has a pair of Merrell boots, so both of us can honestly and accurately guarantee you won’t have an issue with these boots.
Please do yourself a favor and invest in a good pair of hiking boots or shoes even if you have to spend a little more.
I’ve taken the cheap route by purchasing hiking boots from Big 5, but the quality of those shoes doesn’t even come close to higher-end boots, and your feet will hurt sooner or later.
To avoid unbearable foot pain, never break your boots in on the hike. This was one of my first noob mistakes. Break your shoes in at home a few days before the hike.

As I previously mentioned, the weather can change rather quickly outdoors. If there’s a small chance of rain in the forecast, take a jacket with you.
I use a lightweight Columbia waterproof jacket which I can easily stuff into my backpack without adding a ton of weight. It keeps me warm incase it gets a little chilly (which happens often at the summit), but it’ll also keep me dry if it rains.
If you think you’ll be hiking in the heat, I highly suggest you invest in a pair of convertible hiking pants. These awesome pants allow you to unzip your pants around the knee and convert them into shorts quickly and efficiently.
This tip is crucial if you’re hiking by yourself. By the way, if you plan on hiking alone, you can read up on the best tips I have for solo hikes here. It’s super important you know what you’re doing if you’re planning a solo hike.
This is how I like to go about informing someone when I’m planning a hike.
That’s it! Simple but effective, and it can mean the difference between life or death.
Okay, now I”m going to share with you some awesome tips to ensure you have an amazing time on your hike. I’ve learned these unique tips on my own through personal experience so I know they will help you as well.
Certain hikes are more ideal during different times of the year. For example, it’s usually best to visit waterfalls during mid spring to early summer to enjoy a waterfall with more water. This is how you can check your destination without actually being there if you have instagram.
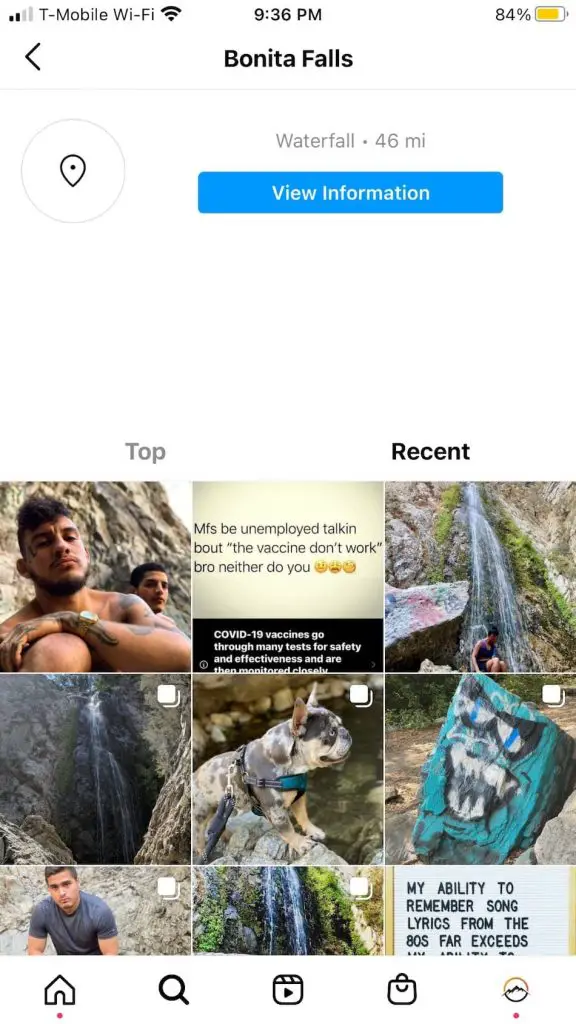
Now you will be able to see all the most recent images people have uploaded. In my case, I’m looking for pictures of a full waterfall.
However, don’t rely on just one image. People occasionally upload images they took weeks or months prior to uploading them.
Look through different images to verify what the location truly looks like. Continuing with my example, if the majority of the images display a full waterfall I can be sure it’s actually full.
If the location doesn’t exist you can repeat the procedure, but instead of tapping on “places” tap on “tags.”
If you want to determine the condition of a trail or other details regarding the hike, you can check the reviews on all trails. I won’t add step by step directions for this section because it’s very easy and straightforward.
Here is a screenshot of Bonita Falls reviews on All Trails.
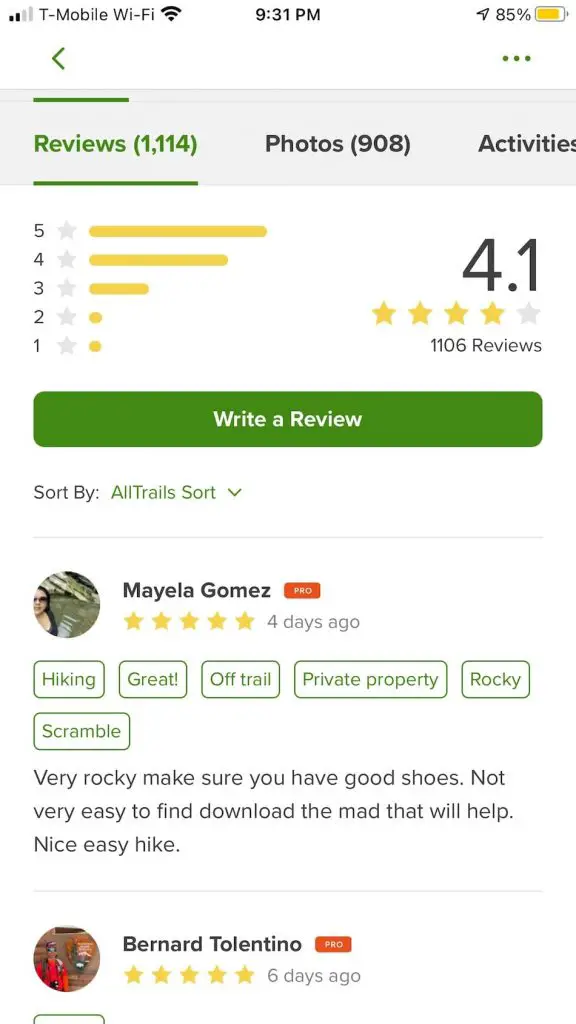
If it’s a popular hike, people will leave reviews almost on a daily basis. Thus, providing up to date information for you.
Sometimes trails are closed due to natural disasters or in recent times, COVID, so it’s good to do a quick search before you head out.
You can also read other stats on All Trails such as total distance, elevation gain, and more. If you’re in Southern California, you can check our site for stats on many of the most popular hikes.
This tip is especially handy if you’re planning on taking really nice photos. Since I always take pictures on hikes, I like to check where the sun will be positioned in the sky and from which angle the light will be hitting my subject.
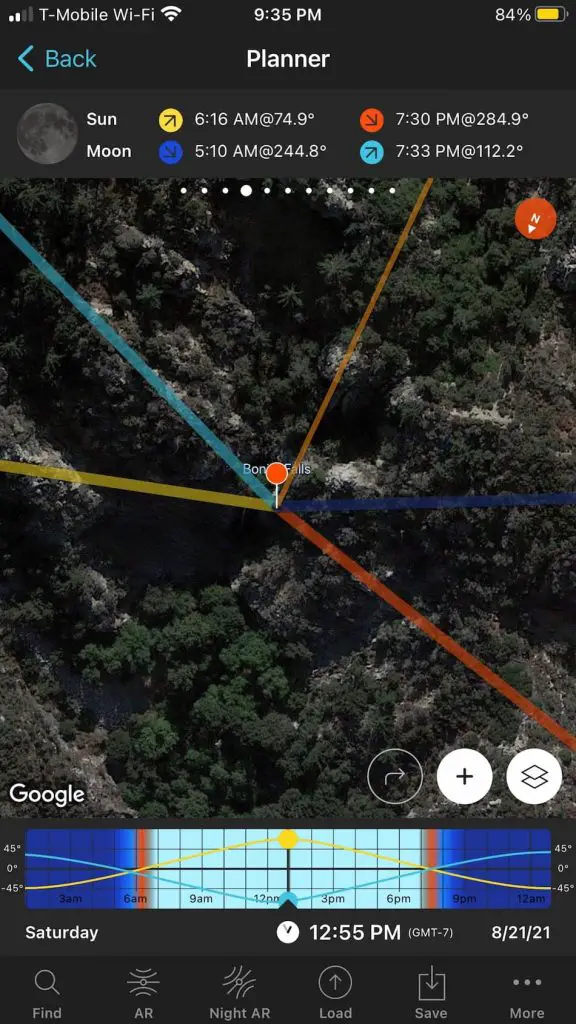
I use an app called Photopills to see exactly where the sun will be positioned at any given time to get the best possible shot. Unfortunately, the app requires a one time purchase of $10, but it’s totally worth it.
Don’t worry, if you don’t want to spend the money I got you covered. You can use Google Earth to find where your destination is located and what direction it’s facing.
With Google Earth, Instagram, and All Trails, you can form a pretty accurate idea of what your subject will look like and when the best time will be to visit.
Pasadena is a beautiful city nestled in the foothills of the Angeles Forest boasting a hiking history that goes as far back as the 1800’s.
I grew up near the City of Roses, as it’s commonly referred to, and actually attended Pasadena City College. Therefore, I’m very familiar with the area.
I’m going to share with you the most beautiful hiking trails in and near Pasadena including a hike to 5 mines, which remain a secret to this day.
Eaton Falls is located in Northern Pasadena and is the most popular waterfall in the entire Los Angeles National Forest. Get there extra early!
A permit to hike the canyon is no longer needed. The hike begins on a dry dirt road which quickly transitions into a much more amusing single track.
The trail closely follows the creek as you make your way through a beautiful gorge filled with white alders and precipitous cliffs on both sides. Because you’re hiking on the canyon floor you can expect plenty of vegetation and some shade.
There is a decent amount of water in the creek year round, so you can expect multiple creek crossings. However, due to the minuscule amount of rainfall we get in Southern California, the falls are more of a trickle than a waterfall throughout the year.
If you want to see a full-flowing waterfall I highly suggest visiting during the months of April, May, and June. Here’s a fun fact that most people are completely unaware of, there’s a second hidden waterfall right above Eaton Falls.
However, getting to the second falls is extremely dangerous and illegal to attempt unless you’re rappelling your way down the canyon.
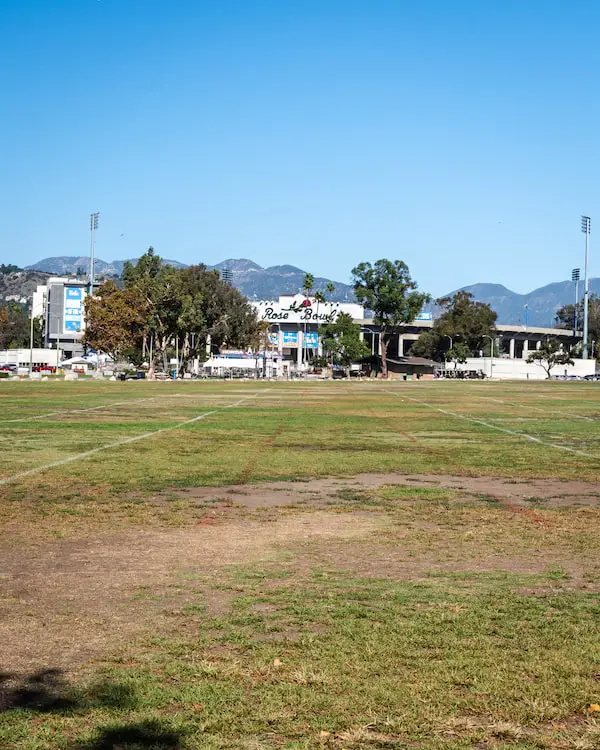
The Rose Bowl Loop is a peaceful hike (in reality more of a walk) around the iconic Pasadena Rose Bowl. This is a great place for kids or beginning hikers to build endurance, but make sure to take plenty of water and a hat because it’s a sunny one!
The Arroyo Seco creek traverses the center of the loop. Fun fact, the Arroyo Seco is the same creek in which Switzer Falls is located, but obviously, much deeper in the mountains.
Various peaks, such as Mt Lowe and Mt Wilson, surround the stadium, forming a picturesque scene along with the Brookside Golf Course located directly behind the stadium.
There are many people walking the loop on any given day, but assuming there are no events at the Rose Bowl, parking is plentiful. The trail is open everyday from 6 am – 7:30 pm.
This is one of the few hikes that is stroller friendly, as the elevation gain is minimal and the entirety of the trail consists of a paved road. Jogging and cycling are also permitted.
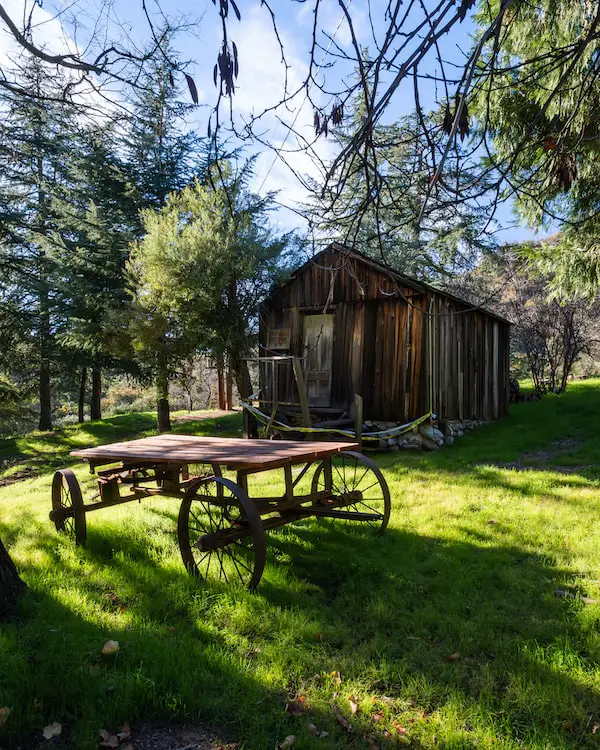
In 1892, Theodore Parker Lukens, an ex mayor of Pasadena and mountain conservationist, created a forest nursery in a hanging basin that is frequently hiked to today.
That nursery is Henninger Flats, a wooded flats located above Eaton Canyon Falls. In fact, both trails share a trailhead. However, getting to the flats requires hiking up Walnut Canyon shortly after the start of the hike, then ascending via the historical road, Mt Wilson Toll Rd.
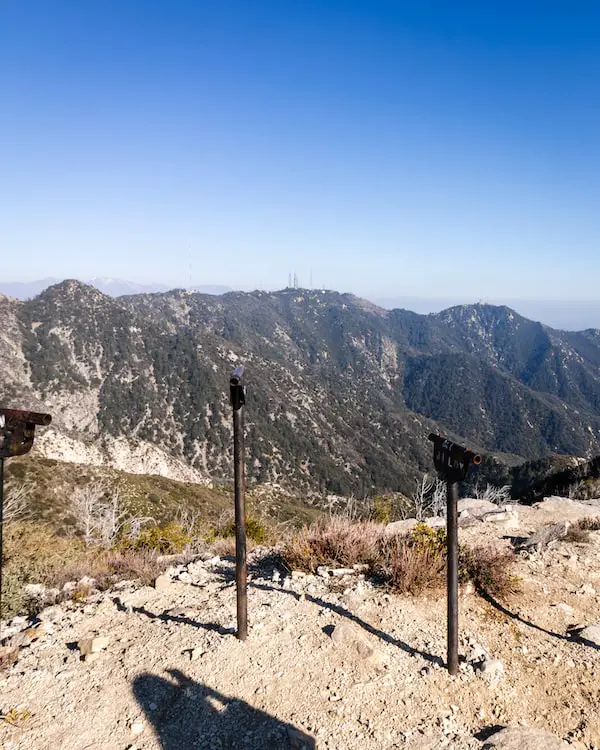
You don’t have to get to the flats to enjoy amazing views. From about halfway up the hike I was able to see JPL, a lot of the valley, and since it was a clear day, the Pacific Ocean.
A museum and multiple historical artifacts including a prior fire tower, a cabin pertaining to La Crescenta’s first settler, and the axels of a tram that was once powered by Herbert the mule and used to transport guests from Inspiration Point to Panorma Point.
Henninger Flats is a great place to relax. Huge pine trees shade virtually the entire grassy area, and picnic tables offer crystal clear views, assuming smog levels are low. A water fountain and restrooms are also located at the flats.
However, the majority of the hike is completely exposed to the sun, so plan accordingly.
In my opinion, the ruins of the resort located at Echo Mountain are the most fascinating part of Pasadena’s history, and a must see for everyone. In 1893 Professor Thaddeus S.C. Lowe built the electric Mt Lowe Railway, a cable funicular railway known as the Great Incline, and White City, essentially a theme park combined with a mountain resort.
From the pavilion in Rubio Canyon, tourists would take the Great Incline to Echo Mt House (AKA Echo Mt Hotel) where they would have the option of transferring to a Mt Lowe Railway trolley and heading up to Ye Alpine Tavern.
Unfortunately, due to a series of fires and floods, all of it was destroyed.
Today we can hike up to the Echo Mountain ruins via the Sam Merrill trail that begins at the Cobb Estate off of Lake Ave. The majority of the trail is sunny and consists of multiple switchbacks.
Make sure to take plenty of water and a hat. Once you reach your destination you can enjoy views of Pasadena and explore the ruins of the chassis, observatory, powerhouse, and the Great Incline.
Did I mention I found a secret waterfall across the canyon? You can see those pictures by clicking on the full post above.
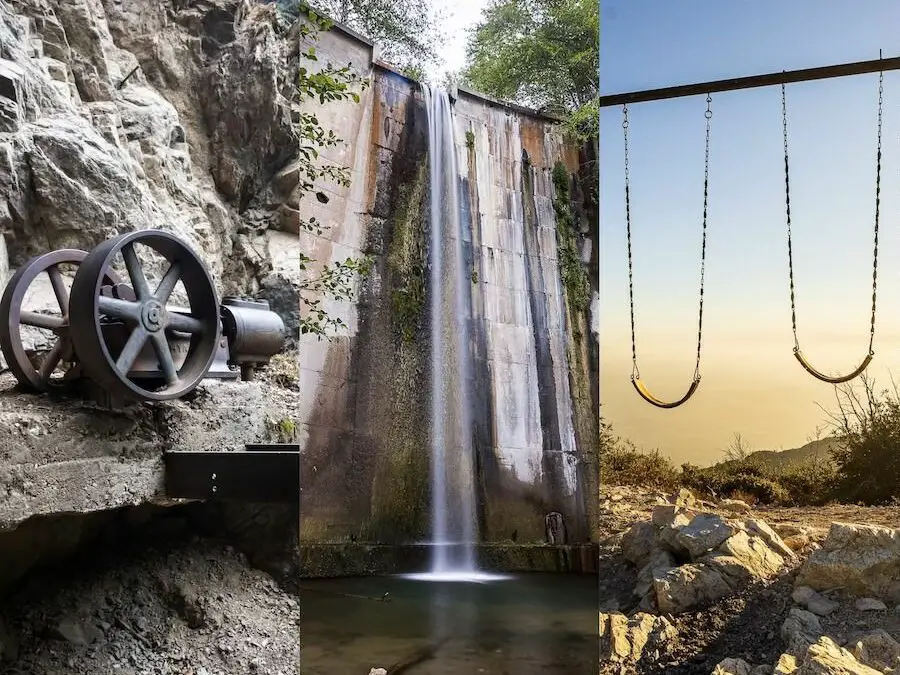
During the Gold Rush of the 1800’s miners excavated roughly 300 mines throughout the San Gabriel Mountains. The mines at Las Flores Canyon were built from 1893-1894 by a man named Wiliam Twadell and his mining company.
Click here to get access to the secret Las Flores Mines!
William staked multiple mines in the area, some of which are known as the Golden Star, Monitor, and Bald Eagle, but shortly thereafter abandoned the operation due to water shortages, a common issue for miners at that time.
Today you can venture to the mines via a quick hike that begins at the Cobb Estate, just like the Echo Ruins. Instead of taking the single track that takes you across the canyon and leads up the mountain, you continue up the cement road and then switch onto a single track that leads you back down to the canyon floor.
It’s a very short and rewarding hike with a decent amount of shade and an abundance of vegetation. The hike has a few very narrow sections with steep ledges and requires climbing down a 10-foot rocky face wall.
Hence, I don’t recommend this trail for individuals who are not in acceptable shape and have good balance. This is definitely not a hike for small children.
Once you get to the last mine you can venture inside and explore for about 100 feet before you reach a dead end. Depending on the season, you may have to trek through shin-deep water to reach the end.
It would be a shame not to share with you a few amazing hikes that are not in Pasadena but just around the corner. These hikes used to be in my “backyard,” so if your goal is to hike in or near Pasadena, I can assure you you won’t be dissatisfied.
Mount Lowe Peak, named after Professor Lowe who built the Rubion Pavilion, is famously known for the swing set located at the peak that allows you to literally “swing above the clouds,” as you enjoy the Pasadena views.
In all other directions, you’ll find yourself surrounded by various peaks such as Mount Wilson, San Gabriel Peak, and Mount Disappointment.
You can reach the peak from the Cobb Estate (a 9+ mile hike) or you can begin from Eaton Saddle to shorten the hike to 3.2 miles. If you choose the Cobb Estate as your trailhead you can make a quick pit stop at the Echo Ruins and Inspiration Point further up the mountain.
If you decide to hike from Eaton Saddle you will be required to drive approximately 21 miles from Pasadena up the 2 hwy. The drive features multiple mountain ranges, so I don’t mind at all.
I prefer the route via Eaton Saddle, not only because it’s shorter, but also because the trailhead is at an elevation of 5110 ft, which means more pine trees, better views, and cooler temperatures.
You also get to walk through the super awesome Mueller Tunnel that used to be part of the Mount Lowe Railway. The trail is mostly exposed. However, if you decide to bag this peak in the winter months you may be surprised to see snow!
Millard Falls is a very short hike located in Altadena, Pasadena’s neighboring city. The trail begins at Millard Campground and makes its way along the creek until you get to the 50-foot falls.
Almost the entirety of the trail is located under the forest canopy and requires multiple creek crossings. White alders and Western Sycamores crowd the narrow canyon and make you feel like you’ve genuinely left the city far behind. It’s the perfect hike for beginners.
Like many waterfall hikes in the San Gabriel’s, the creek contains some amount of water year-round, but the falls reduce to a trickle when summer begins.
Fun fact: Millard Falls used to be known as Church Canyon because the early settlers used the lumber from this canyon to build the Plaza Church in Los Angeles. It was later named after Henry W. Millard who resided in the canyon in 1862.
The Dawn Mine Trail is a moderately difficult-rated trail located in Altadena. The mine was founded in 1895 by a man named Bradford Peck who worked on it for 7 years before closing it down to a lack of success.
The trail begins by leading you down into Millard Canyon above Millard Falls and through the canyon floor until you reach the Dawn Mine.
Bonus Tip: If you can’t find parking at the trailhead, you can begin the hike from the same parking lot intended for Millard Falls, and walk up the same road you came down on or, if you prefer a short faster route, you can hike up a single track that ends at the Dawn Mine trailhead.
Since the trail follows the creek for the majority of the hike be prepared for a few creek crossings. There is lots of vegetation inside the woodsy canyon and therefore a good amount of shade.
Unfortunately, the mine has been closed to the public for a few years now, but you can still peek inside or check out the super cool water pump that was used for the mine.
If you hop back onto the single track after exploring the Dawn Mine, you’ll very shortly run into an exploratory dig on the left side of the trail which you can actually venture inside of and explore. It’s only about 50 feet long but totally worth the time!

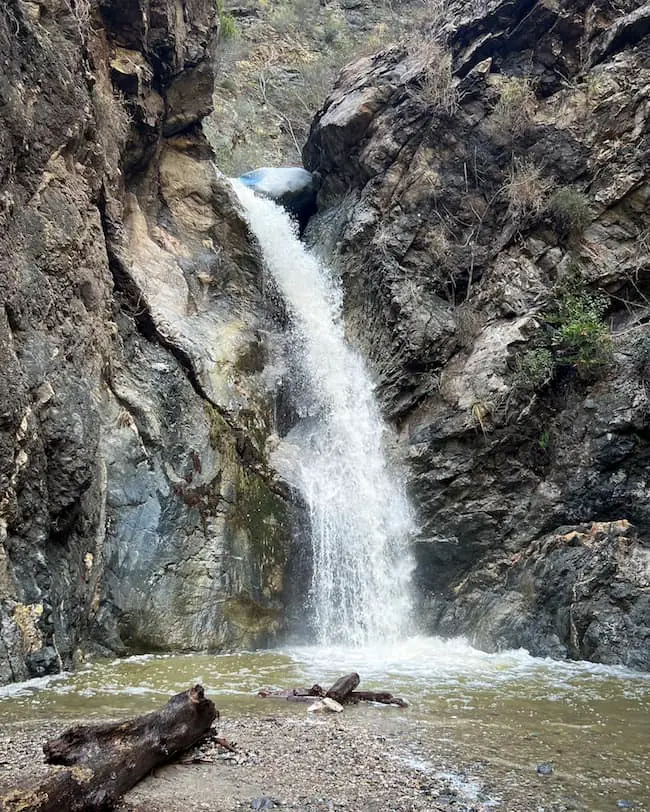
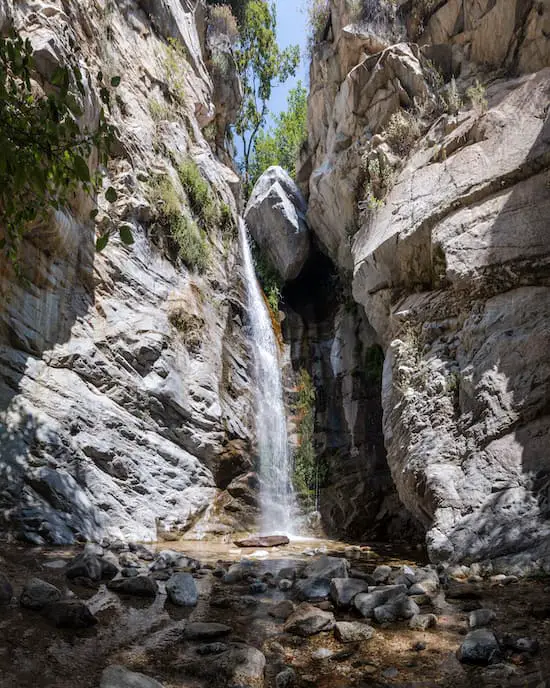
The 80 foot waterfall at Brown Mountain Dam may be man made, but it’s nothing short of exceptional. There are various trails you can hike to get to the falls, ranging from 2 – 8.4 miles.
If you’re trying to avoid an 8-mile hike, I found a 2-mile shortcut that begins off of the 2 hwy. It’s very steep and slippery in a few sections, but nothing too crazy. Either way, I don’t recommend this route for small children.
The first half of the trail quickly descends onto the canyon floor where you’ll be surrounded by tons of greenery and the beautiful Arroyo Seco creek. The ruins at the Paul Little Picnic area give off an eerie vibe.
If you hike in the evening, the sun rays shine through the white alders and illuminate the creek water. It’s paradise.
The waterfall forms a shallow pool at its base, and the moss on the dam provides a feeling of nature taking control of man’s creation.
You’ll be surprised at how fast the setting changes on this short 2 mile hike. I highly recommend it.
Hiking is a great form of exercise. Just like weightlifting I’ve been doing it for years, and can personally attest to its amazing physical benefits.
Hiking can help most people build leg muscle. If you’re an advanced weightlifter or athlete, hiking won’t increase muscle hypertrophy, but you can still improve your endurance and cardiovascular system.
Allow me to explain in further detail whether hiking can help you build leg muscle or possibly have the complete opposite effect.
If hiking is your only form of exercise, you best believe you’re going to see some leg gains. When you haven’t performed any type of consistent exercise in months or years, your leg muscle fibers will easily tear and repair, which means more muscle hypertrophy. (Hypertrophy is just a fancy term for increased muscle size).
Just keep in mind that even if you hike multiple times a week your legs will NOT grow significantly. They’re not going to look like Arnold Schwarzenegger’s legs when he was training for Mr. Olympia. Think about the muscle growth being more like toning your legs rather than having two massive slabs of meat.
Unfortunately, if you’re an athlete or have been weightlifting for roughly 6-12 months or more you will more than likely not see any difference in your muscles. This is due to the fact that your training regimen, either on a field or in the gym, is going to be much more intense than most hikes.
Therefore, you will not tear as much muscle or tear it as easily as a person who has just begun to exercise. If you’ve been weight training for years and have pushed your body to the point where you’ve built a significant amount of muscle, you can actually cannibalize your muscle gains if you’re not careful.
Hiking forces you to burn a lot of calories. If you’re not careful, and you push your body on a long and difficult hike without providing your muscles with an adequate amount of calories, your body will start to use your muscle fibers and the glycogen stored within them to sustain you with enough energy.
It sounds a bit like an exaggeration to lose muscle on one hike alone, but trust me, I can’t tell you how many times I’ve gone on a brutal hike only to find out I couldn’t lift as much weight in the gym the following days.
The process of building muscle while hiking is fundamentally the same as building muscle in weightlifting or any type of exercise for that matter. The step-by-step process goes something like this.
Building muscle is a painfully slow process. Pun very intended. But as we all know, the payoffs are always extremely rewarding. When you hike you tear all the muscles in your legs and possibly some in your upper body as well.
The pain comes from the lactic acid building up in your legs while you’re on the hike. In a nutshell, that’s how muscle mass is increased.
Hiking targets primarily the legs in your muscles. Specifically your quadriceps (the front of your thighs), your hamstrings (the back of your thighs), your glutes, and your soleus and gastrocnemius (your two calf muscles).
Depending on whether you’re ascending or descending the mountain, hiking will target different muscles. Let’s start with ascending.
When you’re heading up the mountain you’re going to feel more of the burn in your hamstrings, glutes, and calves. That’s because you’re targeting all 3 more than your quads. That being said, ladies please don’t expect your glutes to grow a whole lot by hiking.
The only way to add on significant size to your legs and butt is to train with resistance, in other words, weight lifting.
When you’re heading down the mountain you’re going to be significantly engaging your quads to fight against gravity. Be prepared to feel that burn!
Whenever you’re training in any type of exercise you’re actually engaging a wide variety of muscles throughout the entire body. Hiking is no exception. It’s very possible to feel soreness in your abs, back, or your trapezoids the following day even though you didn’t feel like you used those muscles.
The hard ones. Okay but seriously, just like with any workout, the most rewarding is usually the toughest. If you want to tear the most muscle while you’re hiking, I’d focus on the hikes with a high elevation gain to a low mileage ratio.
The steeper the hike the more it forces your body to walk at an angle similar to a lunge, and we all know how fun those are. If you feel like that’s still not difficult enough, take bigger steps. This will lower your body closer to the ground and increase the intensity.
If you’re on a short hike and you don’t need to carry a backpack, you can invest in a weighted vest. It’ll distribute the weight more evenly throughout your upper body, and feel much more comfortable than filling up your backpack with random weight.
After you complete your hike you should focus on tw factors to allow your muscles to fully recover and rebuild.
2. Sleep. If you’re the type of person who’s always sleep-deprived you’re probably going to have a very difficult time building muscle. Your muscles need an adequate amount of sleep in order to fully repair. I recommend at least 7 hours (preferably 8) if you want to maximize your hiking gains.
Even though I’m used to being sore almost every single day because of my training regimen at the gym, I’m quite aware many people hate the feeling. To decrease the soreness in your muscles you can massage them or use ice to reduce the inflammation.
Some people find that CBD helps. I’ve found it to be okay. Kratom is also good for muscle soreness as it reduces pain.
If you really can’t stand the soreness, you can use over-the-counter meds such as Ibuprofen or Advil, but always consult your doctor first. I am not a doctor or licensed practitioner in any way shape or form.
Hiking and weight lifting are both amazing forms of exercise and are superb for burning calories. I like to incorporate both because they offer different types of health benefits. I hit the gym four times a week and hike at least once to maintain a healthy body.
Let’s wrap it up by looking at what each has to offer.
I started weight lifting when I was in high school, which adds up to a total of 12 years at the time of writing. It’s helped me add on a significant amount of muscle and boost my self-esteem, which to me is priceless, and it can do the same for you.
Training with weights also increases bone density and helps maintain a healthy weight. The discipline you learn from being consistent in the gym will spill over to different areas of your life, I promise you that.
Hiking is an amazing workout that will increase your stamina by improving your cardiovascular system in a way that weight training can’t. If you’ve ever felt like your heart was about to burst out of your chest right before you bagged that peak you know exactly what I’m talking about.
Not to mention, there’s something extremely therapeutic about hiking. Stanford researchers concluded in a study that simply being out in nature is one of the best prescriptions for your mental health. I would add spiritual well-being to that study as well.
The page you requested could not be found. Try refining your search, or use the navigation above to locate the post.
There are plenty of adventurous things to do outside but most of you would think of hiking first when it comes to outdoor activities. A mellow nature walk in the mountains unquestionably offers plenty of benefits and strongly impacts the body, brain, and soul, yet it doesn’t have to be the only outdoor activity you can think of.
Besides, hiking takes a lot of effort, patience, fitness, and skill. Being a hiker, I know the amount of effort it goes to walk upon the trails on some days. The length to gradient and other factors sometimes make hiking even more difficult for beginners and for those who’re getting back into hiking post to an injury.
If you’re injured or tired of walking in the mountains endlessly, keep on reading this post! I’ll be sharing the top 10 outdoor activities you can do instead of hiking.
There are tons of outdoor activities to refuel yourself, relax a bit and get the essential dose of vitamin d without even lacing up the hiking boots.
Here are ten outdoor activities you can do besides hiking:
I think camping is a great way to spend quality time with your friends, family, and yourself. If you want to get outdoors and get back in touch with mother nature without breaking your bank, there’s no better way than camping. You can simply forget about charging your smartphone, gaming console, and tablets, and recharge yourself instead.
Unlike hiking, there’s no need to walk endlessly on the trails. You can simply sleep outside in your tent or under the stars. There’s barely any physical effort involved in camping. Campers only require to leave or minimize technology and live in nature. It is believed that camping helps to build trust and teamwork among each other.
Climbing and hiking are erroneously interchanged by participants, but there are distinct differences between the two. I think if you don’t want to walk on the trails and still want to be involved in some sort of physical activity, rock climbing would be an ideal option to spend outdoors.
It is a type of sport or hobby where you’ll climb a mountain instead of walking on the trails. Although rock climbing involves more physical effort than hiking, the enjoyment and happiness multiply when you hit the summit. If you have specific equipment required, then don’t forget to experience the thrill of this challenging outdoor activity.
River rafting isn’t only fun but this activity offers plenty of health benefits as well. The extreme current, strong and turbulent water makes this outdoor activity one of the most thrilling ones. The primary goal of river rafting is to navigate the raft through this turbulent water without capsizing it.
While hiking may help you get close to nature, it barely offers an adrenaline rush. However, river rafting will offer an additional boost to your adrenaline while releasing your stress level rapidly.
Paddleboarding offers tons of health benefits besides being one of the popular outdoor activities for non-hikers. I think the popularity is behind its ability to burn a lot of calories and lose weight. Stand-up paddleboarding is a great way to socialize with other people and make new friends.
While hiking is unquestionably an effective way to enjoy nature and walk in the mountains, it doesn’t provide you the opportunity to enjoy the thrill of boarding on the water. Alternatively, with paddleboarding, you’ll be enjoying the water spot in an open ocean with beautiful scenery around.
Some people enjoy driving on muddy, bumpy, and rocky roads instead of walking on them. The rougher the road, the better the enjoyment. For this group of people, I think off-roading would be the best outdoor activity to uncover the beauty of nature without going against your will.
You can simply drive on typically smooth pavement, dunes, riverbeds, beaches, mountainsides, boulders, gravel, fields, or anything you desire. Nonetheless, it’s important to take proper off-roading equipment to avoid any unfortunate scenarios.
Bird watching is a type of activity that helps you connect with nature. Birds have their voices, colors, antics, and plumage patterns with which they invite people to learn about the ecosystems. Therefore, by watching the birds closely, you can learn ways to stay connected with nature.
Unlike hiking, it doesn’t involve any physical activity like endless walking on the trails. You can simply sit and watch the birds chirping.
Fishing is another outdoor activity that’s as fun as hiking but it doesn’t involve as much physical effort as hiking. Still, it’s an obvious way to boost aerobic exercise. I think fishing can be enjoyed both as a sport or as food. It lets you unplug and enjoy your leisure time with your friends.
If you want to improve your joint mobility, posture, and coordination, there’s nothing like bike riding. I think it could be the best alternative to hiking if you want to uncover the beauty of the mountains with your friends without walking.
Unlike hiking, it lets you discover the hidden trails and spots where people have never been before. Besides, you get cardiovascular benefits as well while riding a bike.
Swimming is one of the best overall body workouts. Since hiking involves only walking down the trails, it’s considered a less superior form of exercise than swimming. Personally, I think swimming helps you rejuvenate while burning calories faster than any other exercise like hiking. However, it depends on which speed you’re swimming at.
Playing golf is one of the best outdoor activities for a lot of people. Golfing is the ideal option if you don’t want to sweat but instead enjoy a few health benefits. Most of the golf clubs are surrounded by picturesque scenarios which make golfing more fun and soothing.
These are the top activities I figured for people who’re looking for an alternative to hiking. While the benefits of hiking can’t be neglected, still you can make your outdoor time more fun by choosing these thrilling activities.
The page you requested could not be found. Try refining your search, or use the navigation above to locate the post.