Mill Creek Falls: Big Tujunga’s Secret Gem

Mill Creek Falls: Big Tujunga’s Secret Gem

Distance 

1 Mile

Time

 1 Hr

Difficulty 

Easy – Moderate

Season

Fall, Winter, Spring

Elevation Gain

~200 Ft

Mill Creek Falls truly is one of the hidden gems of the San Gabriels. The hike is rugged, filled with poison oak, and has an element of danger to it….which is why I love it. 

If this sounds like fun, you’ll enjoy Mill Creek Falls.

I just have one favor to ask. Please do not tag these places on social media, as that is usually the precursor to tons of trash and graffiti. Thank you and enjoy! 🙂

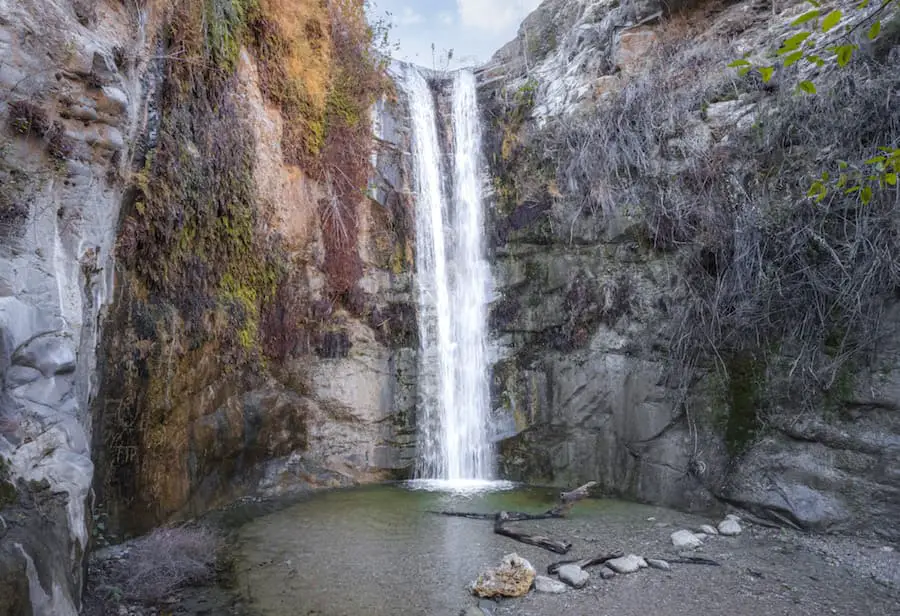
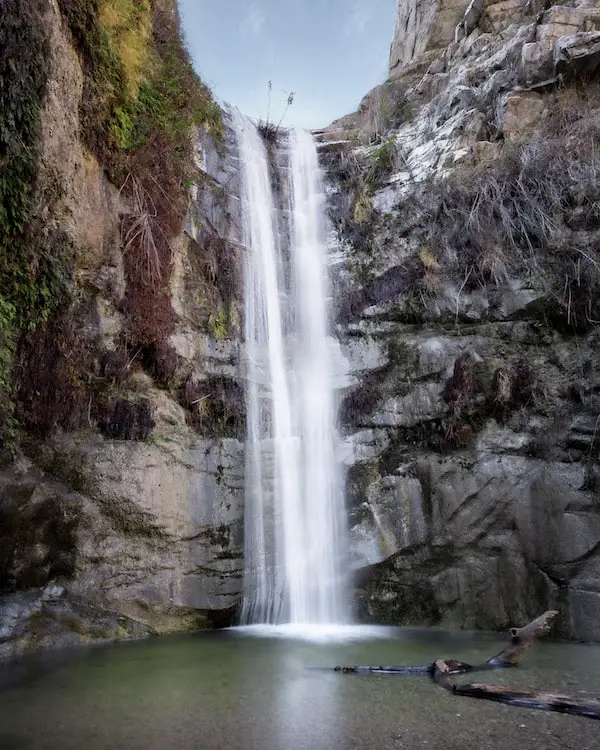
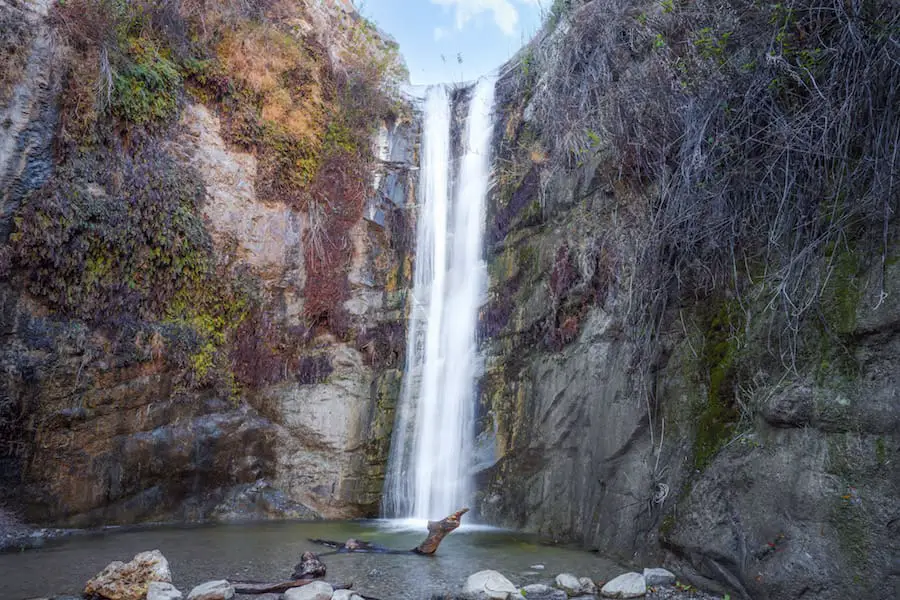
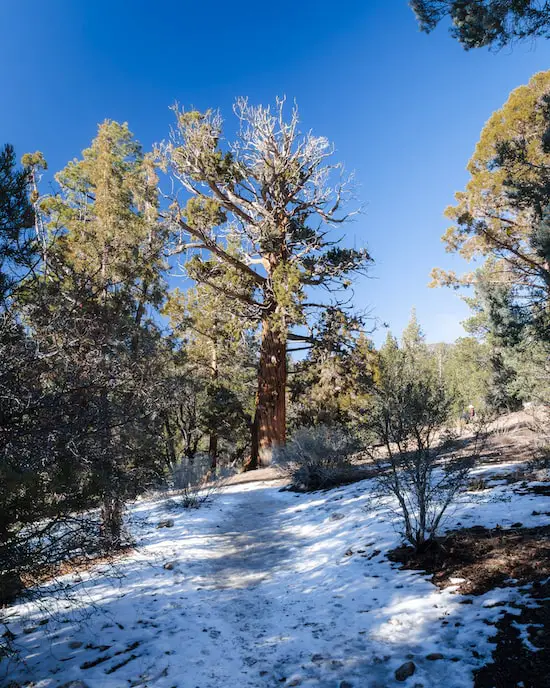
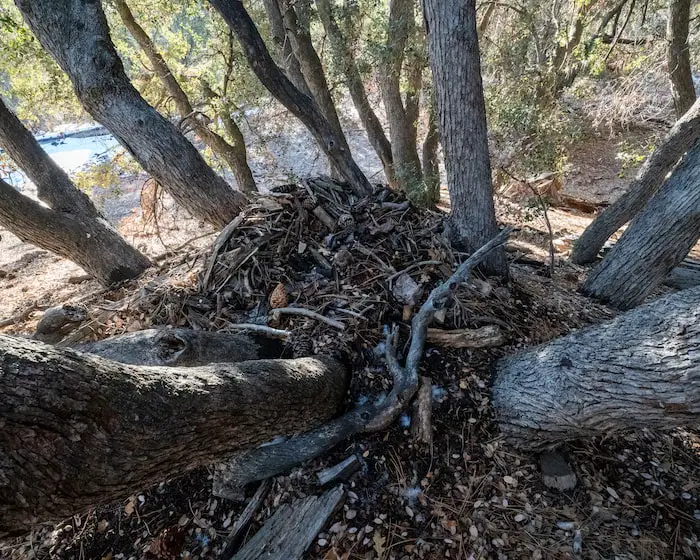
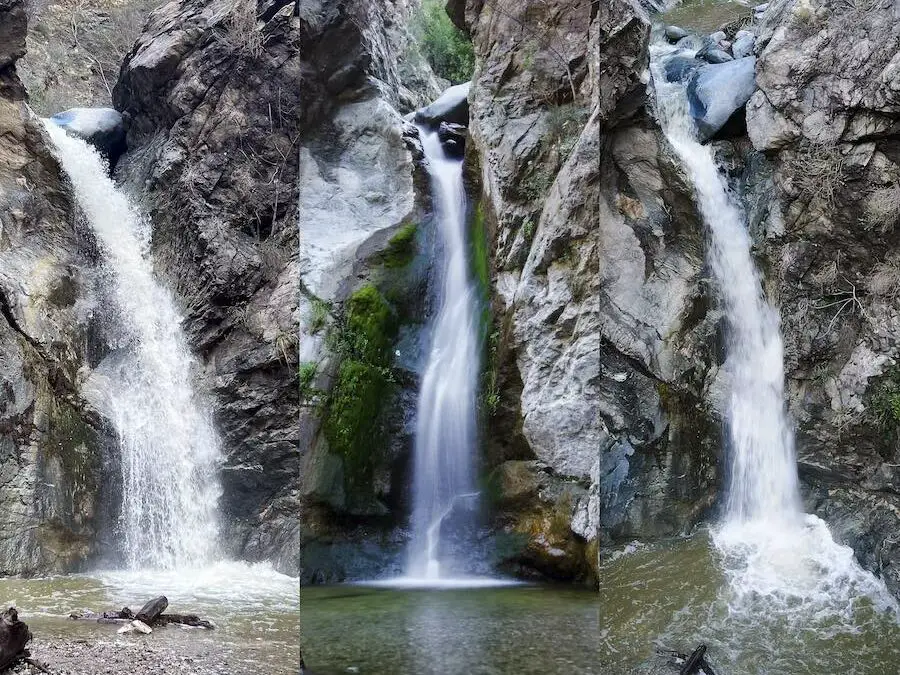
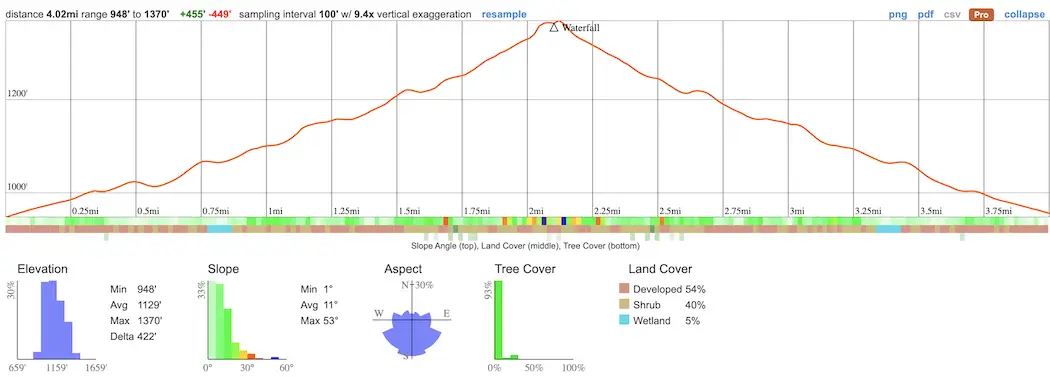
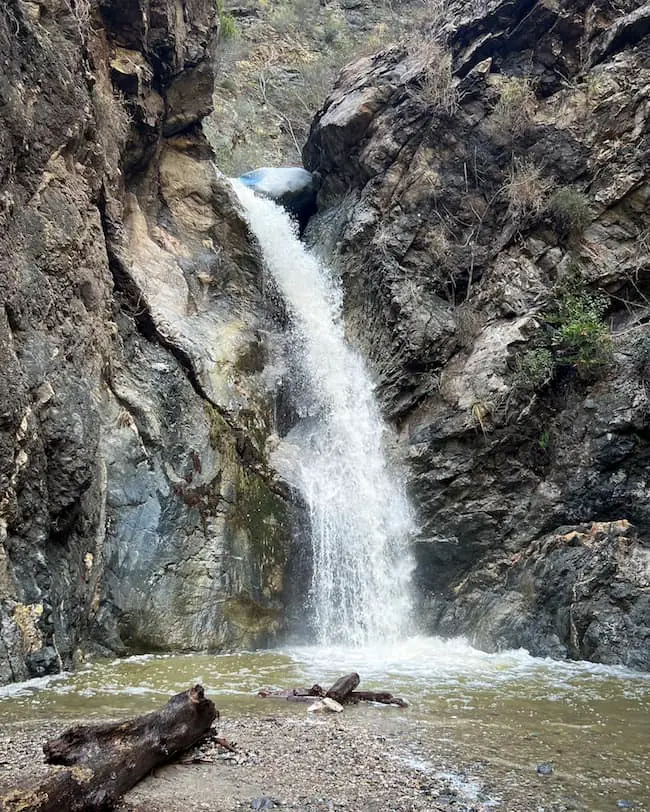
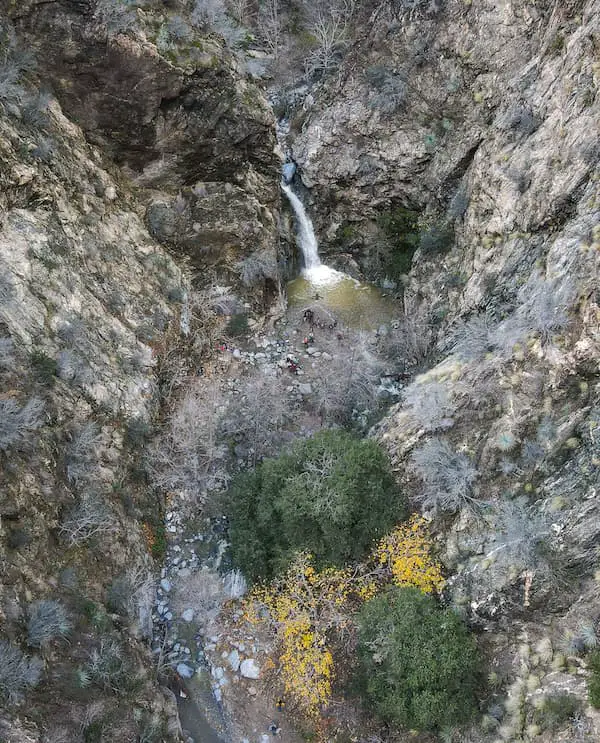
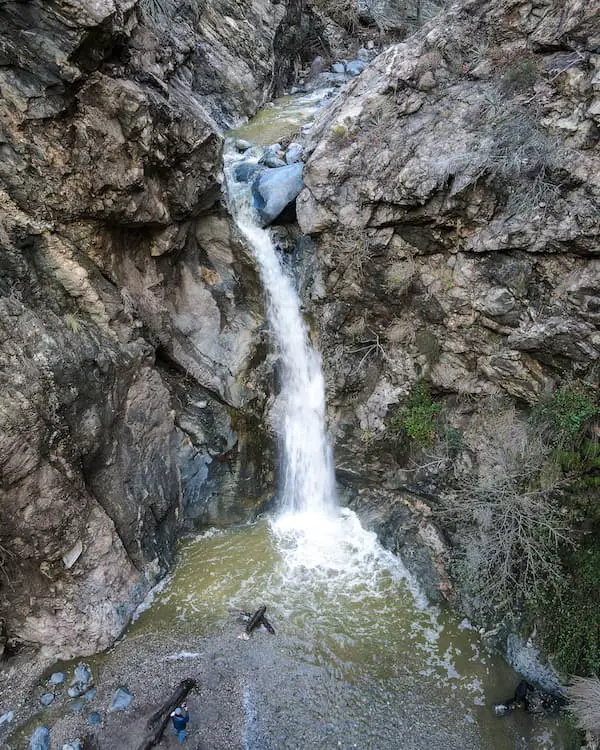
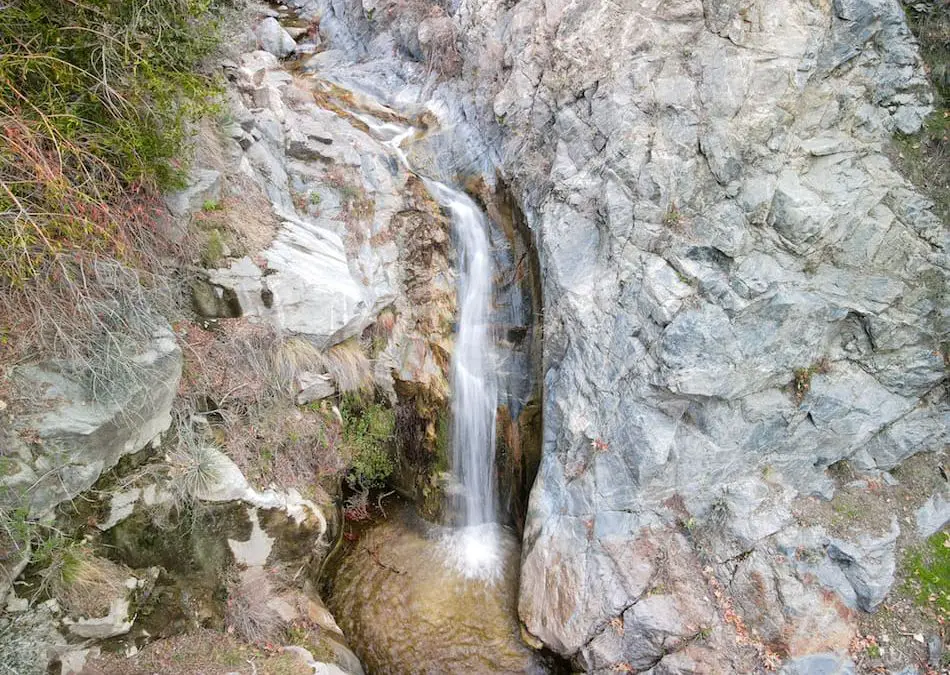
Mill Creek Falls is a roughly 1-mile roundtrip hike in Big Tujunga that requires trekking through an overgrown trail and rock scrambling multiple sections. Although the canyon is littered with graffiti, the 40-foot cascade is virtually unknown to the general public. The hike also contains a beautiful narrow section with a 10 ft waterfall.

Map of Mill Creek Falls

powered by Advanced iFrame

 Download Printable PDF Map

Directions

To get directions to the trailhead, click the link here.


You might also like these other hikes in LA…

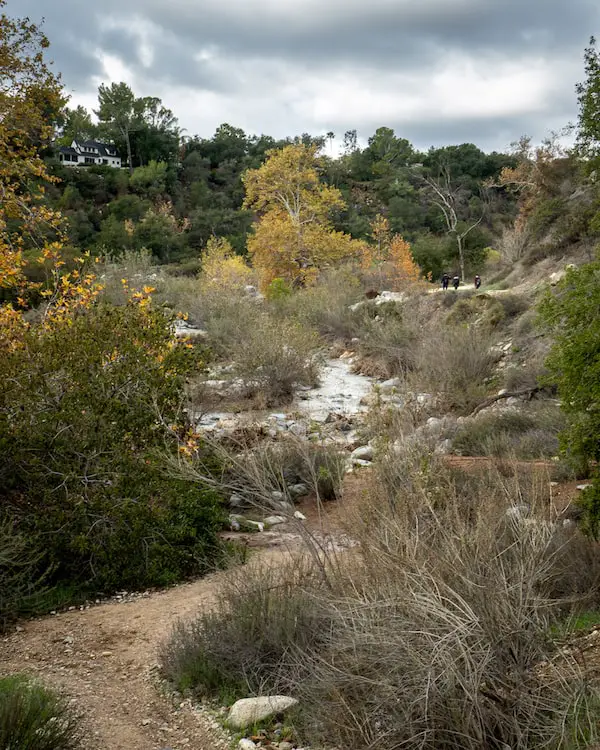
Mill Creek Falls Trail

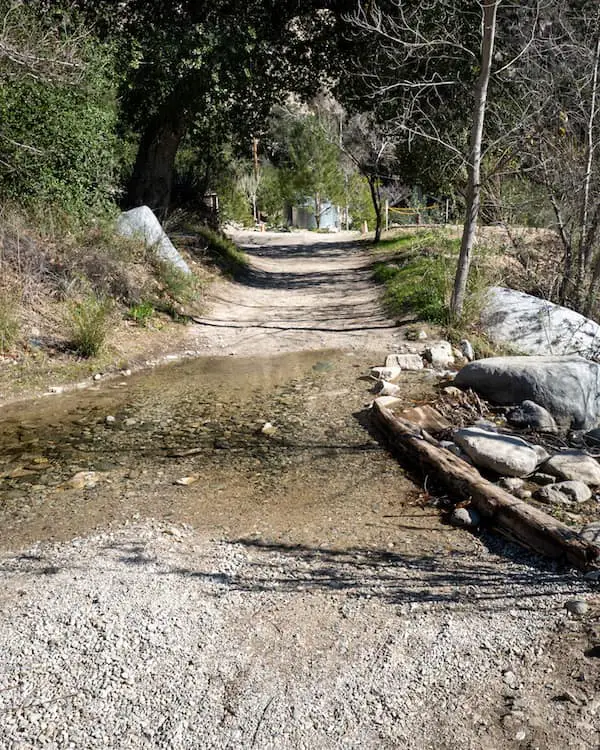
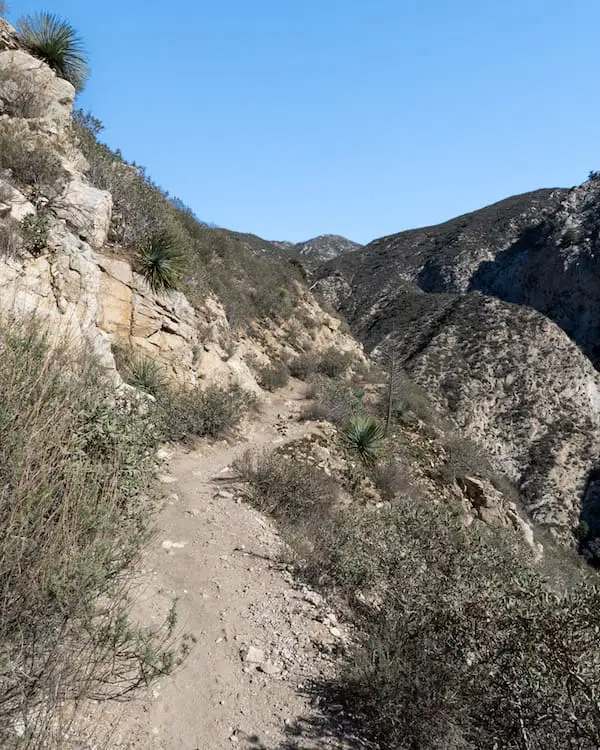
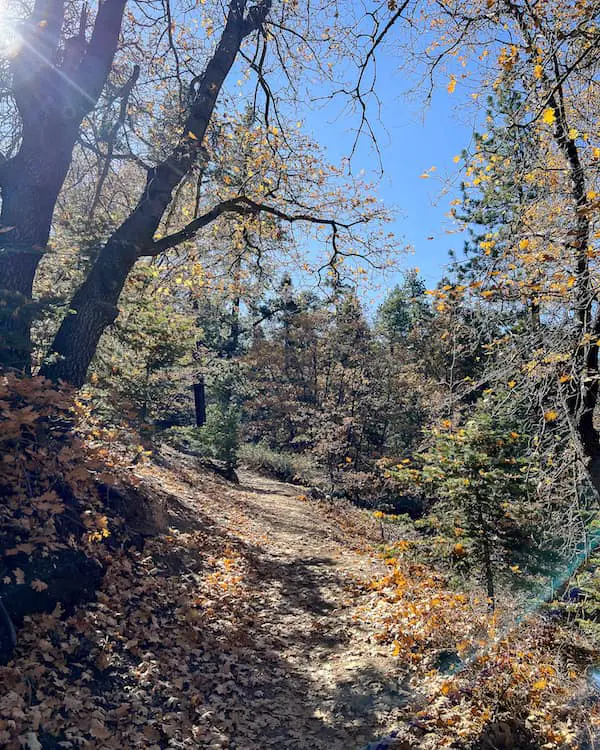
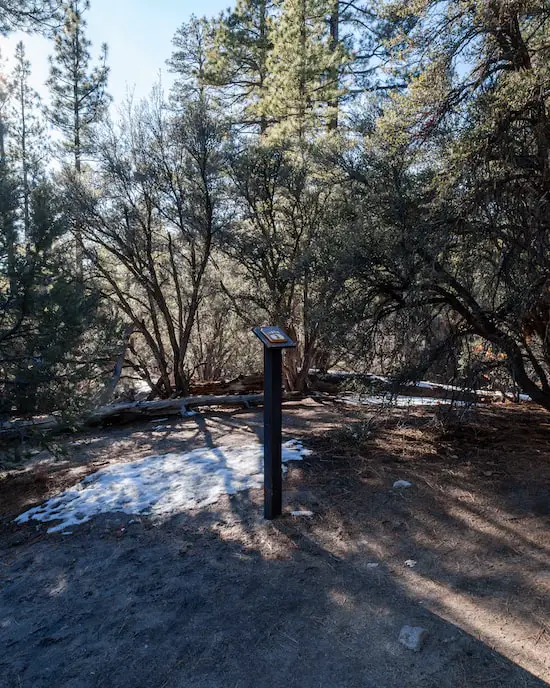
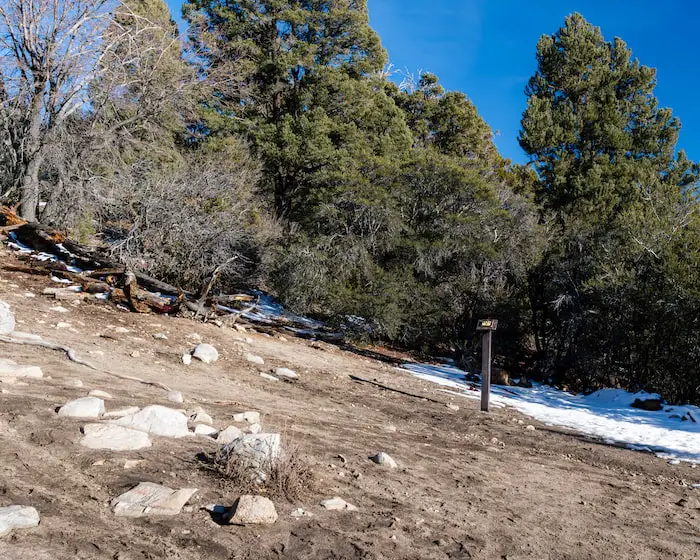
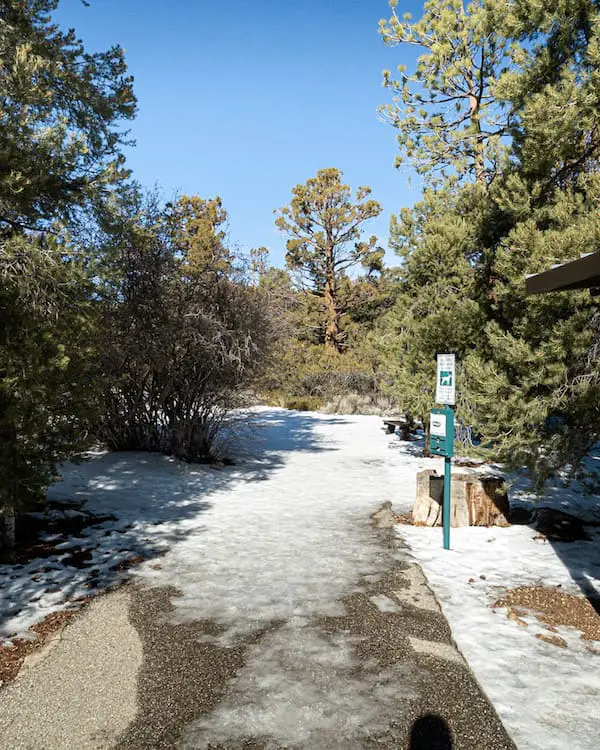
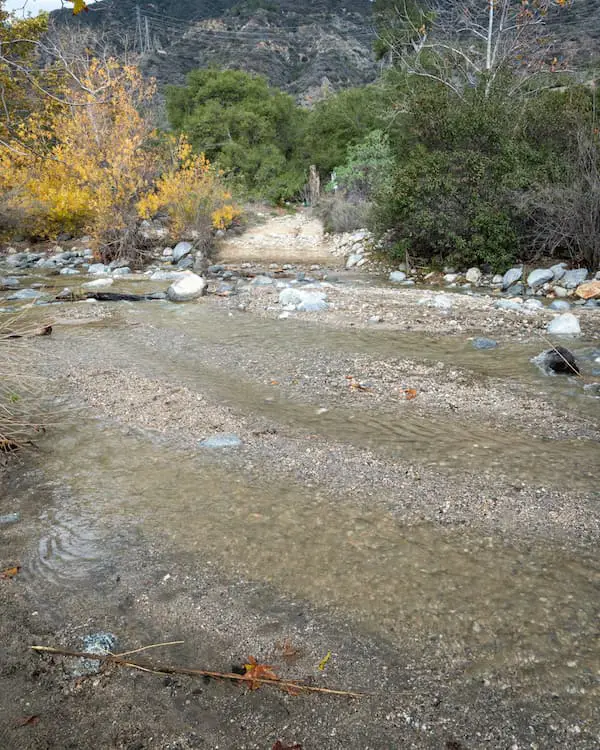
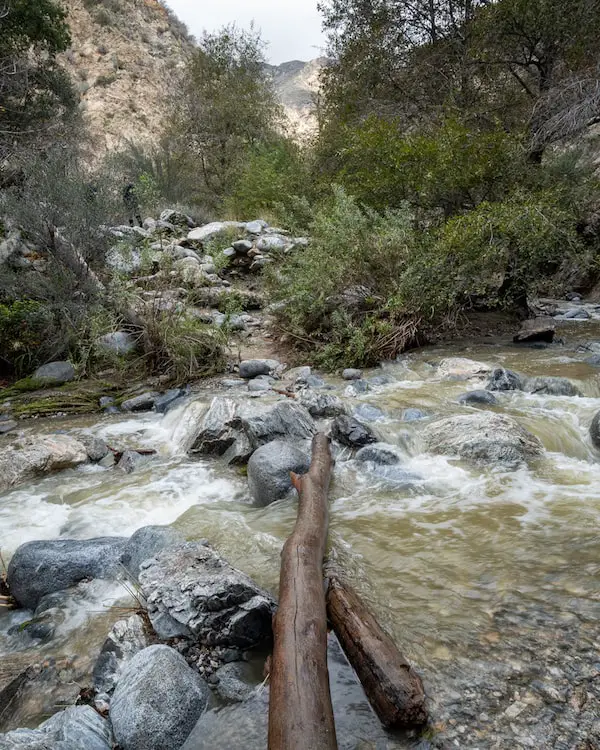
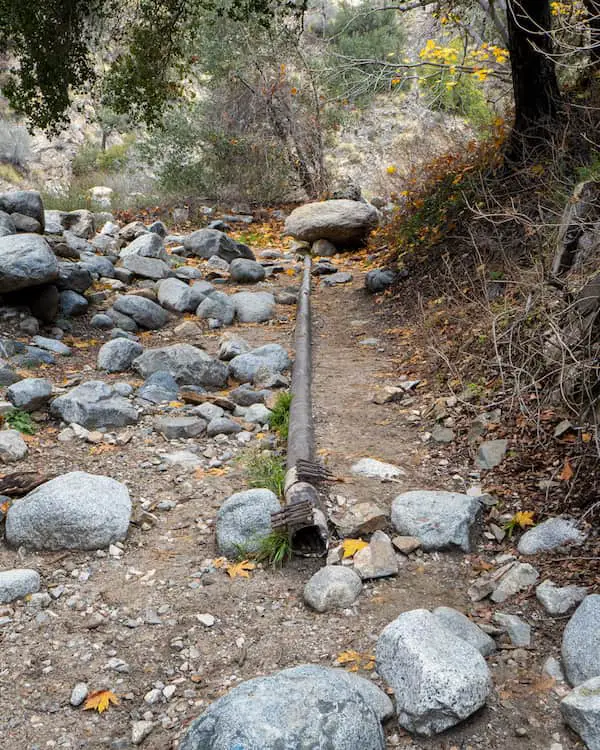
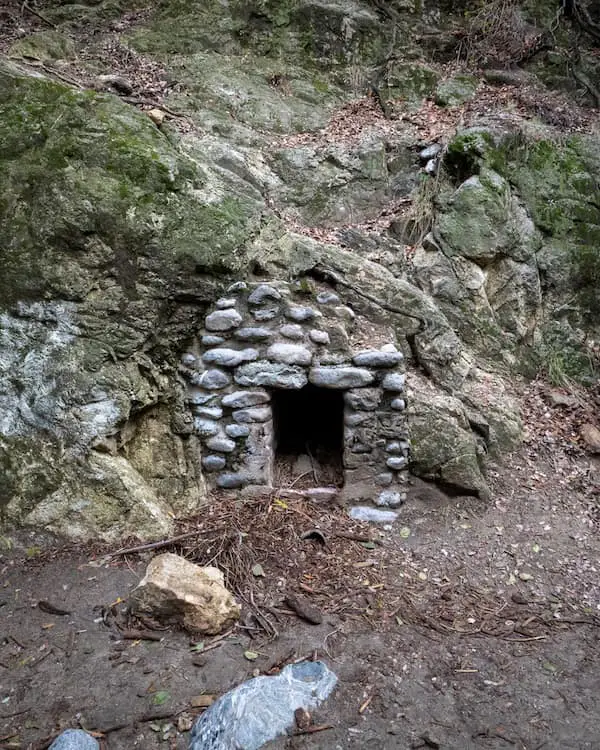
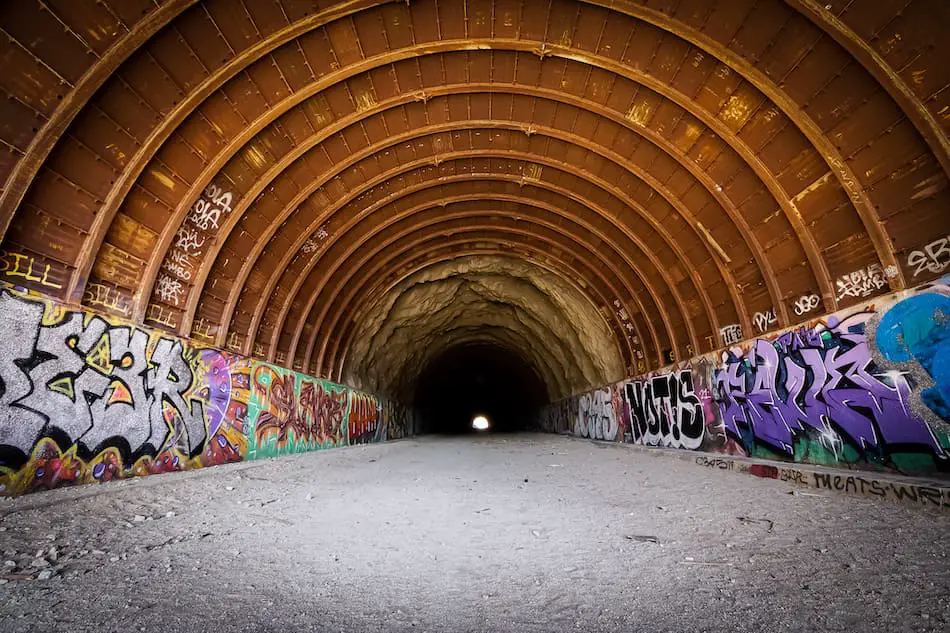
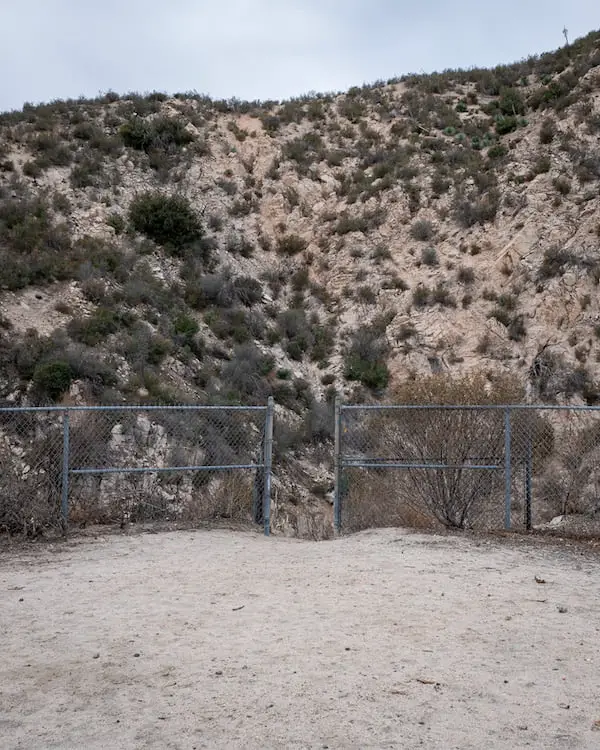
The trailhead is located right next to the Hidden Springs Tunnel in a small parking lot. After walking through the gate, you’ll quickly descend onto the canyon floor where the action begins. 

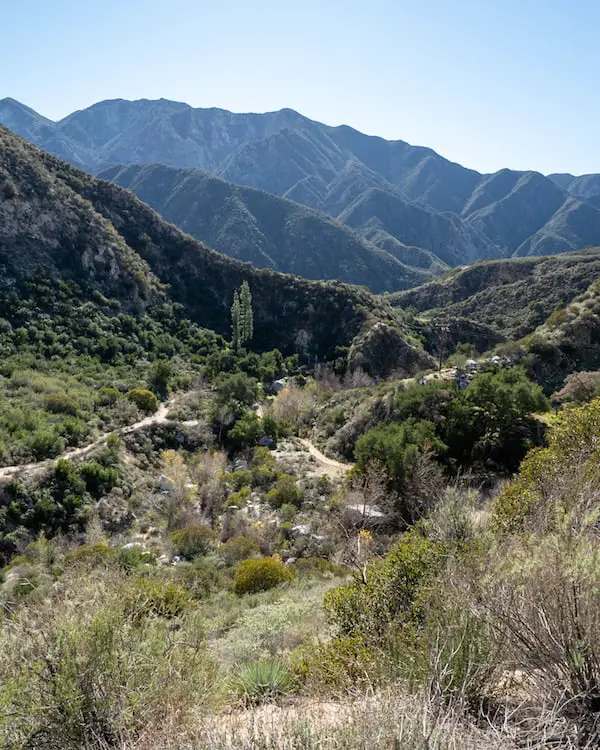
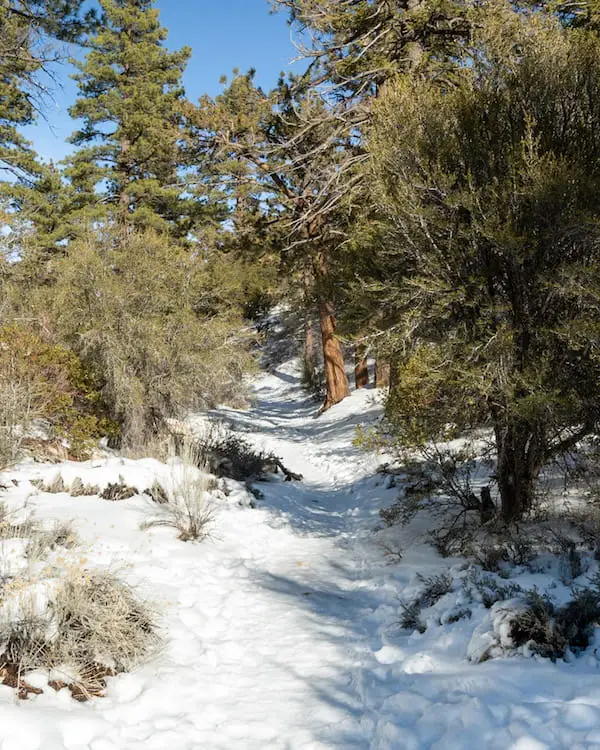
I was expecting to find zero trace of a trail in the canyon, but surprisingly, it’s pretty obvious people trek through here every now and then. 

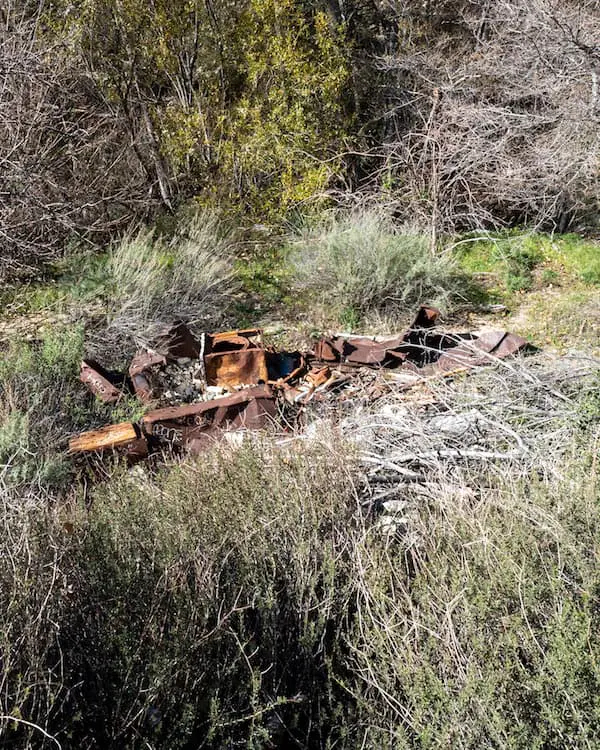
Unfortunately, I get the feeling it’s mostly individuals who are up to no good. Just look at how much more beautiful this gorge would look without the tagging. 

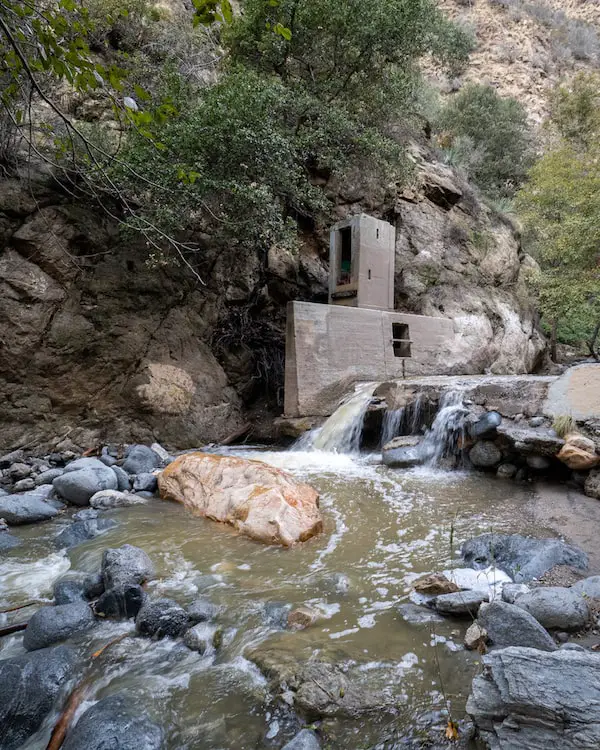
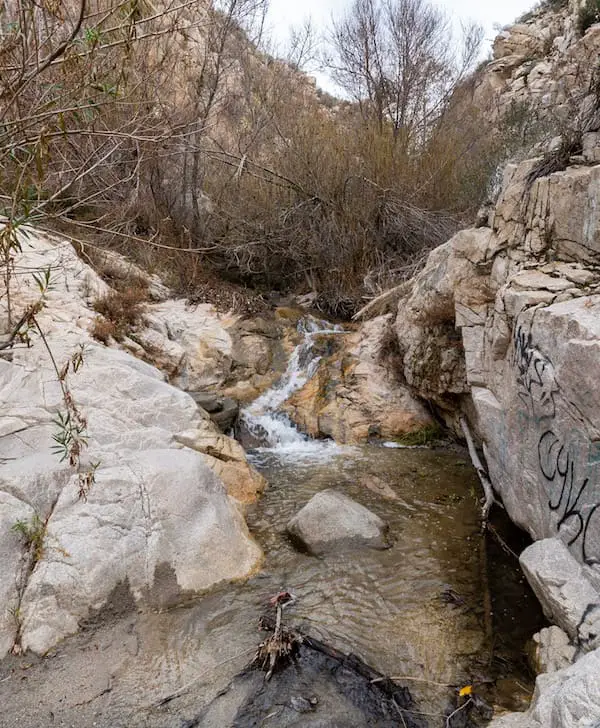
Throughout the hike, you’ll notice neat little features, such as this 4 foot waterfall.

It’s known that Mill Creek retains a high water flow later into the summer than most falls (confirmed until Aug). 

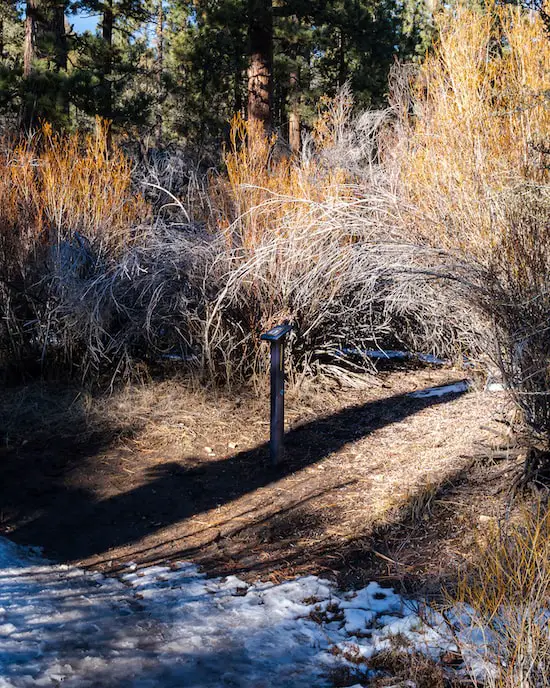
Please keep in mind there is Poison Oak literally EVERYWHERE. Watch your face and hands as you duck below plants and shrubs. Remember the saying, “leaves of 3, let it be.” 

The green shrubs on the right in the picture below is poison oak. This menacing plant can also be partly or fully red. 

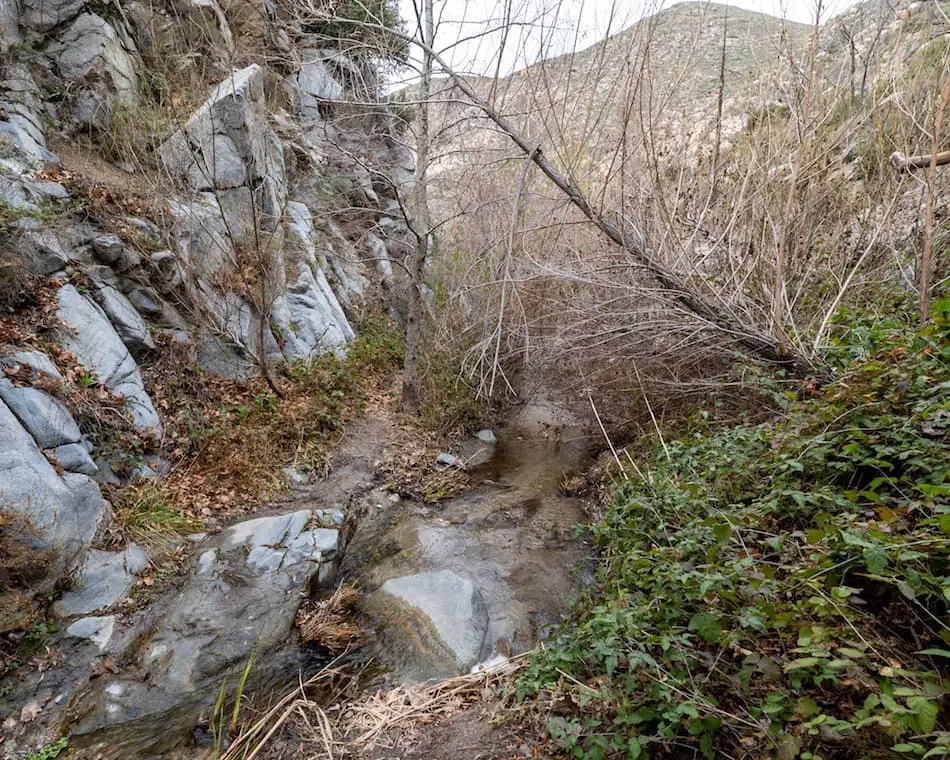
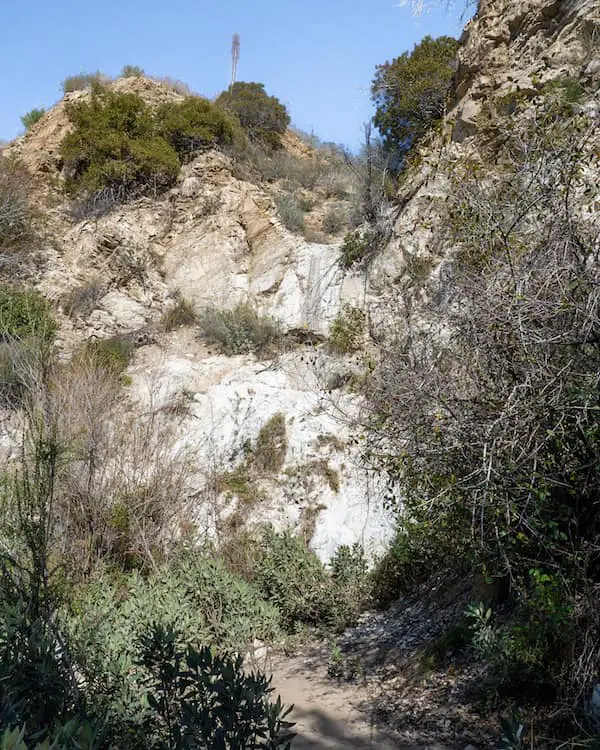
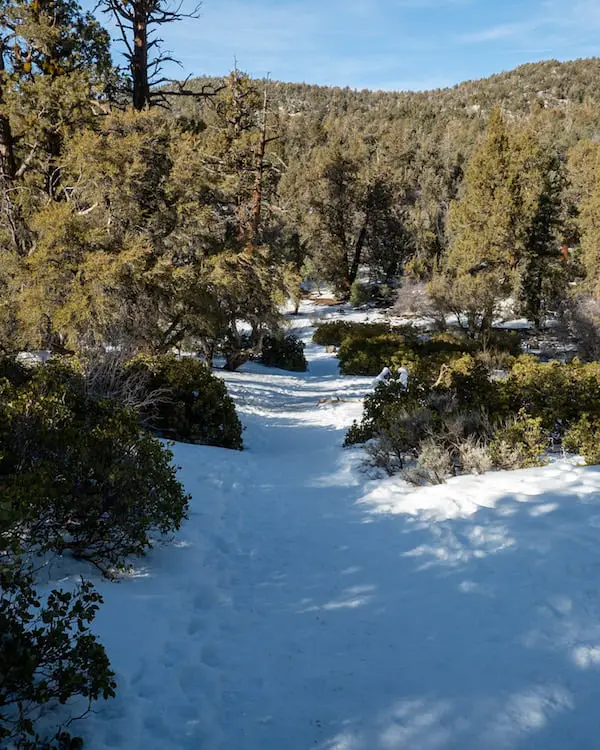
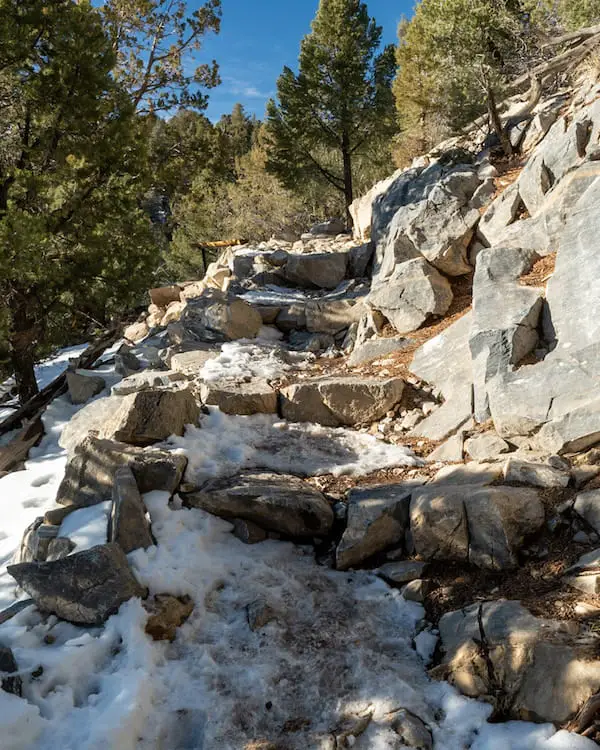
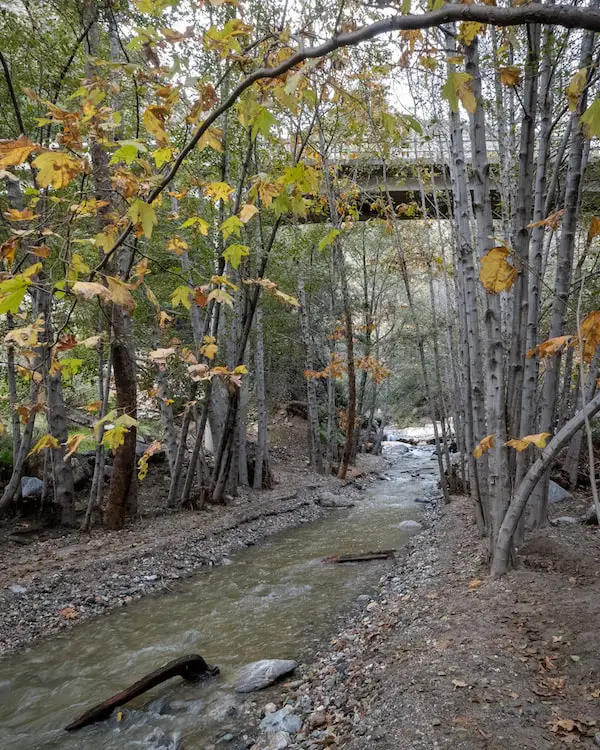
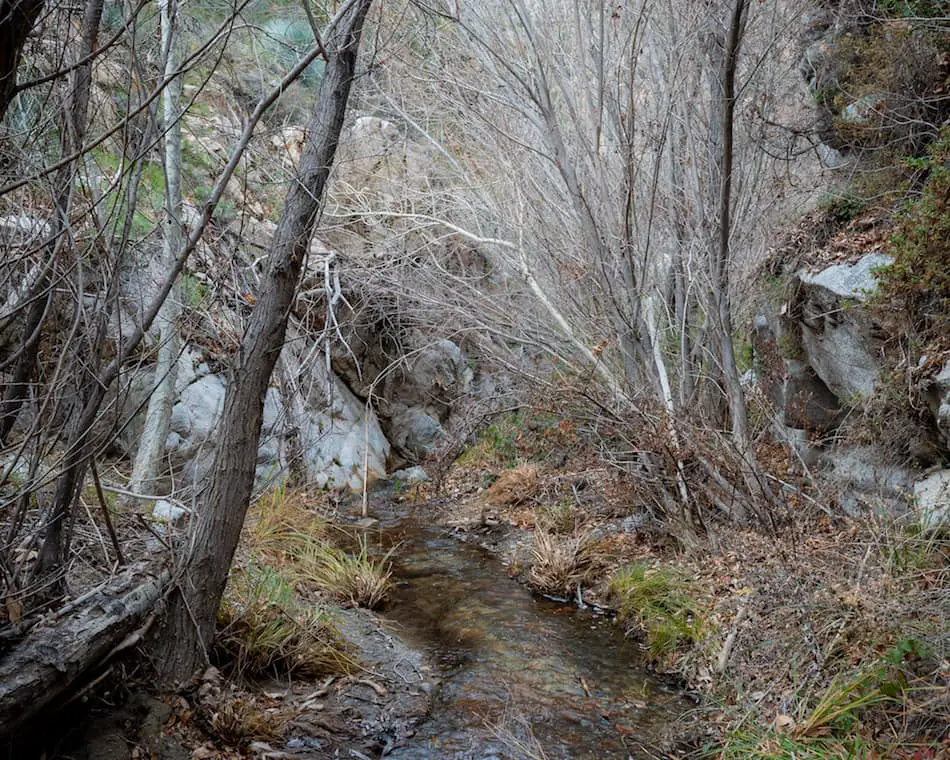
The canyon is so overgrown that certain sections of the trail will be unidentifiable, but don’t worry there’s only one way in and out of the canyon. 

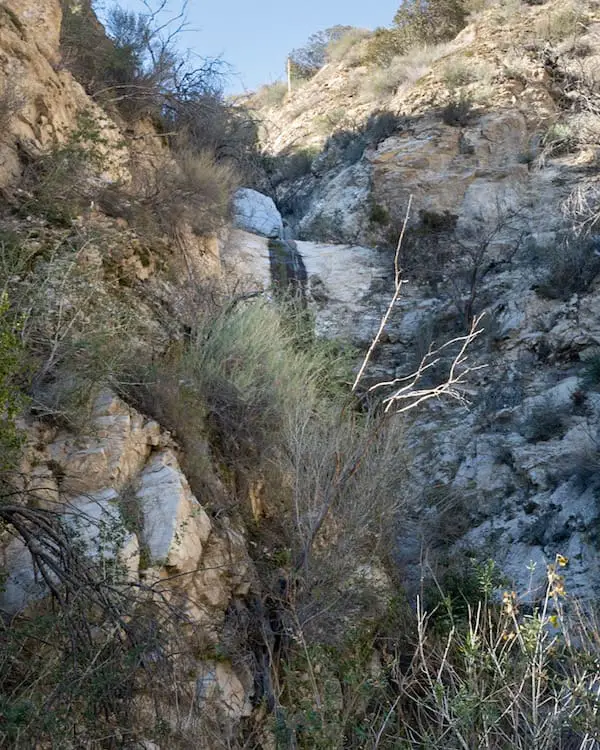
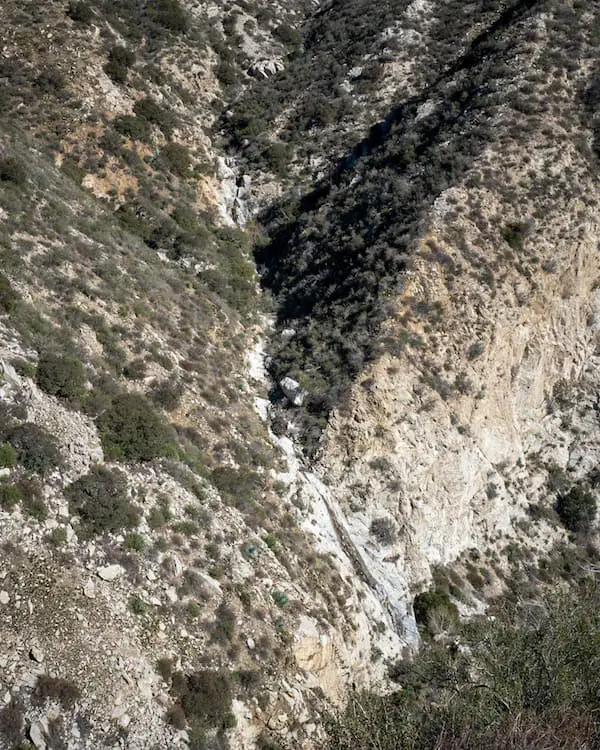
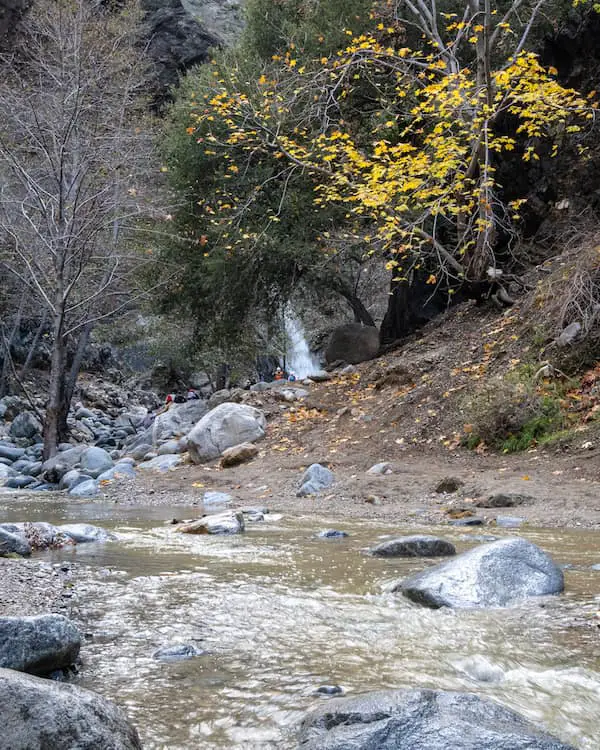
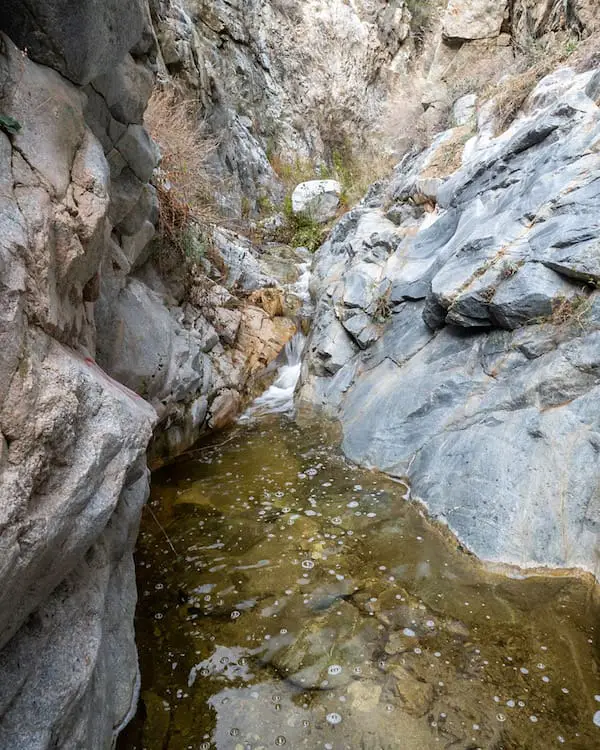
About halfway through the hike, you’ll arrive at the top of a waterfall where you can gaze down into what I call the Mini Narrows. 

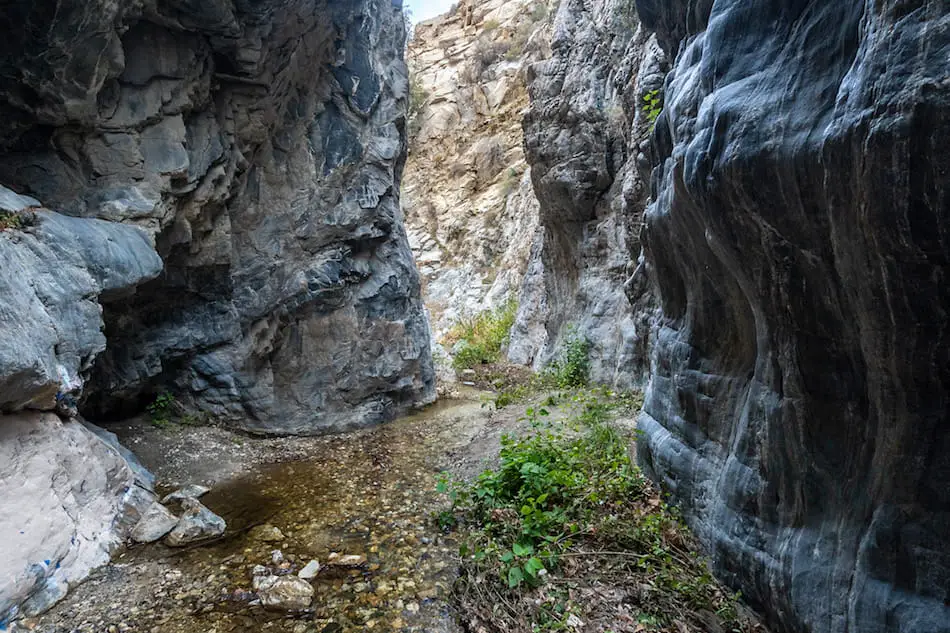
It’s basically a section of the canyon that gets reduced to a width of about 15 feet, with the canyon walls reflecting a beautiful blue marble-like stone. 

mill creek falls

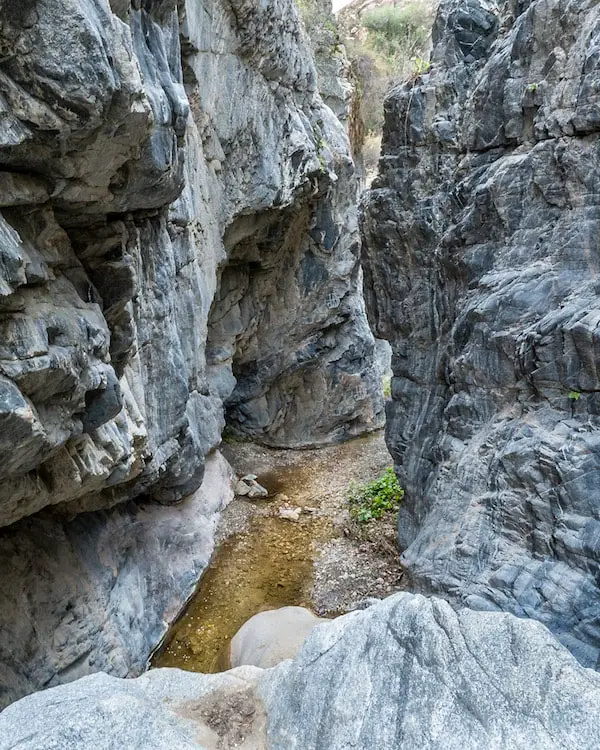
The view from the inside is even more breathtaking. 

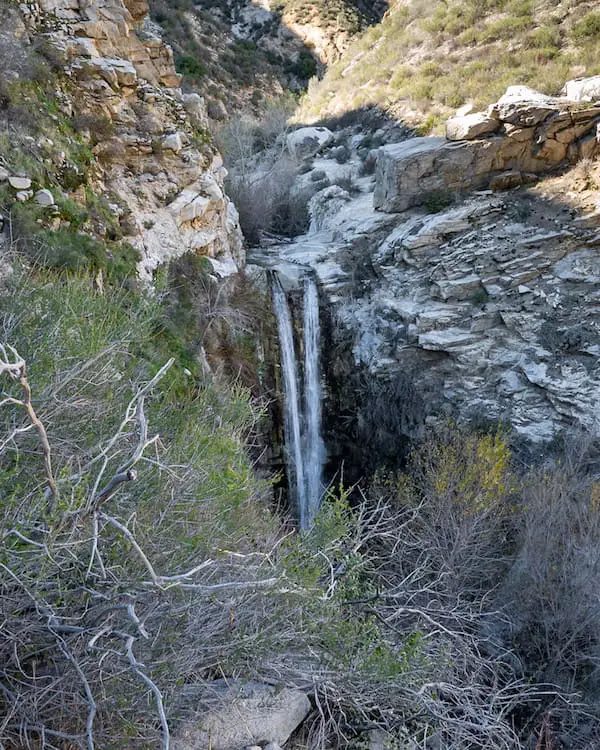
Looking back at the falls, you can see a heart shaped rock at the top. Someone tied a small rope near the top to facilitate climbing down.

mill creek falls

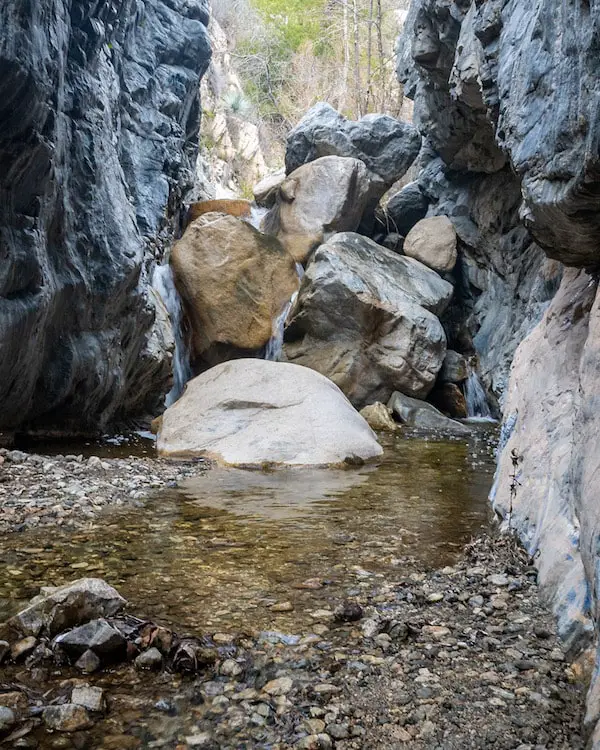
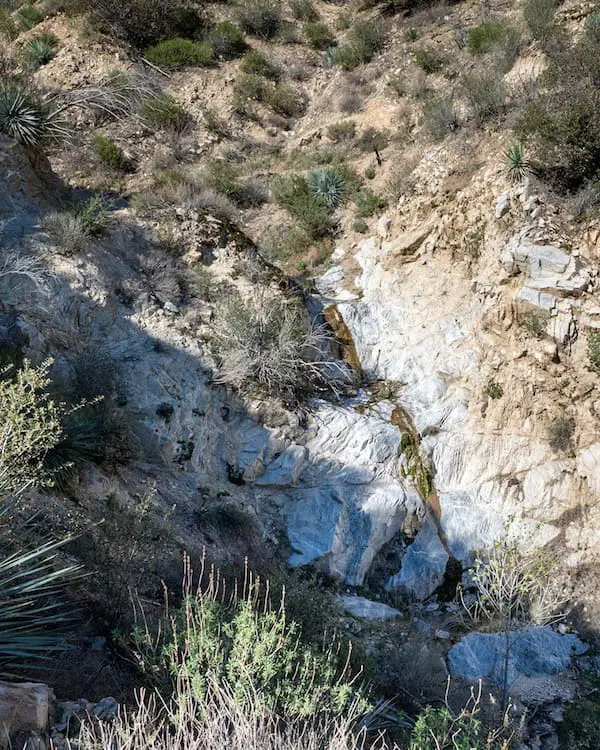
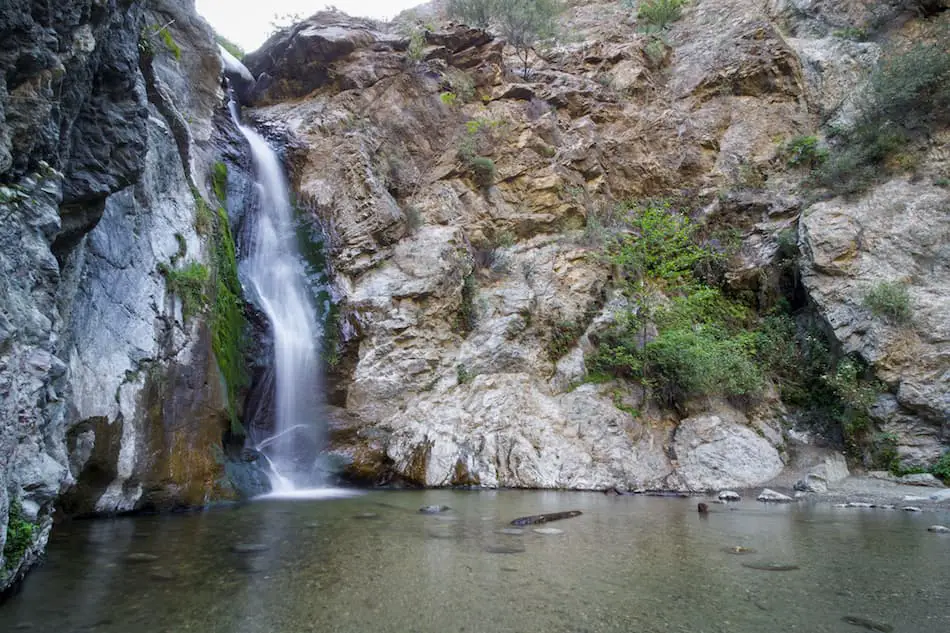
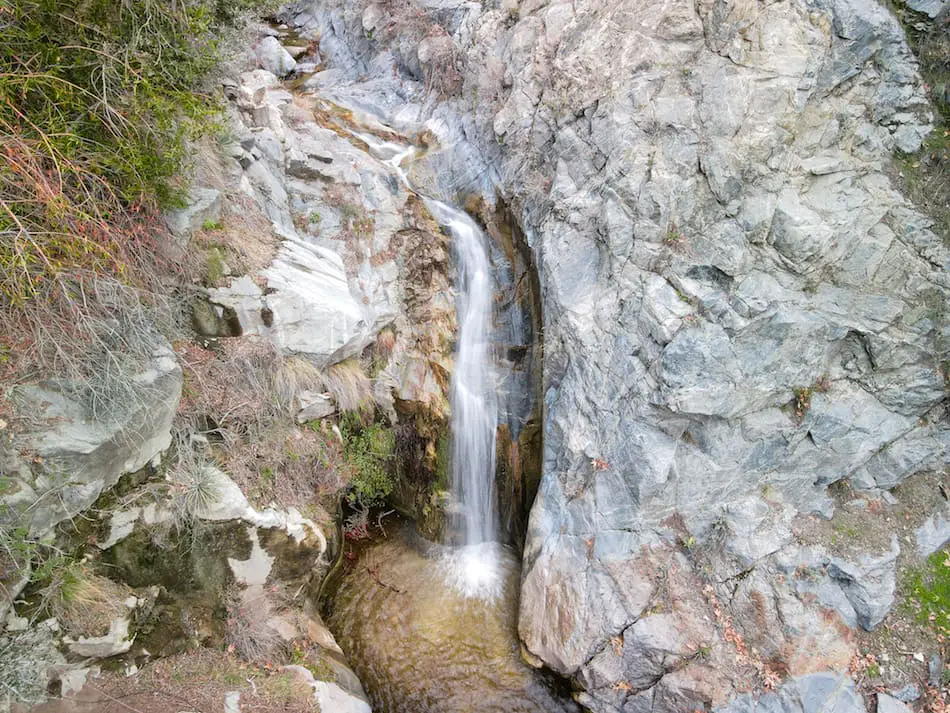
Although this waterfall is smaller than the 40 foot Mill Creek Falls, it’s still a decent 10 feet in height. 

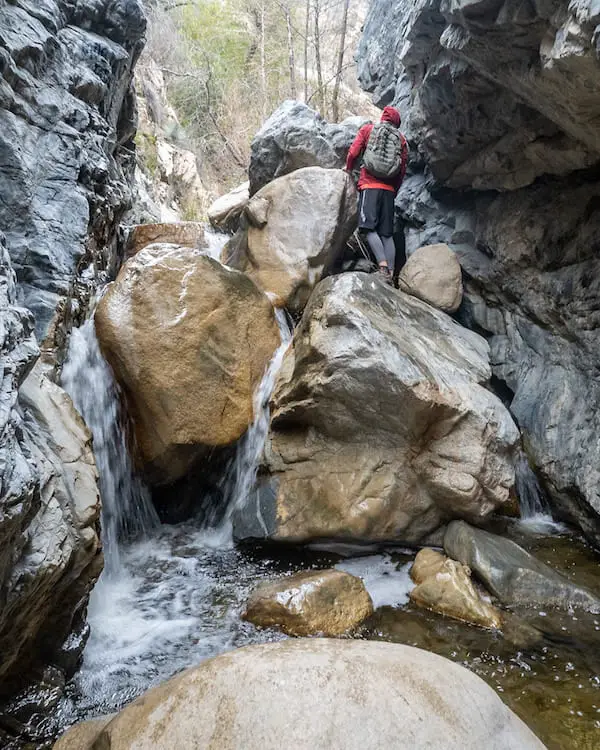
Here’s a picture of my buddy standing on the falls. He’s 6 feet 2 inches tall. 

mill creek falls

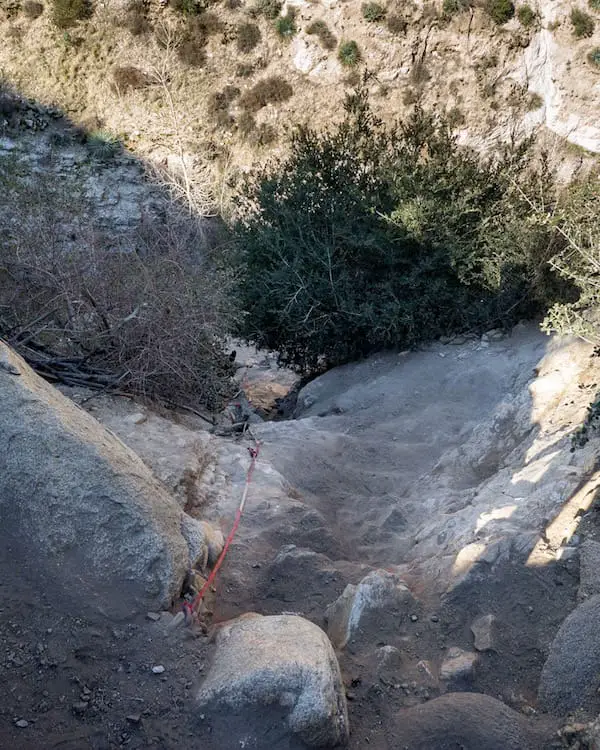
There’s a section of the canyon structured like a funnel with the creek at the base. You have two options here. 

Walk through the creek, which gets to a depth of about 3 feet in this specific location, or boulder scramble about 15 feet up on the right side of the creek. The former, is of course, the safer option. 

Below: Looking back at the funnel.

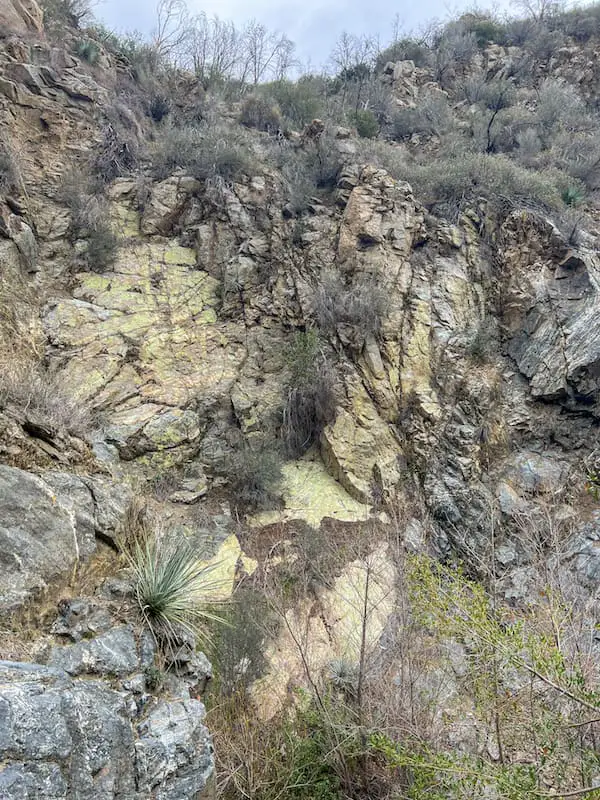
The Mini Narrows are not the only eye catching rock formations in the canyon. After passing the “funnel” look to your left, and you’ll notice the beautiful lime rock that makes up the canyon walls. 

It blows my mind to think that these lime rock walls have been here for millions of years before any human being roamed the planet. Imagine the stories they could tell if they were able to speak. 

lime rock california

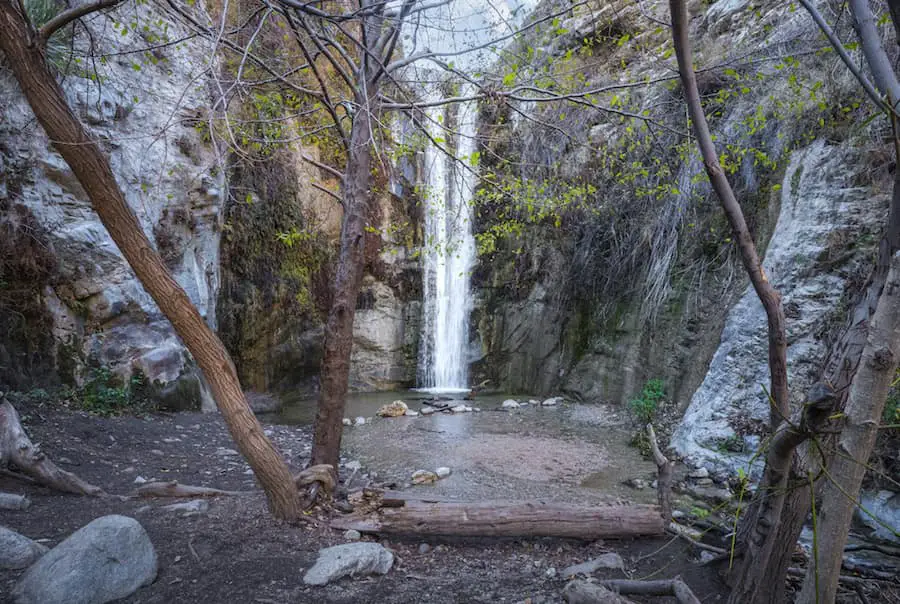
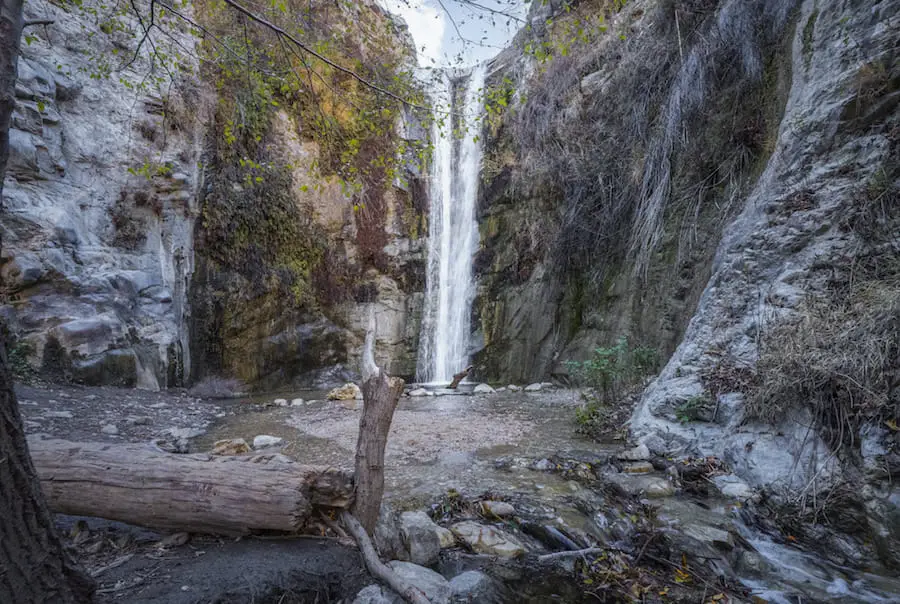
After bushwalking and boulder scrambling, you’ve arrived at the top of your destination. Just look at that beautiful view. 

mill creek falls

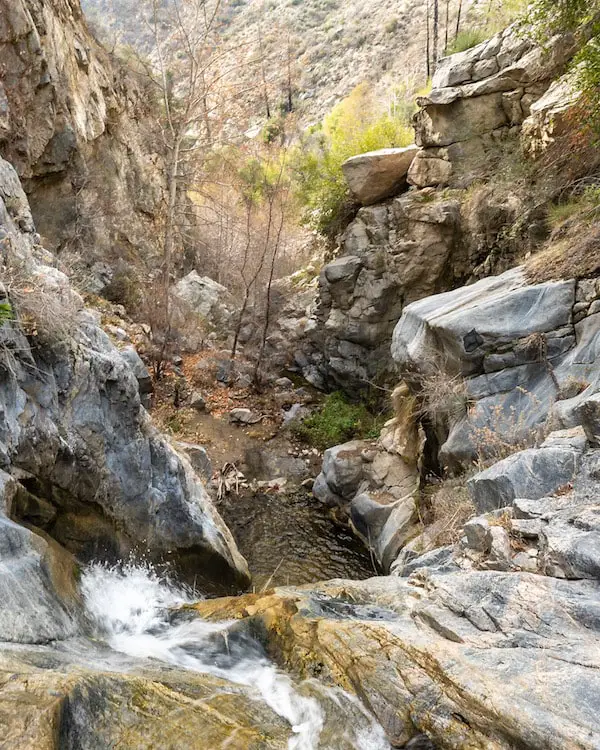
In order to get to the base of the falls, you’re going to have to climb up the rock wall to the right of the creek. 

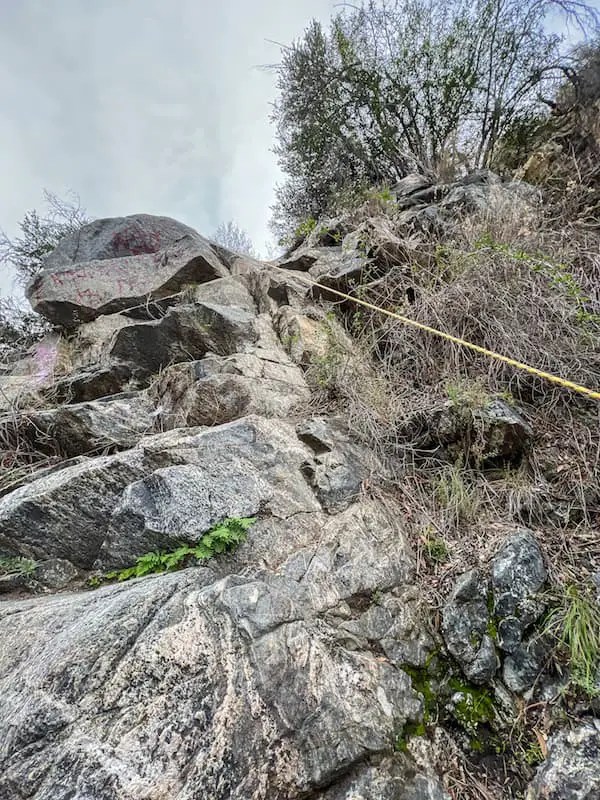
Shortly afterwards, you’ll notice another rope to your left. This rope leads you back down to the canyon floor. Watch your step as this is the most dangerous part of the trail. 

And finally, your mission has been accomplished. Congratulations, you’ve added another hidden gem to your list. One that most people have never even heard about. Enjoy the view, you’ve earned it. 

Mill Creek Falls

mill creek falls

(Please note that if you decide to hike into this canyon, you’re doing so at your own risk).

Trail Canyon Falls: Plus Seasonal Waterfall

Trail Canyon Falls: Plus Seasonal Waterfall

  • Total Miles: 4.54
  • Time: 2.5 Hrs
  • Difficulty: Moderate
  • Best Season: Spring
  • Elevation Gain: 1067 Ft
  • Max Elevation: 2481 Ft
  • Type of Trail: Out & Back
  • Parking Lot: Fits ≈ 20 cars
  • Dogs: Allowed On A Leash
  • Restrooms: Not Available
  • Trail Popularity: High
  • Pics Taken On: Jan 24, 2022

Looking for an adventure? Check out Trail Canyon Falls in Angeles National Forest. This amazing hike is LITTERED with seasonal waterfalls, which you can enjoy if you know when to visit (I’ll let you know the right time if you’re not sure). 

Trail Canyon Falls is a 40-foot waterfall located in Tujunga. The 4.5 mile round trip trail weaves its way from the canyon floor and up through the hills multiple times before reaching the majestic falls. There are no restrooms, and dogs must be on a leash. Parking is allowed in the designated area and on the road. There is very little graffiti on this hike.

Trail Canyon Falls is one of the most popular trails in LA county. To view all of LA’s best trails which include enormous cascades, abandoned places, and epic views, click the links below:

Best Hikes In Los Angeles

Best Waterfalls In LA County

Map of Trail Canyon Falls

powered by Advanced iFrame

Trail Canyon Falls Elevation Profile

 Download Printable PDF Map

Directions

Click the link to be redirected to the Trail Canyon Falls parking lot via Google Maps: Trail Canyon Trail Parking

Helpful Links

Weather Forecast

SoCal Adventure Pass (required to park in SoCal mountains)

Hiking Trail Canyon Falls

The trail begins at a tiny dirt parking lot, with a dirt road quickly ascending into the hill and across the first crossing of the beautiful Golden Creek.  

This same dirt road requires walking through private property, so please be very respectful. 

The locals are not shy when it comes to letting taggers know how they feel about graffiti! Lol, It’s the local’s willingness to protect our mountains that make this trail feel safer than most. 

Many thank you’s to the cabin owners on our behalf. 

trail canyon falls

After passing Gold Canyon (did abandoned mines also come to your mind?) the dirt road begins to ascend into the hills once more, but this time as a single track. 

Shortly thereafter, we ran into the first seasonal waterfall. It was located to the right side of the path and measured about 20 ft in height. It was the first of many.  

I can’t even imagine how beautiful this trail must be when all of the falls are flowing. However, waterfalls are not the only attractions the hike has to offer. 

As the single track looped around the edge of the hill, a short little detour offered a stunning view of the dirt roads and the creek below, with the mountain ranges precipitously surrounding the private properties. 

Once again, the trail fuses into the canyon floor, where you’ll notice some abandoned and rusted items. One of which is a wheelbarrow. 

I don’t know how long they’ve been there, but it seems like it’s been quite a while. 

This next section will require a few creek crossings as you make your way through the popular White Alder and Western Sycamore trees.  

The crossings aren’t as difficult as the ones at Eaton Canyon, but if your balance isn’t too great, take a pair of trekking poles. 

About halfway through the hike, you’ll find a picnic table under the forest canopy. The way the light shined through the trees made me feel like I was in a mountain paradise. 

I promised you multiple seasonal waterfalls, and I intend to deliver. Here are the second falls which you can access by taking a very short detour that I pointed out on the map. 

The waterfall is about 25 feet high. If you look closely, you can see the water towards the top barely trickling down. 

After making this awesome find, the trail began to ascend into the hills once more where we quickly ran into the third amazing waterfall. This one clearly had more water than the previous two. 

It stood at about 30 feet and even had a tiny pool at its base. The trail literally runs right over it and continues to ascend. 

trail canyon falls seasonal waterfalll

This is now the last section of the trail before scrambling back down to the canyon floor. It also has the steepest ledges, so watch your step. 

As the trail loops around the hill, you’ll notice a giant 150 ft beast of a waterfall across the canyon. It’s the most stunning of all the falls. 

In my opinion, if it had more water it’d be the main attraction. Unfortunately, I couldn’t find a name for it. 

trail canyon falls seasonal waterfall

As you begin to approach the main waterfall, the trail comes to a fork. 

trail canyon falls

If you go left, you’ll be led to a large granite flat area above the falls. The trail continues up the canyon to Tom Lucas Trail camp, and even further away, Condor Peak. 

If you go right, you’ll come to a section that requires climbing down a short (about 15 ft) but steep and loose part of the trail to get to the base of the falls.  

Luckily, someone left a rope there for the rest of us. It looks very sketchy, but it’s doable for most people. 

And finally, you have reached your destination. The 40 foot Trail Canyon Falls. 

trail canyon falls

trail canyon falls

If you visit later in the day, you’ll witness the awesome beauty of the surrounding mountain ranges glimmering with the golden light of the evening.  

Top 4 Big Bear Hikes: Forested Trails, Grand Views, & More

Top 4 Big Bear Hikes: Forested Trails, Grand Views, & More

Big Bear, CA is a beautiful mountain town located in the San Bernardino National Forest. It’s home to ancient Western Juniper trees, Big Bear Lake, two winter resorts, and of course, multiple forest hikes. 

Today I’d like to share with you the four best Big Bear hikes, starting with the easiest and ending with the most challenging.

I hiked all of these trails in the winter when the trails were covered with snow. Therefore, I’ll be sharing everything you need to know about hiking at Big Bear after a good dump. 

Big Bear Pro Tips

Pro Tip 1: Parking for all of the trails in this guide requires an annual or daily Adventure Pass, which you can purchase here. Daily passes can also be purchased in person at Big Bear gas stations and stores such as 711, and the Big Bear Discovery Center. 

Pro Tip 2: If Big Bear receives more than 6 inches of snow, wait a few days for some of the snow to melt before visiting. Snow above six inches may be too deep for hiking and is probably better suited for snowshoeing. I once sank up to my waist at the Castle Rock trailhead. 

Pro Tip 3: When planning a snow hike, please do yourself a favor and invest in microspikes. I can’t recommend enough how much of a difference they make. We use these right here and have never looked back. 

Pro Tip 4: It goes without saying, but always check the weather forecast, especially during winter.

1) Woodland Trail: Easy Interpretive Loop

Woodland Interpretive Trail

  • Total Miles: 1.52
  • Difficulty: Easy
  • Best Season: All Year
  • Elevation Gain: 232 Ft
  • Time: 45 Min
  • Dogs: Allowed On A Leash
  • Restrooms: Available At The Trailhead
  • Map, Directions, & Full Post: Woodland Interpretive Trail

Woodland Trail is the easiest hike at Big Bear, making it ideal for the whole family. The woodsy trail features beautiful views of the lake and Snow Summit Resort. 

Wooden markers are posted along the trail in numbered sequence, which features fun and educational information regarding the hike. 

The information for each marker can be found in a PDF guide in the full post. However, we wrote the complete post in an interactive and simplified manner for parents to read to their kids as they’re on the trail. 

If you plan on visiting when it snows, please use microspikes. Although it’s an easy hike, it can get very slippery when ice begins to form. 

The trail has a very gradual incline and lacks dangerous ledges, which is why it’s so ideal for kids. Needless to say, don’t forget to add the Woodland Trail to your Big Bear daycation. 

2) Castle Rock Trail: Climbing A Huge Stone Formation

Castle Rock Trail

  • Total Miles: 1.44
  • Difficulty: Easy – Moderate
  • Best Season: All Year
  • Elevation Gain: 567 Ft
  • Time: 1.5 Hrs
  • Dogs: Allowed On A Leash
  • Restrooms: Not Available
  • Map, Directions, & Full Post: Castle Rock Trail

Unless you arrive super early, you’ll more than likely have to park in the neighborhood, specifically Lowe Dr, and walk to the trailhead. Always double-check that you’re allowed to park in any public area, especially when it snows. 

Since this hike is on the dark side of the mountain, expect a lot more snow, shade, and trees. 

This trail is my favorite from all four Big Bear hikes. It’s very scenic, with lots of trees, and when it snows it looks like a winter wonderland. The view at the top is spectacular. 

The trail bears (pun intended) its name because of the huge rock structure you have to climb to get the best views. It’s about the size of a 3 story building, with a flat “plateau” at the top, but it’s not a direct vertical climb. 

You can make your way to the top by boulder scrambling up the much smaller boulders that make up the entire structure. 

Once you’re at the top, you can see all of Bear Lake while Cougar Crest and Bertha Peak looming in the background. If possible, try to be at the top during Sunrise or Sunset. You won’t regret it. 

3) Pine Knot Trail To Grand View Point

pine knot

  • Total Miles: 6.9
  • Difficulty: Moderate
  • Best Season: All Year
  • Elevation Gain: 1158 Ft
  • Time: 3.5 Hrs
  • Dogs: Allowed On A Leash
  • Restrooms: Available At The Trailhead
  • Map, Directions, & Full Post: Pine Knot Trail To Grand View Point

Pro Tip: You’re allowed to park on the street so long as you’re within the confined area usually marked by orange traffic cones. If you park beyond the cones, you can be fined up to $150 for “parking during snow conditions.” 

Alright, time to step it up a notch. Pine Knot Trail takes you to a nice little mountain saddle (Grand View) adjacent to Grand Peak where you’ll be rewarded with an amazing view of the tallest peak in Socal, San Gorgonio, and the valley where highway 38 runs through. 

This hike intertwines with dirt roads for off-road vehicles. You may be miles into the hike when suddenly you see a jeep roaming through the trees. It’s very unexpected and super cool.  

Pro Tip 2: Do you have family that wants to experience Grand View, but can’t hike the whole trail? You can off-road your way to the top and walk the remaining section, which is about ¼ of a mile one way. 

However, a 4×4 vehicle is highly advised. Click the link here to get directions to the turnout that is closest to Grand View. Unfortunately, the dirt roads are closed during the winter months. 

Pine Knot is Big Bear’s top-rated hike for a reason. The trail is very scenic, with lots of pine trees, and views of the lake here and there. 

Fun Fact: Big Bear used to be called Pine Knot! Check out the full post to view vintage shots of the name during its use.

pine knot trail

During the fall season, virtually everything on the trail is orange and yellow. It’s a hike you’ll never forget. 

4) Cougar Crest Trail: Best Views Of Big Bear Lake

Cougar Crest Trail

  • Total Miles: 5.43
  • Difficulty: Moderate – Hard
  • Best Season: All Year
  • Elevation Gain: 900 Ft
  • Time: 3.5 Hrs
  • Dogs: Allowed On A Leash
  • Restrooms: Available At The Trailhead
  • Map, Directions, & Full Post: Cougar Crest Trail

This scenic hike is the most challenging of all the hikes on our list. It’s not extremely difficult, but definitely too difficult for children. 

The trail winds its way up the mountain until it reaches Cougar Crest, where you can enjoy a spectacular view of the lake, resorts, and San Gorgonio in the far background. 

Further up the ridge is Bertha Peak, which you can access if you keep trekking up another 0.6 miles. You’ll see the sign for Bertha Peak at a junction once Cougar Crest comes to an end. 

During the spring and summer months, the area looks like a sea of green pine trees, and during the winter, beautiful Western Juniper trees look like something out of a movie. 

In my opinion, Cougar Crest Trail features the best view of Big Bear Lake. Definitely check out this hike, you’re going to love it. 

What Is The Most Popular Hike In Big Bear?

The most popular hike in Big Bear is Pine Knot Trail To Grand View Point. How do I know this? Because I checked the number of All Trail reviews for each of the four hikes listed above, and Pine Knot Trail came on top.

Here are the number of reviews and average rating for all four trails as of December 4, 2023.

  1. Pine Knot Trail To Grand View Point: 4.7 out of 4087 reviews.
  2. Woodland Interpretive Trail: 4.6 out of 3382 reviews.
  3. Cougar Crest Trail: 4.7 out of 2774 reviews.
  4. Castle Rock Trail: 4.6 2247 reviews.

What Is The Easiest Hike In Big Bear?

The Woodland Trail is the easiest hike in Big Bear because it’s not only the shortest, but it also has a very low elevation gain.

What Is The Hardest Hike In Big Bear?

The hardest hike in Big Bear is Bertha Peak, which is essentially the exact same hike as Cougar Crest but with an additional 1.35-mile stretch from where Cougar Crest ends to get to the peak.

What Is Your Favorite Hike In Big Bear?

My favorite Big Bear hike is Castle Rock Trail (when it snows) because I enjoy boulder scrambling my way to the top of the rock formation, it’s very scenic with lots of pine trees everywhere, and the closeup view of the lake.

When there is no snow, my favorite hike is Pine Knot Trail, especially during the fall when many trees have beautiful and vibrant orange, yellow, and red leaves.

Is Big Bear Good For Hiking?

Big Bear is one of the best places to hike in Southern California. The dense forest, amazing lake views, small town, and deep snow make me feel like I’m no where near Los Angeles County where I currently live.

Does Big Bear Have Waterfalls?

The town of Big Bear does not have any waterfalls. However, there are waterfalls located near the base of the mountain. Check out Big Falls in the San Bernardino category in the main menu or type it into the Search Bar.

Where Is The Best Viewpoint In Big Bear?

Pine Knot Trail To Grand View Point has the best viewpoint In Big Bear, which is probably the reason why it’s the most popular trail in the area. You can see the valley where the 330 Hwy runs through and Mount Gorgonio in the back.

However, and this is just my opinion, the view from Cougar Crest looks even better after a good snowfall and during sunset. The resorts light up the snow-covered mountains, and Big Bear Lake in the foreground resembles a Christmas puzzle. It’s truly amazing.

If it hasn’t snowed and you’re not visiting during sunset, choose Pine Knot Trail.

Santa Fe Dam Recreation Area: A Little Known SGV Gem

Santa Fe Dam Recreation Area: A Little Known SGV Gem

Distance 

3.7 Miles

Time

2 Hrs

Difficulty 

Easy

Season

All Year

Elevation Gain

75 Ft

Santa Fe Dam holds a very special place in my memories because my parents would bring me here every year in the summer to swim at the lake. It’s the perfect place for a day out with the family, or to go for a walk around the lake. 

Santa Fe Dam Recreation Area is an 836-acre park with a 70-acre lake located in Irwindale, CA within the San Gabriel Valley. This park offers fishing, camping, bike and boat rentals, a swim beach, splash pads, and more. The vehicle entrance fee is $12. Dogs are allowed and must be leashed.

Santa Fe Dam Recreation Area Map

powered by Advanced iFrame

Santa Fe Dam Directions 

Santa Fe Dam is located at 15501 Arrow Hwy, Irwindale, CA 91706.

Santa Fe Dam Hours

Current hours of operation for Santa Fe Dam are Monday through Sunday from 6:30 AM – 8 PM. Starting November 1st, it will be open from 6:30 AM – 6 PM.

Santa Fe Dam Parking and Entrance Fee

The vehicle entrance fee is $12 per day, year-round.

Camping at Santa Fe Dam

You are not allowed to camp or park RVs overnight. Camping is only reserved for special occasions, such as on-site youth group camping near the Nature Center and during the Moonlight Fishing event.

Santa Fe Dam Events

Moonlight Fishing

Moonlight Fishing is a summer night camping event held yearly at the Santa Fe Dam Recreation Area. You can enjoy special activities such as fishing in the dark, kayaking, camping, movie nights, nature center presentations, and more

General admission is $10, while kids ages 11 and under are free! Be aware that times and dates change on a yearly basis, so be sure to stay up to date by checking the LA County Parks website.

Renaissance Pleasure Faire

The Renaissance Pleasure Faire is an annual event meant to create and reenact “living history” from the late 1500’s English market. The fair brings in over 200,000 guests annually, including family, friends, and children. It hosts live entertainment, food tastings, games, rides, pub crawls and so much more.

This year, the fair will take place from April 9 – September 22, 2022, on Saturdays and Sundays. Be sure to purchase tickets ahead of time on the RenFair website.

More Hikes in LA that you’ll definitely like:

Santa Fe Dam Nature Center

You can begin the loop around the lake via a dirt road that connects to a small portion of the bike trail. This bike path runs from the beach alongside the 605 Fwy to the top of the dam, through the north side of the lake, and ends at the mouth of Asuza Canyon. 

santa fe dam bike path

On the right side of this cemented bike path is our first destination, the Santa Fe Dam Nature Center. 

Unfortunately, they were closed when we visited, but if you’re interested, they’re open Mon-Sat from 10 am-1 pm.

santa fe dam nature center

At the nature center, you’ll find more information regarding Santa Fe Dam, an outdoor amphitheater, and a beautiful bridge with a creek bed underneath.

This is where you might catch a glimpse of wildlife, such as quails, rattlesnakes, coyotes, and the wildest of all animals, the fisherman.

As you come around the west side of the lake, the view is breathtaking. 

The lake peacefully looms in the foreground while snow-capped Mount Baldy towers over the trees.  

Santa Fe Dam Recreational Area

Santa Fe Dam Splash Pad

Now that we’re on the Southside of the lake where the park is located, we come to our second attraction, the water park, also known as the Splash Pad. 

The Splash Pad opens on June 15th from 10:30 am until 6 pm 7 days a week, including Holidays from Memorial Day to Labor Day. 

The cost is $2 per person and per session. A limit of 4 sessions are allowed per day. Each session is 90 minutes. 

Here’s the schedule for the sessions: 

  • 1st 10:30am to 12:00pm
  • 2nd 12:30pm to 2:00pm
  • 3rd 2:30pm to 4:00pm
  • 4th 4:30pm to 6:00pm

Children cannot be taller than 52 inches, must be accompanied by an adult, and should be potty trained. If the child isn’t potty trained, swim diapers will be required.  

Feel free to double-check the link here to make sure none of the info mentioned above has changed.

Santa Fe Dam Fishing 

Fishing is more than just allowed at Santa Fe Dam, it’s highly beloved and encouraged year-round.  

As you’ve probably already read at the top of the post, Santa Fe Dam is home to the moonlight Fishing events during the summer, where families can camp and fish all night.

The California DFG stocks catfish during the Summer and rainbow trout every year from Fall through Spring. At the lake you’ll also find: 

Largemouth bass

Bluegill 

Crappie

Carp

Click the link here to view the stocking schedule on the Department of Fish and Wildlife website. 

The park even offers its very own sinks to clean and gut your fish.

Please remember to carry your fishing license with you at all times. If you don’t have a license you can purchase one at the bike and boat rental shop or at the store, assuming they’re open. 

Don’t want to fish off the shore? No problem, Santa Fe Dam has a nonmotorized boat launch just a few feet away from the sinks. 

santa fe dam boat ramp

It costs $12 to launch your boat, and you can do so all year.

Bike & Boat Rentals

As you walk past the boat launch ramp, you’ll notice a random storefront adjacent to the lake called Wheel Fun Rentals. 

If you’re trying to make the best out of your trip, this place is a must. They rent out various types of bikes and watercraft for the whole family. 

Their hours vary depending on the time of year. They are: 

  • Aug 2, 2021 – Mar 11, 2022: Sat, Sun, & Holidays 10am – 4pm
  • Mar 12 – Jun 24: Sat & Sun 10am – 6pm
  • June 25 – Jul 31: Thu & Fri 11am – 5pm, Sat & Sun 10am – 6pm

You can double-check their hours here.

santa fe dam bike and boat rentalls

Their rentals include: 

  • 2 & 4 seater pedal boats
  • Paddleboards
  • Kayaks (single, double, & triple)
  • Surreys (double, 4 seaters, and 6 seaters)
  • Bicycles, Tricycles, and Quadcycles

For more info on prices click the link here. 

Swimming at Santa Fe Dam

Santa Fe Dam is such a cool spot (especially during the summer) because it literally resembles a little beach in the foothills.

santa fe dam swimming

You have the sand area with palm trees, a section of the 70-acre lake closed off specifically for swimming, a view of the snow-capped peaks in the back, and, as if that wasn’t enough, a playground on the sand. 

By the way, just in case you don’t want your kids playing in the sand, there’s a regular playground located to the east of the sandy playground

santa fe dam sand playground

The park’s swimming hours are Mon-Sun 10am – 6pm 

  • Jun 17th – June 20th
  • Jun 24th – Jun 27th
  • July 1st – Sept 5t

Be sure to arrive early during the summer as the lifeguards close the park once it reaches its full capacity, and from what I remember, the park gets full real fast (and that was 20 years ago).

santa fe dam

Unfortunately, no balls or floats are allowed in the water, as they may create obstructions for lifeguards.  

The swimming section of the area is deep enough for adults to dive down while the lakeshore is shallow enough for babies to sit and splash in the warmer shallow water. The park is perfect for the whole family.  

Fitness

Looking to stay in shape? Near the east side of the lake, you’ll find a little outdoor gym/fitness zone. 

After completing the 3.7-mile loop, finish strong with a quick workout before jumping back in your car and calling it a day. 

History of Santa Fe Dam

The Santa Fe Dam was first constructed back in 1941 by the U.S Army Corps of Engineers. The main reason for the construction of the dam was because of major floods on the San Gabriel River back in 1938. Another flood occurred in 1943 which halted further construction, but then resumed in 1943. By January 1949, the dam was completed. 

In the mid-1950s there was a proposal to create recreational amenities at the dam. However, a master plan to fulfill those wishes wasn’t created until 1975. A lot of the amenities we see today were built between the years 1976-1984. 

Woodland Trail 1E23: Interpretive Big Bear Hike For Kids

Woodland Trail 1E23: Interpretive Big Bear Hike For Kids

  • Total Miles: 1.52
  • Time: 45 min
  • Difficulty: Easy
  • Best Season: All Year
  • Elevation Gain: 232 ft
  • Max Elevation: 6967 ft
  • Type of Trail: Loop
  • Parking Lot: Fits 20+ Cars
  • Dogs: Allowed On A Leash
  • Restrooms: Available On The Trailhead
  • Trail Popularity: High

The Woodland Trail is an easy 1.5-mile round trip hike for the whole family located in Big Bear, CA. The loop includes 16 numbered markers along the trail which can be used along with a guide to learn fun information regarding the area. The slopes at the parking lot make for a fun (and free) area for kids to sled, while the slopes on the trail are gradual and easy enough for small children to hike.  

All vehicles must show an Adventure Pass at the parking lot. Make sure to arrive early, especially if you’re visiting on a weekend as this is a VERY popular trail. 

Want to make the most out of your Big Bear trip? Check out the post below.

Best Hikes In Big Bear

Woodland Trail Map

powered by Advanced iFrame

Woodland Trail Elevation Profile

Download Printable PDF Map

Address & Directions

The Woodland Trail in Big Bear is located at 41948 N Shore Dr, Big Bear, CA 92314. 

Helpful Links

Weather Forecast

SoCal Adventure Pass (required to park in SoCal mountains)

For those who don’t have a SoCal Adventure Pass, daily passes can be purchased at the Big Bear Discovery Center, nearby gas stations, or stores such as 7-11 for $5. If you’ve already purchased a SoCal adventure pass you don’t need to buy the daily $5 pass. 

Interpretive Trail PDF Guide

Big Bear Weather And More (My friend’s YouTube channel. He updates us on all things Big Bear within a few hours of the event, including weather changes).

The Woodland Trail

From this point forward I’ve written the post to be read as a children’s book while you hike the trail. I’ve made the writing very simple and will be including images for each marker. 

Let’s start the hike! 

1) 1500 Year Old Western Juniper

Look, it’s our first signpost, and it’s right next to this old Juniper Tree. When I say old, I mean OLD. It’s over 1500 years old!  

This tree has been around before we had electricity or cars. Imagine what else these trees have come to see!

2) Mountain Mahogany (Ironwood)  

The great Mountain Mahogany tree! This is a very dense and strong tree, that’s why locals call it “Ironwood”. Although it’s pretty hard to cut this tree down, it can make a fire last hours and hours! The wood is so heavy that it’ll sink down to the ocean floor instead of floating. It sure is one sturdy tree. 

3) Downed Log: Grub Gallery

Bugs on the bark! If you look at the dead logs on the ground, you’ll be able to spot markings left by bark beetles, larval grubs, and other insects. That’s because these critters love feasting on weak trees. It helps the ecosystem make room for stronger trees. 

Do you spot any of these helpful insects?

4) Willow Wishes

The watered Willow Bush. The willow bush is only found in areas where there’s water. You might see a stream flowing in the winter and spring months. What about when the streams dry up in the summer and fall? Well, there’s still water underground for them to survive! 

Want to know something unique about the willow bark? They’re natural pain relievers when chewed!

5) Downed Trees

Fallen Trees. Remember when we mentioned earlier that the insects eat the dead logs off of fallen trees? Well, fallen trees aren’t just food for bugs. They’re also homes for other creatures such as snakes, lizards, and small mammals.

I know it can be sad to see trees that were once standing tall now broken on the ground, but they can still be helpful even after they aren’t alive anymore. 

6) Jeffery Pine: Woodpeckers’ Granary  

This tree is called the Jeffrey Pine. It’s used as a kitchen for Acorn Woodpeckers! These woodpeckers use their pointy beaks to poke through trees. Can you guess why they drill these holes? Yup, to store food such as acorns!

I highly suggest combining this hike with a nearby densely forested trail that features amazing views of Big Bear Lake. Check out the post below:

Castle Rock Trail 

They work really hard during the warmer months because they get ready to have enough to eat for the cold and long winter. They want to keep warm and eat all the acorns they can feast on during the cold season.

See any of the holes or leftover acorn bits?

7) Different Types of Oaks 

The oak trees! The California Black Oak and Canyon Live Oak are typically neighbors around here. Both of them produce lots of delicious acorns for many of the animals. 

Can you name a few animals that love to munch on acorns? 

8) Rings On A Tree 

Guess how old these trees are! Did you know that a tree’s rings tell a lot about its age and the conditions it grew up in?

Tree rings that are closer together mean that the tree didn’t grow up in very good conditions, such as a drought. But, if it has more separated rings, then there was lots of water and healthy nutrients for it to grow. 

Look at any of the chopped-down trees. How far apart or close do the rings look? Does it look like it lived a long life?

9) Woodrat Home

The ninth stop- a mansion! Okay, maybe it’s not a fancy mansion to us, but to the “packrat” it is. Their homes are made of broken branches, bark, pinecones, and leaves. 

These “homes” can get really big because the woodrat loves to build! They like to live in the same house and build on it for years. They even have a special nesting room for the baby packrats. 

10) Fire Resistant Jeffrey Pine

This next stop is all about the Jeffrey Pine fire survivors. These trees are large and magnificent. A lot of them can survive a blazing wildfire because of its thick bark that acts as armor. 

One interesting fact is that they might smell like vanilla! Check it out for yourself and smell the bark on the tree trunk. 

11) San Gorgonio Peak (Old Grayback)

At the 11th stop, you will see good Old Grayback! This nickname is given to Mount San Gorgonio- the highest peak in SoCal. It’s 11,499 feet high! Unlike other mountains nearby, this one is gray because the conditions are so harsh that trees can’t grow there.

San Gorgonio is barely peaking above the closer mountain ranges in the image above.

12) Granite Rock

Check out these large boulders of granite. These are igneous rocks that are home to lizards and snakes…yikes! 

Be very careful when climbing these large rocks. You don’t want to fall or run into any slithering snakes. But, you don’t want to worry too much if you’re hiking this trail in the winter. Most snakes are present during the hot summer months.

13) Yerba Santa & Rubber Rabbitbrush

Chewing gum in the form of plants? Yup! The Yerba Santa plant flourishes in hot and dry areas. Luckily, the shiny leaves keep them from completely drying out. These leaves were also used as chewing gum by Indians. It’s been said that the leaves taste like spearmint, but I don’t recommend trying it. 

The Rubber Rabbitbrush was also used similarly. You can identify these plants by looking at the stems which are white and rubbery to the touch, hence the name. Native Americans used the bark wood of the bush to make it into chewing gum, teas, cough syrup, and more. Funny enough, rabbits don’t like the taste of these Rabbitbrush plants as you might’ve thought.

14) Mother Nature’s Highways

Did you know animals have their own pathways and routes like humans do? They’re called corridors. Try to spot the drainage and any animal prints! Mule deer, bobcats, and coyotes use them to travel down to the lake for a refreshing drink.

15) Pinyon Pine 

At the 15th signpost, you’ll see the Pinyon Pine. These pine trees are the only single-needle pine in the world! Pine nuts from these trees provide food to many of the animals and even humans and they’re also packed with protein.

Can you name some of the animals that eat pine nuts? Have you ever tried them? 

16) Twisted Living & Dead Junipers

Our final stop. The twisted Juniper tree! Don’t they look like trees out of an enchanted forest? The reason it has a twisted appearance is that there are actually multiple trunks twisting together! The tree in the center is actually dead, while the ones that surround it are alive.

Looking for a bit more of a challenge? Check out the trail below which offers the best views of Big Bear Lake, San Gorgonio, and the mountain resorts. You won’t regret it!

Cougar Crest Trail

What animals do you see living in this tree? 

That completes the Woodland Interpretive Trail! I hope you had fun and learned some new things. Below are some nearby attractions you should check out after the hike. Catch you on the next trail!

Cougar Crest Trail: Best Views Of Big Bear Lake

Cougar Crest Trail: Best Views Of Big Bear Lake

  • Total Miles: 5.43
  • Time: 3.5 hrs
  • Difficulty: Moderate – Hard
  • Best Season: All Year
  • Elevation Gain: 900 ft
  • Max Elevation: 7717 ft
  • Type of Trail: Out & Back
  • Parking Lot: Fits 20+ Cars
  • Dogs: Allowed On A Leash
  • Restrooms: Available On The Trailhead
  • Trail Popularity: High
  • Pics Taken On: Jan 3, 2022

Are you looking for the best views of Big Bear Lake? Look no further, and hike up to Cougar Crest.  

Cougar Crest Trail is a 5.43-mile hike located in the San Bernardino mountains that offers the best views of Big Bear Lake and Snow Summit. The moderate-rated trail is known to get plenty of snow during the winter months. Restrooms are provided at the parking lot, an Adventure Parking Permit is required, and dogs are allowed but must be on a leash. 

Perhaps Cougar Crest is too long of a hike or maybe not long enough. No problem, choose from the best trails by checking out the post below:

Best Hikes In Big Bear

Cougar Crest Trail Map

Please disregard the blue arrow on the map. It’s simply marking the end of the Cougar Crest Trail. 

powered by Advanced iFrame

Cougar Crest Trail Elevation Profile

Download Printable PDF Map

Address & Directions 

Click the following link to be redirected to the Cougar Crest Trailhead via Google Maps.

Pro Tip: You can park at the Discovery Center parking lot until 6:00 pm for free and walk to the trailhead to avoid buying an Adventure Pass. 

Helpful Links

Weather Forecast

SoCal Adventure Pass (required to park in SoCal mountains)

For those who don’t have a SoCal Adventure Pass, daily passes can be purchased at the Big Bear Discovery Center, nearby gas stations, or stores such as 7-11 for $5. If you’ve already purchased a SoCal adventure pass you don’t need to buy the daily $5 pass.

Big Bear Weather And More (My friend’s YouTube channel. He updates us on all things Big Bear within a few hours of the event, including weather changes).

Cougar Crest Quick Guide 

Microspikes: If you’re hiking in the snow I HIGHLY recommend using microspikes. It’s a night and day difference. You can view the ones we use here.  

Trekking Poles: If you’re going to use microspikes, trekking poles won’t be needed to help with balance. However, they can still help reduce the weight from your legs, especially on steep sections. We use these trekking poles right here. 

Best Time to Visit: Go during the week if you can. Otherwise, arrive extra early at the trailhead. I also recommend hiking a few days after it snows as the views are even more beautiful (at least in my opinion).  

Hiking Cougar Crest

The trail begins via a very wide and gradual ascend. If you wanted to build a snowman, this beginning section is it.

As you keep hiking up, the trail becomes more narrow and the trees begin to enclose you in. Pretty soon, you’ll feel like you’ve wandered deep into the forest. 

Keep an eye out for the majestic Western Juniper trees. These native giants have red “peeling” barks, and some have been here for over a thousand years. 

They’re truly amazing and beautiful.

western juniper tree

Because most of the hike is on the south side of the mountain, the snow tends to melt much more quickly than the south side, as you can see from the following two shots. 

You know you’re almost to your destination once you loop around the darkside of the mountain.

cougar crest trail

And voila! You’ve reached your destination! Look at that view! 

The biggest peak in the distance is San Gorgonio, AKA Old Gray Back, the highest peak in Socal. You can also see Big Bear Lake and Snow Summit to name a few.

Check out this awesome interpretive trail located literally down the street from Cougar Crest. The trail features multiple plants and animal habitats which are detailed in a downloadable guide in the post below:  

Woodland Interpretive Trail

cougar crest trail

Need help identifying the peaks? I got you covered. I use the app, Peak Visor, to help me identify all the peaks on my hikes. 

It’s super cool. You can download it here for iPhones and here for Androids.

cougar crest trail

One thing to keep in mind regarding Cougar Crest is that it’s not a peak. It’s simply a ridge as the name implies. 

Do you want to enjoy amazing lake views without hiking 5 miles? My favorite Big Bear trail leads hikers to a huge boulder formation that can be climbed to enjoy scenic views.  Check it out in the link below: 

Castle Rock Trail 

cougar crest and bertha peak

However, some people like to elongate the trail by hiking up to Bertha Peak. It’s an additional .6 miles to the top and a total elevation of 8502 feet. 

If you want to do the same, stay on the trail until you see a sign that says Bertha Peak located on the junction of the famous Pacific Crest Trail, and head up. 

bertha peak

Unfortunately, we ran out of daylight so we ended the hike on the more popular Cougar Crest Trail. We had no complaints as the views are breathtaking.

Cougar Crest Trail

We loved this hike, especially because of the snow and the views. I’m positive you will too.

FAQs

How Long Is Cougar Crest Trail?

The trail is a total of 5.43 miles, out and back, and is located on the north side of Big Bear Lake. Thus, offering views of the mountain resorts and San Gorgonio.

Is Cougar Crest Trail Open?

Cougar Crest Trail is currently open.

What Is The Elevation Gain Of Cougar Crest Trail?

The elevation gain for Cougar Crest is a total of 900 feet.

Do You Need An Adventure Pass For Cougar Crest Trail?

An Adventure Pass is required to park at the trailhead parking lot. Those who do not own an Adventure Pass can purchase a daily $5 pass at the Big Bear Discovery Center, gas stations, or nearby stores, which help support the preservation of the forest. Smoking and campfires are not allowed in the area.

Eaton Canyon Falls: Best Guide On Hiking LA’s #1 Waterfall (Closed)

Eaton Canyon Falls: Best Guide On Hiking LA’s #1 Waterfall (Closed)

  • Total Miles: 4.02
  • Time: 2.5 Hrs
  • Difficulty: Easy
  • Best Season: Spring
  • Elevation Gain: 449 Ft
  • Max Elevation: 1370 Ft
  • Type of Trail: Out & Back
  • Dogs: Allowed On A leash
  • Restrooms: Available At The Parking Lot
  • Trail Popularity: Extremely High

I’ve hiked Eaton Canyon Falls more than most trails as it was one of the first places I visited when I first began my outdoor journey. I know it like the back of my hand, and now I’m going to teach you how to make the best of it.

Eaton Canyon Falls is the most popular waterfall in the San Gabriel Mountains. The 4 mile hike requires crossing the white alder decorated creek multiple times as it weaves through the canyon’s steep and narrow walls, and ends at the beautiful 40 foot cascade. Parking lot and restrooms can be found at the trailhead. Dogs must be on a leash.

Eaton Canyon Falls is one of the most popular waterfalls in SoCal, and undoubtedly, the most popular in LA. Explore abandoned ruins, huge waterfalls, and amazing views by clicking the links below:

Best Hikes In Los Angeles

Best Waterfalls In Southern California

Eaton Canyon Trail Map

Choose from 3 trailheads depending on how much you want to hike. The distances for each trailhead is detailed below.

powered by Advanced iFrame

Download Printable PDF Map 

Address & Directions

Trailhead 1: 4.02 miles roundtrip. Elevation Profile shown below. The first and most popular of the three trailheads. It begins at the parking lot where the Nature Center is located.

Eaton Canyon Elevation Profile

Clicking the following link to redirected to the trailhead via Google Maps:  1750 N Altadena Dr, Pasadena, CA 91107.

Trailhead 2: 1.9 miles roundtrip. The second trailhead begins further up the canyon off of Pinecrest Dr where the Mount Wilson/Pinecrest Gate is located.  Click here to get directions.

Keep in mind the hours for the Mt Wilson Toll Rd are 8am – 7:30pm Monday through Sunday.

Trailhead 3: 3.3 miles roundtrip. The third and least known route is the Henninger Trailhead off of N Altadena, which cuts halfway through the Eaton Wash. Keep in mind that crossing the wash may be a difficult feat during very rainy seasons.

You can get directions to the Henninger trailhead by clicking here.

Helpful Links

Weather Forecast

SoCal Adventure Pass (required to park in SoCal mountains)

Eaton Canyon Nature Center Association

Hiking Eaton Canyon Falls 

I started the hike via the most popular trailhead that begins at the Eaton Canyon Nature Center.

If you have kids, do them a favor and visit the nature center. It’s such an awesome place.

They have live animals on display, info on the surrounding area, and more. They’re open every day from 8-5pm except Mondays. The nature center phone number is (626) 398-5420.

Eaton Canyon Nature Center

If you’re like me and eat like a horse after every hike, consider taking food to barbecue at the Eaton Wash. Why not make a full day out of your trip.

Eaton Canyon Cooking Grill

Below is the first creek crossing, which also happens to be the biggest.

After many years of visiting Eaton Canyon  I noticed that water at the first creek crossing usually signifies a flowing waterfall. Thankfully, I was right again on this visit.

First Creek Crossing At Eaton Canyon

If you have family or friends that can’t make it to the falls, they’ll still be able to appreciate the beauty of the wash.

Multiple trails lead from the dirt road down into the wash, where the brush and water make it an enticing area for kids to play in.

The wash is safe the majority of the year, just make sure it’s not raining and the water level is low before giving your kids permission to explore.

Eaton Canyon Wash

Once I reached the Chuck Ballard Bridge shown in the image below, I hopped off the dirt road and onto the trail that begins at the mouth of the canyon.

It’s at this point the hike gets much more scenic, with Western Sycamore trees and White Alders lining the creek bank for the majority of the hike.

The bridge can be used to access the dirt road known as the Mt Wilson Rd, the oldest American road in the San Gabriel Mountains that leads up to Henninger Flats, or Mt Wilson if you hike to the peak.

Henninger Flats is a mountain nursery founded by Theodore Parker Lukens (I read his biography that you can find here), a former mayor of Pasadena and friend of John Muir.

chuck ballard memorial bridge eaton canyon

After searching both online and offline, I finally found the true purpose of the structure shown below.

Initially, I believed it was some sort of water pump, but according to John Robinson’s book The San Gabriels 2, it’s actually a stream gauging station used to measure water levels, and it’s not the only one.

More can be found in the San Dimas Experimental Forest which is unfortunately, closed to the public, but for a good reason. They’re doing marvelous work for our mountains in San Dimas.

If you love our mountain history, check out Robinson’s amazing book, The San Gabriels 2. Robinson’s work is invaluable in preserving our history, which is why his books are my most prized possessions.

Plus, if you decide to purchase the book I’ll receive a small commission that helps me keep this website going.

Tool For Measuring Water Level At Eaton Canyon

The creek is rarely more than 1-2 feet deep, but since it had just rained the day prior to my visit, some areas were 3-4 feet deep.

Hence, watch your step and really consider my advice regarding trekking poles and hiking boots.

I don’t know about you, but when I can hear a waterfall before I’m able to see it, it gets my heart pumping.

Below is the second to last creek crossing before I reached the falls. It’s about the same length as the first creek crossing, but there are less rocks and dry surfaces to cross on. Fortunately, it’s not deep (less than one foot).

There she is, beautiful Eaton Canyon Falls.

Keep in mind the only reason the falls was flowing really well during my visit was due to the rain from the previous days.

However, if SoCal had a snow-packed winter, the falls may look just as full in the late spring.

eaton canyon falls

Fun fact: The rock wedged at the top of the falls has been there since at least the late 1800’s.

Want to hike more nearby waterfalls? Check out the post below!

Best Waterfalls In LA County

eaton canyon falls

I flew my drone to get a bird’s eye view of the falls when I remembered something very important.

Most people don’t know that there is a second falls above Eaton Canyon Falls, with a rockslide and swimming hole. However, it is no longer accessible.

eaton canyon falls drone shot

Visitors used to be able to access the second falls by venturing into one of the water tunnels in the area, but unfortunately, the tunnel has been closed.

Now, the only way to get to the falls is to climb up the super dangerous Razorback Ridge, which I do NOT recommend, as multiple people have been seriously injured and died attempting to do so.

eaton canyon falls drone shot

The image below is a shot I took of Eaton Canyon Falls in the spring of 2016-17ish, after a not too snow-packed winter. I wanted to include it to show you how the falls will more than likely be flowing during your visit.

Also, the falls tends to dry up pretty badly around midsummer, and won’t flow again until the following spring. Therefore, plan accordingly.

eaton canyon falls

Don’t leave just yet! Explore abandoned ruins, more waterfalls, and amazing views by clicking the link below:

Best Hikes In Pasadena

Eaton Canyon History

eaton canyon falls history

The image above is a vintage photograph I purchased depicting Eaton Canyon Falls at the beginning of the 20th century. Notice the rock which is currently lodged at the top of the falls is missing.

Eaton Canyon has a long and rich history beginning with the Tongva people, the Spanish, Mexicans, and last but not least the Americans. 

Much of the Tongva history has been lost, but we do know the Spanish called Eaton Canyon, Canon Precipicio, which means the “Precipice Canyon” due its steep canyon walls. 

In 1877 legendary conservationist (and hero in my book), John Muir, shown below, visited Eaton Canyon Falls and dubbed it the Yosemite of the San Gabriels. What an honor! 

John Muir

Eaton Canyon had multiple uses including hunting, water for irrigation, and even gold prospecting. 

Irrigation 

Once CA became US territory, a man by the name of Judge Benjamin Eaton, for which the canyon is now named after, purchased Fair Oaks Ranch and the surrounding land in 1865. 

The street cutting through Old Town Pasadena, Fair Oaks Ave, bears the name of this long forgotten ranch. 

Judge Eaton, a patriarch of the San Gabriel Valley, was a pioneer in tapping water from the creek and used it to irrigate his ranch.

He built a water system consisting of miles of pipeline running through the canyon, which is still there!

Here’s a picture of one of those 157 year old pipes. Give or take a few years. 

Many of the surrounding canyons in the San Gabriels contain these pipes, as they were also used for irrigation. 

Water tunnels were constructed for irrigation purposes, with the longest measuring 600-700 ft.

Unfortunately, this tunnel was blasted in the 1980’s to block the entrance, but part of the rock wall still remains.

You can see the entrance of a different tunnel on your way to the falls. 

It was one of these types of tunnels which allowed you to bypass the fatal Razorback Ridge, and safely access the second hidden waterfall in the Canyon. 

Gold 

Although hard rock mining never took place in Eaton Canyon, placer mining (panning for gold in the creek) wasn’t rare. 

In 1853-1854, gold was found in Santa Anita Ranch (owned by Lucky Balwdin who now has a Belgian pub with my favorite beer named after him) and in the surrounding canyons including Eaton, Rubio, and Arroyo Seco.

Deep sand pits at the Eaton Wash which were used to look for gold still remain to this day. 

Over the span of 18 years, a total of 2 million dollars worth of gold dust was sold from San Gabriel, Santa Anita, and Eaton Canyon.

-Thompson and West’s History of LA County 

FAQs

How long is the Eaton Canyon Falls hike?

Eaton Canyon Falls is a total of 4.02 miles roundtrip when starting from the Nature Center parking lot.

Does Eaton Canyon have a waterfall?

Eaton Canyon has a 40 foot waterfall. In fact, the entire canyon has many waterfalls, which is why it’s one of the most popular canyons for rappelling.

Is Eaton Canyon Falls kid friendly?

Eaton Canyon Falls is most definitely kid friendly. There are no dangerous ledges, the water is not deep, and the trail has a low elevation gain. 

Is Eaton Canyon Falls stroller friendly?

The trail is only stroller-friendly from the Nature Center to the mouth of the canyon where the Chuck Ballard Bridge is located. However, the trail from the mouth of the canyon to the falls is not stroller-friendly.

Do you need reservations to hike Eaton Canyon Falls?

Reservations are no longer required to hike Eaton Canyon.

Can you swim at Eaton Canyon Falls?

The pool at the base of the falls is not deep enough for swimming. However, cooling off in the pool and the falls is permitted.

Do you have to pay for parking at Eaton Canyon Falls?

Parking is free for all three Eaton Canyon Falls trailheads.

What city is Eaton Canyon Falls in?

Eaton Canyon is located in Pasadena, CA.

Does the waterfall flow in the autumn and winter seasons?

Eaton Canyon Falls usually dries up during the summer and is nothing more than a trickle during the fall and autumn.

When does Eaton Falls begin to flow?

Eaton Canyon Falls begins to flow every year around mid-spring.

Top 12 Hiking Gifts For Men & Women

Top 12 Hiking Gifts For Men & Women

It’s that special time of the year again! But don’t worry, I got you covered with Christmas gift ideas for hikers of all ages. I’ll start with the cheapest to the most expensive. 

Although I receive a small Amazon affiliate commission when you buy these products via my links, I own and use many of them, which is why I’m suggesting them.

The products that have a white background, are products that I do not own but have done my homework to ensure they’re reliable. They’re on my personal wishlist. 

Here we go!

Michael Josh Whistles

1 – Michael Josh Survival Whistles $7.19

7 bucks can save your life. The packet contains two. I purchased these whistles back in June 2021 for me and my girlfriend and immediately attached them to my backpack.

I don’t realize it’s there most of the time because it’s so lightweight. They’re VERY loud.

View Here

Selfie Stick, Tripod Stand

5 – 3 in 1 Selfie Stick, Tripod, Remote Control $9.99

Everyone knows, pics or it didn’t happen. This specific product is lightweight, half the price of most competitors, and rotates to take both vertical and horizontal shots. Many don’t rotate.

I don’t take pictures with my phone much these days, but if I did, this would be a must in my collection of hiking gear.

View Here

Nalgene Wide Mouth Waterbottle

2 – Nalgene Tritan BPA-Free Water Bottle $11.99

This is my go-to gear for carrying water. I prefer this 48 oz (1.4 liter) water bottle over a hydration bladder for several reasons: it leaves more room inside my backpack, it’s way easier to clean, and no leaky messes. It’s perfect for hikes ranging up to 4-5 miles.

View Here

LifeStraw

3 – LifeStraw Water Filter $12.99

Lifestraw pledges to provide school kids with drinking water for an entire year with every product that’s purchased. It can also save your loved ones life in an emergency.

Filter water from a moving creek or stagnant lake. It’s super light, doesn’t take up room, and affordable. If I’m venturing into a very rural area, and/or there’s a small chance of getting lost, this is one of the first items that goes into my pack.

View Here

The Lost Art of Reading Nature's Signs

4 – The Lost Art of Reading Nature’s Signs $13.82

For true outdoorsmen and women, walking in nature is not enough. We want to become a part of it and feel truly connected. Which is why this amazing book is on my wishlist.

Author Tristan Gooley is a world navigator who shares with us all his skills and knowledge regarding animal tracking, weather forecasting, locating water, and much more. This book may be a small gift, but it can have a huge impact in someone’s life incase of an emergency.

View Here

Missing 411 Book

6 – Missing 411 Western & Eastern North America $24.95

These fascinating books by former detective, David Paulides, detail the mysterious disappearances in National Parks. Cases include people disappearing just a few feet away from family and friends or toddlers “traveling” miles into rural areas without trails.

The cases share commonalities, such as berries, nearby water, or bad weather affects the SAR. The bodies are sometimes found in areas that are virtually impossible to reach, less often they’re found alive, but most of the time they disappear without a trace.

Western North America click HERE. Eastern NA click HERE

LifeStraw Filter Bottle

7 – LifeStraw Go Water Filter Bottle $29.96

The LifeStraw bottle has 2 benefits over the aforementioned Nalgene bottle. Less weight and infinite amount of water. The only catch is you have to be near a water source to filter the water. Pretty obvious right?

For this reason I only take it with me when I know I’ll be hiking near a creek or spending lots of time at a swimming hole or lake. It’s a very useful addition to my pack.

View Here

DanForce Headlamp

8 – DanForce Headlamp $29.97

One of the issues I’ve had with other headlamps is how dim they are, but not with DanForce. The 3 bulbs give off a powerful blueish white light.

It’s the perfect headlamp for night hikes and exploring the inside of old abandoned mines.

View Here

TrailBuddy Hiking Poles

9 – TrailBuddy Hiking Poles $37.99

They’re light, collapsable, and help so much on the steep sections. They’ve also saved me a few times from slipping and falling in the snow. They come with multiple adapters for various terrains, including mud, gravel, snow, and dirt.

I’ve owned a pair of these since May of 2020 and the’ve never let me down.

View Here

10 – Merrel Moab 2 Vent Mid HIking Boots $79.95 – $226.09

First and foremost, these are the BEST hiking boots I’ve ever owned for two primary reasons: They’re incredibly light and highly ventilated, making them ideal for hiking in hot weather. They also provide tons of traction and ankle support. It’s okay to cheap out on certain gear, but a good pair of boots is definitely not one of them.

outdoors men click HERE outdoors women click HERE

Osprey Statos 24 Backpack

11 – Osprey Men’s Stratos 24 $120.53 / Women’s Sirrus 24 $140

The Stratos and the Sirrus are both 24 liters and identical. BEST hiking backpack I’ve ever owned. It has adjustable shoulder straps for maximum comfort. The backpanel is made of a ventilated tension mesh that decreases back sweat and provides additional comfort.

Their larger size is more ideal for longer hikes or you carry lots of gear. They boast a raincover, 2 bottle pockets, 3L hydration sleeve, & more. Amazon is accepting monthly payments without a credit card. Worth every penny.

Men View Here Women View Here

DJI Mavic Air 2

12 – DJI Mavic Air 2 Fly More Combo $988

This is the drone I use to take all my aerial pics and recordings. See some of my images here.  Amazon allowed me to make 5 monthly payments WITHOUT a credit card. Pretty sweet right?

The Air 2 is the best bang for your buck and the perfect medium size for longer hikes. The shots look AMAZING. Let your loved one enjoy the outdoors from a completely different and breathtaking angle.

View Drone Here

Bolsa Chica Ecological Reserve: HB’s Saltwater Wetlands

Bolsa Chica Ecological Reserve: HB’s Saltwater Wetlands

Distance 

3 Miles

Time

1.5 Hrs

Difficulty 

Easy

Season

All Year

Elevation Gain

72 Ft

Bolsa Chica Ecological Reserve is a 1400 acre saltwater marsh with seasonal estuarine conditions located alongside Pacific Coast Highway in Huntington Beach, CA. It boasts five miles of trail through fresh and saltwater wetlands, lowlands, and mesas. 321 aerial species make the reserve a hot-zone for birdwatchers and photographers. No biking or pets are allowed and fishing is restricted to certain areas. 


Bolsa Chica Ecological Reserve Map

powered by Advanced iFrame

Bolsa Chica Reserve Elevation Profile

Download Printable PDF Map

Where to Park

Parking and entrance is free

The reserve offers 2 parking lots. One is located on Warner Ave on the corner of Warner and PCH. The second parking lot is about a mile down from PCH.

Parking lot on the corner of PCH and Warner: Click here

Parking off of PCH: Click here

** I recently went back to take pictures during sundown. Images adjacent to each other were taken at virtually the same location, but some may be looking in a different direction. **


The Bolsa Chica Reserve

I’m really excited to share this place with you as I live only 4 minutes away! You might see giant brown Pelicans or the classic American Bald Eagle if you’re lucky. The reserve is a must-do if you’re planning on visiting HB.

We started our walk in the first parking lot, where the Bolsa Chica Conservancy building is located, and made our way towards the bridge. (You can’t miss it).

The area located to the right of the bridge is the only location where fishing is allowed. The image below shows the view of the rest of the reserve from the bridge.

As we continued our walk through the reserve, we came across a rest stop offering amazing views of the wetlands and Bolsa Chica State Beach. You can see all the way to Catalina Island from here.

During the Fall and Winter, the water dries to leave a marsh ecosystem. If you’re looking for a beautiful sunset spot, this is it.

The dirt trail runs parallel to a roughly 20-foot embankment and PCH. If you have small children I wouldn’t let them get too close.

Here’s the view looking out into the ocean and the beach.

Roughly 1 mile into walk, we arrived at the heart and sole of the reserve. This is where most birdwatchers and photographers hang out because of the abundant wildlife.

We made our way down the stairs and onto the dirt road in the distance to begin a small loop.

If it’s a clear day you can expect to see the majestic Santa Ana mountain ranges across the valley. When it snows, the snowcapped peaks are a bonus for the reserve’s visitors.

We were surrounded by water on both sides of the road, and I was very surprised to see so many fish in the water.

Schools of fish frequently appear near the surface of the water as various birds feast on them.

Birds patrol the skies looking for distracted fish to snack on.

It really feels like you’re just a visitor. A spectator witnessing the interaction between plants and animals, prey and predators.

When we reached the far end of the loop, we crossed a second bridge before heading back on another dirt road opposite to the first.

Here’s the view from the bridge looking out towards PCH.

Shortly thereafter, we reached the largest viewpoint in the reserve. You can see everything from Catalina Island, the largest body of water in the reserve, and the mountain ranges across the valley.

The viewpoint area sits adjacent to oil rig machines, which many claim are an endangerment to wildlife and the reserve.

Once you complete the loop, head back up the stairs and make your way to the parking lot.


History of Bolsa Chica Reserve


Bolsa Chica was first inhabited 8,000 years ago by Native American tribes known as Tongva and Acjachemen. They built seasonal settlements on the Mesa to avoid harsh winter weather in the Santa Ana Mountains.

When California became a part of Mexico, it was dubbed Bolsa Chica, which means Small Purse, after Rancho La Bolsa Chica owned by Joaquin Ruiz. He was given this land by the descendants of Spanish soldier Manuel Perez Nieto.

Following the American conquest, the Nieto family was unable to pay certain debts, so their land was subdivided and sold.

A group of Los Angeles businessmen bought a portion of the land, and the wealthy duck hunting Bolsa Chica Gun Club was born in 1899. Among those who used the reserve to hunt, was national baseball star Babe Ruth.

Oil was discovered in the reserve in 1920. Therefore, the Bolsa Chica Gun Club signed an oil and gas lease with Standard Oil Company of California to begin drilling oil, which didn’t begin until 1940 when the Signal Oil Company took over the lease.

During World War 2, the US Army took over the land following the attack on Pearl Harbor and proceeded to build artillery battery to protect the Port of Long Beach and Fort MacArther.

In 1972, Signal Landmark signed off roughly 310 acres of land to the state, which officially established the Bolsa Chica Ecological Reserve. In 1997, the remaining lowland portions of Bolsa were purchased by the state, and in 2004 the area was restored to its original conditions in the early 1800’s.


Bolsa Chica Wildlife

Bolsa Chica is especially well known among birdwatchers and photographers. Over 300 bird species are found in the marsh as they make a migratory spot, including 18 rare species such as the Californian Brown Pelican and American Bald Eagle.

The best time for bird watching depends on the species. However, the two main seasons that offer a wide variety of birds are summer and winter.

You can find a thorough checklist of all the birds which have been spotted at Bolsa by clicking the link here. 

Please be very respectful of the area as there are quite a few endangered species who call this place home. Drones cannot be flown over the reserve nor are equestrians are not allowed to enter the premises.

Wildlife in the wetlands includes far more than just birds. Sharks, fish, coyotes, snakes, lizards, rabbits, and squirrels all roam the marsh, cohabiting in a balanced ecosystem that only exists thanks to the relentless efforts of conservationists.

Shoemaker Canyon Road: LA’s Nuclear War Escape Tunnels

Shoemaker Canyon Road: LA’s Nuclear War Escape Tunnels

Distance 

5.1 Miles

Time

2.5 Hrs

Difficulty 

Moderate

Season

All Year

Elevation Gain

1267 Ft

Did you know LA has two abandoned tunnels that were built in order to escape nuclear attacks during the Cold War? You don’t want to miss walking through the deserted Shoemaker Canyon Road, also known as Road to Nowhere. Plus, I’ll share two more hidden tunnels that I found along this trail!

Shoemaker Canyon Road is a 5.1 mile hike located in the East Fork of Asuza Canyon. The entirety of the trail includes a dirt road which runs through 2 tunnels built in the 1950’s in the event of a nuclear attack on LA. Dogs are allowed on leashes and there are no restrooms.

Shoemaker Canyon Rd, along with trails to Nazi ruins, 500 Ft falls, and epic views, can be found in the following links:

Best Hikes In Los Angeles

Best Hikes In Southern California

Map of Shoemaker Canyon Rd

powered by Advanced iFrame

Shoemaker Canyon Rd Elevation Profile

Download Printable PDF Map

Directions & Parking

Directions: Shoemaker Parking Lot

Try to hike this trail in the early spring, fall, or winter months. 

Hiking this trail in the summer will be agonizingly hot and sunny, especially since there’s hardly any shade. So, plan your trip accordingly! 

The Trail

Starting off at the parking lot, I made my way around the gates. This is where the trailhead begins. 

As I looked to my right, I could see the parking lot for a popular hike known as the Bridge to Nowhere, but that’s a different adventure for another day. 

The view here is really nice, too!


First Drainage

I wanted to venture off a bit since I knew there was a hidden drainage near the parking lot.

To get to this first drainage tunnel, you’ll need to spot the area where there are tons of small piles of dirt. It’ll be on your left-hand side towards the beginning of the hike. It’s well before the first nuclear escape tunnel. 

This drainage is hidden by shrubs, so just look for these short stone walls towards the bottom ditch. 

This is how the entrance looks. 

I took my flashlight out and ventured inside. 

I got a pretty cool view of the canyon and hills. You’ve got to go inside and take a look for yourself!


First Nuclear Escape Tunnel

After the first drainage, I continued making my way to the first nuclear escape tunnel. 

Off to the side, I could see this enclosed area where they used to have tons of beehives a few years back. There’s also another beehive area along the trail. 

It seems like the beehive farming days are over. 

Further up, I could see the first main tunnel. This one was completed in 1961 and goes in about 400 yards. 

Although it’s been vandalized with graffiti, it’s still very intriguing to walk through this dark tunnel.

You can bring out your flashlight if you’d like since you do have to walk for a bit. But, I found it to be more exciting venturing into the unknown. 

Read More: Murphy Ranch Trail: Nazi Ruins in Los Angeles 

A light at the end of the tunnel. 

Down the road, after crossing through the tunnel, I looked to my side and could spot it from afar.

In my opinion, this is one of the coolest views of this trail. You get to see the sun illuminate the canyon and trees all while spotting a dark tunnel nestled in the mountain.

It looks beautiful, yet eerie.


Second Drainage

To get to the second drainage, I decided to go completely off-trail to see what I could find. 

First, I spotted a water tank uphill. You won’t miss it, as it’s now covered in graffiti. However, don’t actually walk to the water tank. The tunnel is in the field below it. 

I made my way down through the purple-colored shrubbery. The drainage is located right below the Shoemaker Canyon Trail, hidden by overgrown vegetation. Walking through this wide and open area, I heard water flowing from a small creek. 

Here was the second drainage tunnel!

Read More: Vanalden Caves: 14ft Caves in Santa Monica Mountains 

I’m not going to lie, I was a bit scared to walk inside. I didn’t know who or what would be awaiting me. 

You’ll want to take out your flashlight, like I did, just in case.

It’s a pretty short tunnel that leads to another view of the area. 

No bears or ghouls here. Just views!


Second Nuclear Escape Tunnel

Back on the main trail,  I headed to the second main tunnel. 

This second tunnel was completed in 1964 and is about half the length of the first tunnel. At 250 yards long, it’s more well kept and less vandalized than the first one. 

In case you’re wondering, the trail continues to Rattlesnake Peak. But, I decided I’d leave that trail for another day. This was the end of the tunnel and my journey. 

Another interesting and thrilling hike within the San Gabriel Mountains!

Want to keep exploring cool places? Check out this stunning 50 ft falls and its bonus secret waterfall that most hikers overlook!

History of Shoemaker Canyon Road

Shoemaker Canyon Road was named after a man named Alonzo Shoemaker. Shoemaker was a miner back in 1855. He ended up making his way into this side of the San Gabriel Canyon, where he developed his claim in the upper part. 

He and his mining partner, John McCaslin, worked on the Shoemaker mine for many years. Later, in 1890, four skilled miners began working at the Shoemaker Mine where they installed a hydraulic jet system for mining.

Throughout the decade, there was a coming and going of miners. Then, the Standbergs came into the canyon in 1903. E.C. Standberg was one of the best miners in the entire area during this time. Later, in the 1930s, he and his two sons decided to continue digging in the Shoemaker Claim for some years.

A Cold War Scare 

In the 1950s and ’60s, Cold War-era leaders felt it was necessary to build an escape route for fellow Angelinos to escape through. With rumors and fear circling, they began construction in 1956. 

They finished building the first tunnel in 1961 and then the second tunnel in 1964. The plan was to have the tunnels extend all the way to Nevada. But, after only 4.4 miles of work, construction ceased in 1969. 

It’s a very crazy story, indeed. Now the tunnels sit in between the canyon walls, forsaken, only to be traveled by curious cats and adventure seekers like you and me.