17 Best SoCal Hikes For Kids: Safe, Easy, & Fun Trails

Not all trails are steep, sun exposed, backpack-lugging adventures. In fact, a huge portion of them are the complete opposite, and therefore, suitable for small children.

I browsed through my entire website to put together a list of the most kid-friendly hikes in Southern California. These trails will have you less worried about your child’s safety, and more focused on what really matters, fun and quality family time.

Here are a few things you can expect from this guide:

  • Detailed trail stats
  • Best season to visit
  • Recommended gear (if necessary)
  • Necessary precautions to keep in mind
  • Trails listed from least attractive to the most stunning

Why I Chose These Trails For Kids

In an attempt to balance safety and adventure, I ensured each trail passed the following requirements:

  1. No steep ledges. If steep ledges are present, I promise you they will comprise such a tiny section of the trail that you’ll be able to carry your kids.
  2. Gradual incline.
  3. No poison oak or, if present on the hike, remains at a safe distance away from the trail.
  4. Relatively short. Most of these trails are under three miles.

Let’s get started!

17) Quail Hill Trail

quail loop trail

  • Total Miles: 1.8
  • Difficulty: Easy
  • Best Season: Year-round
  • Elevation Gain: 152 ft
  • Time: 45 min
  • Restrooms: Available At The Parking Lot
  • Stroller Friendly? Yes!
  • Map, Directions, & Full Post: Quail Hill Trail

Quail Hill Trail is an easy hike located in Irvine which loops around beautiful golden hills that seem to glisten during sunset. Although it’s a short trail, there is no shade.

Hence, I highly recommend sunscreen, a hat, lots of water, and a pair of sunglasses probably wouldn’t hurt. The loops is located adjacent to the 405 freeway, so if you’re looking for an outdoor getaway, Quail Hill may not be ideal.

16) Paramount Ranch

Paramount Ranch

  • Total Miles: 2.53
  • Difficulty: Easy
  • Best Season: All Year
  • Elevation Gain: 272 ft
  • Time: 1.5 Hrs
  • Restrooms: Available
  • Stroller Friendly? Explained Below
  • Map, Directions, & Full Post: Paramount Ranch

Paramount Ranch is not an abandoned ruin, it’s a studio set where very famous movies such as Van Helsing or American Sniper have been filmed. There used to be an entire Western Town set, but unfortunately, everything except the church and train station are left standing. Still worth it, though!

The set is located at the trailhead, which is where the loop into the dry, sunny hills begins. If you don’t wish to hike the entire 2.1 miles you can easily cut it short by creating your own shorter loop, and the same goes if you wish to extend the hike.

The area where the church and train station are located is stroller friendly. However, pushing a stroller will not be possible once you begin the loop.

15) Lake Gregory

Lake Gregory

  • Total Miles: 2.3
  • Difficulty: Easy
  • Best Season: All Year
  • Elevation Gain: 59 ft
  • Time: 1.5 Hrs
  • Restrooms: Available At The Parking Lot
  • Stroller Friendly? No
  • Map, Directions, & Full Post: Lake Gregory Regional Park

Lake Gregory is a little lake located in one of my favorite mountain towns, Crestline, CA. One of the things I love most about the lake is the abundant pine trees, which make you feel like you’re in a dense forest far away from home.

The loop begins at the parking lot but quickly turns into a dirt path that follows the lakeshore fairly closely. However, the lakeshore is shallow and gradually deepens, so you don’t have to worry about the kids falling in.

Once you’re done with the hike, you can head over to all the restaurants in the downtown area which begin literally one block away from the lake.

Bonus Fact: During the summer, Lake Gregory sets up an entire water park! You can expect inflatable platforms in the lake and giant water slides. Cost of entry may vary. Lake Gregory gets snow during the winter!

14) Sycamore Canyon Trail
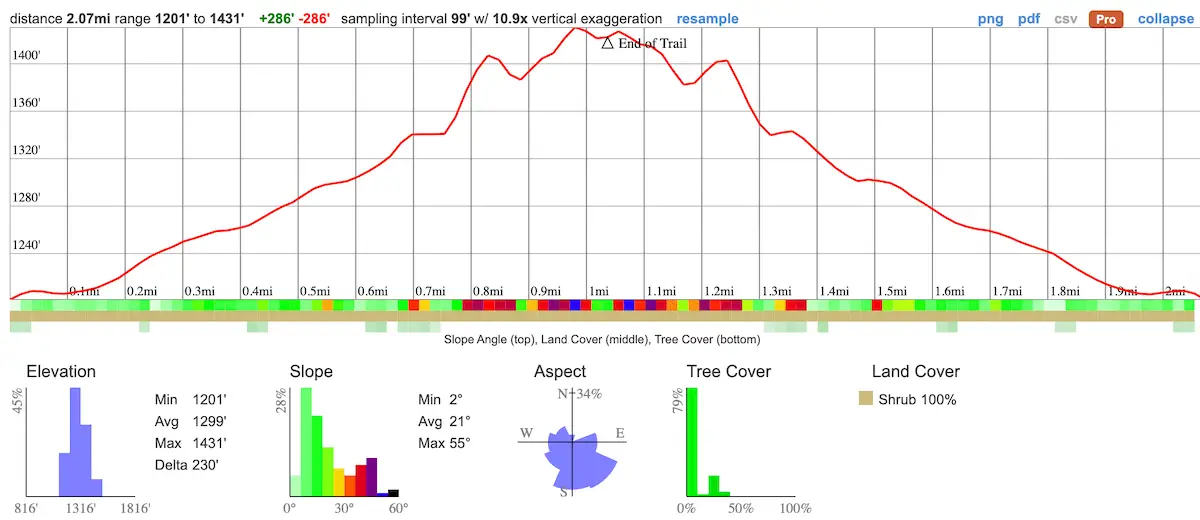
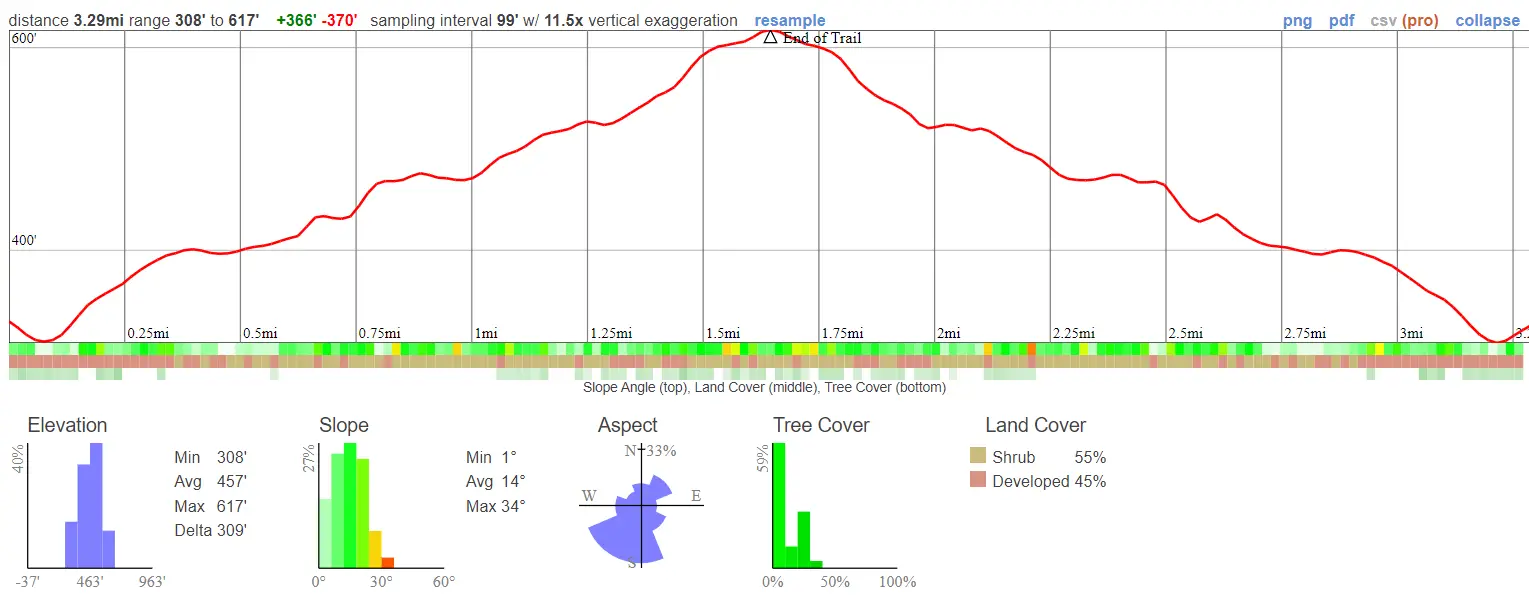
Sycamore Canyon Trail

  • Total Miles: 3.3
  • Difficulty: Easy
  • Best Season: All Year
  • Elevation Gain: 370 ft
  • Time: 90 min
  • Restrooms: Available At The Parking Lot
  • Stroller Friendly? No
  • Map, Directions, & Full Post: Sycamore Canyon Trail

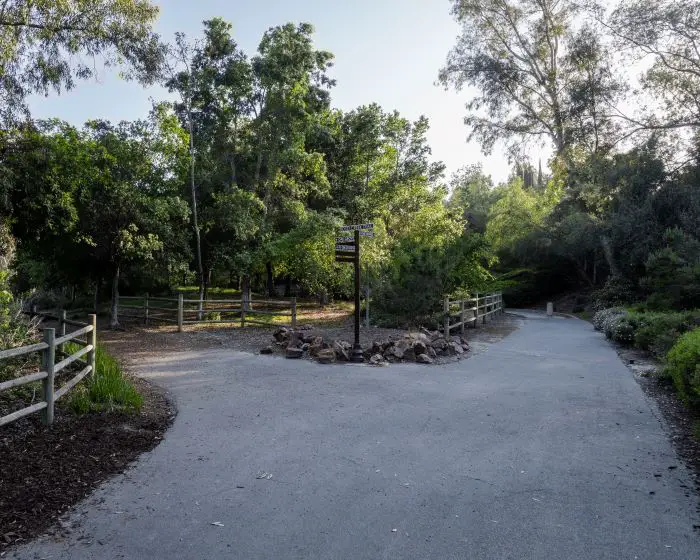
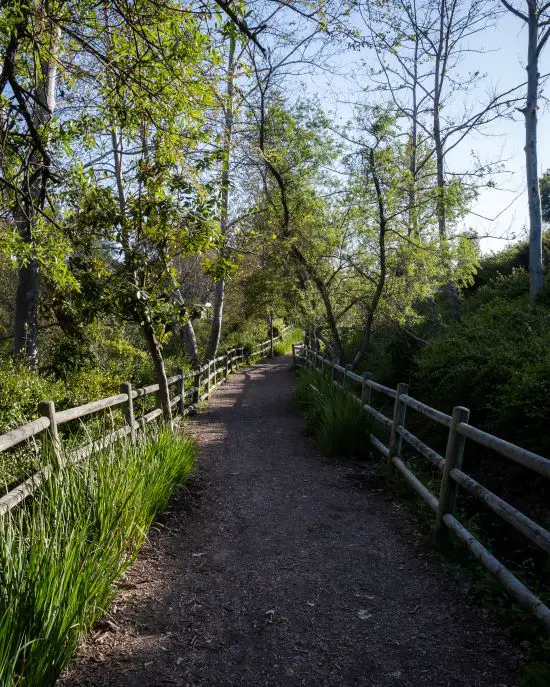
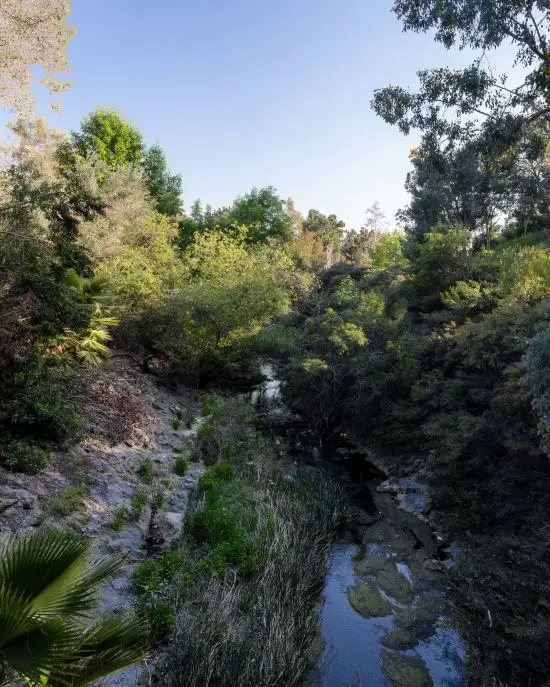
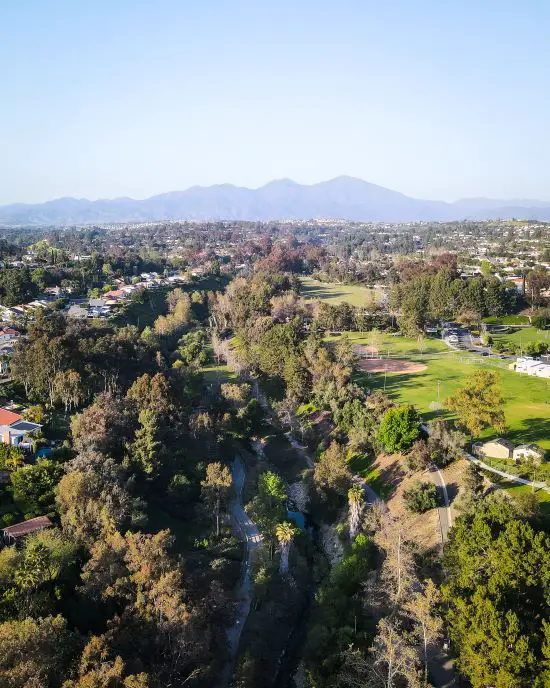
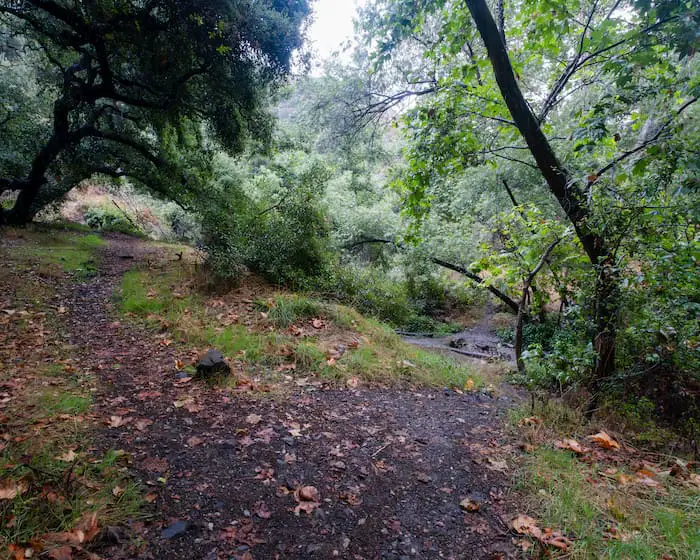
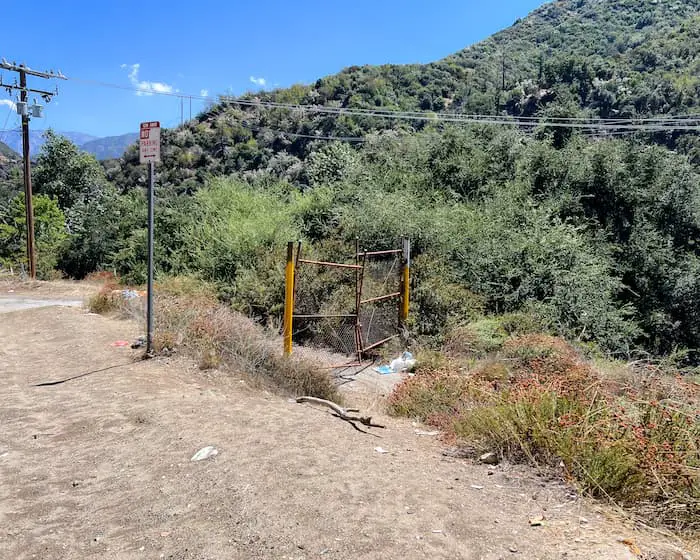
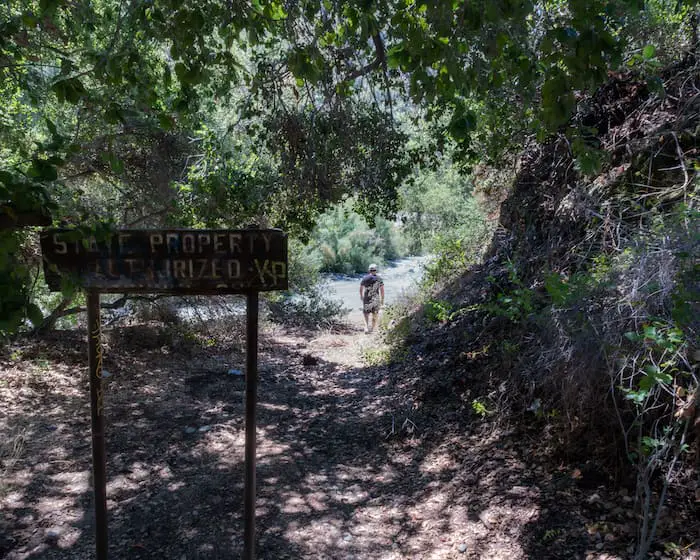
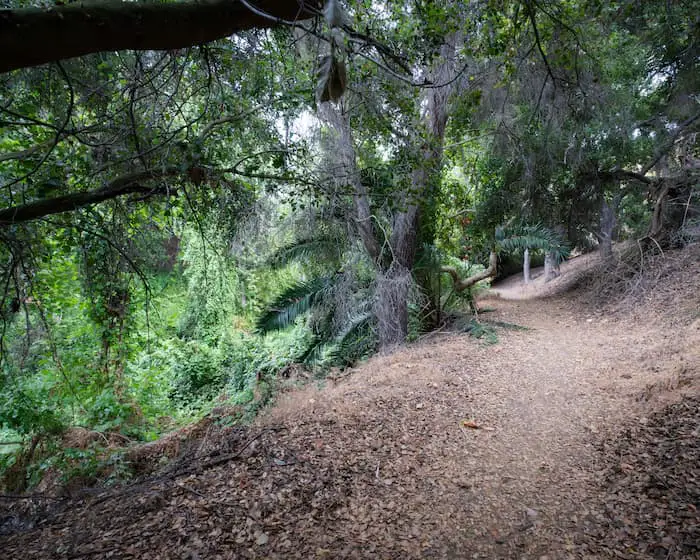
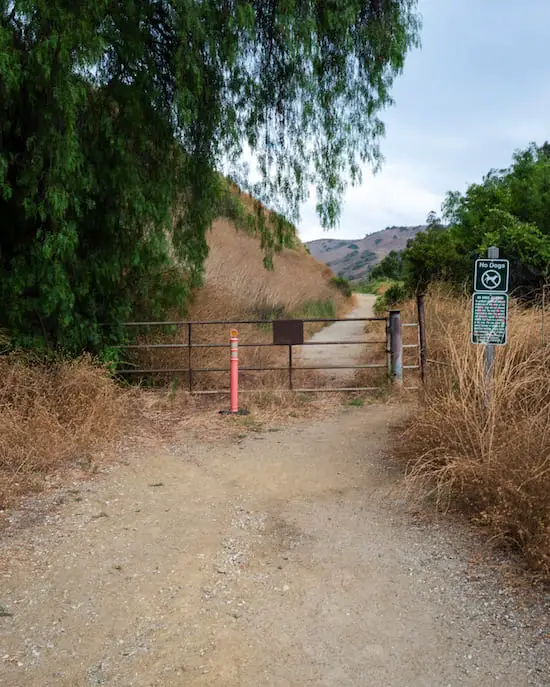
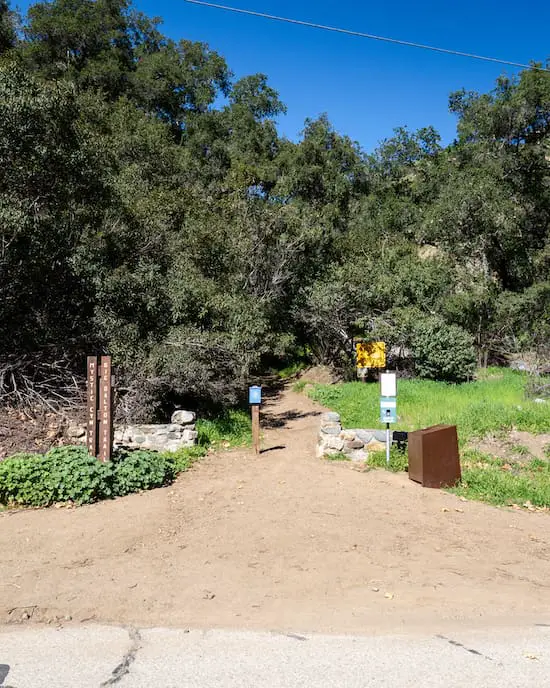
Unlike most trails, Sycamore Canyon Trail is not located in the mountains. Rather, it’s deep in the center of what I like to call, a concrete jungle, Whittier. The upside of its location is the ease of accessibility for those living in LA County.

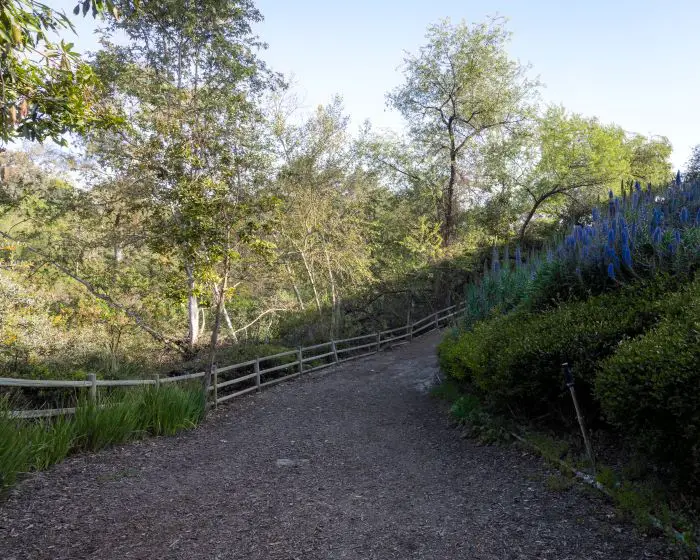
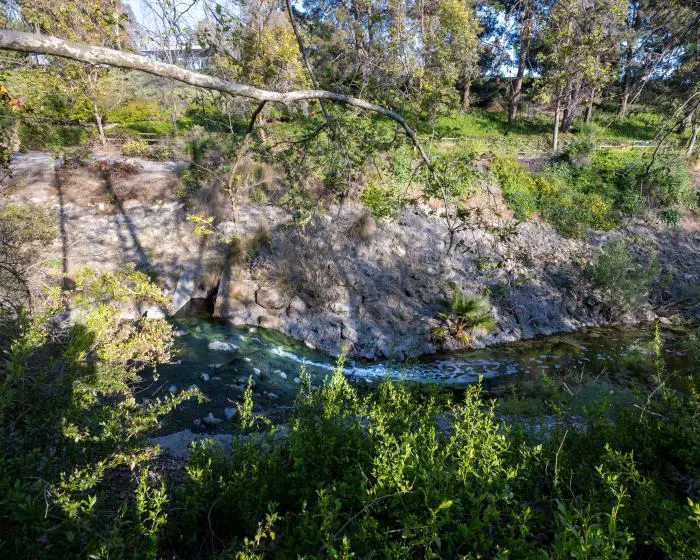
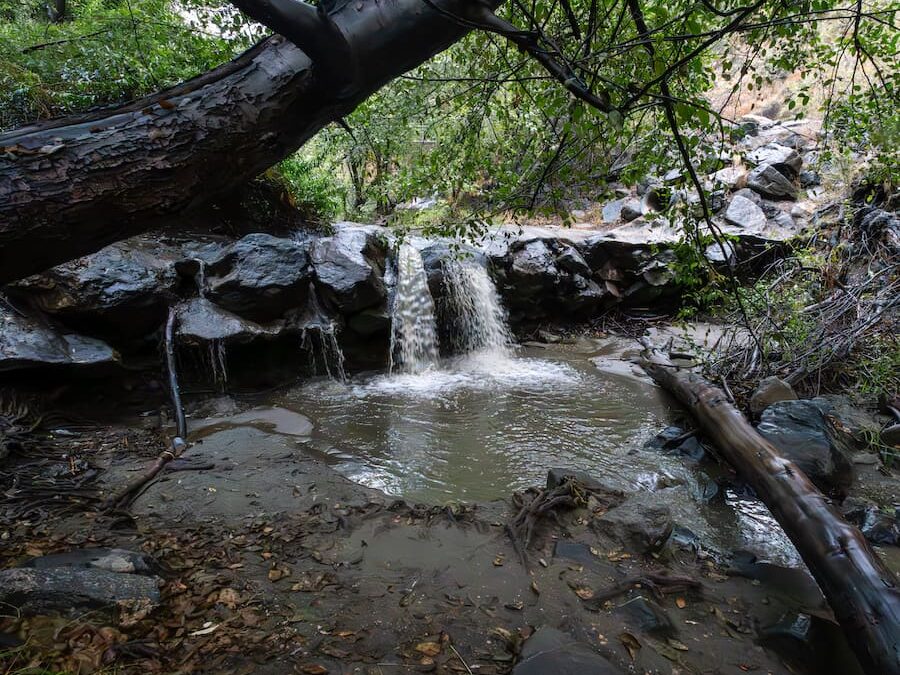
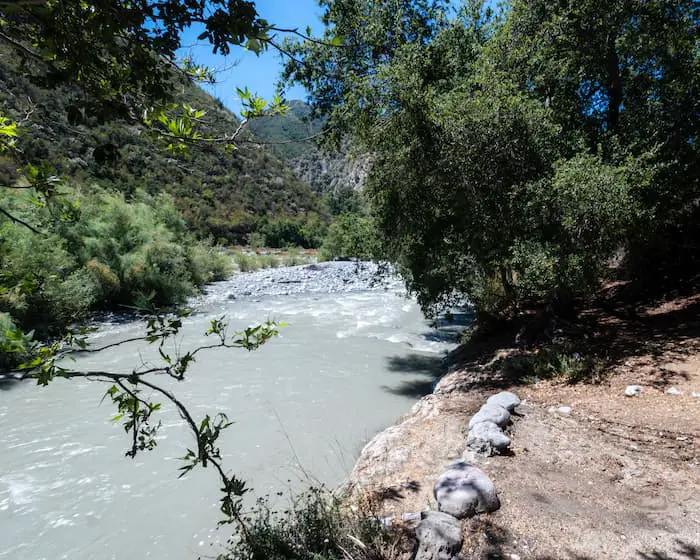
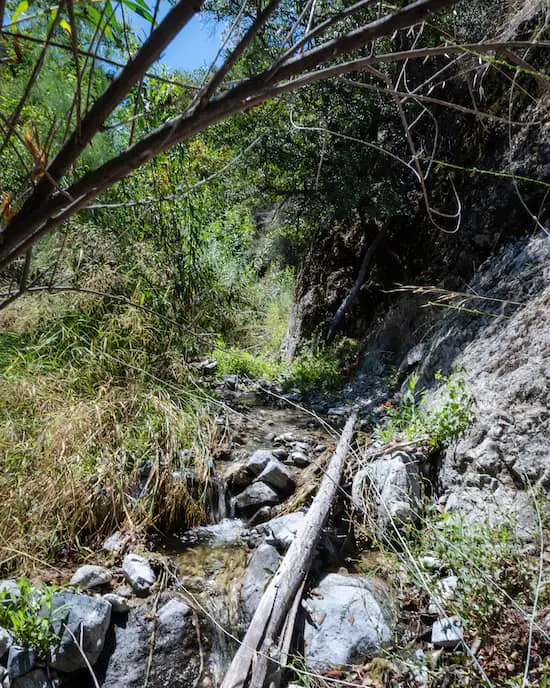
The trail is actually a dirt road for a large portion of the hike, leaving it exposed to the sun. However, the dirt road converts into a dirt trail and the scenery radically transforms into a highly vegetated, vibrant green, adventure with water visibly flowing in the creek.

13) Woodland Trail

Woodland Trail

  • Total Miles: 1.6
  • Difficulty: Easy
  • Best Season: Spring – Fall
  • Elevation Gain: 232 ft
  • Time: 1.5 Hrs
  • Restrooms: Available At The Parking Lot
  • Stroller Friendly? No
  • Map, Directions, & Full Post: Woodland Trail

The Woodland Trail is an interpretive trail in the most famous SoCal mountain town, Big Bear. The hike is virtually across the street from Big Bear Lake and features a wide variety of plants and animal habitats which you can learn about by downloading the guide.

I recommend hiking the Woodland Trail from Spring to Fall, as Big Bear gets snow in the winter and may interfere with some of the interpretive features.
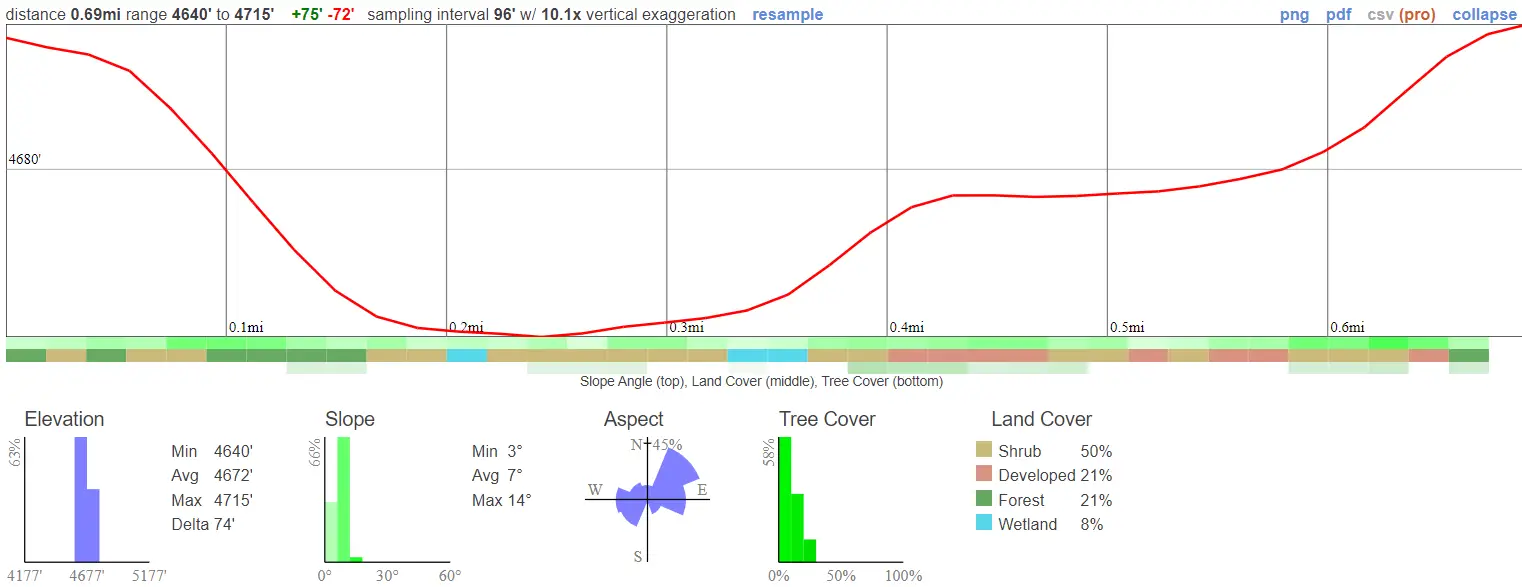
12) Stonewall Mine

stonewall mine

  • Total Miles: 0.7 (Can Be Extended)
  • Difficulty: Easy
  • Best Season: All Year
  • Elevation Gain: 75 ft
  • Time: 20 min
  • Restrooms: Available At The Parking Lot
  • Stroller Friendly? No
  • Map, Directions, & Full Post: Stonewall Mine

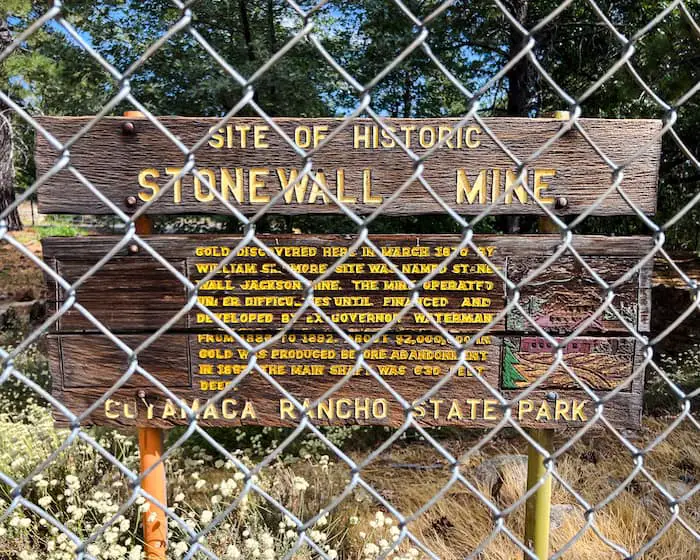
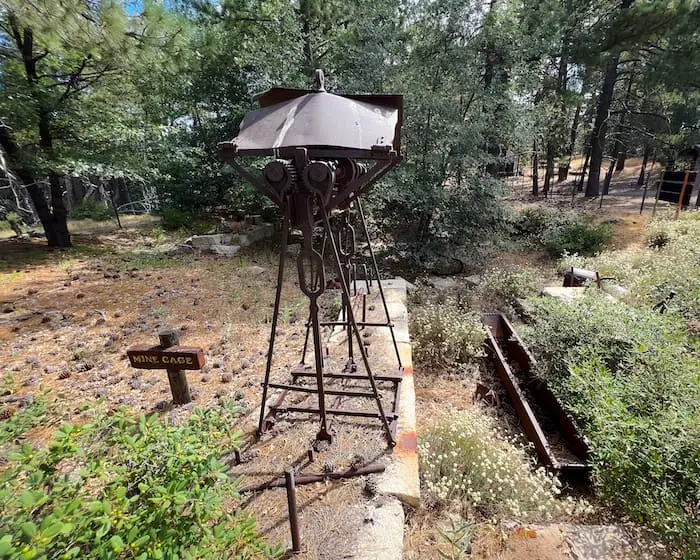
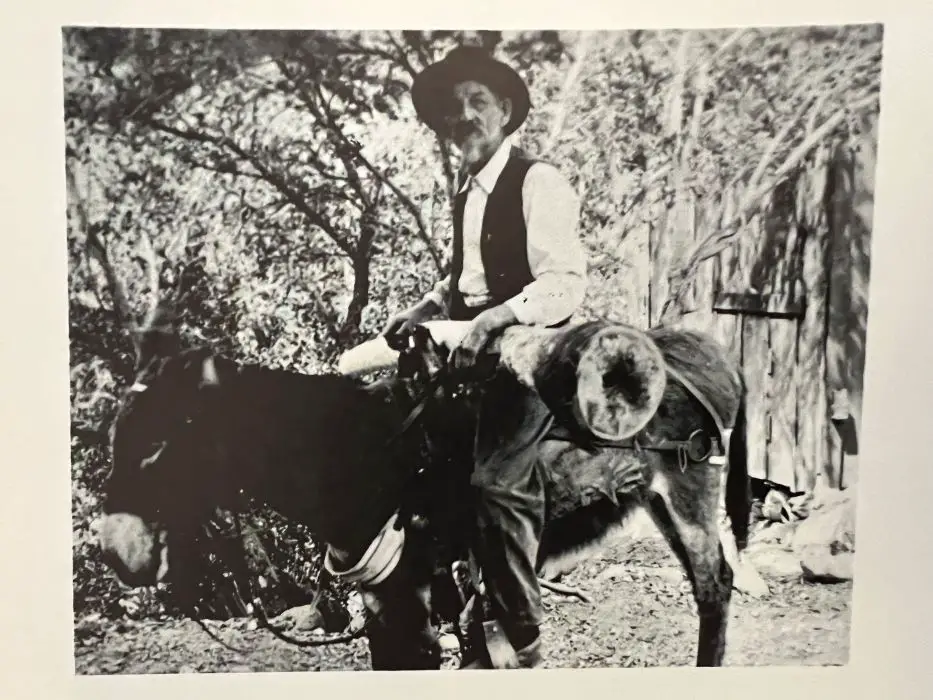
If you want to teach your kids a little bit of local mountain history, head over to the Stonewall Mine, an easy hike near Lake Cuyamaca featuring mining relics from the 1800s.

The trail is located in Cuyamaca Rancho State Park within the Cleveland National Forest. Although the relics are fenced off, they can nevertheless be seen from outside the perimeter. The fenced-off perimeter is located at the trailhead.

Bonus Fact: The hike features a little cabin museum with vintage shots of the mines’ heydays. The trail leads you through a little woodland area and loops around until you get back to the site of the relics.

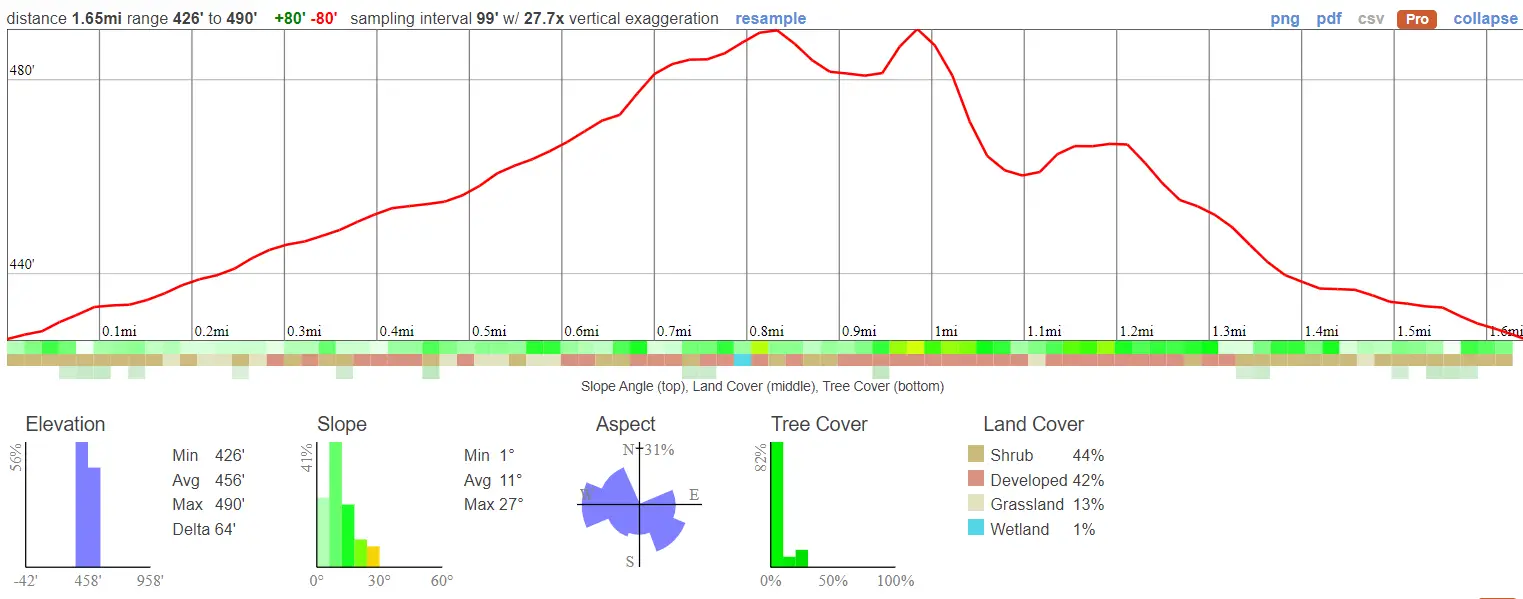
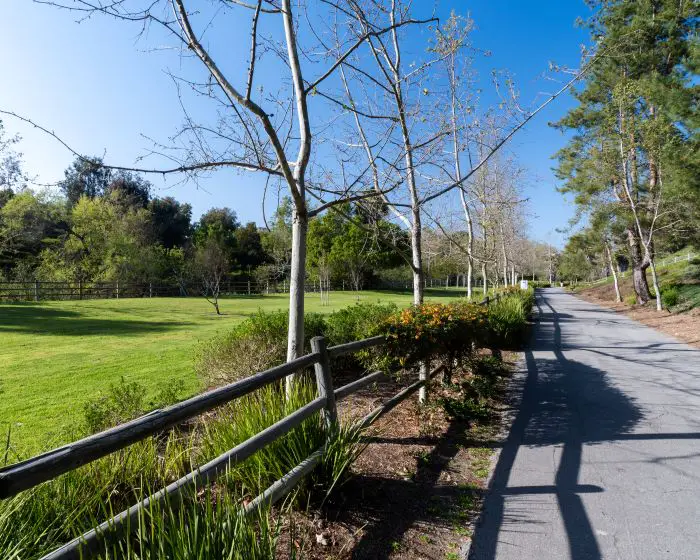
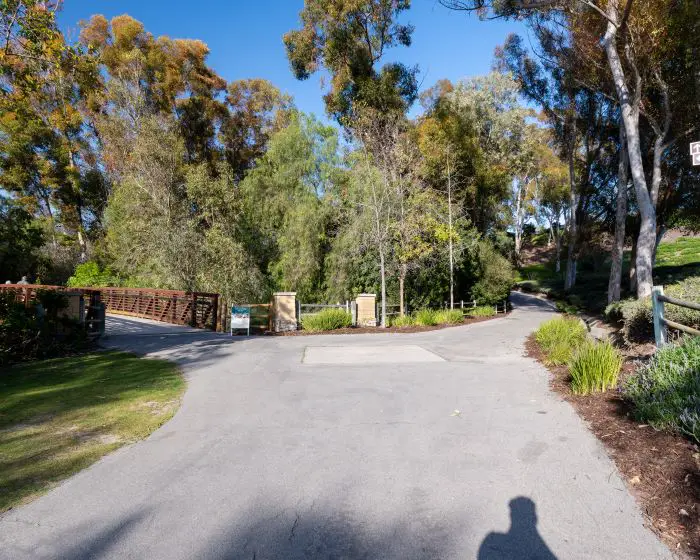
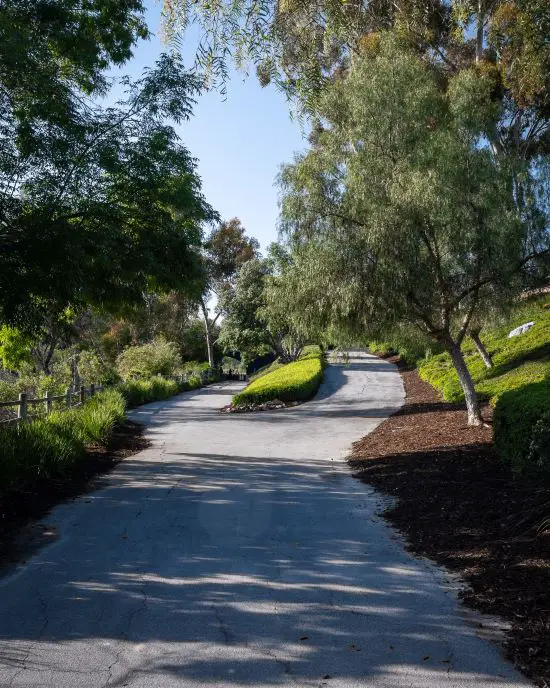
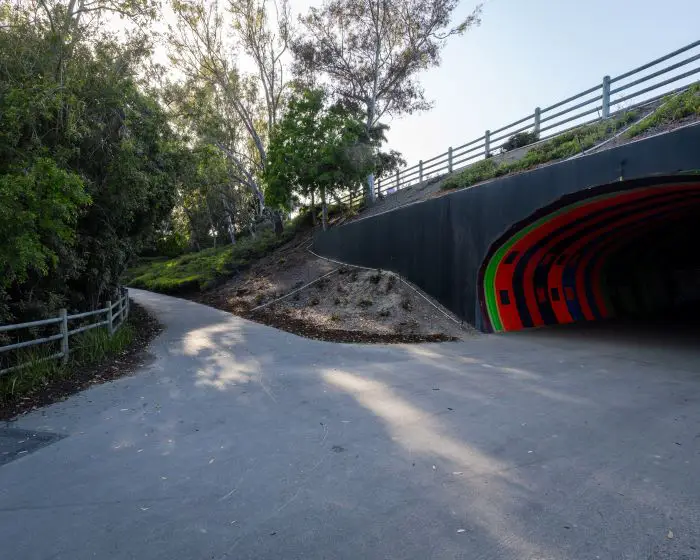
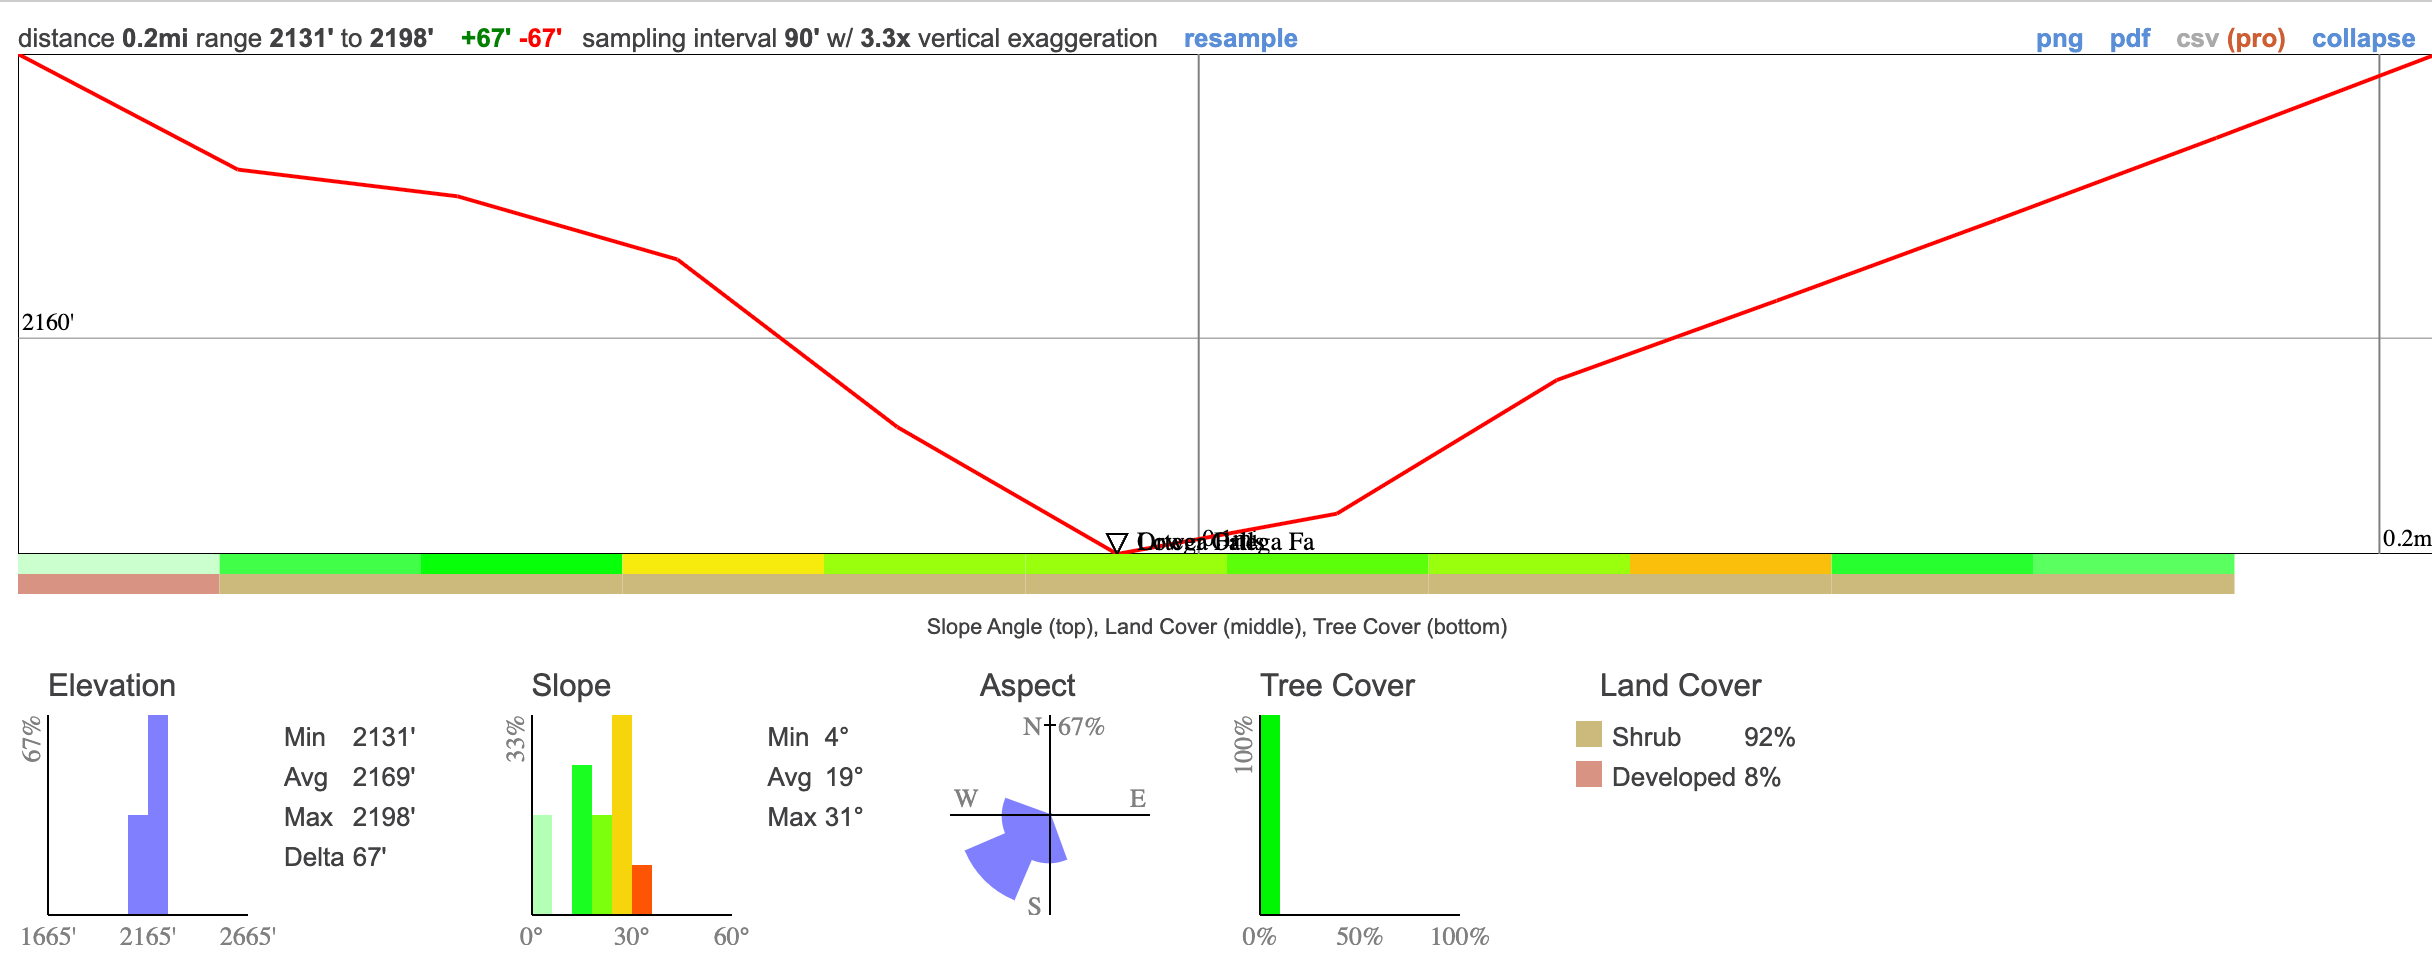
11) Oso Creek Trail: Mission Viejo’s Most Popular Hike

Oso Creek Trail

  • Total Miles: 1.7
  • Difficulty: Easy
  • Best Season: All Year
  • Elevation Gain: 80 ft
  • Time: 35 min
  • Restrooms: Not Available
  • Stroller Friendly? Yes!
  • Map, Directions, & Full Post: Oso Creek Trail

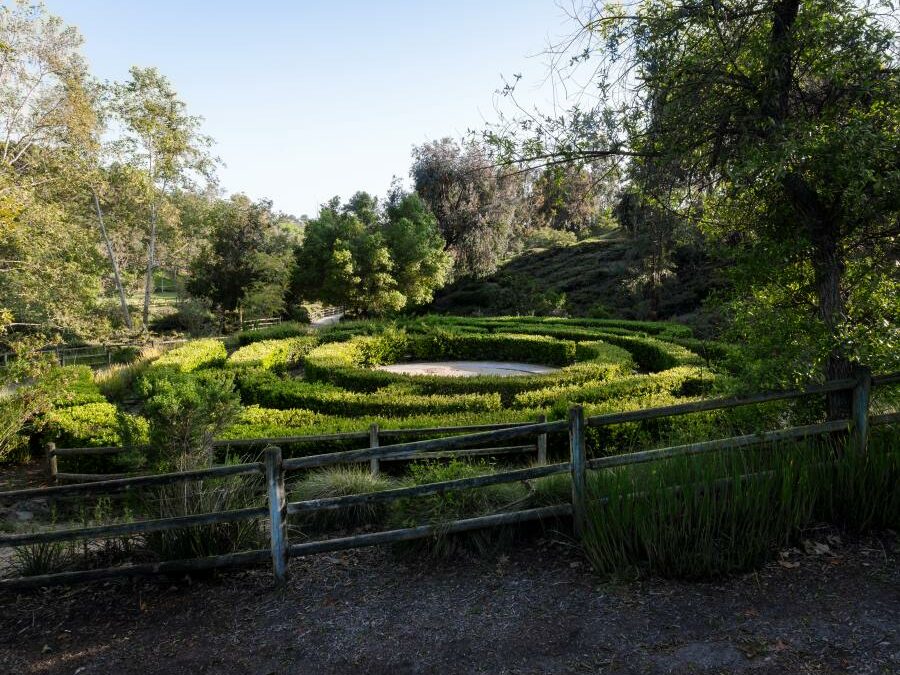
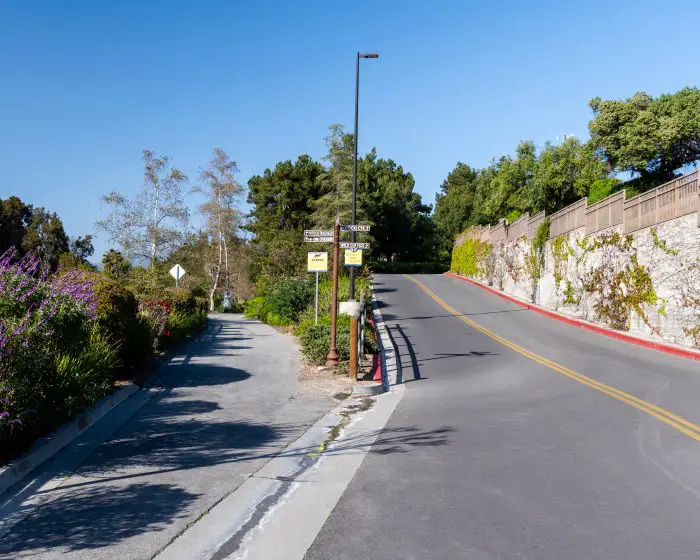
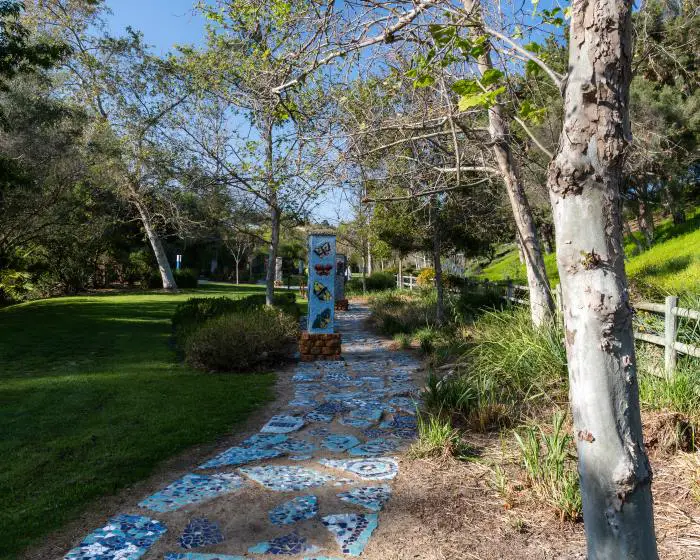
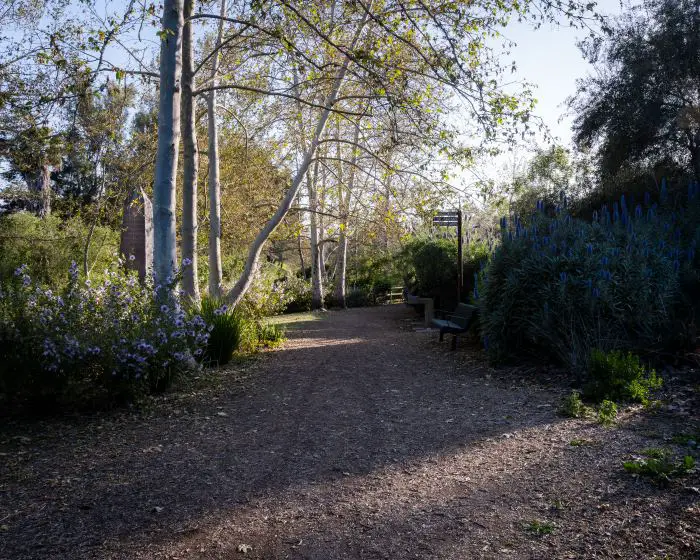
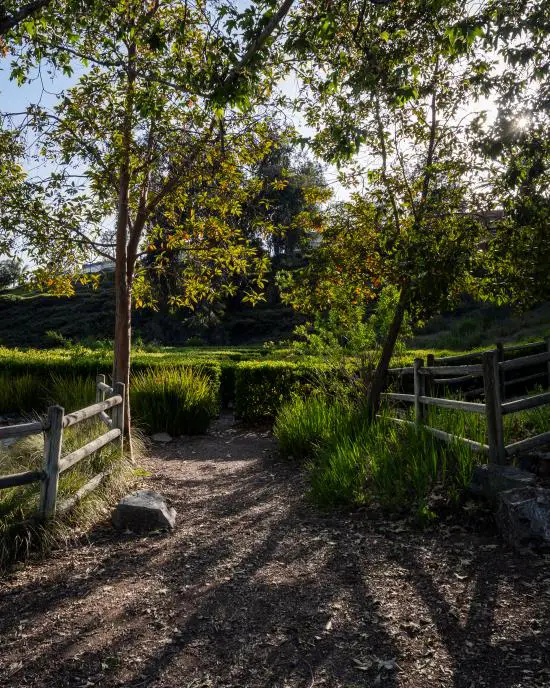
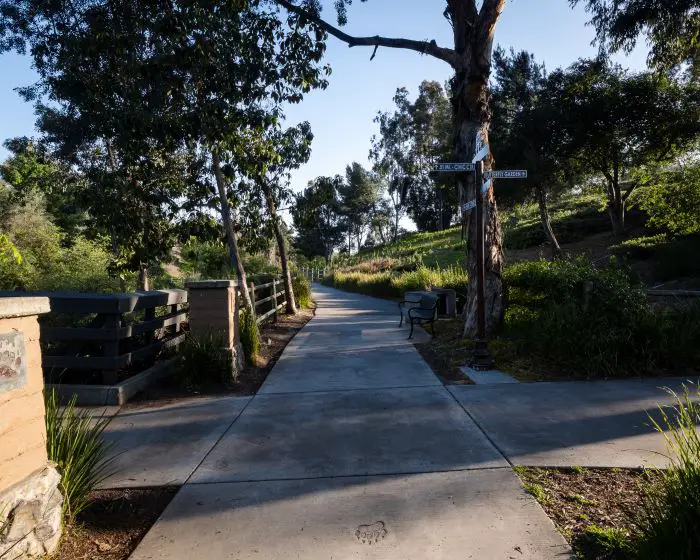
Oso Creek Trail is a scenic hike that is decorated with a wide range of exotic plants, similar to an arboretum.

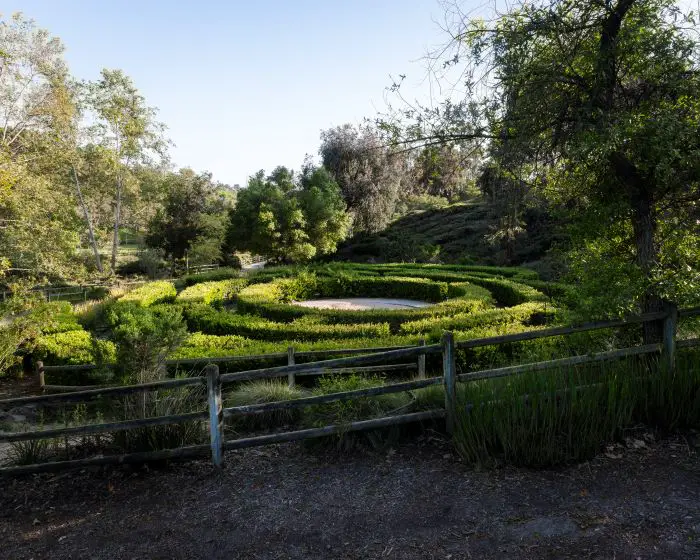
The trail features unique landmarks such as a garden maze, a peace obelisk, and a celebration garden to name a few. Although it’s technically not labeled as an interpretive trail, you can learn about all these landmarks in the Oso Creek Trail Brochure.

It’s the perfect mid-week adventure, especially for OC residents who live nearby.

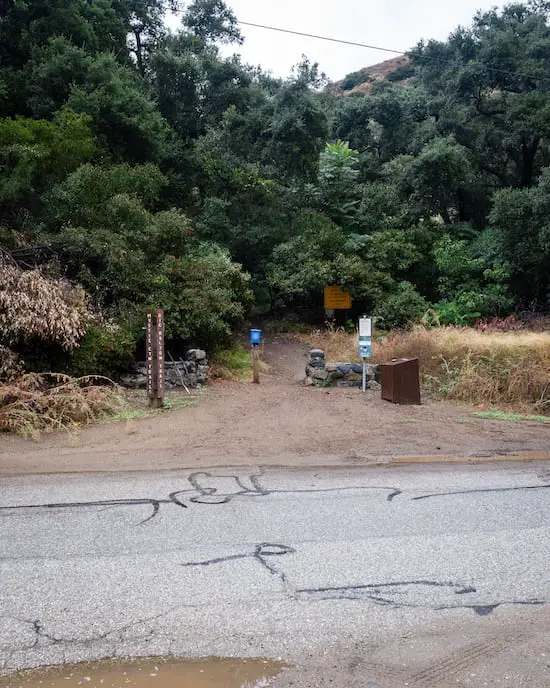
10) Big Dalton Canyon Trail: Bridges, Falls, & Swings

Big Dalton Canyon Trail

  • Total Miles: 2
  • Difficulty: Easy
  • Best Season: All Year
  • Elevation Gain: 286 ft
  • Time: 45 min
  • Restrooms: Available At The Campground
  • Stroller Friendly? No
  • Map, Directions, & Full Post: Big Dalton Canyon Trail

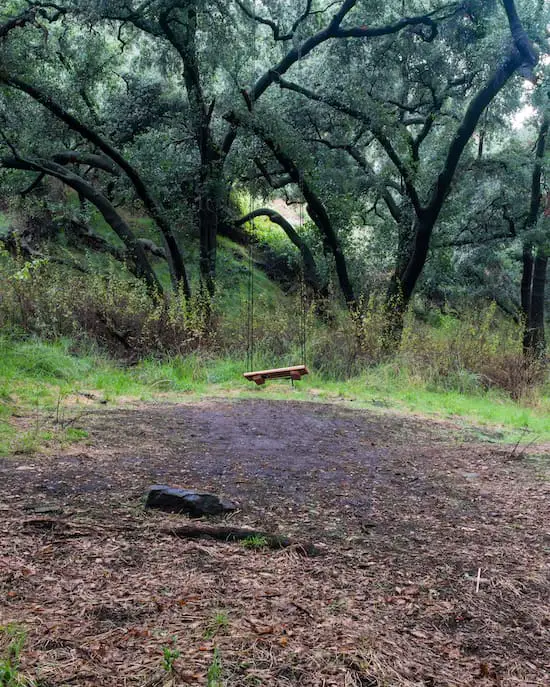
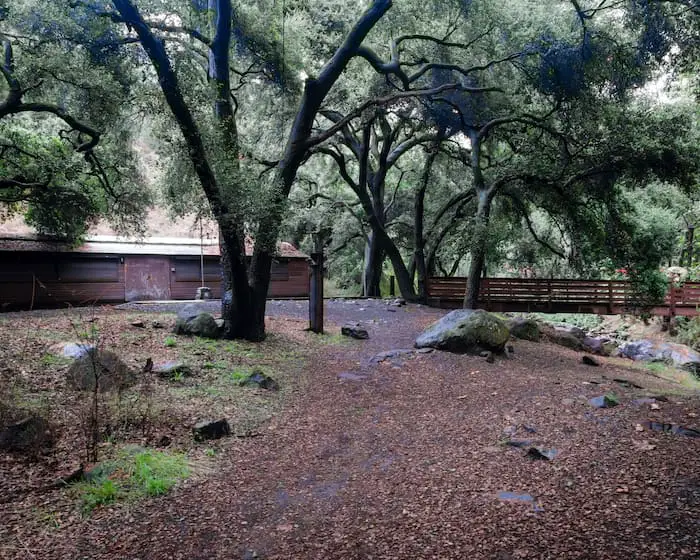
Big Dalton Canyon Trail is a real treat. You get the feeling of being deep in the backcountry while only venturing in the foothills.

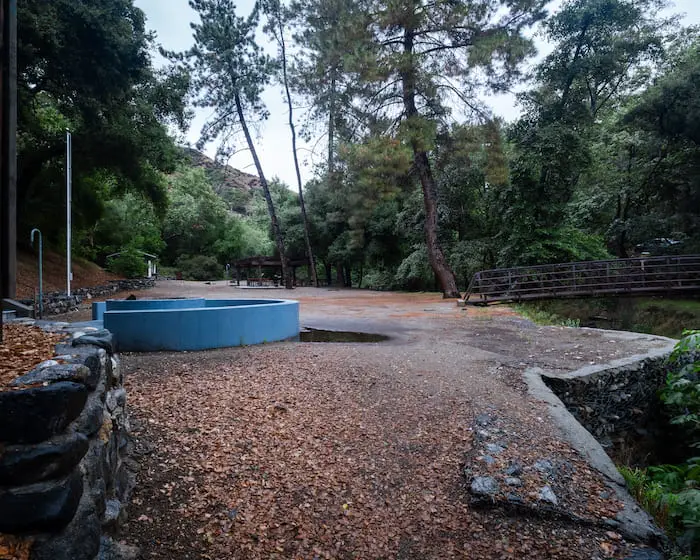
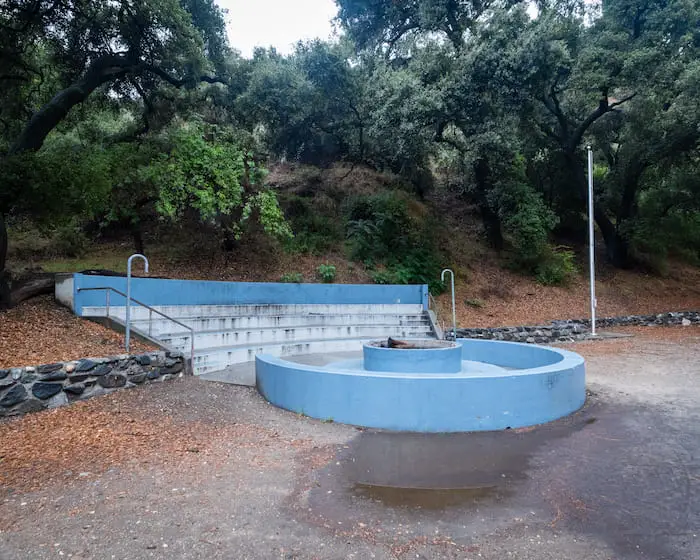
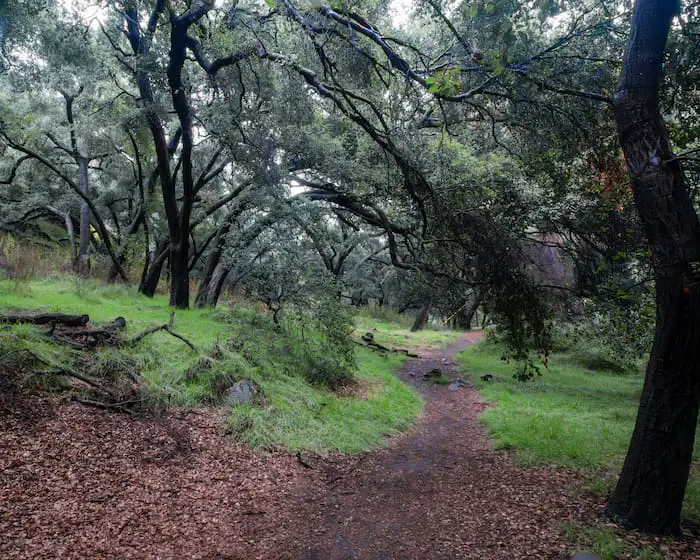
The trail features a small set of cascades, a campground, wooden bridges, an amphitheater with a fire pit, a live oak grove, and a wooden swing at the grove, all while hiking alongside the creek.

Due to the luscious vegetation, virtually the entire trail is shaded.

Note: The trail’s end becomes very overgrown, so keep an eye out for poison oak! Leaves of three let it be. Most people turn around once they reach the permanently closed nature center.

9) Bolsa Chica Reserve

bolsa chica ecological reserve

  • Total Miles: 3
  • Difficulty: Easy
  • Best Season: All Year
  • Elevation Gain: 72 ft
  • Time: 1.5 Hrs
  • Restrooms: Not Available
  • Stroller Friendly? No
  • Map, Directions, & Full Post: Bolsa Chica Ecological Reserve

I had the privilege of living in Huntington Beach for three and a half years, and during that time Bolsa Chica Ecological Reserve became my go-to nature getaway.

The trail leads you through HB’s wetlands, which are home to a lot of exotic wildlife, some of which are endangered species. While at the salt marsh, you’ll have views of the beach on the opposite side of PCH, and the Santa Ana Mts.

There is no shade on this trail, so plan accordingly. Also, the cliffs on the banks of the marsh can be dangerous, but luckily, they’re located far away from the trail.

Bonus Fact: Bolsa Chica is a pit stop for migrating birds, including the American Bald Eagle.
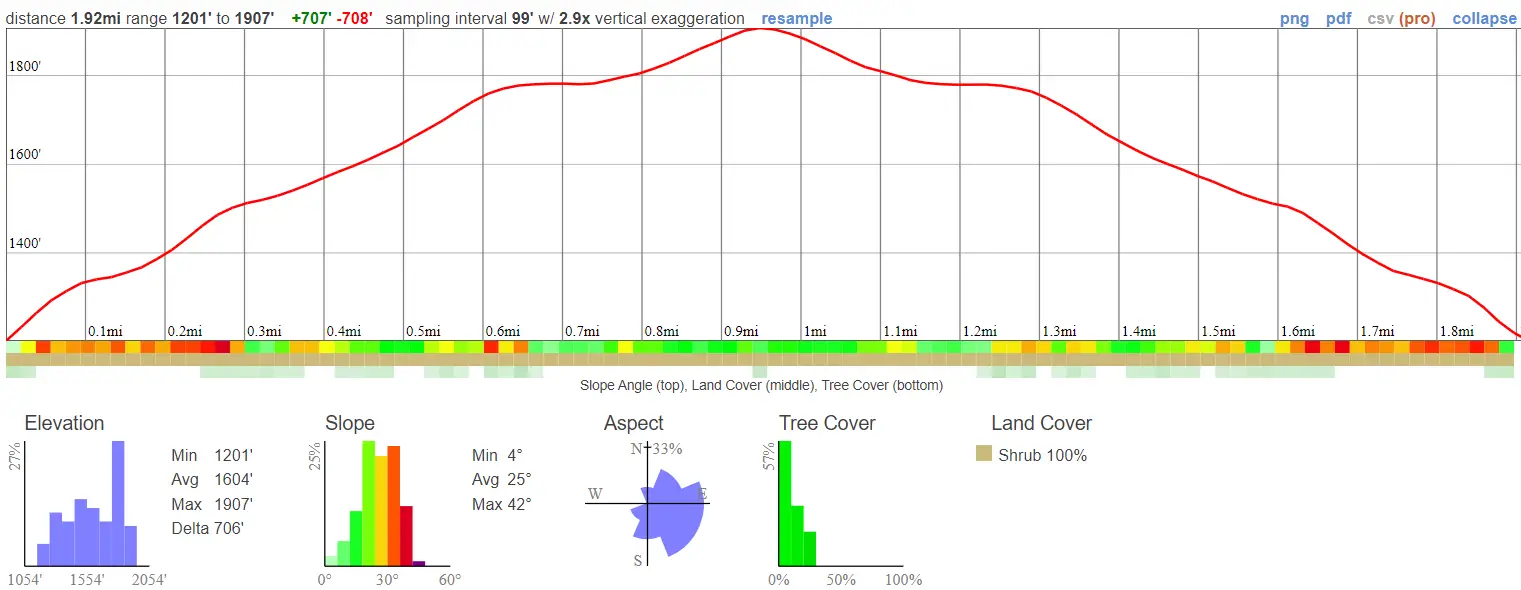
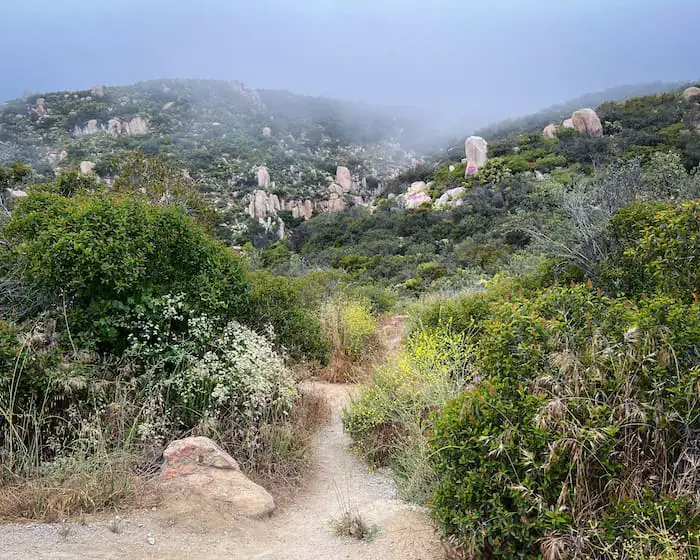
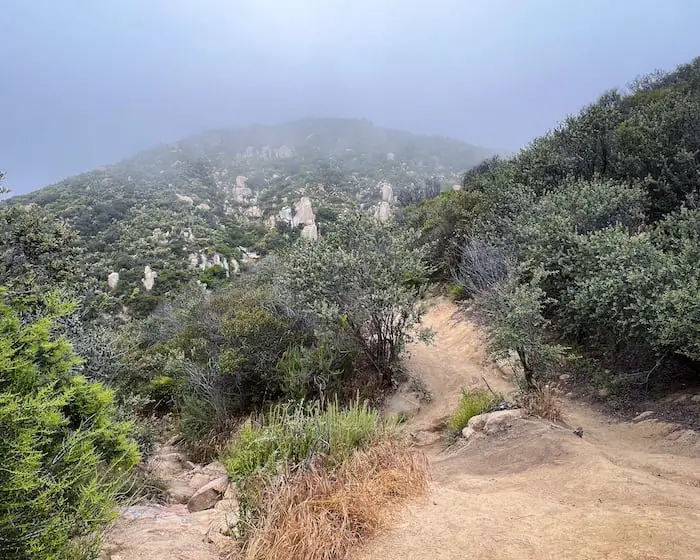
8) Pumpkin Rock

Pumpkin Rock

  • Total Miles: 1.7
  • Difficulty: Easy
  • Best Season: All Year
  • Elevation Gain: 551 ft
  • Time: 60 min
  • Restrooms: Available At The Parking Lot
  • Stroller Friendly? No
  • Map, Directions, & Full Post: Pumpkin Rock

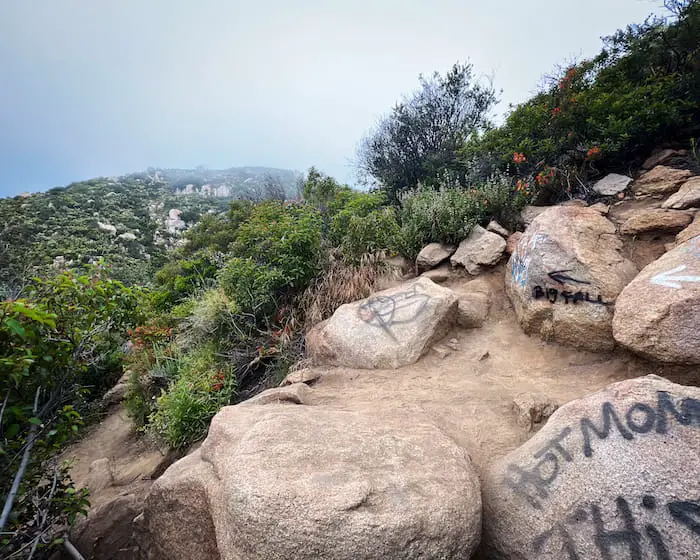
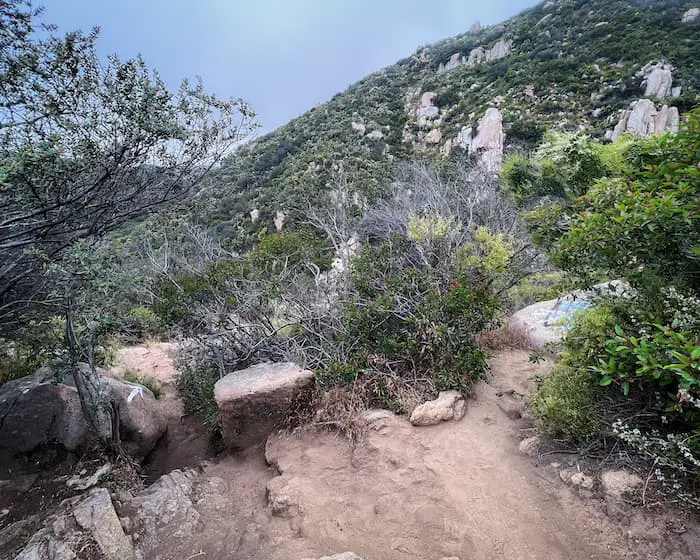
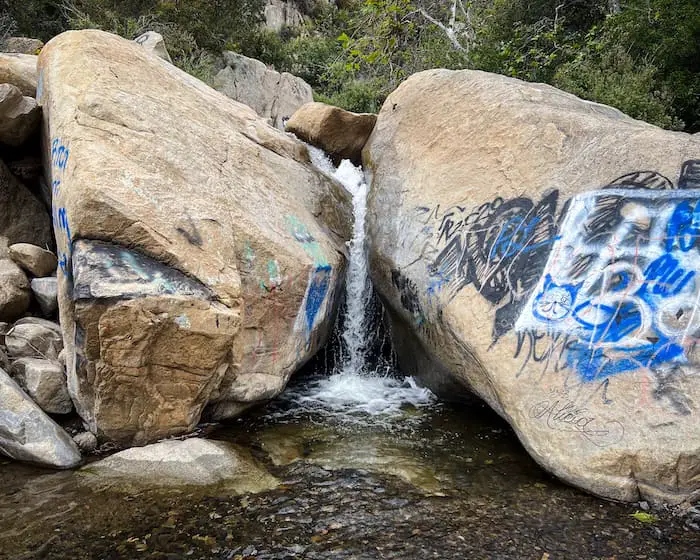
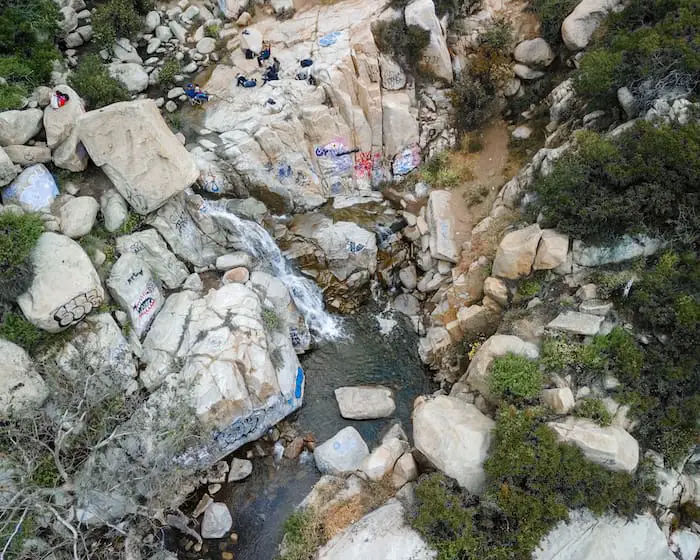
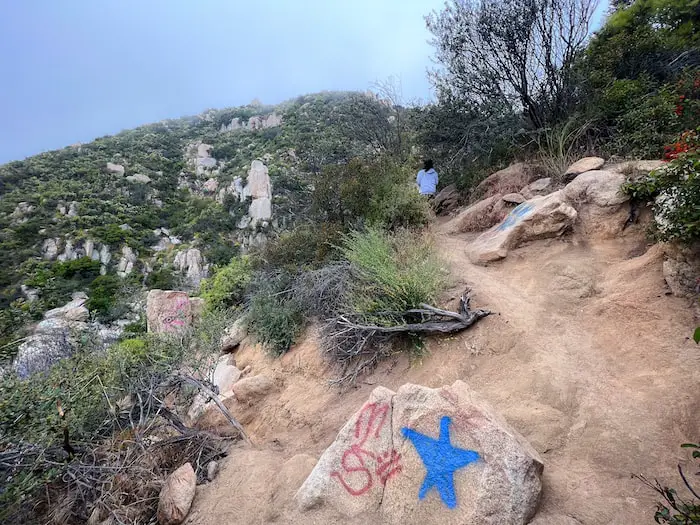
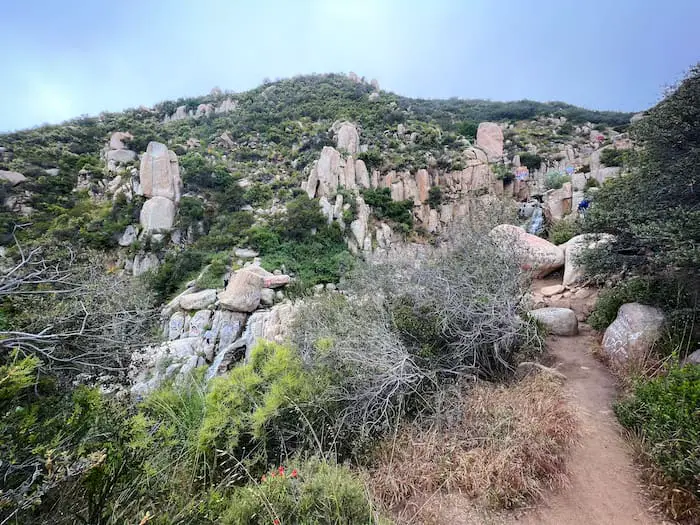
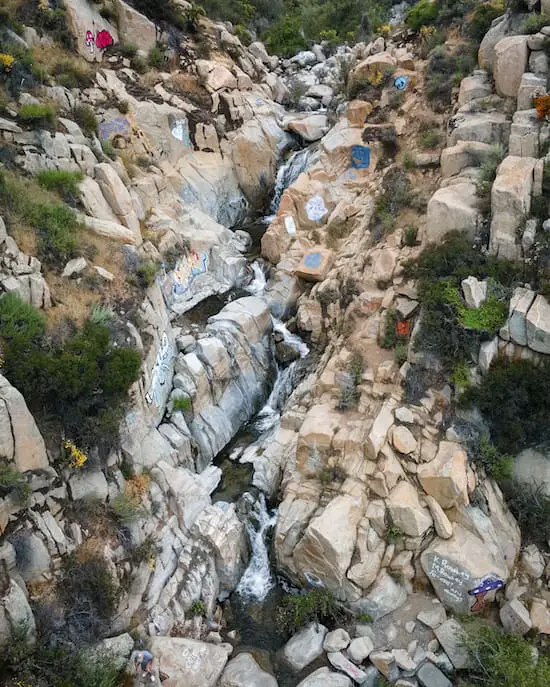
The spooky season calls for a must-do hike to Pumpkin Rock in Norco, CA, a local landmark that gets tons of visitors every autumn.

Fortunately, the sunny trail is easy enough for kids to hike, and once you’ve made it to the top, you’ll have amazing views of the San Bernardino Mts.

Bonus Fact: Although Pumpkin Rock has been completely vandalized with graffiti in the image above, the locals are kind enough to give the rock a new coat of paint every year for the fall season.

7) Upper Newport Bay Nature Preserve

upper newport bay nature preserve

  • Total Miles: 5.2
  • Difficulty: Easy
  • Best Season: All Year
  • Elevation Gain: 226 ft
  • Time: 2 Hrs
  • Restrooms: Available At The Parking Lot
  • Stroller Friendly? Yes!
  • Map, Directions, & Full Post: Upper Newport Bay Nature Preserve

Like Bolsa Chica, Newport Bay Nature Preserve is a saltwater marsh, but in my opinion, it’s a bit nicer. Much of the trail is a wide dirt road and a paved bike path, allowing for strollers.

Although there isn’t any shade on the trail, the temperatures are much lower than most hikes due to the proximity to the ocean. However, I still recommend a hat and plenty of water.

The hike offers views of Old Saddleback, the highest two peaks in the Santa Ana mountains, and an enormous marshland. The John Wayne airport is located very close by, which is why you’ll get up-close views of airliners flying directly overhead.

6) Old LA Zoo

Old LA Zoo

  • Total Miles: 2.63
  • Difficulty: Easy
  • Best Season: All Year
  • Elevation Gain: 374 ft
  • Time: 2 Hrs
  • Restrooms: Available By The Merry-Go-Round
  • Stroller Friendly? No
  • Map, Directions, & Full Post: Old LA Zoo

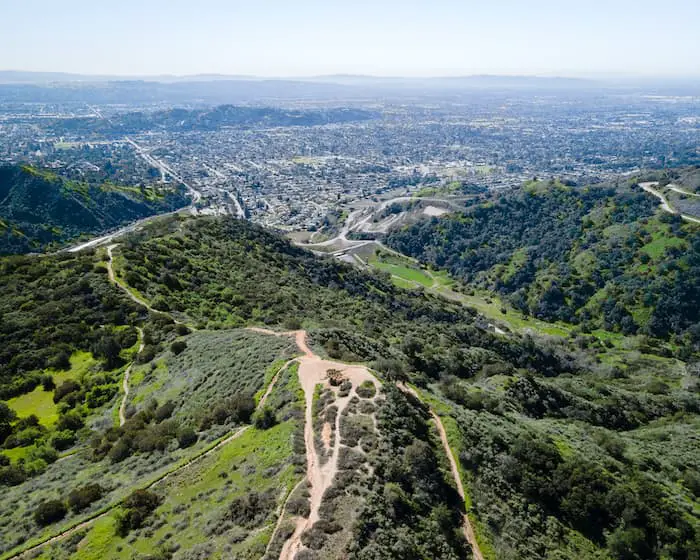
The Old LA Zoo is one of those places kids will absolutely love, especially during Halloween Season. The trail begins at a parking lot by a park and leads up into the sunny hills before descending down into a different section of the park where all the structures are located.

The views while in the hills are breathtaking. I was able to see virtually the entire Angeles and San Bernardino National Forests.

Bonus Fact: If you have children who are too young to hike you can always drive to the parking lot that leaves you basically right at the ruins. The park where the structures are located has paved roads that are stroller-friendly. It’s the trail that leads up into the hills that isn’t stroller-friendly.

5) Vanalden Cave

Vanalden Caves

  • Total Miles: 2.7
  • Difficulty: Easy
  • Best Season: All Year
  • Elevation Gain: 563 ft
  • Time: 1.5 Hrs
  • Restrooms: Available At The Parking Lot
  • Stroller Friendly? No
  • Map, Directions, & Full Post: Vanalden Cave

Yes, there are caves in Southern California, and some, like the Vanalden Cave, are suitable for children. The majority of the hike consists of a sunny dirt road with amazing views of the Angeles and San Bernardino National Forests to the north and the Santa Monica Mts to the south.

However, the last section is a dirt trail that descends onto the canyon floor where it gets shady and green. Shortly thereafter, I saw the cave tucked into the corner up against the canyon wall.

The inside of the cave reaches a height of about ten feet.

Bonus Fact: It’s possible to climb on top of the cave. Just make sure the kids don’t fall through one of the holes in the ceiling.

4) Bonita Falls

Bonita Falls

  • Total Miles: 1.28
  • Difficulty: Easy
  • Best Season: Spring – Summer
  • Elevation Gain: 443 ft
  • Time: 45 min
  • Restrooms: Available At The Campground
  • Stroller Friendly? No
  • Map, Directions, & Full Post: Bonita Falls

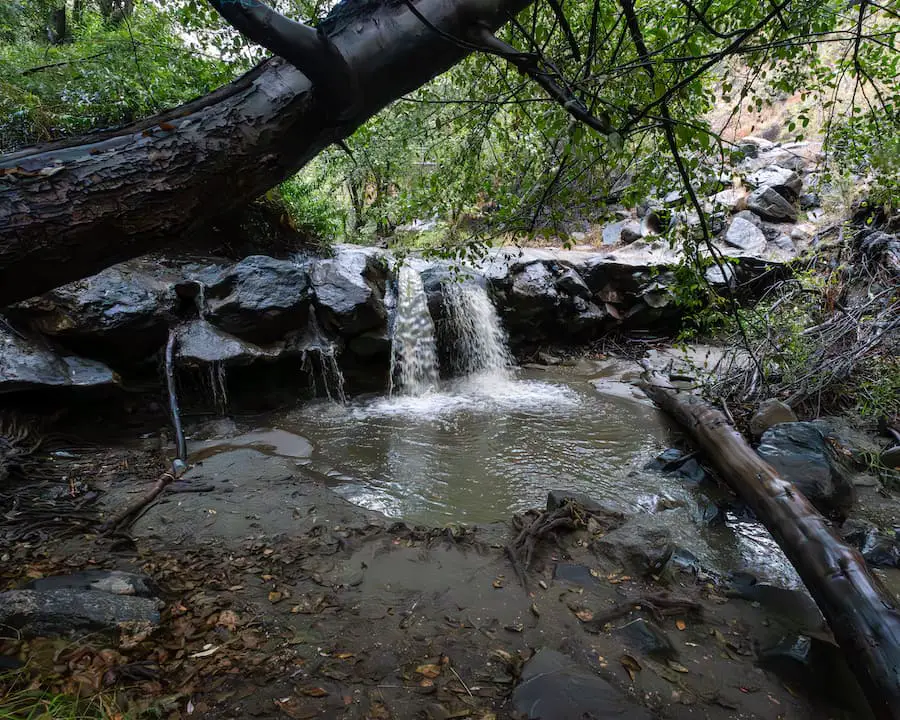
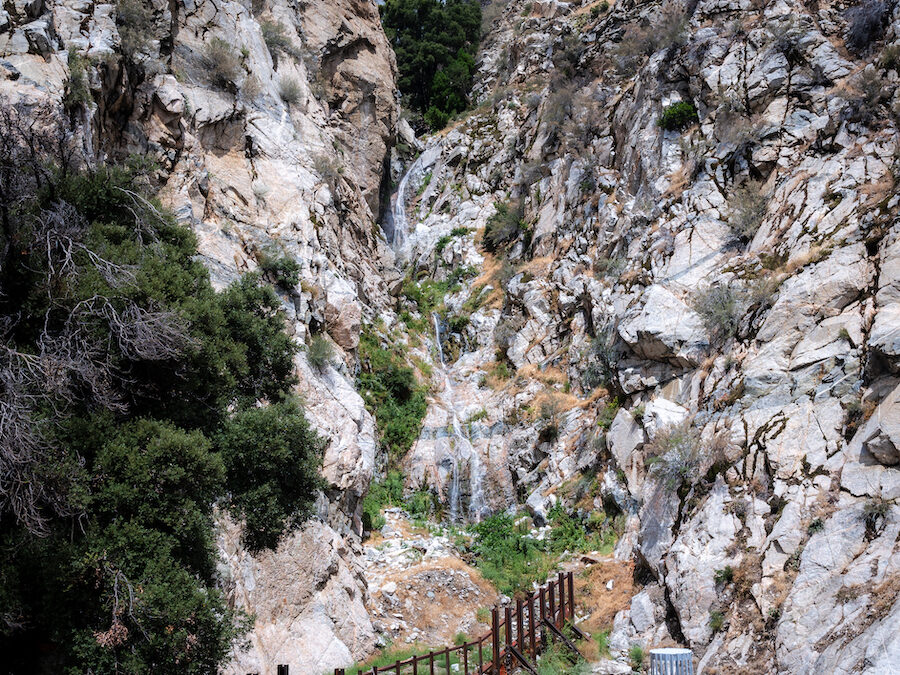
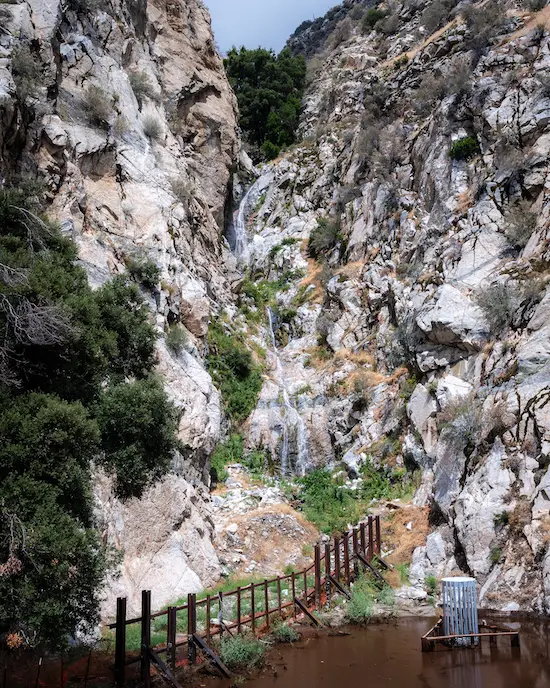
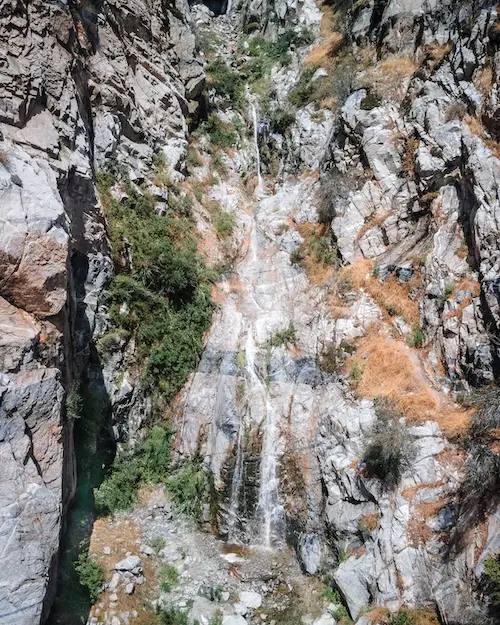
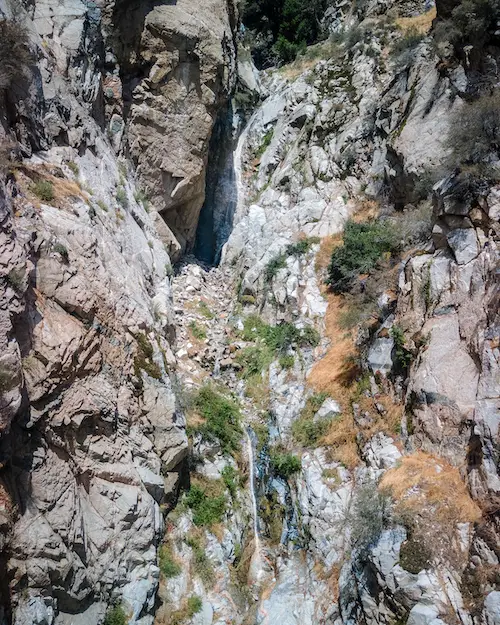
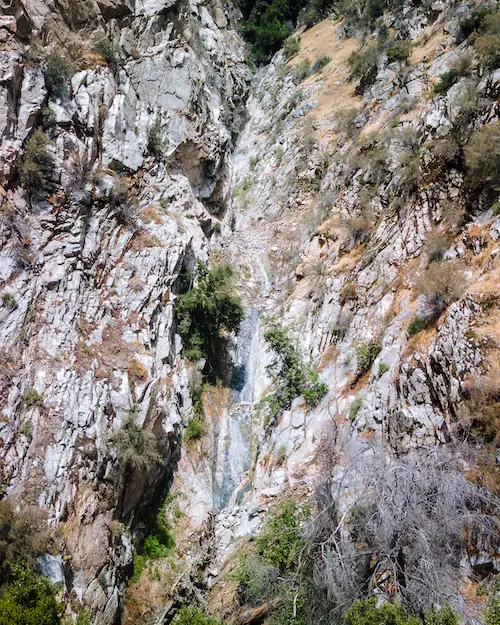
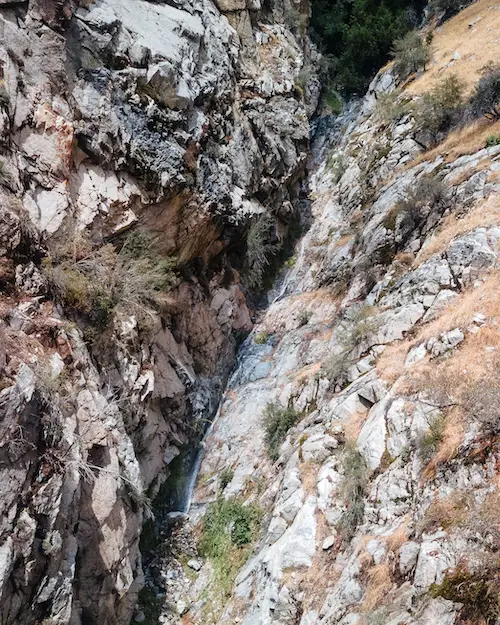
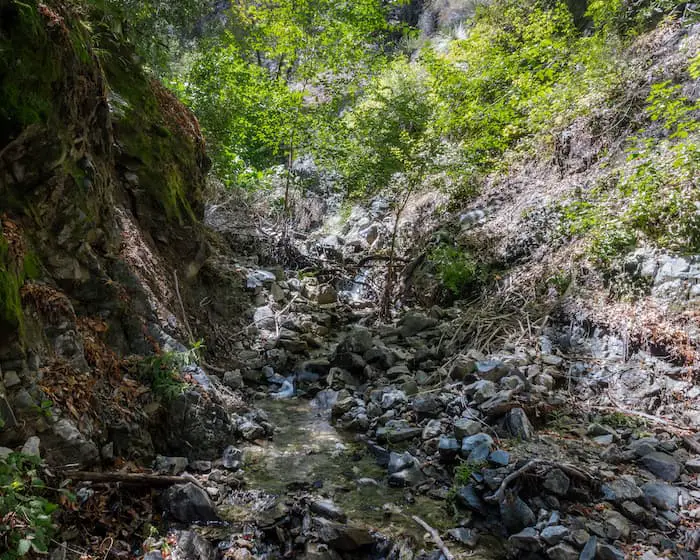
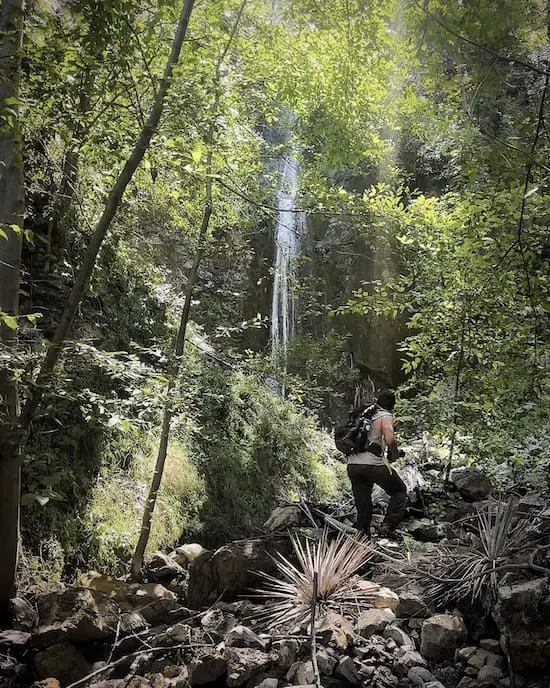
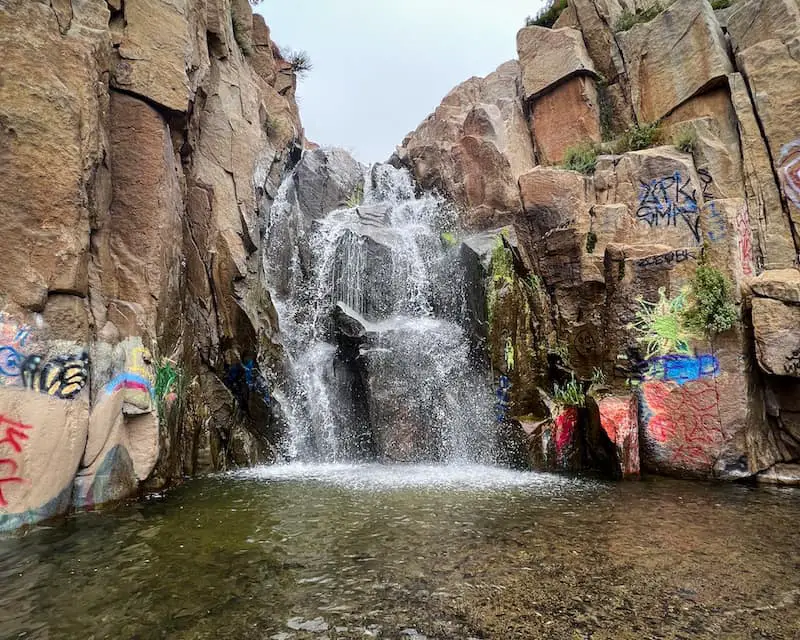
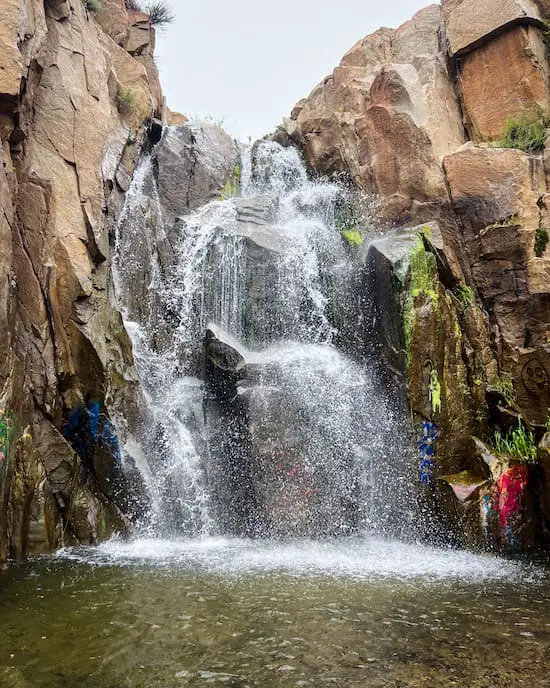
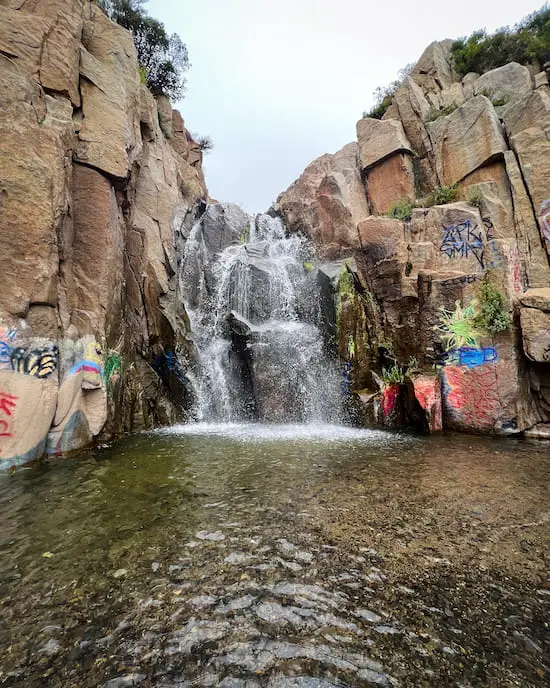
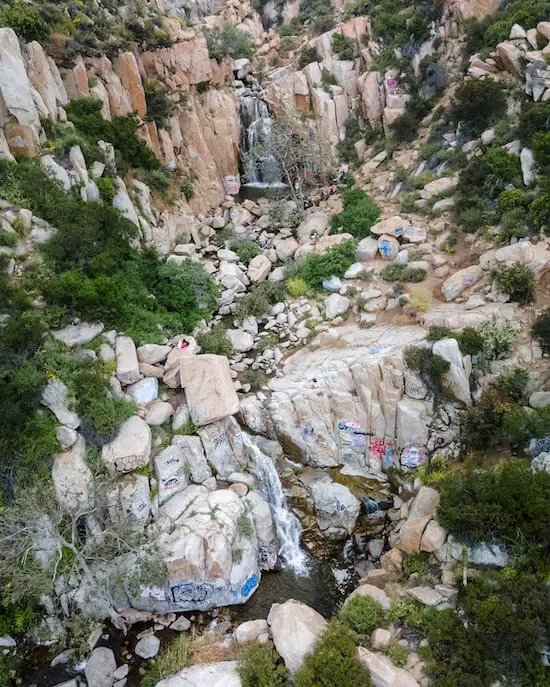
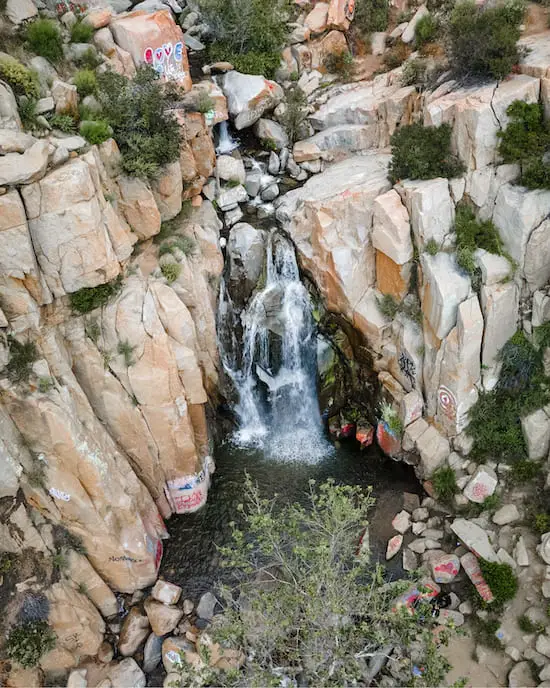
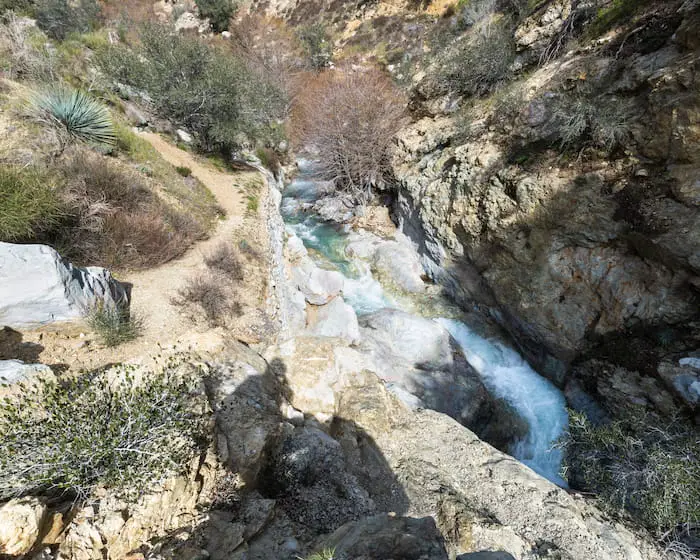
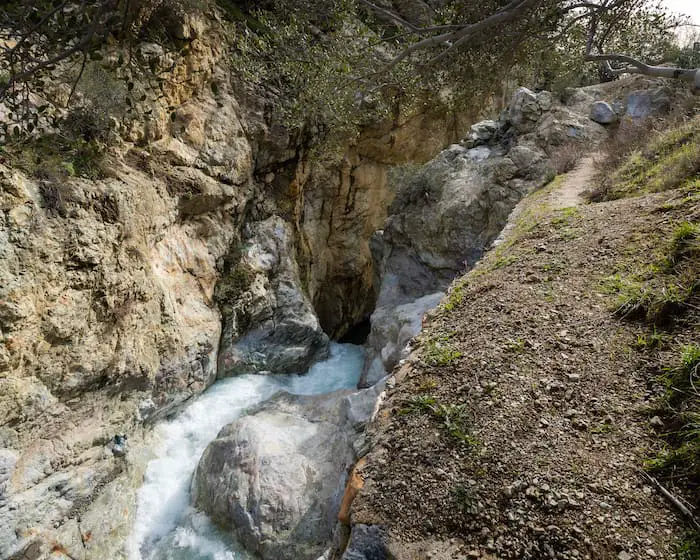
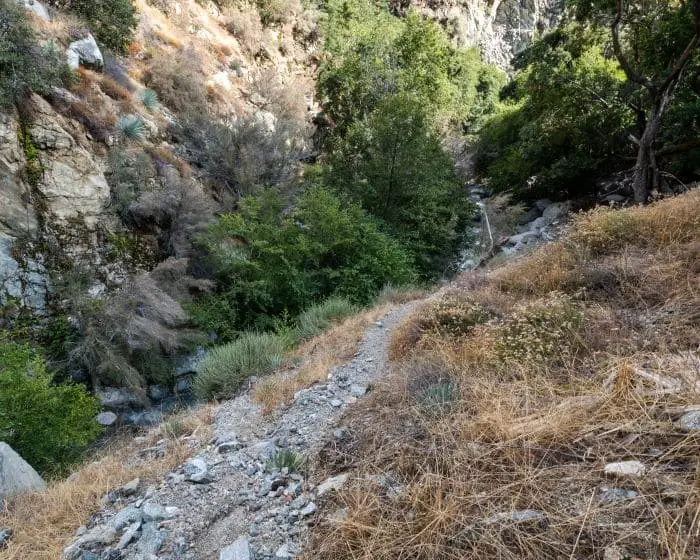
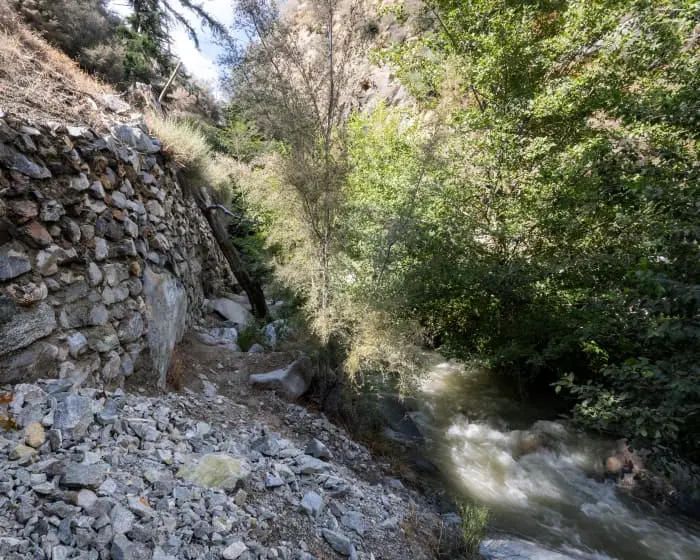
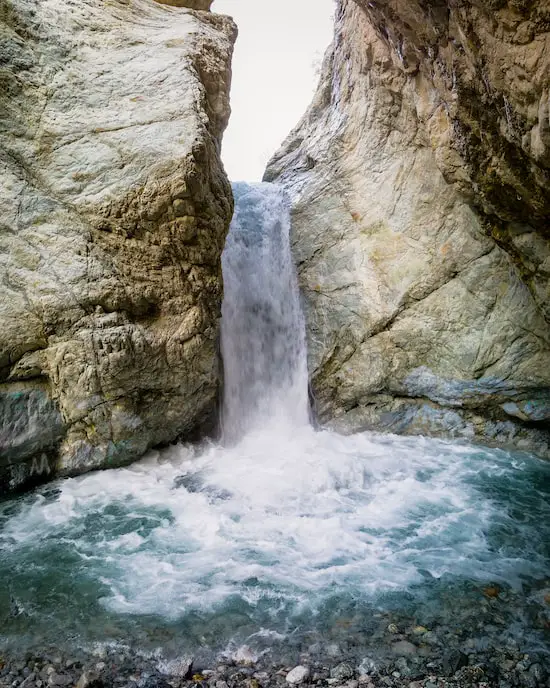
Bonita Falls is a must-do hike for the whole family. The falls flow almost year-round and are located in a beautiful little mountain town called Lytle Creek. Bonita is actually the 2nd largest waterfall in all of SoCal.

However, only the bottom tier, the largest of all three, can be seen from the canyon floor. Climbing up to the middle tiers is extremely dangerous, so I don’t recommend it.

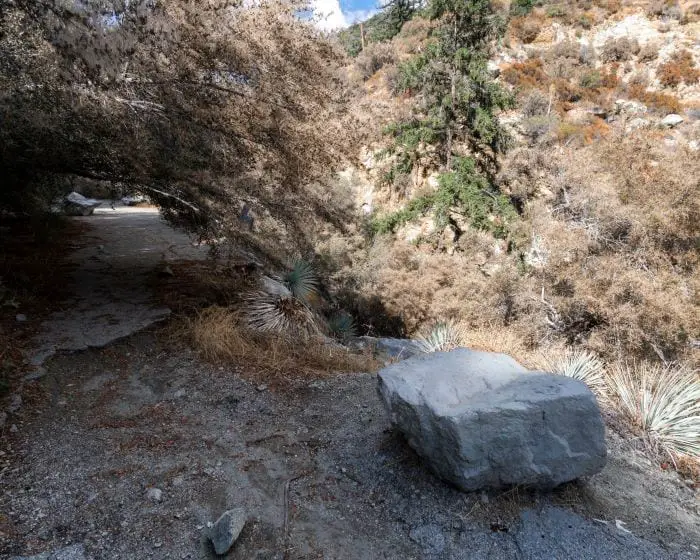
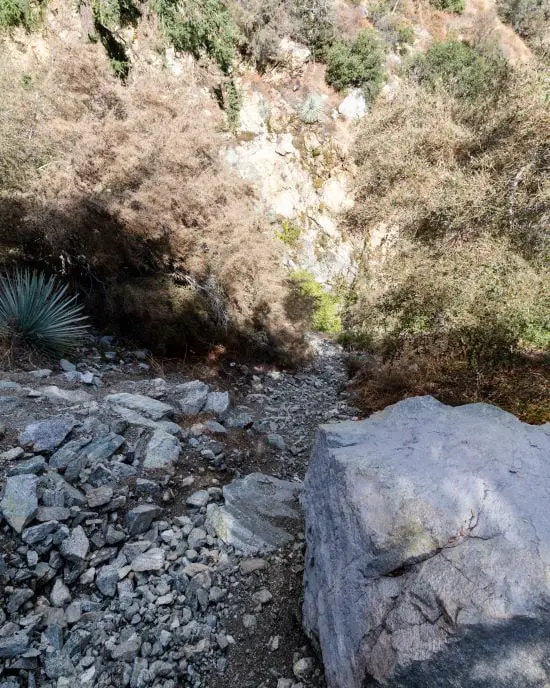
The majority of the trail requires trekking through a dry river bed which is littered with small boulders. About 75% of the way into the hike, I hopped onto a dirt trail that leads into the tributary where the falls are located.

Although it’s not too abundant, poison oak is present inside the tributary. So as long as everyone stays on the trail, poison oak shouldn’t be a problem.

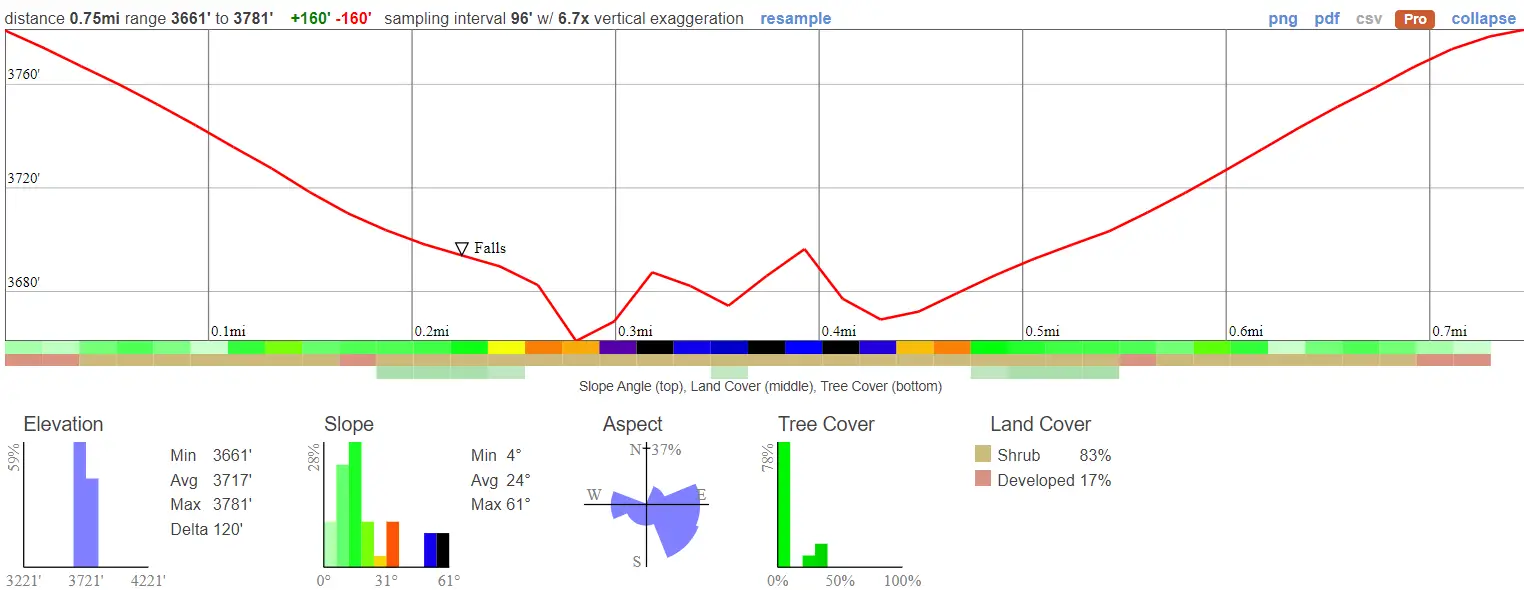
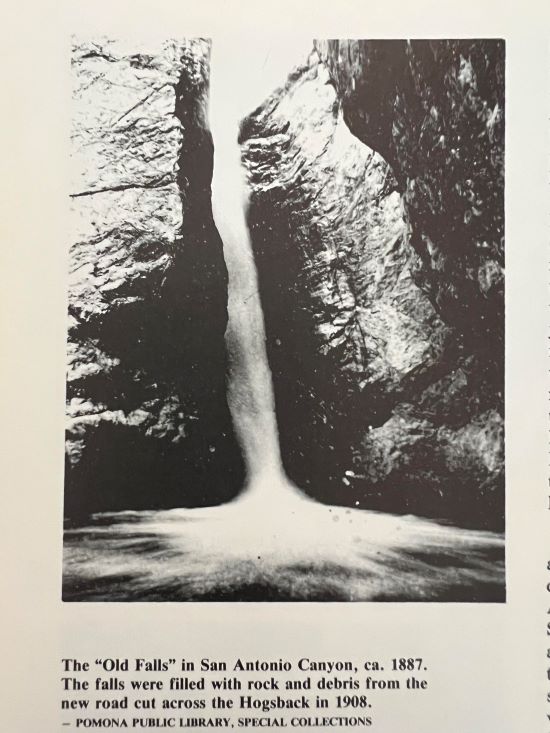
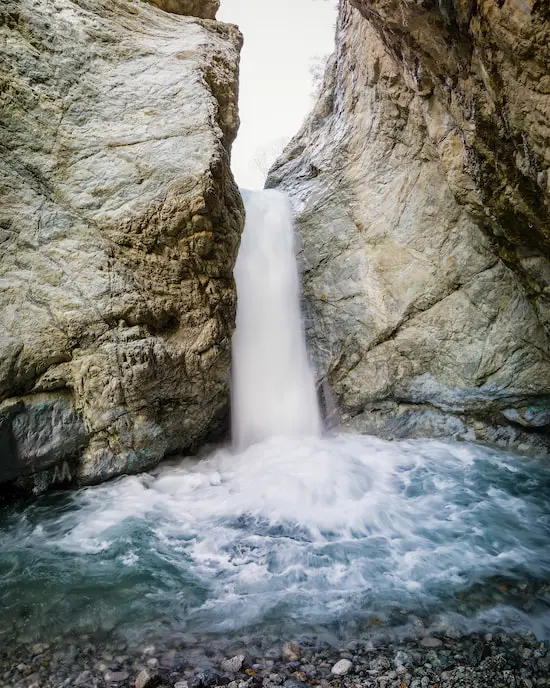
3) San Antonio Falls

San Antonio Falls

  • Total Miles: 1.33
  • Difficulty: Easy
  • Best Season: Spring – Summer
  • Elevation Gain:  277 ft
  • Time: 30 min
  • Restrooms: Not Available
  • Stroller Friendly? Explained Below
  • Map, Directions, & Full Post: San Antonio Falls

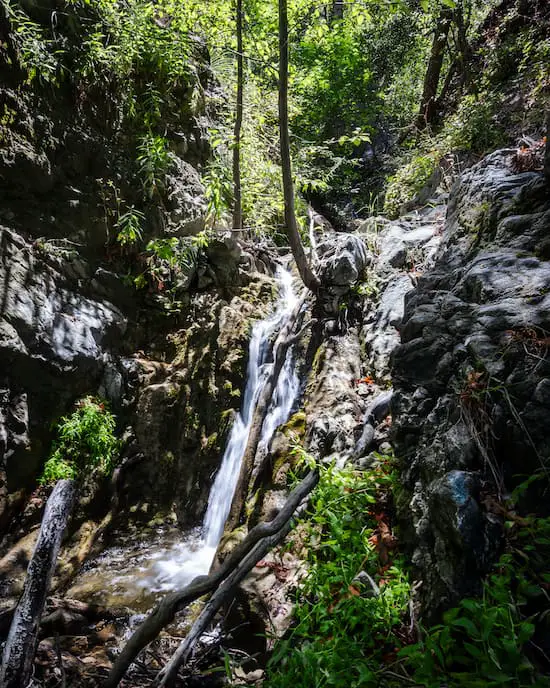
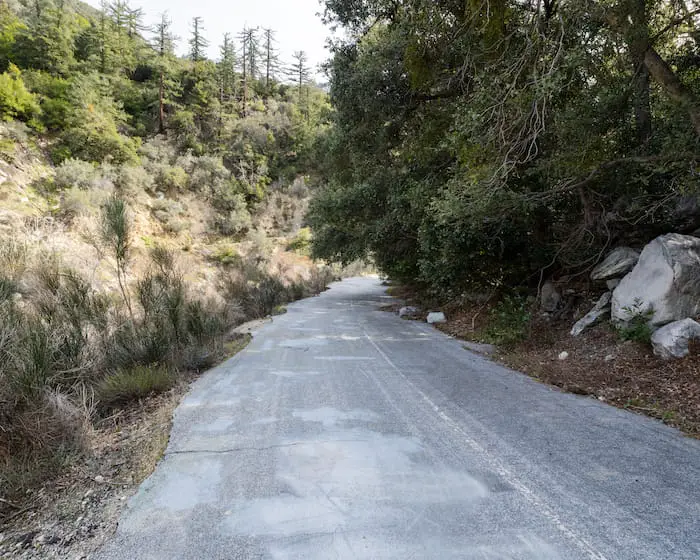
75-foot San Antonio Falls is an easy hike in the Mt Baldy area. This is one of those hikes that’s surrounded by tall pine trees, making it feel like you’ve left California before you’ve even hopped on the trailhead.

The trail mostly consists of a paved road, then switches to a dirt trail for the last short section that leads down to the falls. The paved road is without a doubt stroller friendly, but the dirt trail is not.

However, there’s a viewpoint where the dirt trail begins which overlooks the waterfall. In my opinion, the hike is still worth doing with a stroller even if you turn back at the viewpoint.

Shortly after hopping on the dirt trail, I reached a roughly 20-foot-long section that was very steep and loose. I recommend carrying small children for this part.

Bonus Fact: San Antonio Falls gets snow!

2) Annie’s Canyon

Annie's Canyon Trail

  • Total Miles: 1.3
  • Difficulty: Easy
  • Best Season: All Year
  • Elevation Gain: 144 ft
  • Time: 1 Hr
  • Restrooms: Available At The Park
  • Stroller Friendly? No
  • Map, Directions, & Full Post: Annie’s Canyon Trail

Annie’s Canyon Trail is a very popular hike in San Diego County which cuts through San Elijo Lagoon Ecological Reserve and ends at a stunning slot canyon.

There is one obstacle to keep in mind regarding the slot canyon. At the very end, there is a roughly 15 ft metal ladder that must be climbed in order to exit the slot canyon.

Turning back instead of climbing up the ladder is nearly impossible, especially on weekends, as the slot canyon gets full of people.

Bonus Fact: There’s a small park with a playground adjacent to the slot canyon. Hence, if you decide not to enter Annie’s Canyon, you can always hang out at the playground.

1) Millard Canyon Falls (Closed)

Millard Canyon Falls

  • Total Miles: 1.3
  • Difficulty: Easy
  • Best Season: Spring
  • Elevation Gain: 308 ft
  • Time: 45 min
  • Restrooms: Available At The Campground
  • Stroller Friendly? No
  • Map, Directions, & Full Post: Millard Canyon Falls

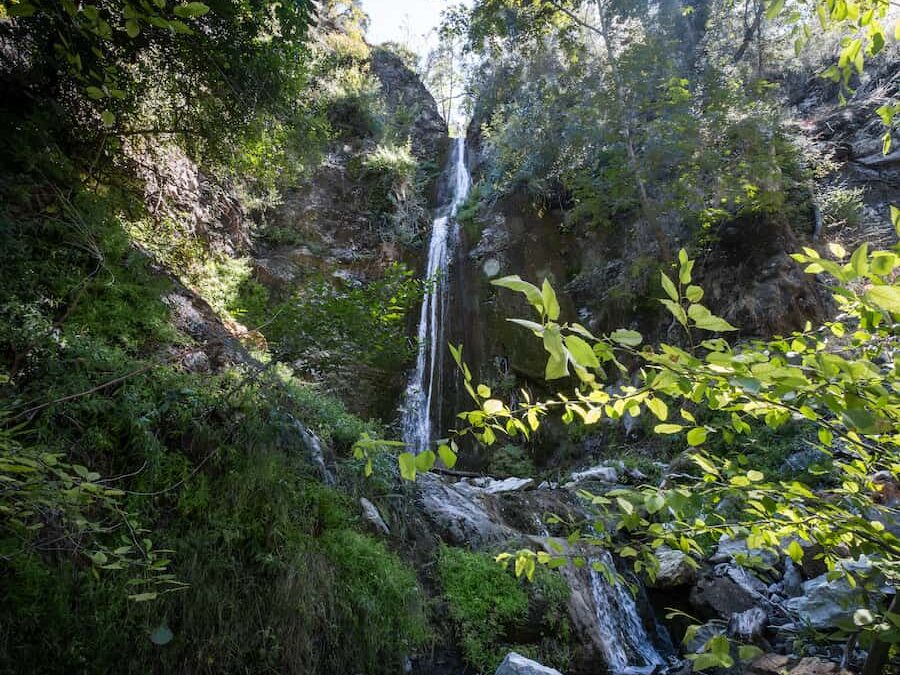
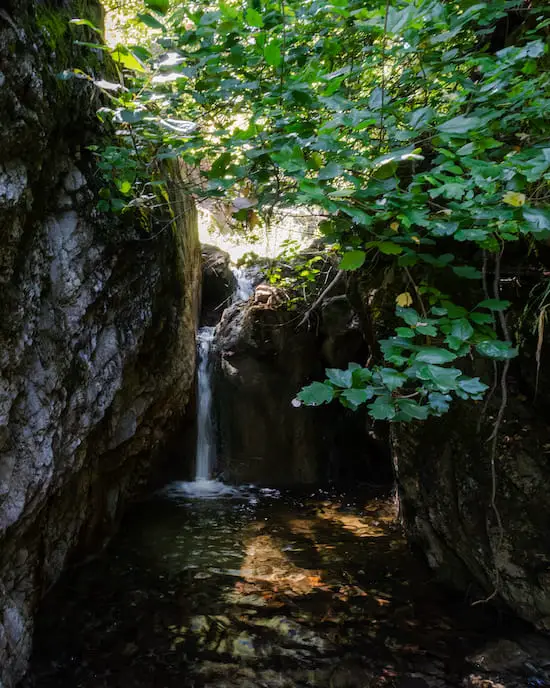
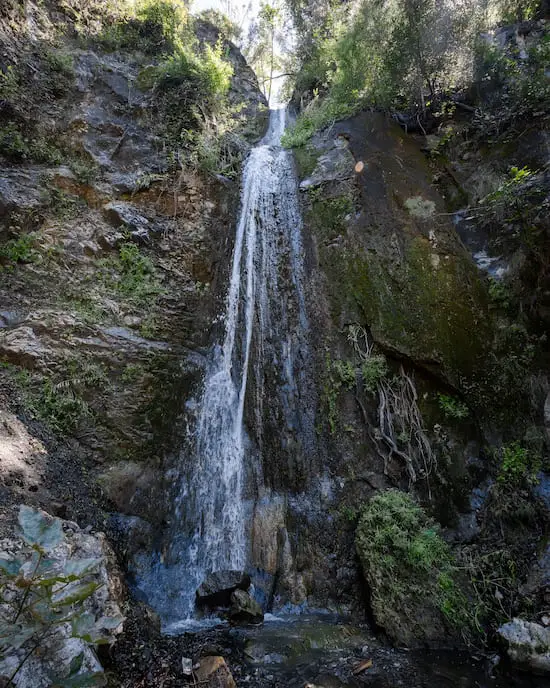
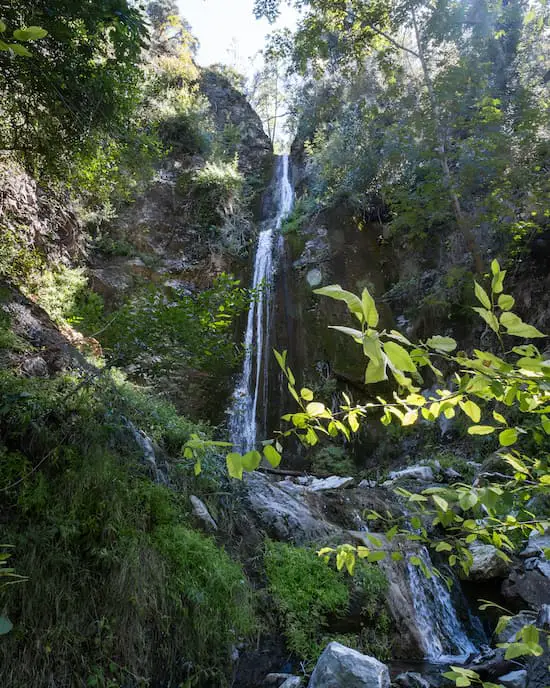
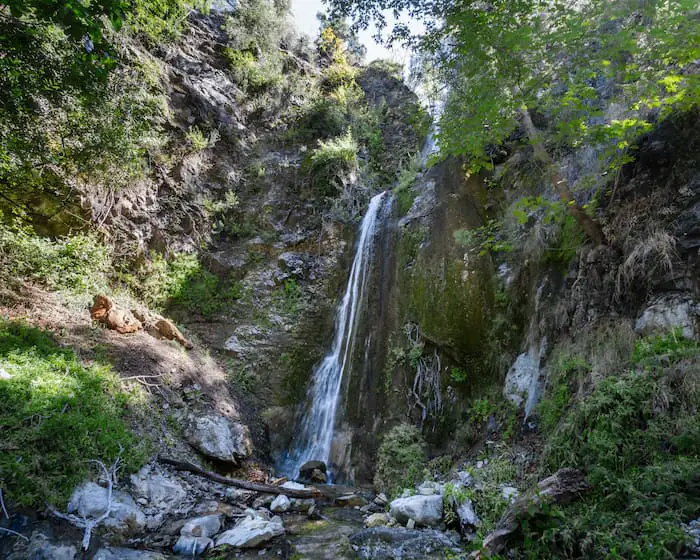
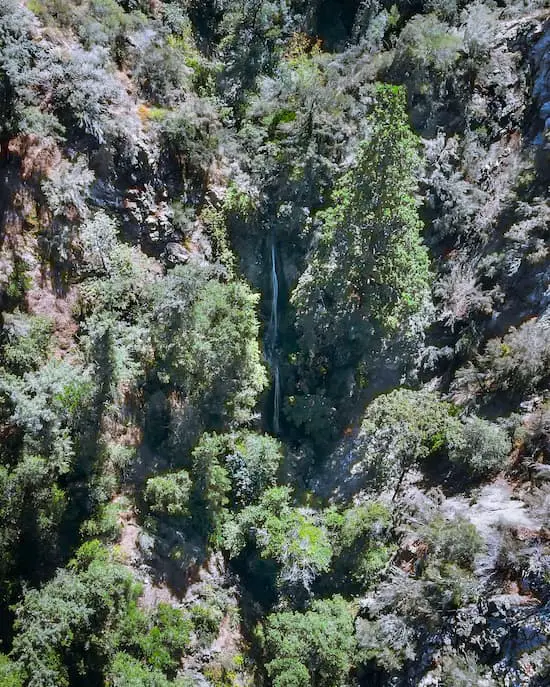
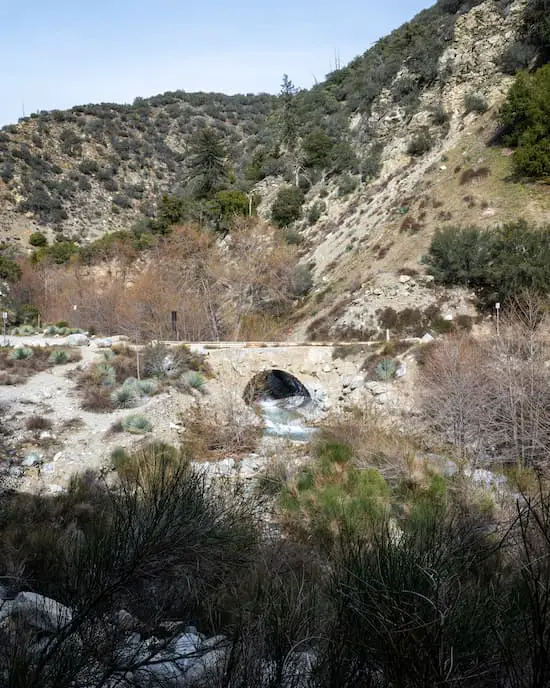
Millard Canyon Falls is a beautiful 50 ft cascade located in the foothills of the San Gabriel Mountains.

The majority of the trail lies underneath the forest canopy and is surrounded by green luscious vegetation. The beginning of the trail requires climbing a 4-foot wall, but that’s as difficult as it gets.

Expect crossing the creek a few times as well, but the crossings are neither deep nor long. Poison oak can be found in the canyon, but it shouldn’t be a problem as long as everyone stays on the trail.

The pool at the falls is only 1-2 feet deep. Millard Falls is my number one recommendation because of the greenery, the falls, and easy obstacles. It’s a complete adventure for kids.

Oso Creek Trail: Mission Viejo’s #1 Hike

Oso Creek Trail: Mission Viejo’s #1 Hike

  • Miles: 1.7
  • Time: 35 min
  • Difficulty: Easy
  • Best Season: All Year
  • Elevation Gain: 80 ft
  • Max Elevation: 490 ft
  • Type of Trail: Loop
  • Parking Lot: Fits ≈ 30 cars
  • Dogs: Allowed On A Leash
  • Restrooms: Not Available
  • Trail Popularity: Moderate
  • Pics Taken On: Apr 15, 2023

Although smack-dab in the middle of a city, Oso Creek Trail is nevertheless a must-do walking garden for the whole family.

Oso Creek Trail is a fun walk which loops around the creek and features multiple park landmarks, such as a Peace Obelisk and Plant Maze. Roughly half the hike is on a concrete path while the second half is on a dirt road, and a myriad of vibrant plants decorate the ecosystem in various colors, resembling an arboretum. The creek has running water year-round.

Want to view more hikes in Orange County? Check out the full list below:

Orange County Hikes

Oso Creek Trail Map

powered by Advanced iFrame

Oso Creek Trail Elevation Profile

Download Printable PDF Map

Directions

Click the link to be redirected to the Oso Creek Trailhead via Google Maps.

Helpful Links

Weather Forecast

Oso Creek Trail Brochure

Oso Creek Trail

Keep in mind there’s multiple parking lots for this trail, but the trailhead I sent you to will look like the image below.

I stayed to the left to begin the hike.

Oso Creek Trailhead

Our first stop was the Celebration Garden with a bright blue path.

Although the majority of the park is primarily intended for walking, there is a decent sized field for sports.

I crossed the bridge at the fork to stay on the trail. The bridge provided nice views of Oso Creek below.

Oso Creek eventually merges with Trabuco Creek. 

Fun Fact: A tributary of Trabuco Creek is home to a scenic waterfall that can be reached via a 3 mile hike. Click here to view the falls. Trust me, it’s worth a visit. 

Shortly afterwards I got to another fork and also stayed left.

I noticed a painted tunnel on the trail, but I stayed left again. The tunnel provides access to Jeronimo Open Space Park, for those who would like to extend the hike.

In case you haven’t caught on, it’s all left hand turns at each fork. The concrete road now became a dirt road, and the trail became more scenic.

Here’s a shot of the creek. Both riparian and drought resistant plants were planted alongside the creek, such as the popular Sycamore tree whose branch you can see protruding in the image below.

A little detour to the left took us to the Peace Obelisk, which you can see sticking out above the roses.

Then we arrived at my favorite part of the trail, the plant maze.

The evening light illuminated the maze, making it look even more amazing. The center of the maze has a sand pit.

Maze At Oso Creek Trail

We kept heading down the trail after the maze until we reached a bridge which we had passed by at the beginning of the trail. This will be the last left turn.

However, you can make a right for a detour to the Butterfly Garden.

Here’s another shot of the creek from the bridge.

After we crossed the bridge, we made a right and completed the loop, but of course, no hike is complete without a drone shot.

The creek is running down the middle of the shot, but it’s a bit tough to see because it’s in the shadows.

The peaks in the back are Santiago Peak, the tallest peak in the Santa Ana Mountains, and the second highest peak, Modjeska Peak. Together they’re known as Old Saddleback.

If you like hikes which also offer views of the mountains, click the link Upper Newport Bay, a 5.2 mile hike at a picturesque marshland.

Big Dalton Canyon Trail: Gem Of The Glendora Mts

Big Dalton Canyon Trail: Gem Of The Glendora Mts

  • Total Miles: 2
  • Time: 45 min
  • Difficulty: Easy
  • Best Season: All Year
  • Elevation Gain: 286 ft
  • Max Elevation: 1431 ft
  • Type of Trail: Out & Back
  • Parking Lot: Fits ≈ 20 cars
  • Dogs: Allowed On A Leash
  • Restrooms: Available On The Trail
  • Trail Popularity: Moderate
  • Pics Taken On: Sept 2, 2023

Big Dalton Canyon Wilderness Park is home to a gem of a trail which is easy enough for the entire family.

The Big Dalton Canyon Trail is located in the foothills of the San Gabriel Mountains. The entirety of the trail follows the creek upstream through a campground, wooden bridges, amphitheaters, live oak groves, small waterfalls, and even a wooden swing. The lack of steep ridges makes it more than ideal for small children.

Looking for hikes in LA County? Check out the complete list by clicking the link below:

Los Angeles Hikes

Big Dalton Canyon Trail Map

powered by Advanced iFrame

Big Dalton Canyon Elevation Profile

Download Printable PDF Map

Directions

Click the link to be redirected to the Big Dalton Trailhead via Google Maps.

The parking lot is a large dirt turnout located across the street from the trailhead.

Helpful Links

Weather Forecast

SoCal Adventure Pass (required to park in SoCal mountains)

Big Dalton Cn Wilderness Park Website

Big Dalton Canyon Trail

The trailhead for Big Dalton Canyon is also shared by Mystic Canyon, a short trek up to a lookout that offers views of the valley below. Since both hikes are very short, I highly recommend combining them.

Click the following link to view Mystic Canyon Trail.

Big Dalton Canyon Trailhead

Although both hikes share the same trailhead, Big Dalton Canyon Trail splits off to the right almost immediately.

I have to be honest, I wasn’t expecting much out of this trail. I thought it was going to be rather bland.

However, after crossing the bridge and walking underneath the trees, I was proven completely wrong.

Sycamore trees adorned the creek, and the recent rainfall made the leaves and water glisten more than usual.

About 1/4 of the way into the hike I reached the Big Dalton Canyon Campground, and once again I was very shocked.

Big Dalton Canyon Campground

An amphitheater with a fire pit known as the Rowley Wilderness Amphitheater memorialized the contributions of Gordon Rowley and his wife Norma.

Big Dalton Canyon Amphitheater

A beautiful wooden bridge arched over the creek to provide access from the dirt lot to the camp. I can definitely see why people choose to get married here.

As I made my way past the campground, a light drizzle started coming down and added to the scenery.

I spotted my first tiny waterfall when crossing this bridge.

After crossing the set of bridges, the trail led me through a stunning grove of California Coast Live Oak Trees. It reminded me of the haunted forests in movies. It was awesome.

California Coast Live Oak Grove On Big Dalton Canyon Trail

Someone had gone through the trouble of hanging a wooden swing from one of the trees.

It was at this point that I realized the trail had no trash or graffiti.

Swing At Big Dalton Canyon Trail

After walking through the grove, I came to a fork and made a right to proceed onto my first creek crossing.

Creek Crossing

Although the hike had been full of positive surprises up to this point, all things, good or bad, must come to an end. The building in the image below was once a nature center, but unfortunately, it’s been permanently closed.

Big Dalton Canyon Nature Center

It seems like most people head back after reaching the nature center because from that point forward the trail was very overgrown.

For a brief section, the trail merged with the creek, but I was able to keep my feet dry by zigzagging.

The last creek crossing was the largest, but it was nevertheless very easy to cross.

I wasn’t expecting more pleasant surprises at this point, especially since I was near the end of the trail.

However, I heard the sweetest sound a hiker can hear coming from out of the blue. The creek was gushing over a roughly 5 foot ledge as a double cascade.

Want to explore a real waterfall? Check out this 40 ft waterfall with a rockslide and swimming hole. The hike is less than 1 mile roundtrip and can be accessed by driving up Glendora Mt Road then descending into the Mt Baldy area. 

Big Dalton Canyon Trail

The trail ended at a road bridge shortly after passing the waterfall. For the way back, you have the option of returning via the trail or hopping onto Big Dalton Canyon Rd, as both lead back to the dirt parking lot.

Frustration Creek Falls: Huge Waterfall Off Of Hwy 38

Frustration Creek Falls: Huge Waterfall Off Of Hwy 38

  • Miles: No Hiking Required
  • Best Season: Mid-Late Spring
  • Max Elevation: 4750 ft
  • Parking Lot: Turnout fits ≈ 10 cars
  • Dogs: Allowed On A Leash
  • Restrooms: Not Available
  • Pics Taken On: Aug 21, 2023

Want to explore an enormous waterfall on your drive up to Big Bear? Check out Frustration Creek Falls, a 400+ foot multi-tier cascade which literally cuts through Highway 38.

Visiting Frustration Creek Falls does not require any hiking whatsoever. In fact, it can be seen from the turn out on the opposite side of the road. This beast of a waterfall rarely flows, and is one of the four waterfalls in the area measuring over 400 feet. It is highly recommended to visit a day or two immediately after a decent rainfall in order to catch it flowing.

Did you know the largest waterfall in SoCal is literally five minutes down the road in the town of Forest Falls? It’s called Big Falls, and it measures a whopping 500 feet! Click the link to check it out!

Directions

Click the link to be redirected to Frustration Creek Falls via Google Maps.

Helpful Links

Weather Forecast

SoCal Adventure Pass (required for parking in CA mountains)

Frustration Creek Falls

The waterfall is located on the right side of the road (assuming you’re driving up the mountain). You’ll notice a pool of very muddy water in the turnout along with rockslide barriers.

I know it’s difficult to see, but the image below shows the bottom three tiers of the falls. This is the most you’ll be able to see in person. The rest of the tiers require a drone.

Frustration Creek Falls

Here’s a closeup of the bottom two tiers. The lowest tier is pretty big, reaching about 60 feet high.

Here’s a shot of the bottom three tiers.

Here is another closeup, but this time of the 2nd and 3rd tier.

Moving higher up the falls you can see the 4th, 5th, and 6th tiers in the image below.

My favorite tier was the 6th, as it looked like a giant 80 foot rockslide! Believe it or not, this is not where the waterfall ends.

There are more tiers further up the creek, but my drone was out of range. That’s how enormous these roadside falls are.

Did you know there’s another enormous waterfall a little further down the mountain? It’s just as big but it has a lot more water! Check it out, it’s called Monkeyface Falls.

Cape Horn Falls: Secrets Of The East Fork

Cape Horn Falls: Secrets Of The East Fork

  • Miles: 0.8
  • Time: 45 min
  • Difficulty: Moderate
  • Best Season: Late Spring
  • Elevation Gain: 157 ft
  • Max Elevation: 1753 ft
  • Type of Trail: Out & Back
  • Parking Lot: Road Turnouts
  • Dogs: Allowed On A Leash
  • Restrooms: Not Available
  • Trail Popularity: Extremely Low
  • Pics Taken On: Aug 22, 2023

Hidden in the East Fork of the San Gabriel Canyon lies a beautiful 2-tier cascade. The entire hike is a true adventure. I had to cross the roaring San Gabriel River, bushwhack my way through a trail-less canyon, and climb over smaller waterfalls to get to Cape Horn Falls, all while avoiding poison oak.

Cape Horn Falls is a roughly 70-foot waterfall that only flows after a really wet winter. The trail is virtually non-existent, which means hikers will have to bushwhack for some sections of the trail. Poison oak is abundant, and two small waterfalls must be climbed over to get to the primary waterfall. This hike is definitely not for beginners.

Want to view more secret hikes? Create an account and verify your email to unlock the “Hidden Gems” category in the main menu. Click here to create an account. Just please remember to tag responsibly when/if sharing on social media to keep these places free of trash and graffiti. 

Cape Horn Falls Trail Map

powered by Advanced iFrame

Cape Horn Falls Elevation Profile

Download Printable PDF Map

Directions

To be redirected to the trailhead via Google Maps, click the link here. Parking is very limited, especially on weekends.

Do NOT leave anything valuable in your car, as this is the exact place where my truck was broken into.

Helpful Links

Weather

SoCal Adventure Pass (required for parking in CA mountains)

Cape Horn Falls Trail

Once again, don’t leave valuables in your car, as this place is known for low lives breaking into peoples’ cars.

I parked a little further up the road and walked down until I saw the gate in the image below. This was the beginning of the adventure.

Cape Horn Falls Trailhead

After walking past the gate, I made a left until I spotted this sign underneath the trees. This is the area where I crossed the San Gabriel River.

Since I visited two days after Hurricane Hilary, the river was deeper than usual. I found myself a sturdy walking stick and made my way across.

The deepest section of the river was only about 3.5 feet, but it’s usually a lot shallower.

San Gabriel River

I tried to enter the canyon by following the creek into the tributary. However, the creek, which was located on the right side of the canyon mouth, was surrounded by too much dense vegetation.

I had a much easier time entering the canyon from the left (the left side assuming you’re facing the canyon mouth shown below).

Cape Horn Canyon

Once I entered Cape Horn Canyon, I bushwhacked my way across until I reached the stream that was located on the opposite side of the canyon.

From this point forward, all I did was trek upstream.

Keep an eye out for poison oak, as it’s abundant. The first major obstacle was a roughly six-foot waterfall. Although it wasn’t a big waterfall, it was incredibly slippery.

If climbing isn’t your forte, look for signs of a worn-out trail to the left of the falls, as you can go around.

Fortunately, about halfway through the hike, the vegetation cleared up. Still no trail, but it’s better than bushwhacking.

Shortly thereafter, I reach the second small waterfall. Luckily, this one was much easier to climb over, as it wasn’t as vertical as the first.

The canyon was quiet. We didn’t see a single person on the hike.

Just when I was starting to wonder if one of the small waterfalls was the secret Cape Horn Falls that I was looking for I heard the sound of roaring water in the distance, and spotted something glistening through the trees.

Me Spotting Cape Horn Falls

Destination reached! The waterfall was bigger than I thought it would be.

Cape Horn Falls

The falls had two main tiers, three if you include the tiny four-foot tier at the very bottom.

Did you know there are two abandoned tunnels in the East Fork? They were built in the 60’s to allow Los Angelinos to escape to the high desert in the event of a nuclear holocaust. I’m not kidding. Check out the post Shoemaker Canyon Rd.

Cape Horn Falls

Unfortunately, it’s tough to see the entire top tier from the canyon floor, but after flying the drone, I realized that the top tier was actually larger than the bottom tier.

Cape Horn Falls Bottom Tier

This hike was a true adventure. Thanks to the fact that there were no other people in sight and because I had to bushwhack my way through many sections, I felt like I was able to truly disconnect from the city and plug myself right into Mother Nature.

Cape Horn Falls Drone Shot

Cape Horn Falls is located in the East Fork, but did you know 50 ft Lewis Falls is located just up the North Fork? Click here to check it out. I highly recommend combining the waterfalls and making a day out of it, as both hikes are very short.

Sycamore Canyon Trail: Whittier’s Perfect Getaway

Sycamore Canyon Trail: Whittier’s Perfect Getaway

  • Miles: 3.3
  • Time:  90 min
  • Difficulty: Easy
  • Best Season: All Year
  • Elevation Gain: 370 ft
  • Max Elevation: 617 ft
  • Type of Trail: Out & Back
  • Parking Lot: Fits ≈ 20 cars
  • Dogs: Not Allowed
  • Restrooms: Available At The Trailhead
  • Trail Popularity: High
  • Pics Taken On: Aug 9, 2023

There exists in the heart of Whittier a preserve which unfortunately, is mostly unknown by the public…until now.

Sycamore Canyon Trail is a short and easy trail located in the Puente Hills Habitat Preservation. Since it’s smack dab in the middle of a concrete jungle, it’s more than ideal for a quick nature recharge right before or after heading to work. The beginning of the trail consists of hiking on Sycamore Canyon Rd, which offers little shade and is mostly dry. However, the road later turns into a dirt trail and the scenery becomes almost jungle-like.

Want to browse through more hikes in Los Angeles County? Click the link below!

Los Angeles Hikes

Sycamore Canyon Trail Map

powered by Advanced iFrame

Sycamore Canyon Elevation Profile

Download Printable PDF Map

Address & Directions

Click the link below to be redirected to the Sycamore Canyon trailhead via Google Maps

5040 Workman Mill Rd, Whittier, CA 90601

Helpful Links

Weather Forecast

HabitatAuthority.org (Puente Hills Habitat Preservation Site)

Preserve Map

Preserve Number: (562) 945-9003

Preservation Hours:

June to September: 9am – 6pm

October to May: 9am – 5pm

Make sure your car is out of the parking lot when they close the preserve, otherwise you’ll get a $100 – $150 fine.

Sycamore Canyon Trail

The trail begins at a dirt lot. If you have to use the restroom, now is the time as there is a porta potty at the lot.

I made a left as I hopped on to Sycamore Canyon Rd.

And then a right to stay on the road.

The trail seems pretty dull in the beginning but don’t be fooled, the scenery will definitely change.

I made my way through the gate which marks the beginning of the preserve. Remember, no dogs, bikes, or drones are allowed on any preservers as they can interfere with wildlife.

The tree below is one of the few spots which offers protection from the sun, at least for the beginning of the trail.

I noticed ruins on the left side of the road, but unfortunately, I couldn’t find any information on them.

These ruins may be unimpressive, but that’s certainly not the case for the abandoned Nazi ruins in the Santa Monica Mts. Check out the hike, you’ll definitely enjoy it!

Shortly after, I spotted manmade homes for bats off the side of the road. I didn’t see any bats, however, as I visited too early in the day.

About halfway through the hike I noticed the environment getting greener. The creek, which is located on the right side of the road, was densely adorned with this vibrant green plant.

As soon as the road turns into a dirt trail, the vegetation closed in on me, and the preserve began to look more alive.

Eventually I ended completely under the forest canopy.

My favorite spot of the trail is the area where there is a swing hanging near the creek.

There is only one creek crossing in this hike, but it’s not at all difficult.

As I approached the end of the trail, the vegetation became even more dense. I remember thinking it looked like a rainforest due to the palms and vines.

Just like that, the hike was over. There is nothing specific at the end of the trail, just a few log steps leading deeper into the preserve.

Once I was done taking in the scenery, I made my way back the same way.

The adventure doesn’t have to end here! I highly recommend Mystic Canyon Trail in the Glendora Mountains. The views are amazing, especially during sunset.

Stonewall Mine: San Diego’s Forgotten Relic

Stonewall Mine: San Diego’s Forgotten Relic

  • Miles: 0.7
  • Time: 20 min
  • Difficulty: Easy
  • Best Season: All Year
  • Elevation Gain: 75 ft
  • Max Elevation: 4640 ft
  • Type of Trail: Loop
  • Parking Lot: Fits ≈ 20 cars
  • Dogs: Not Allowed
  • Restrooms: Available At The Trailhead
  • Trail Popularity: Moderate 
  • Pics Taken On: Jul 25, 2023

Deep in Cuyamaca Rancho State Park lies a must-visit site for all my fellow mountain history nerds. An abandoned gold mine calls your name.

The Stonewall Mine, named after Confederate General Thomas J. “Stonewall” Jackson, is located at the trailhead adjacent to the parking lot, as is the cabin museum which features many vintage shots of the mine’s early history. Although the perimeter around the adit is fenced off, many old artifacts can still be seen from up close. The 0.7 mile loop, which begins at the mine, can be extended to over 3 miles and offers views of Lake Cuyamaca.

Looking forward to hiking in San Diego? Check out more awesome trails by clicking the link below:

San Diego Hikes

Stonewall Mine Trail Map

powered by Advanced iFrame

Stonewall Mine Elevation Profile

Download Printable PDF Map

Address & Directions

Click the link to be redirected to the Stonewall Mine via Google Maps.

Helpful Links

Weather Forecast

SoCal Adventure Pass (required for parking in CA mountains)

Stonewall Mine

As soon as I pulled into the parking lot, the mine came into full view.

The concrete walls which descend into the mound were once the entrance to the mine.

I’m not entirely sure, but I believe the machinery below is the actual cage which lowered the miners to the deeper levels of the mine. Feel free to correct me if I’m wrong by sending me an email at info@cahikingadventures.com

The box-looking object below is an ore cart that was once used to transport the ore out of the mines. The ore carts were placed on tracks, similar to trains, to facilitate movement.

Here’s another shot of the mine entrance, also known as the adit, but this time from the opposite side of the perimeter.

This log must have been a part of the mine’s structure. The mine is immediately to the left of the log, and if you look in the far distance you can see the little cabin museum in the back.

I almost didn’t pay a visit to the museum because I thought it was a privately owned cabin!

Here are some vintage shots of the mine’s heyday dating from the late 19th century to the early 20th century.

Stonewall Mine Trail

Once I was done exploring the mine and the museum, I headed east towards the lake to begin the hike.

I made a left at the first fork.

And another left at the second fork. Lake Cuyamaca was visible for the majority of the hike from this point forward.

Speaking of Cuyamaca, have you heard of Cuyamaca Peak? It’s a 7.7 mile trail with literal breathtaking views located only a few minutes away from the Stonewall Mine.

We cut the hike very short and headed back up the dirt road to the parking lot. However, you can continue to follow the side of the lake if you wish to extend the hike.

If you plan on following my same route, stay to the left again at the third fork. The dirt road will quickly turn into a paved road.

As soon as I saw the gate I knew we were back at the parking lot.

Since Stonewall Mine is very short, I highly recommend combining it with Stonewall Peak. The panoramic view from the peak is stunning to say the least.

Mystic Canyon Trail: Stunning Views In The Glendora Mts

Mystic Canyon Trail: Stunning Views In The Glendora Mts

  • Miles: 1.92
  • Time: 45 min
  • Difficulty: Moderate
  • Best Season: All Year
  • Elevation Gain: 707 ft
  • Max Elevation: 1907 ft
  • Type of Trail: Out & Back
  • Parking Lot: Turnout, Fits ≈ 20 cars
  • Dogs: Allowed on a leash
  • Restrooms: Not Available
  • Trail Popularity: Low – Moderate
  • Pics Taken On: Feb 28, 2023

If you’re looking for a quick hike to sneak in right after or before work then look no further than Mystic Canyon Trail. I’ve hiked and biked (yeah that’s me in the featured image) this trail more times than I can count, and one of the things I love most about it is how accessible and thus, ideal, it is for a midweek. 

The trail is a short, fun hike located in Glendora, CA that offers amazing views of the city below, and ends at a hoisted American Flag. Mountain ranges surround the viewpoint on three sides, and the ocean can be seen to the south on very clear days. There is very little shade on this trail. Hence, a hat and plenty of water is highly recommended.

Need more hiking ideas in Los Angeles county? Check out the complete list below!

Los Angeles Hikes

Mystic Canyon Trail Map

powered by Advanced iFrame

Mystic Canyon Elevation Profile

Download Printable PDF Map

Address & Directions

Click the link to be redirected to the Mystic Canyon Trailhead via Google Maps.

After clicking the link, you may notice I linked to the Big Dalton Canyon Trailhead, but that wasn’t a mistake, as both hikes share the same trailhead. I parked in the dirt lot off of Big Dalton Canyon Rd.

Helpful Links

Weather

SoCal Adventure Pass (required for parking in CA mountains)

Mystic Canyon Trail

Almost as soon as as I walked passed the trailhead, I came to a T intersection. I made a left, and the elevation immediately began increasing.

Mystic Canyon Trailhead

From this point forward there are only small pockets of shade so enjoy it. I found the beginning of the trail to be very rutted, steep, and the dirt loose. Also keep an eye out for cyclists as the trail is very popular with mountain bikers.

Trust me, I used to frequently bike this trail, especially during the fall and winter, when the Snow Summit Bike Park closes down for boarding season.

The views of Big Dalton Wilderness Park were exceptional as I made my way to the top.

Shortly thereafter, I got a glimpse of the Big Dalton Debris Basin, which, like its name suggests, is responsible for catching the gravel, boulders, and sediment from traveling downstream from the Big Dalton Reservoir.

As I made my way further up the trail the views kept getting better.

To the east, the king of the San Gabriels, Mt Baldy, peeked over the vibrant green mountain ranges.

Want to visit a much shorter, snowy peak instead of Mt Baldy? Check out Sunset Peak in the vicinity of Mt Baldy, a long and easy dirt road from beginning to end.

The flagpole loomed in the distance as I got closer, while Laurel sumac and California Sagebrush, two of some of the most popular plants, adorned the sides of the trail.

The last part got a little rutted, but nothing too bad. Regardless, I was careful to watch my step, as it doesn’t take a deep rut to strain your ankle.

If you’re not already using hiking boots with ankle support, do yourself a favor and invest in a pair.

Here is the view from the top. I could easily see the entire city of Glendora. I hiked back the exact same way I got to the top.

I’ve biked down the road heading south from the flag, and it’s very steep and loose. I don’t recommend it for most people. Additionally, it ends at the intersection of Big Dalton Canyon Rd and Glendora Mountain Rd (GMR), which means you’ll have to walk back Big Dalton Canyon Rd to get to the dirt lot.

Since we received major storms during the 2023 winter season, the mountains were greener than I’ve ever seen them. That’s snowcapped Mt Baldy in the back.

The road heading west is the Lower Monroe Truck Road. If you head down from this road, you’ll end up back on GMR.

However, if you head up from the Lower Monroe Truck Rd, you’ll end up on the Punk Out Trail, or as well call it in the biking community, “The Poop Chutes”.

Here’s one more drone shot of Mystic Canyon with a view of the valley below.

Not sure if you want to hike Mystic Canyon, but still in the mood for nearby lookout? Check out Claremont Loop, an easy 5 mile trek in the foothills of the Angeles Forest.

Ortega Falls: 2 Cascades Off Of Hwy 74 (Closed)

Ortega Falls: 2 Cascades Off Of Hwy 74 (Closed)

  • Miles: 0.2
  • Time: 25 min
  • Difficulty: Easy
  • Best Season: Spring
  • Elevation Gain: 67 ft
  • Max Elevation: 2198 ft
  • Type of Trail: Out & Back
  • Parking Lot: Turnout, Fits 20+ cars
  • Dogs: Allowed on a leash
  • Restrooms: Not Available

Excluding the plethora of graffiti, Ortega Falls is exceptionally stunning. Unlike most waterfalls which look like a thin stream flowing off a cliff, this waterfall is wide and roaring (assuming there’s plenty of water of course). There are actually two large falls on this trail.

The larger of the two waterfalls, which is known as Ortega Falls and measures a decent 40 feet high, is located right above the smaller one that I’ll call Lower Ortega Falls. In addition, much smaller falls can be found all throughout the creek. There is no shade on this trail. Hence, a hat and water are highly recommended. It is possible to climb to the top of the falls, but the pool is not deep enough for cliff jumping.

Were you looking to hike in the Riverside area? Check out more trails by clicking the link below:

Riverside Hikes

Ortega Falls Trail Map

powered by Advanced iFrame

Ortega Falls Elevation Profile

Download Printable PDF Map

Directions

Click the link below to be redirected to the Ortega Falls Trailhead via Google Maps.

Ortega Falls Day Use Site, 33288 CA-74, Lake Elsinore, CA 92530

Helpful Links

SoCal Adventure Pass (required for parking in CA mountains)

Weather Report 

Ortega Falls Trail

The trailhead is located on the west side of Highway 74, also known as Ortega Hwy. I hopped on the trail and wasted no time.

Ortega Falls Trailhead

This trail splits many times, but don’t worry, I’ll make it super easy for you to get to the primary waterfall. Simply stay to the right every time you come to a trail split.

By doing so I arrived at Ortega Falls quickly and easily.

Below is an example of a split. The trail to the right is actually a bit tough to see.

The trail to the main falls is not at the bottom, lefthand side of the image. It’s straight ahead and required a bit of boulder scrambling, but nothing too extreme.

Once again I found myself in front of a fork. However, I wanted to explore the base of Lower Ortega Falls, so I took the trail to the left where the white arrow is painted.

When I got to the canyon floor, I saw one of many small falls flowing between two large boulders, but I wasn’t ready to give up, so I climbed the boulder on the right.

Unfortunately, I quickly found out that it’s very difficult to get to the base of Lower Ortega unless you’re willing to go for a swim.

Notice the people in the shot below? That’s as far as I was able to get, and since the creek flows at a 90-degree angle, you can’t even see the falls flowing over the cliff, but hey, it was worth a try.

(I took the shot below after I had arrived at the main falls).

Lower Ortega Falls

Here’s another shot of Lower Ortega that I took with my drone.

Betcha haven’t heard of the giant pumpkin rock in Riverside County. It gets a new coat of paint every year before Halloween so plan accordingly!

Lower Ortega Falls

I made my way back to the main trail and found myself at another split yet again. The trail to the left in the image below ends at the dirt ledge to the right of the falls in the image above. However, I stayed to the right this time.

There was a point when I walked around the bend and was able to see both waterfalls from the trail. It got my heart pumping. All I could think about was getting to the main waterfall.

When I finally arrived at my destination, I was pleasantly surprised at the size of the waterfall, as it looks a lot smaller in pictures. If only people had respect and hadn’t covered it in graffiti.

Fun fact, Ortega Falls and Highway are named after Sgt. Jose Francisco Ortega, a Spanish sergeant who led the scouts of the 1769 Portola expedition. They were the first non-native people to see the area.

Ortega Falls

Ortega Falls

Once I arrived at the falls, I was able to walk a short distance to the top of Lower Ortega. The drone shot below shows how close both falls really are.

Upper and Lower Ortega Falls

A beautiful little grotto is located right above the main waterfall….but wait, there’s more.

Lower Ortega Falls

Further up the creek is a whole host of little cascades, which can be accessed by climbing up the right side of Ortega Falls, zig-zagging their way down the canyon.

Above Ortega Falls

Want to hike a trail closer to the city but still within Riverside County? Check out Mt Rubidoux, a 2.7-mile trek to a peak with breath-taking panoramic views, especially during the sunset.

Stoddard Canyon Falls: Rock Slide & Pool

Stoddard Canyon Falls: Rock Slide & Pool

  • Miles: 0.75
  • Time: 45 min
  • Difficulty: Moderate
  • Best Season: Spring
  • Elevation Gain: 160 ft
  • Max Elevation: 3781
  • Type of Trail: Out & Back
  • Parking Lot: Dirt Lot, Fits 30+ Cars
  • Dogs: Allowed on a leash
  • Restrooms: Not Available
  • Trail Popularity: High
  • Pics Taken On: May 7, 2023

Stoddard Falls is not just any type of waterfall. It’s a rockslide falls with a pool for floating and relaxing. Not to mention, the water in the creek is crystal clear, and even looks blue, something we rarely see in Southern California.

Stoddard Canyon Falls is a forty foot waterfall located in the Mt Baldy area. It’s a short easy hike. However, the small section of the trail which heads down from the road to the canyon floor is steep and slippery, and shouldn’t be attempted by people with poor balance or those who are afraid of heights. If there is a lot of water in San Antonio Creek, getting to the falls may be difficult and dangerous.

Stoddard Falls is one of the nicest waterfalls (and overall best hikes) in Southern California. However, it’s far from the only one. To view abandoned gold mines, 500 ft waterfalls, and multiple ruins, click the links below:

Best Hikes In Southern California

Best Waterfalls In SoCal

Stoddard Falls Map

powered by Advanced iFrame

Stoddard Falls Elevation Profile

Download Printable PDF Map

Parking & Directions

To be redirected to the Stoddard Falls Trailhead via Google Maps, click the link here.

This hike shares the same trailhead with Stoddard Peak.

Helpful Links

Weather Report

SoCal Adventure Pass (required for parking in CA mountains)

Stoddard Falls Trail

I began the hike on the concrete road on the west side of the creek. Make sure you don’t go up the dirt road, as it goes up to Stoddard Peak.

You know you’re on the right track when you can see the bridge on the opposite side of the canyon that crosses the creek and leads up the dirt road.

A little further down, I noticed dirt trails splitting off of the concrete road, so I decided to head down and explore.

I was so amazed at how blue and clear the water was. I’ve yet to see another creek with water as nice as this one.

Turns out they were dirt trails leading to the top of the falls. The shot both above and below were taken from these short detours.

I passed the top of the falls and kept heading down the paved road. Shortly after, I reached a tree with branches which were hanging over the road. This is where I made my way down.

I know the way down looks extremely steep, but trust me when I tell you it’s not that bad in person. For some reason ledges look way steeper in pictures. It’s a bit slippery, but it’s not too bad.

The trail descends straight down and then makes a sharp right for a gradual descend to the canyon floor.

When I got to the bottom, I busted a U-turn and started making my way upstream towards the falls.

Here she is. The beautiful Stoddard Falls, named after Barret Stoddard, brother in law of one of the four transcontinental railroad builders, Collis Huntington (Collis was the uncle of Henry Huntington).

Want to explore more waters in or near LA county? Check out the post below:

Best Waterfalls In Los Angeles

Barret Stoddard on his trusty mule.

Barret Stoddard

I have to share some very interesting information I recently found in one my local history books. Apparently, this waterfall is not the real Stoddard Falls.

The real Stoddard Falls has been lost to history for roughly a century and measures a whopping 100 feet tall. In fact, the waterfall on this hike used to be known as Old Falls. Don’t believe me? Check out this picture I took from one of my favorite books, The San Gabriels.

Stoddard Falls' real name

However, I recently located it.

By the way, if you find there’s too many people at the falls, you can continue down the road and find plenty of nice spots with semi deep pools in the creek, and have them all to yourselves.

If you hike to Stoddard Falls, don’t forget to also check out Stoddard Peak, as both hikes can be done in the same day.