No Results Found
The page you requested could not be found. Try refining your search, or use the navigation above to locate the post.
Hiking with a group or a friend isn’t always possible. People are busy, but that shouldn’t stop us from enjoying the great outdoors. Solo hiking can be extremely peaceful and rewarding when done safely.
If you feel ready to get out there on your own I have great news. I took out my notepad and came up with the 10 most essential tips that will help you stay safe on your solo hikes. Let’s get started!
This is arguably the most important rule and why it’s number one on my list. Notice the word reliable in the heading. You don’t want to tell someone who’s going to completely forget you were even out in the first place. Believe me, it’s possible.
This is exactly how I go about this. I literally write down or text someone the exact name of the location I’m planning to visit as well as the trails I intend to travel on.
Then I tell them, “if I don’t text you back by a certain time, let’s say 8pm, text me. If I don’t reply within an hour I’m probably lost or injured and I need help so call 911.”
Choose a time that will give you leeway in case you decide to stay a little longer in the outdoors. For example, if you plan on getting back by 4pm tell them you’ll send them a text by 7pm, because you never know, you might just feel the need to stay out a little longer.
It can be very easy to overlook this guideline especially if you live in a place like California where it’s sunny 99% of the time. However, you’ll be surprised how fast nasty weather can form in the mountains.
You don’t want to be caught in a thunderstorm while hiking alone. Flash floods are a real danger and lightning can be as well. Which reminds me, if you want to be well prepared and know exactly what to do if you get caught in a thunderstorm, check out this post I wrote by clicking right here.
When it comes to weather and hiking alone it’s best to stay home if you see any chances of rain, snow, or high winds. It’s not worth the risk.
Go on solo hikes only if you see good weather in the forecast.
Whenever you’re solo hiking there’s going to be gear and equipment that’s a bit more crucial than if you were to hike in a group. Cherish your life by always being well prepared. Here are the following items I ALWAYS take when I hike alone.
First Aid Kit: I think this one is pretty self explanatory.
Headlamp: not a regular flashlight. If you’re alone you’ll want a headlamp to keep your hands free. Remember, no one’s going to be with you to help you carry anything.
Lifestraw: You should always carry extra food and water with you regardless of whether you’re in a group or alone. However, the Lifestraw can literally mean the difference between life and death. You can use this to drink from the creek, pond, lake, river etc. without boiling your water.
This godsent piece of equipment is light and doesn’t take up much room in your backpack so always carry it with you on your solo hikes.
Whistle: A whistle can save your life if you’re lost or trapped. Imagine how your voice would feel after an hour of screaming for help. Not to mention, a whistle can be heard much farther away than your voice.
Plus, it’s so small and light that I carry one with me everywhere I go. I keep it attached to my backpack using a keychain. It’s also very effective for scaring wild animals.
To signal for help with a whistle simply blow three consecutive rapid bursts and wait a few seconds for a response. The three bursts stand for SOS.
Satellite Communicator: Literally the best gear you can take on a solo hike is a satellite communicator. These amazing communicators use GPS to locate your position and allow you to send and receive messages without cell service.
You can send your location to first responders from anywhere in the world. The downside is they’re a bit costly. Unfortunately, I haven’t gotten my hands on one just yet, but when I find which one is the best and test it out I’ll update you guys on the make and model.
Map: It’s good practice to take a map with you at all times. Not a map from your phone. You need an oldschool foldable map. They’re super lightweight, inexpensive and barely take up any room in your backpack, but they can save your life.
Flint Firestarter or Lighter: If you don’t know how to use a firestarter it’d be a good idea to start learning. Starting a fire is possibly one of the most important lifesaving skills we can learn as outdoorsmen and outdoorswomen.
However, if you haven’t found the time I perfectly understand. A waterproof lighter will do the trick. To build a fire, always remember, you start with tinder (no not the app) which is anything dry and paperlike that will catch fire quickly, then add twigs, followed by slightly thicker branches and keep moving up in thickness until you can burn a log.
Compass: Your map will do you no good if you can’t tell which way is north. Luckily, compasses are small, cheap, and don’t take up much space. You can keep one attached to the inside of your backpack with a keychain similar to how I mentioned carrying a whistle.
Don’t worry about getting a fancy high tech compass. Anything durable will be just fine.
I love listening to music as much as the next guy, but the reality is we’re not taking a walk through the park. We’re on mother nature’s turf now, and that means danger can be lurking around any corner.
Bears, cougards, rattlesnakes, bad weather, these are just a few reasons why you want to be fully aware of your surroundings, especially on solo hikes. A more common reason is to be able to hear the bikers racing down the mountain. Yeah, you know exactly what I’m talking about.
It’s also nice to be courteous to hikers who are trying to pass you from behind. If listening to music for you is a must, keep the volume low and periodically remove your earphones to remain aware of your surroundings or keep only one earphone on.
Confucius is known for his wise saying, “success depends upon previous preparation, and without such preparation there is sure to be failure.” When it comes to our lives and wellbeing we can never be too prepared.
Before your solo hike do some quick research (either online or by asking someone) to inform yourself about the types of wildlife you can expect and whether you should take additional gear. For example, some places suggest you carry bear proof containers to eliminate food odors or bear spray for protection.
Certain areas may be known for natural disasters especially at different times of the year. Had you done your homework, you could have potentially avoided a serious catastrophe.
When you’re hiking alone, it is vitally important to know the area you intend to visit.
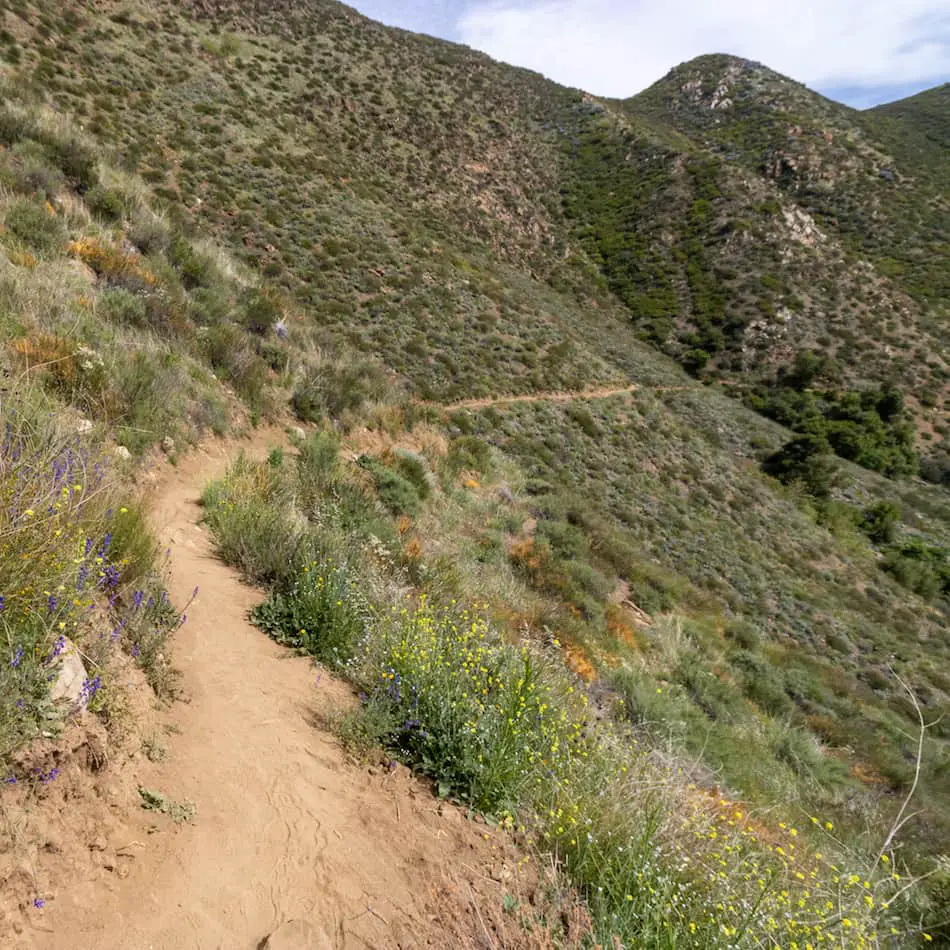
The fact that we’re outdoorsy means we have an adventurous spirit. However, I highly advise hiking off the trail when solo hiking. This is one of the easiest ways to get lost and never be found.
Here in Southern California we’ve had 2 hikers pass away in the mountains in the last 8 months. Both were hiking alone. One body was never found. Hundreds of hikers go missing every year in the US. Many resulted from venturing off the trail either intentionally or accidentally.
Bonus Tip: Even if you have a map with you and/or are using gps to track your hike, it’s a good idea to take pictures of the trail signs and noticeable landmarks along the trail to minimize your chances of getting lost.
Mother nature is not the only threat when you’re solo hiking. The sad truth is there are people in the world who have ill intentions towards others, and they’re looking for any chance they can get to cause harm.
If you plan to hike alone, do not share it on social media. At the very least don’t mention you’re hiking alone. This rule applies even more so to the ladies.
The area where I grew up hiking had graffiti everywhere. Many people who were involved in gangs and crimes would go up to the mountains to use drugs and vandalize whatever they could get their hands on. It’s sad but it’s reality.
If you live in a very safe area, this rule may not apply as much to you, but why not decrease your chances of running into a crazy person if you can.
We’ve all had the gut feeling where we sense something is wrong, but we don’t listen to ourselves and we end up paying the price. When you’re hiking alone, always trust your judgement
If you see bad weather forming and you think you should head back, listen to yourself. If you think you saw a cougar run off into the woods, head back. If you ran into a person who gave you a bad vibe, it’s probably a good idea to call it quits.
Solo hiking is not the time to take risks.
I’m a very competitive person, so I’m always competing even if it’s against myself. When I’m hiking alone, however, I like to focus more on relaxation rather than trying to break new records.
“The ones who push the limits discover that the limits sometimes push back.” – Frosty Hesson from the movie Chasing Mavericks. Pushing yourself past your limit is great, but it increases the chances of something going wrong.
Remember, when you’re alone, the objective is to reduce all risks. Instead of rushing, try to focus on unique plants and animals that you hadn’t seen before. This will help you soak it all in while keeping you aware of your surroundings.
One of the best ways to stay safe is to choose a trail that has a decent amount of hikers on it. If anything goes wrong, it’ll be nice to get help from a fellow hiker. Choosing a well trafficked trail also ensures the trail is not overgrown and thus leading to a lower chance of getting lost.
The second criteria is to make sure the trail has signs. You don’t want to accidentally take the wrong trail and find out 3 hours later. You can check to see if the trail has signs by calling the ranger station or going online and looking up pictures, but the former would be much more effective and easier.
There’s a huge misconception about hiking alone. If you take all the necessary precautions, however, you’ll find that solo hiking can be just as safe and more enjoyable than hiking with a group.
You’ll notice more things, go at your own pace, and allow you to learn new things about yourself. I always feel more connected to mother nature when I’m hiking alone. I hope these tips keep you safe, allow you to enjoy solo hiking as much as I do, and remember, leave no trace.
The page you requested could not be found. Try refining your search, or use the navigation above to locate the post.
I get this question all the time, and for a good reason. No one wants to spend another hefty lump sum on a second pair of hiking boots for the snow unless you absolutely have to.
Hiking boots can be used in light snow. However, they must provide insulation, traction, and be waterproof. If the boots fail to meet the three requirements or the snow is too deep, investing in a second pair of boots for the snow will be necessary.
Hold on right there! Before you go buy a second pair of hiking boots for the snow, I’d like to teach you a few hiking hacks that will work exceptionally well in case your boots don’t meet the 3 requirements. They’ve worked for me and I know they will work for you. Let’s get started.
First and foremost you need to find out how much snow you’re going to be hiking in. For the sake of this article I’m going to define light snow as roughly 2 inches or less of snowfall. You can easily determine this by checking the weather forecast.
If you see anything above 2 inches of snowfall you’re more than likely going to need hiking boots specifically designed for the snow. Anything above 6 inches will require snow shoes, and exposed and steep conditions (regardless of snowfall inches) where snow may turn into ice will require crampons.
However, if you determined your hiking location received light snow, your hiking boots should be sufficient. Just check for the following 3 general guidelines.
Many hiking boots nowadays come waterproofed straight out of the box regardless of what season they were designed for. If you are unsure whether your boots are waterproof or not, simply do a quick google search for your specific brand and model. However….
Heed this warning: Many hiking boots, which claim to be waterproof, WILL leave you with soaked feet in the snow such as my Moab Merrel 2 boots.
They’re amazing boots, until you hike in the snow or one of your feet goes straight into the creek on your last creek crossing just before you get to the car….you know what I’m talking about.
If your boots aren’t waterproof or even if they are but you want to take extra precaution, here are two of those hacks I was talking about which will help MINIMIZE the amount of water getting into your boots.
Remember, there is no magic spray that will completely waterproof your boots. If you’re hiking in the snow, your feet will get wet. I’m emphasizing it so you are completely aware of the situation before you go out on your hike.
As far as which product I’ve used, I’ve found The Art of Crep Protect Spray to be the best at minimizing the amount of water seeping into your boots.

I like to use multiple coats on my boots (at least 3 for each boot) before heading out into the snow. Spray your boots from about 7-10 inches away for best results.
I don’t like to spray the inside of the boots because I feel it’s unnecessary, and I’d like to avoid as many chemicals as possible near my skin, but I’ll leave that one completely up to you!
It takes about 8 hours for each coat to dry, so make sure to begin the process a few days before you go on a hike.
Hack #2 includes using gaiters to keep snow, water, dirt, and rocks from creeping into your boots especially around the ankle. There are three different types of gaiters: hiking, trail running, and mountaineering gaiters.
Although we’re talking about hiking in this post, I’ve found the following all-around-use gaiters to be sufficient, and the best part is they don’t break the bank! They are lightweight, ACTUALLY waterproof, and breathable.
They’re called Azarxis Hiking Gaiters.

I love these gaiters. They’ll do a great job at stopping snow from getting in through the ankle area, but keep in mind the front of your boot and the sides will still be exposed.
To sum things up, if you’ve done everything you can to waterproof your feet and you’re okay with getting your feet somewhat wet in the snow, you can mark this section as a pass for your boots.
Most hiking boots do an amazing job at providing sufficient traction in all weather conditions, which is great because there’s not much we can do to increase their traction other than using microspikes in very icy conditions.
You could technically apply a salt and glue mixture to the bottom of your boots if you really wanted to, but I wouldn’t advise it for the snow. If you find that you’re slipping frequently in dry conditions you’re better off investing in a new pair of hiking boots that will also suit you well in the snow.
What I do HIGHLY recommend is using your trekking poles to increase your traction. My girlfriend and I learned this the hard way at Big Bear, CA. Most poles come with different adapters for different conditions including mud, snow, and dry conditions.
Trekking poles are godsent in snowy conditions.
Most all-season hiking boots will not provide the necessary insulation for snowy conditions. Your toes will get numb from the cold. Luckily for us, there’s more hiking hacks we can use to compensate for the lack of insulation.
Yup it’s that simple. Want to keep your feet warmer? Simply use two pairs. You should have bought your hiking boots at least an extra half size bigger therefore, you should have enough room to double up on socks.
If you didn’t go up a half size when you bought your boots, you can use socks specifically designed for the snow. I recommend cushioned high socks for hiking in snowy conditions, preferably made of wool, polyester, and/or nylon. Trust me, you’ll thank me later for this one.
So what are my favorite hiking socks for the snow you ask? Believe it or not I used Stance Star Wars Snowboarding Socks for the longest time and they worked like a charm. It was a night and day difference from regular socks.
Unfortunately, those socks are no longer around. However, you can find very similar ones right here:
Musan Wool Ski Socks Unisex

The page you requested could not be found. Try refining your search, or use the navigation above to locate the post.
There’s no doubt hiking and high elevation go hand in hand. However, high elevations in the mountains are the perfect recipe for unexpected thunderstorms, and where there are thunderstorms there’s lightning.
Here are five guidelines you can follow which can potentially save your life or the life of a loved one if you find yourself in the midst of a thunderstorm on your hike
If you’re at the peak when the thunderstorm begins or is approaching, you should start heading down right away.
The reason is pretty simple: the higher up the mountain you are, the more likely it is to be barren and the higher your chances are of being struck by lightning. Lightning is more likely to strike a plateau, ridge, or summit, so get down quickly and safely.
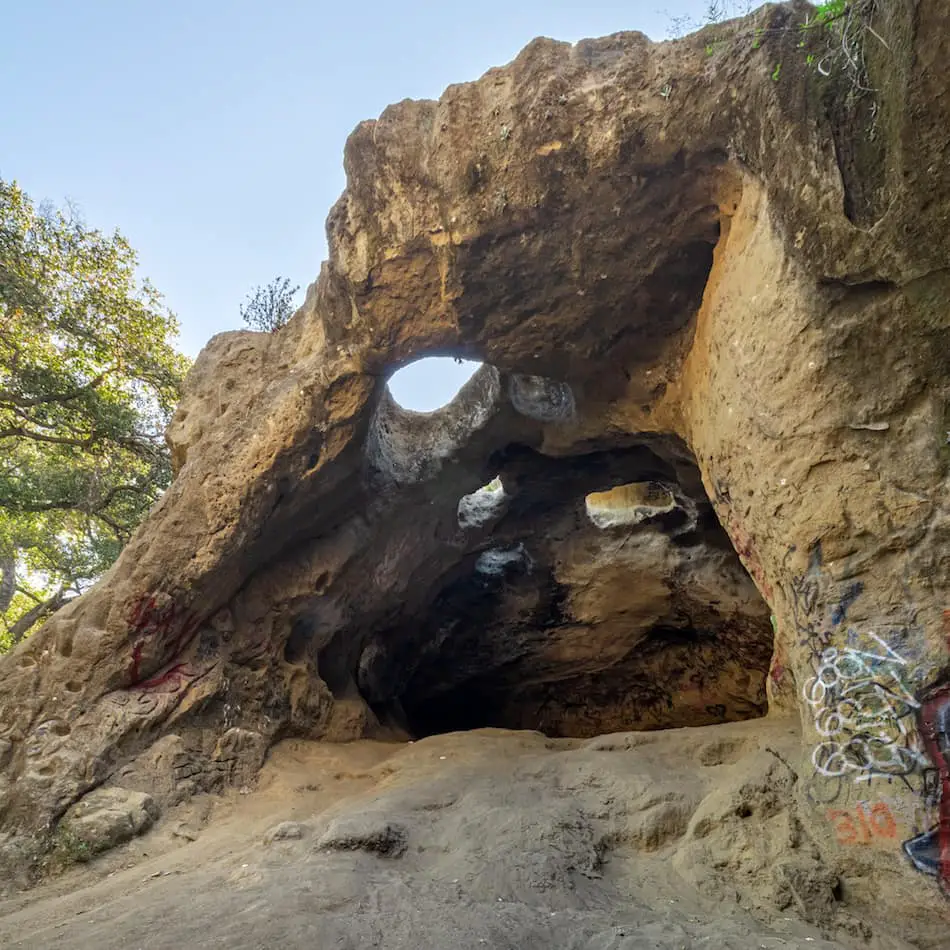
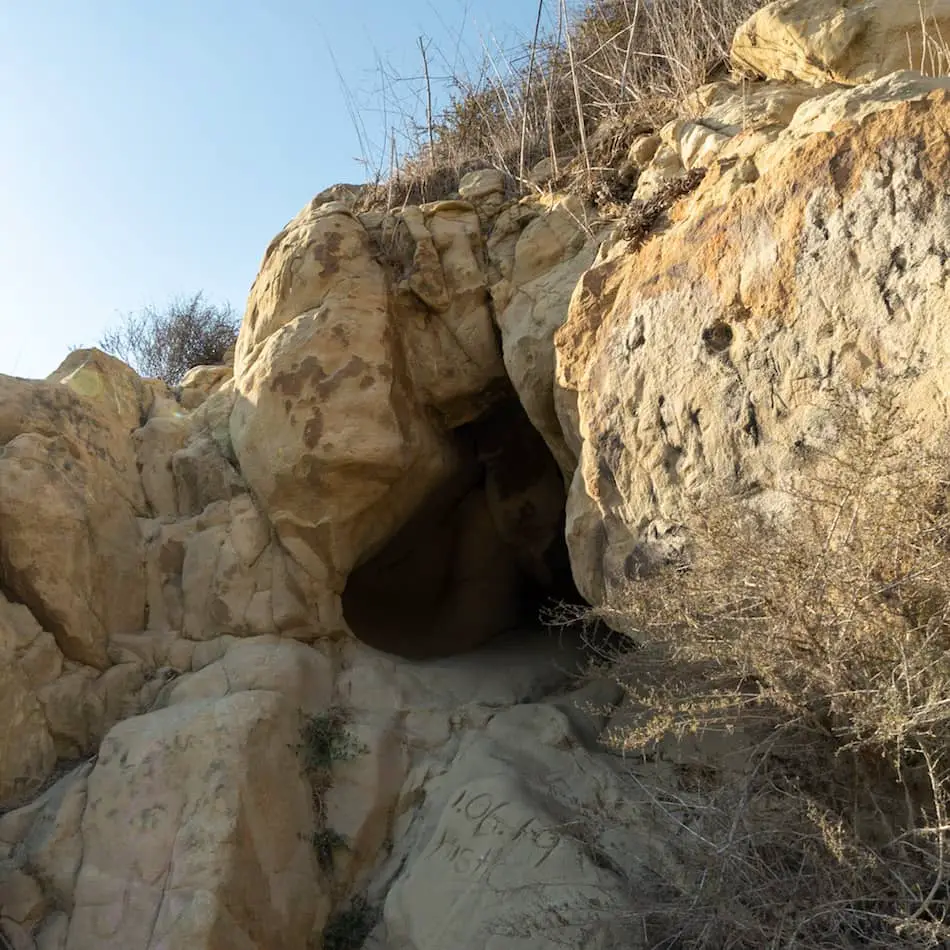
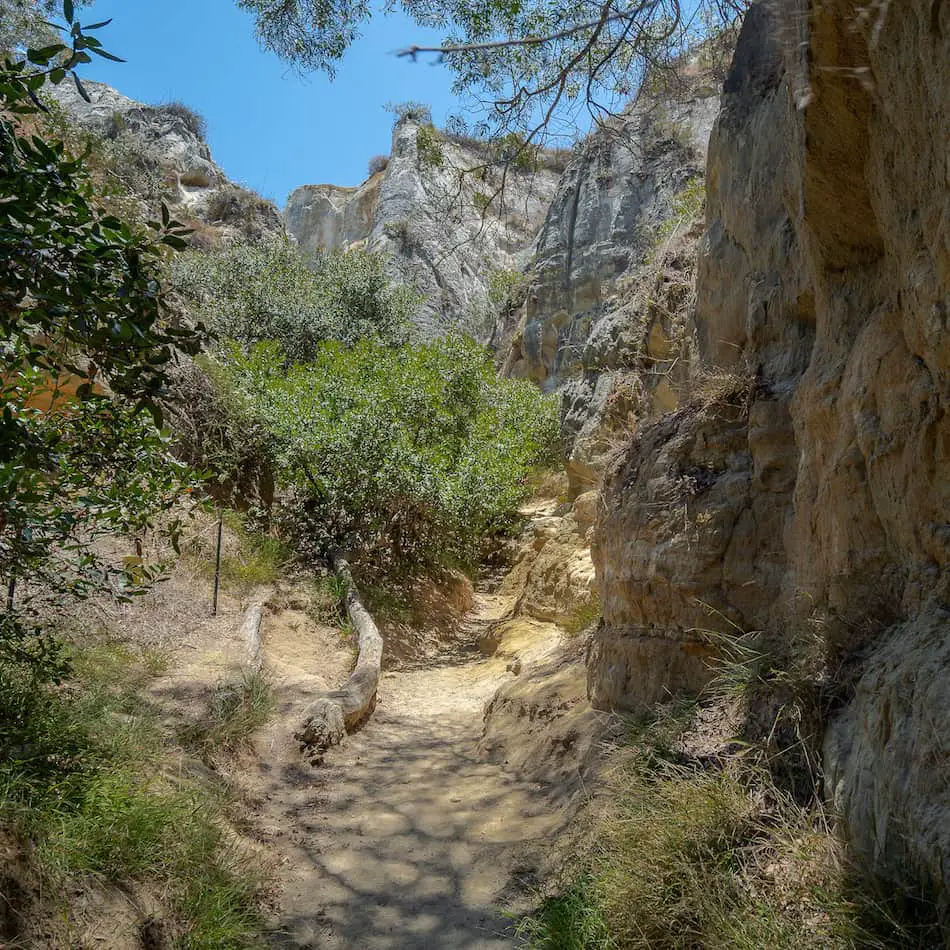
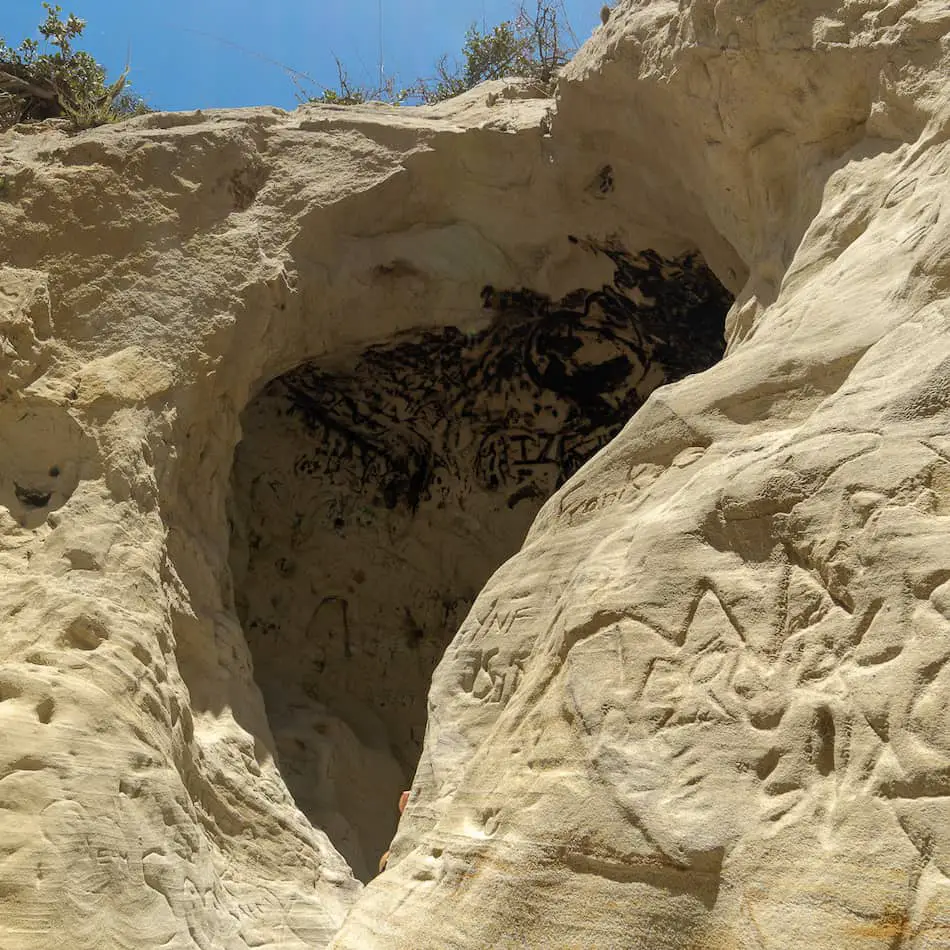
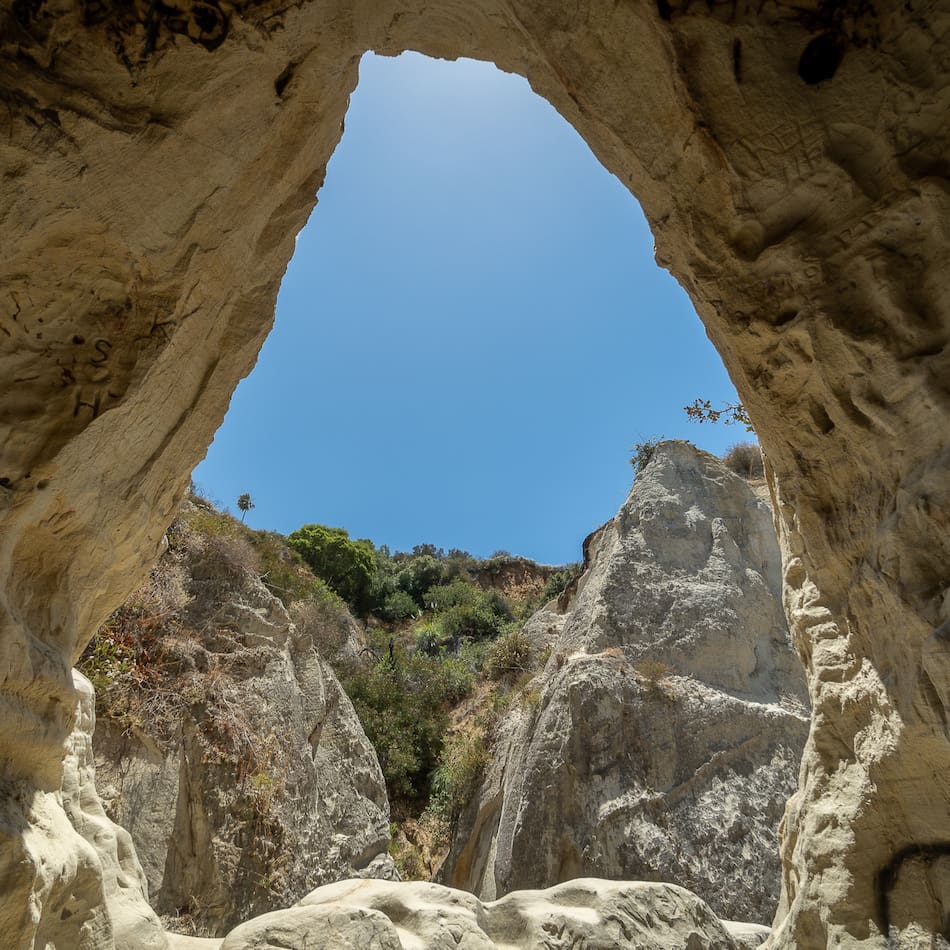
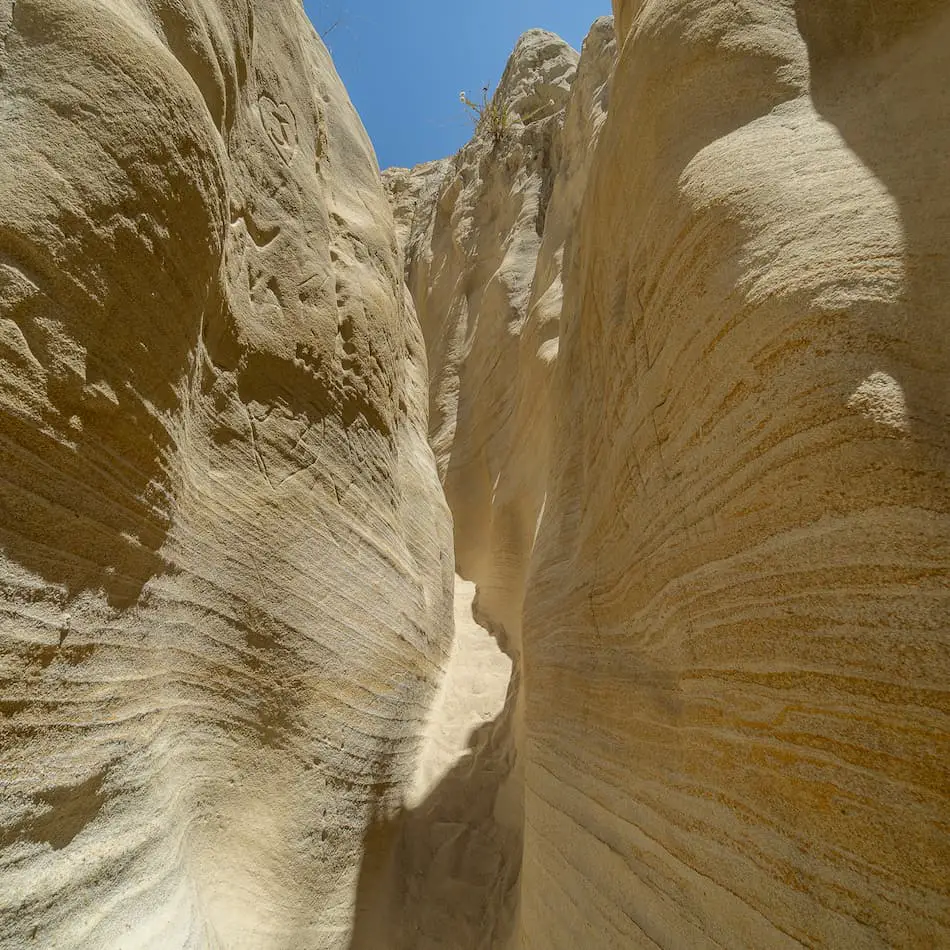
It’s perfectly safe to take shelter in a cabin, your car, or a deep cave, such as the Vanalden Caves in the image above. If you can’t find any type of shelter, look for a depression or valley.
By the way, if you want to see more regarding the Vanalden Caves, click the link here. You would never think these types of caves exist in LA, but they do, and they’re breathtaking.
A low point in the mountains (preferably with dense trees) can also good for taking shelter. Just keep an eye out for flooding if you choose any low-point areas, and keep your distance from large trees.
Shelters you’ll want to avoid include shallow caves and open structures such as picnic pavilions as these are more likely to attract lightning. Also avoid sparsely covered areas including meadows, fields, and large clearances.
Never take shelter under a large tree ESPECIALLY if it’s dry and standing alone.
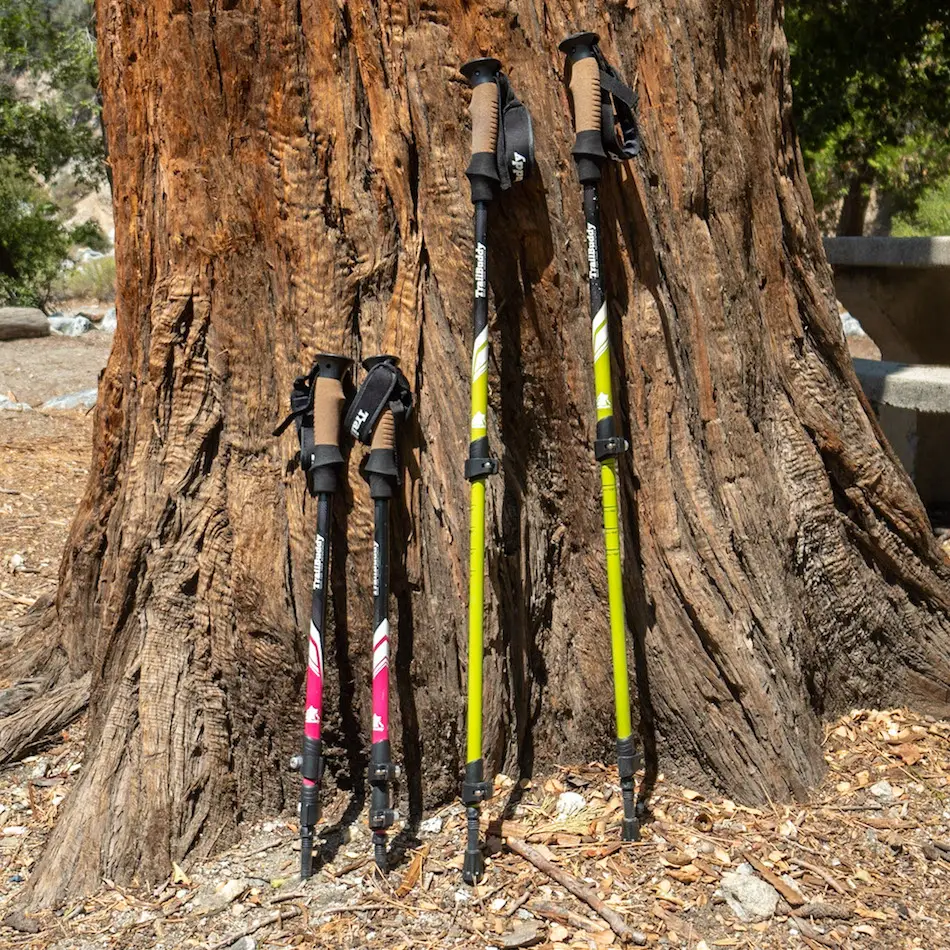
Once you’ve identified your proper shelter, remove your backpack and trekking poles. You don’t have to leave them outside the shelter, just keep them a few feet away, especially if you’re outside such as in a valley or low point that I mentioned in point number 1.
Your backpack and trekking poles won’t attract lightning, but they do conduct electricity, and we definitely don’t want that.
In case you’re wondering, the trekking poles in the image are called TrailBuddy Trekking Poles. We wrote a thorough review after putting them to the test for a year. You can check that out right here. Even though they’re one of the lower priced trekking poles on the market, you’ll be surprised how reliable they are.
Sometimes it’ll be impossible to find shelter, and the only choice you’ll have is to get moving. If such is the case, you and your group will want to take the following precautions.
If you’re traveling in a group, you’ll want to spread out in order to minimize the chances of lightning striking more than one person.
Keeping roughly 100 feet in between each person should be sufficient. I highly advise stopping every 20 minutes or so to ensure everyone is safe and still connected to the group.
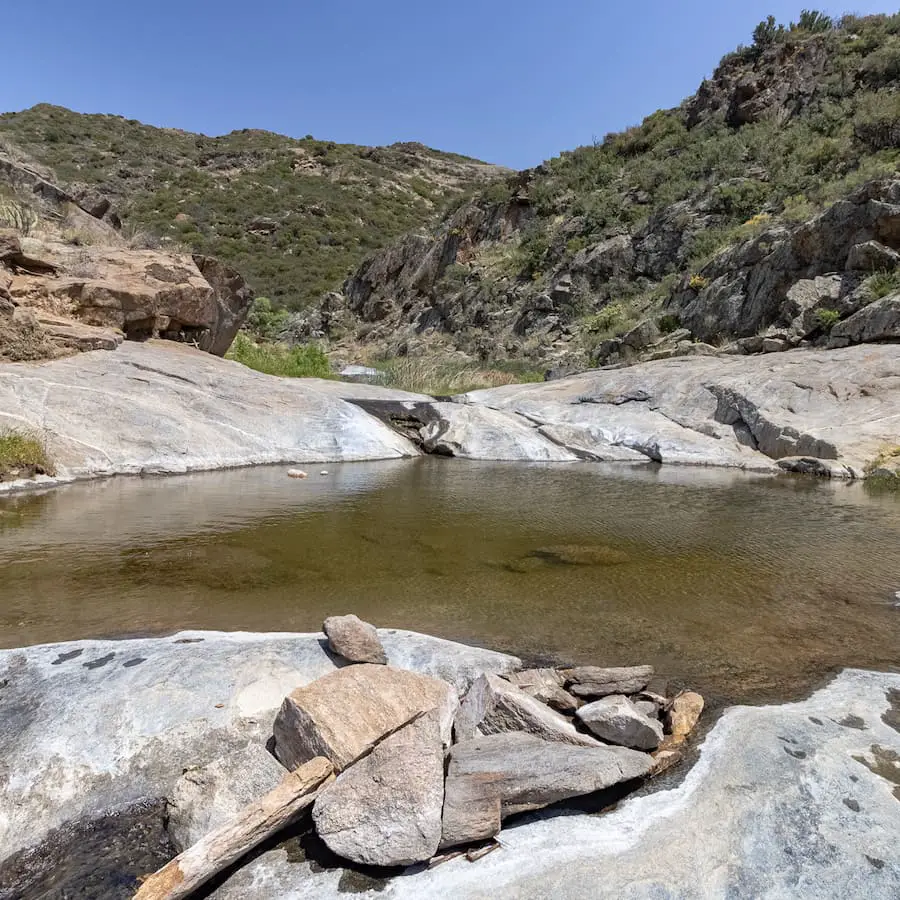
Sorry guys, but this is just not the right time to grab a drink from the nearest swimming hole. As you probably already know, water and metal are two of the best conductors of electricity.
Avoid creeks, swimming holes, metal fences, and posts to minimize the risk of being struck.
The image above is a series of pools and a waterfall called Kitchen Creek Falls located in San Diego County. If you want to see more on that super amazing place click the link here.
It’s okay to take shelter in a canyon in a place like Kitchen Creek Falls. Just make sure you don’t go in the water.
If someone in your group is struck by lightning, you’ll want to proceed in the following manner. Begin by checking for a pulse and breathing.
If the individual is not breathing or doesn’t have a pulse, call 911 if possible and begin CPR immediately.
If more than one person has been struck, treat those that are unconscious first as they have the highest risk of dying.
It’s not uncommon for people to appear dead when they’ve been struck by lightning. However, there’s a good chance of them regaining consciousness once you’ve performed CPR.
There is no danger in touching a person who has been struck by lightning. You will not be shocked yourself. This is a common misconception.
Always be aware of your surroundings when performing CPR in the outdoors. Keep an eye out for wild animals, flash floods, and high winds knocking down branches. If you must, move the unconscious person to a safer area before performing CPR.
Use this method to detect how far the storm is from your location. When you see a flash of lightning, count the number of seconds until you hear thunder.
If the number is less than 30 seconds, the storm is less than 6 miles / 10km away, which means you’re within striking distance.
Please keep in mind that just because you’re not in the danger zone you shouldn’t take precautions. As soon as you see a thunderstorm in the distance, you should highly consider turning back for your safety and the safety of the group.
You may have heard of the stance called the lighting crouch. It consists of crouching down on both feet with your head between your knees, closing your eyes, and covering your ears with your hands. It’s been recommended as a last resort type of protection against lightning strikes.
Unfortunately, the lightning crouch is not very effective. Hence, the National Weather Service (NWS) stopped recommending the crouch in 2008. You’ll more than likely still hear or read about it, but just keep in mind it’s no longer suggested by professionals.
There’s no doubt in my mind that the best way to avoid a catastrophe is to plan accordingly. If you don’t want to find yourself soaking wet and dodging lightning bolts in the mountains, simply follow these tips.
Looking for abandoned creepy places, breathtaking views, and stunning waterfalls? Say no more. I browsed through my entire site and chose the trails which I believe are the most breathtaking, jaw-dropping, hikes that'll leave you thinking, "How is this located in...

Miles: 5.5 Time: 3 hrs Difficulty: Moderate Best Season: Spring Elevation Gain: 1026 ft Max Elevation: 1836 ft Type of Trail: Out & Back Parking Lot: Fits 15+ cars Dogs: Allowed On A Leash Restrooms: Available At The Parking Lot Trail Popularity: Very High Pics...
Total Miles: 7.24 Time: 4 Hrs Difficulty: Moderate - Hard Best Season: All Year Elevation Gain:1815 ft Max Elevation: 6463 ft Type of Trail: Loop Parking Lot: Available At The Campground Dogs: Not Allowed On Trail Restrooms: Available At The Campground Trail...
Total Miles: 0.66 Time: 25 min Difficulty: Easy Best Season: Spring - Summer Elevation Gain: 174 ft Max Elevation: 6016 ft Type of Trail: Out & Back Parking Lot: Fits ≈ 20 cars Dogs: Allowed On A Leash Restrooms: Available At The Parking Lot Trail Popularity: High...

Whether you like paddle boats, jogging, or archery, this park has everything to offer, and that’s not an understatement. Mile Square Park is a beautiful 607 acres of land located in Fountain Valley. The public has tons of amenities to choose from, some of which...
Los Angelinos have been in love with hiking since the late 1800s. With the never-ending list of trails growing each year since the hiking boom at the turn of the 20th century, finding the best hiking trails in Los Angeles can be daunting. But not to worry, I'm here to...
5 Miles
~3 Hrs
Moderate
All Year
839 Ft
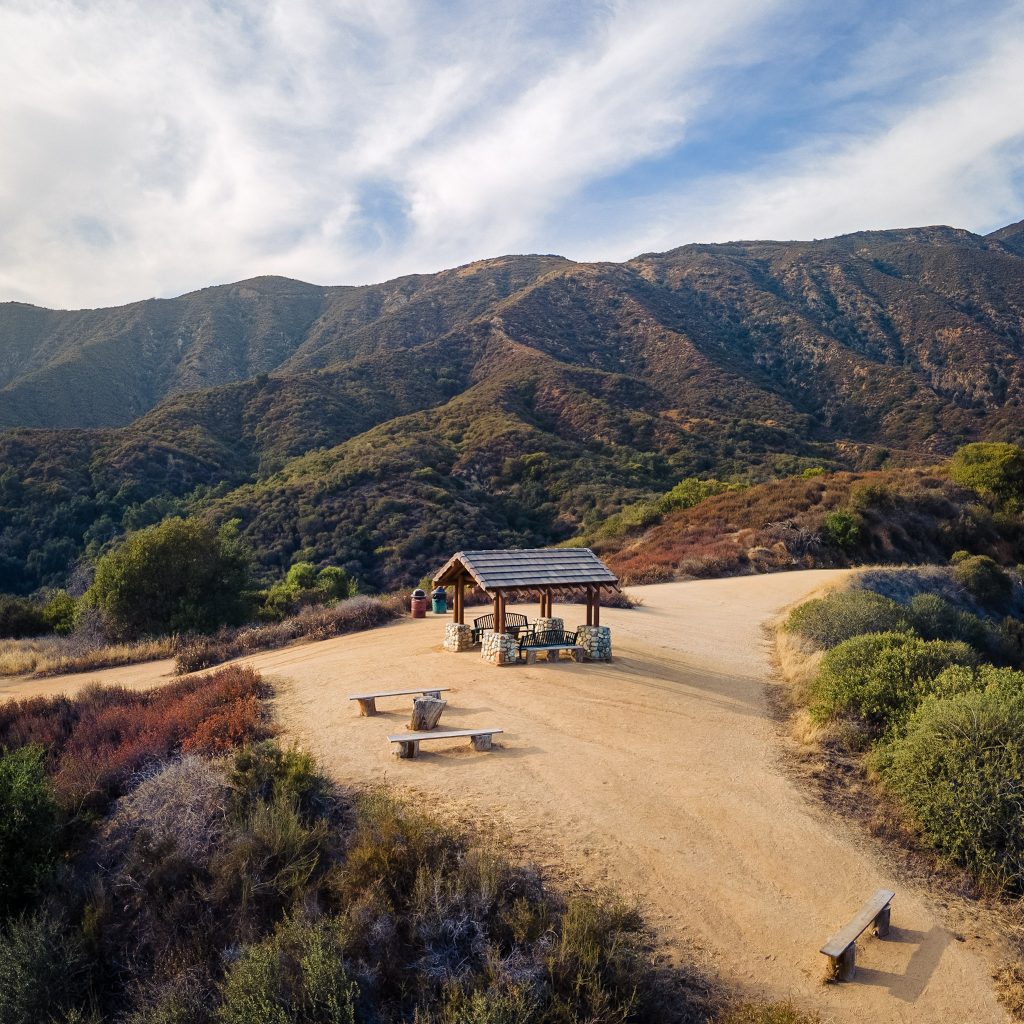
Claremont Loop is a very popular hike nestled in the foothills of the LA National Forest, but only the locals really know about it. It features a nice overlook with multiple benches flanked by towering mountain ranges that make a person feel completely submerged in mother nature.
Claremont Loop is a moderately difficult 5-mile hike located in Claremont Hills Wilderness Park. The trail features an overlook that offers Claremont city views and as far as Catalina Island. Parking is $5 on weekdays and $7 on weekends. Restrooms are located throughout the trail and in the parking lot.

Claremont Loop Address: Claremont Wilderness Park, Claremont, CA 91711.
Weedays: $5, Weekends: $7
January 6:30 a.m. – 5:00 p.m.
February 6:30 a.m. – 5:30 p.m.
March 6:30 a.m. – 6:30 p.m.
April 6:00 a.m. – 7:30 p.m.
May 5:30 a.m. – 8:00 p.m.
June 5:30 a.m. – 8:30 p.m.
July 5:30 a.m. – 8:30 p.m.
August 6:00 a.m. – 8:00 p.m.
September 6:30 a.m. – 7:00 p.m.
October 6:30 a.m. – 6:00 p.m.
November 6:00 a.m. – 5:00 p.m.
December 6:30 a.m. – 5:00 p.m.
More LA hikes you’ll love to explore!
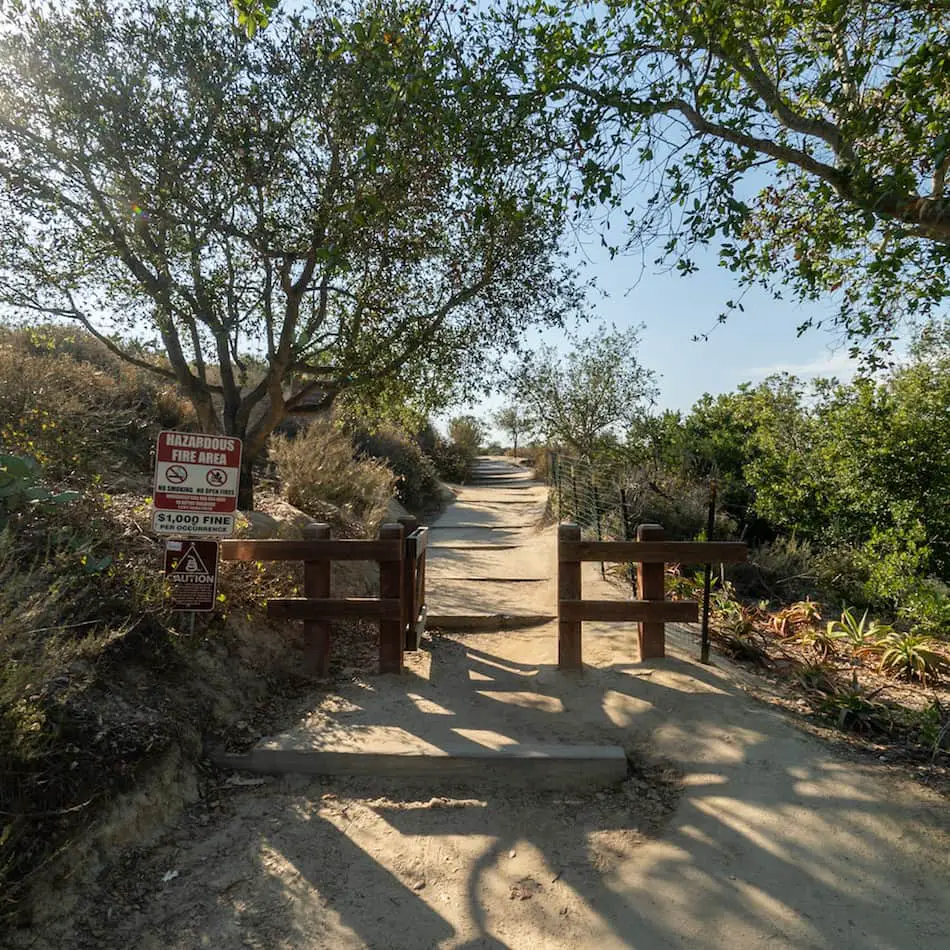
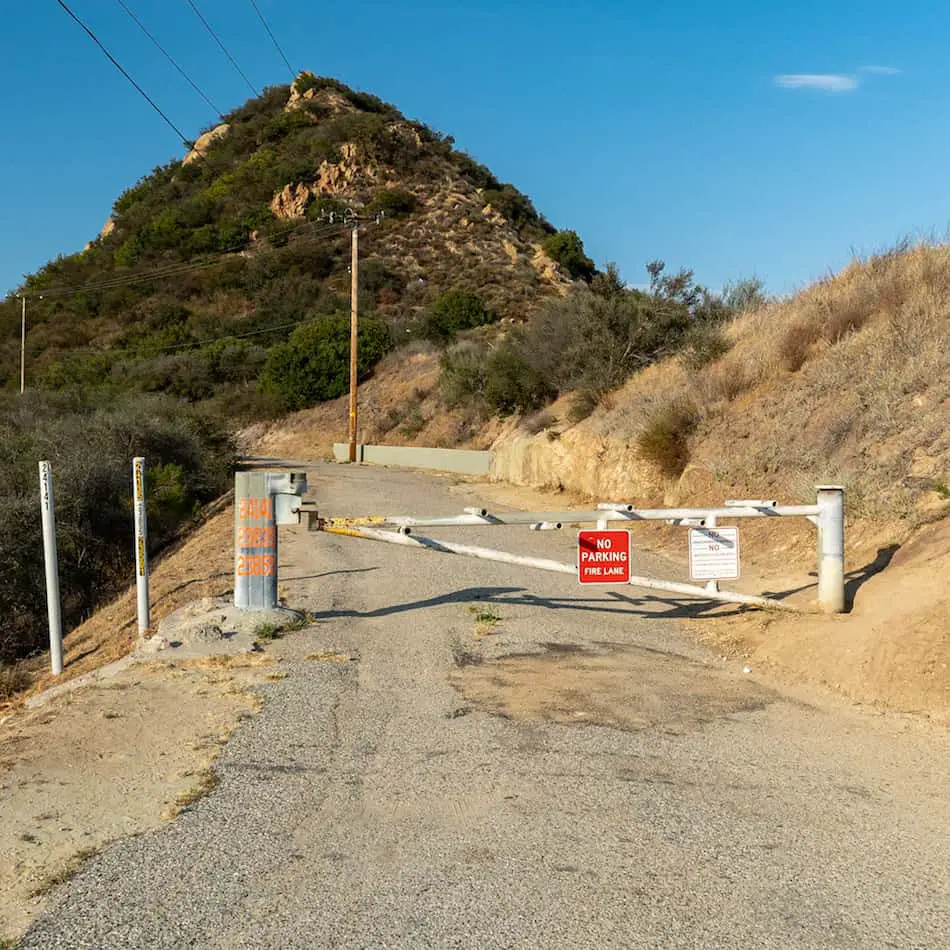
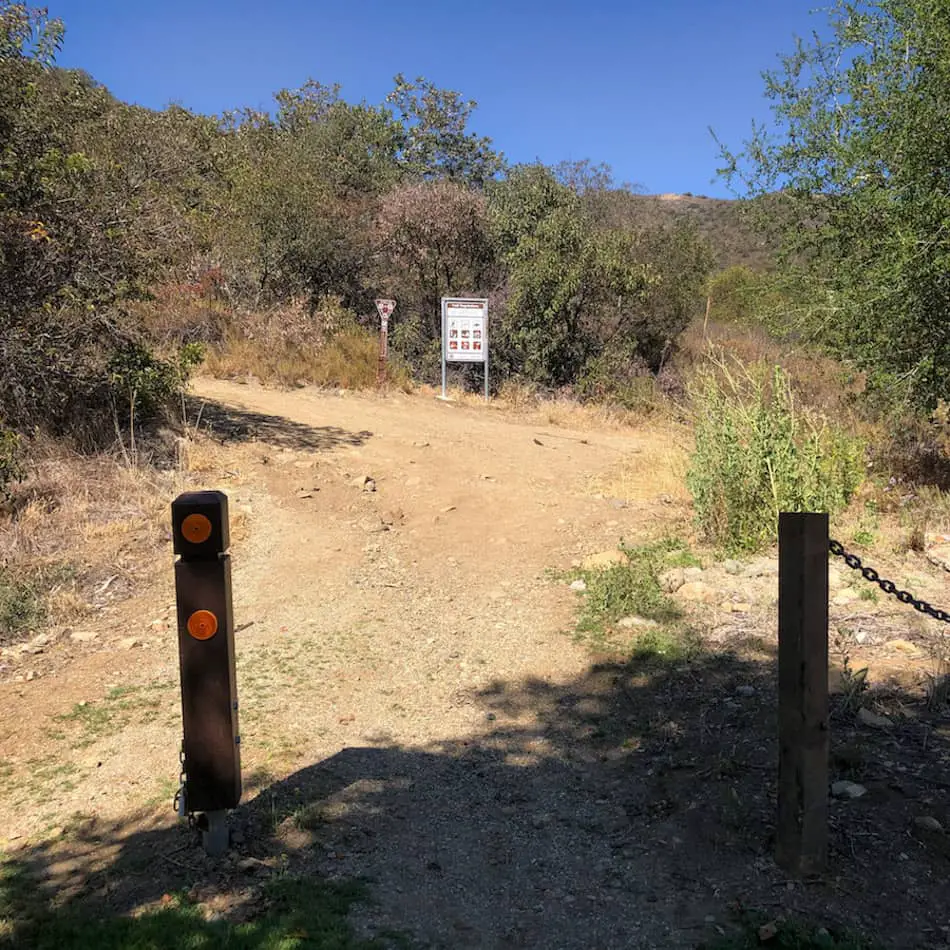
The hike begins past the gates. Keep in mind that the gates do close at different times depending on the month/week. There are also restrooms located right by the parking lot and gate.
We noticed a lot of signs warning hikers to keep an eye out for bears. This was in July.

At the first fork, you can take the left or right. The left side is more exposed to the sun and is less scenic, so we saved the nicer section of the trail for last.
The landscape, which includes oak trees, western sycamores, and buckwheat, is typical in the foothills from Pasadena to Rancho Cucamonga. (It gets drier as you drive out to either side of the LA Forest).

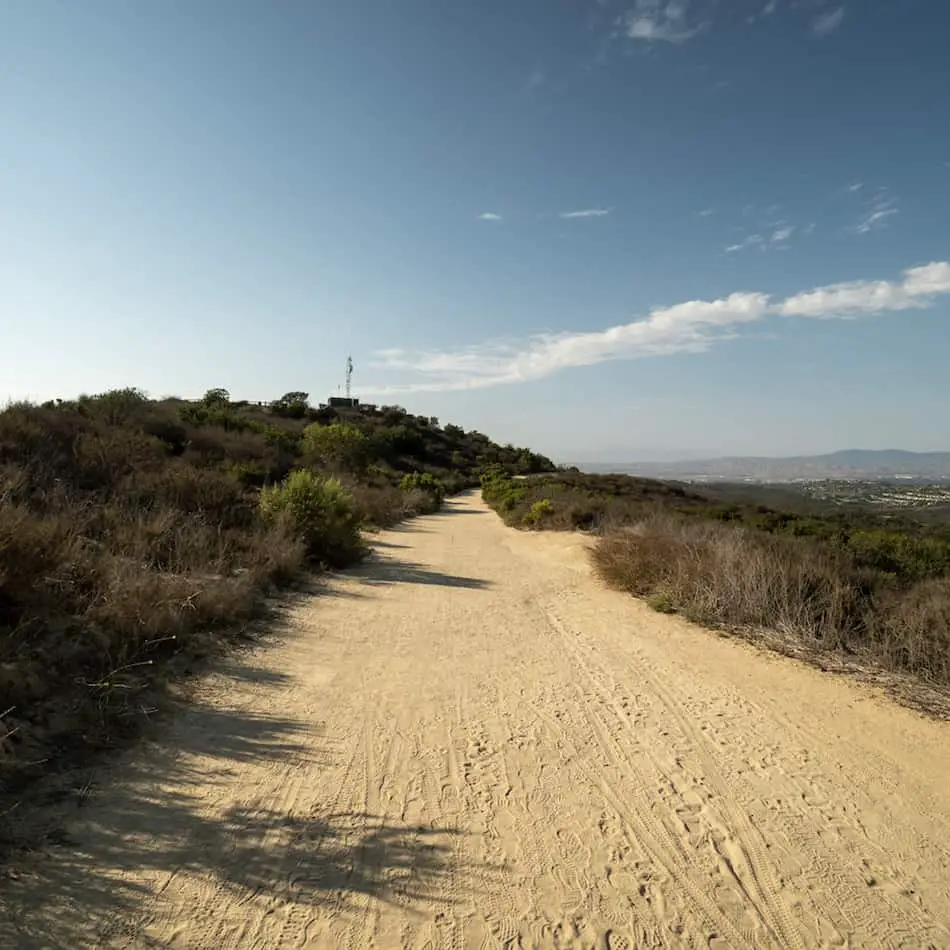
The entire trail consists of a dirt road with a gradual incline, making it suitable for small children and families.
Make sure to bring a hat because of the lack of shade on this trail.

Be aware of the poison oak! They’re found throughout the trail.
“Leaves of three, let it be!”

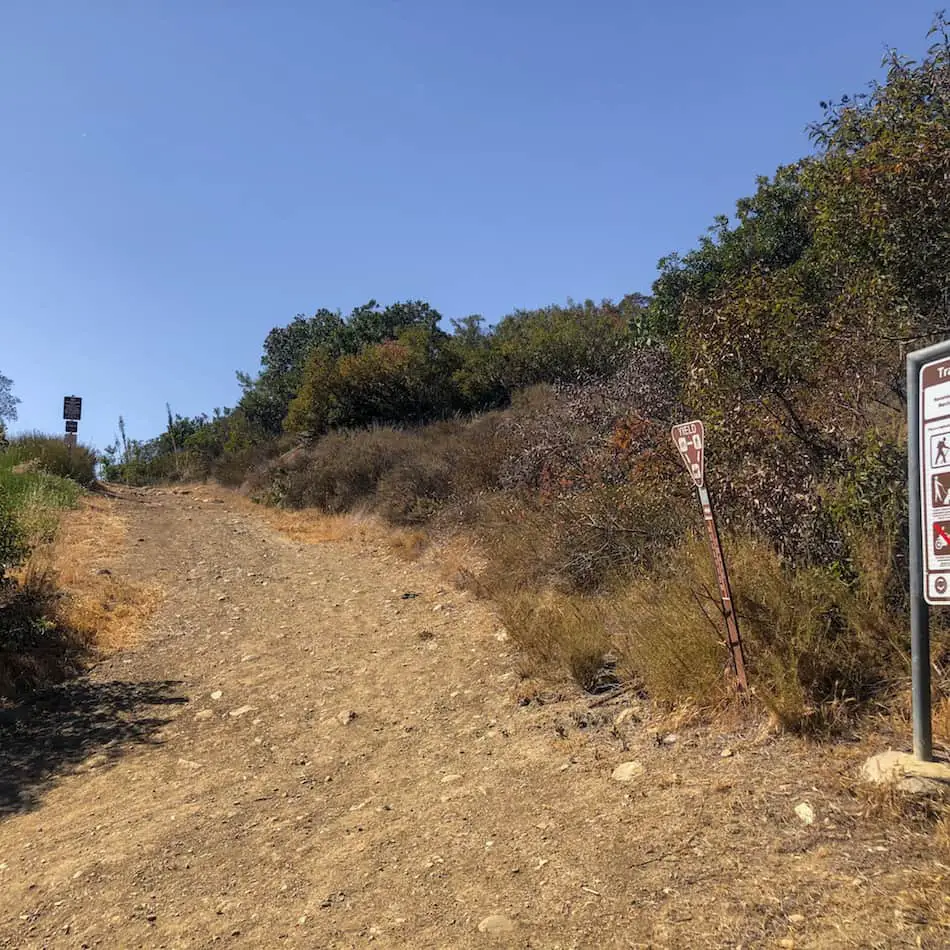
At the second fork, use the switchback on the right to keep heading up towards the mountains.

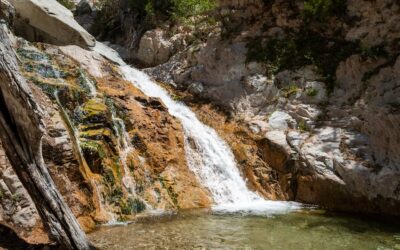
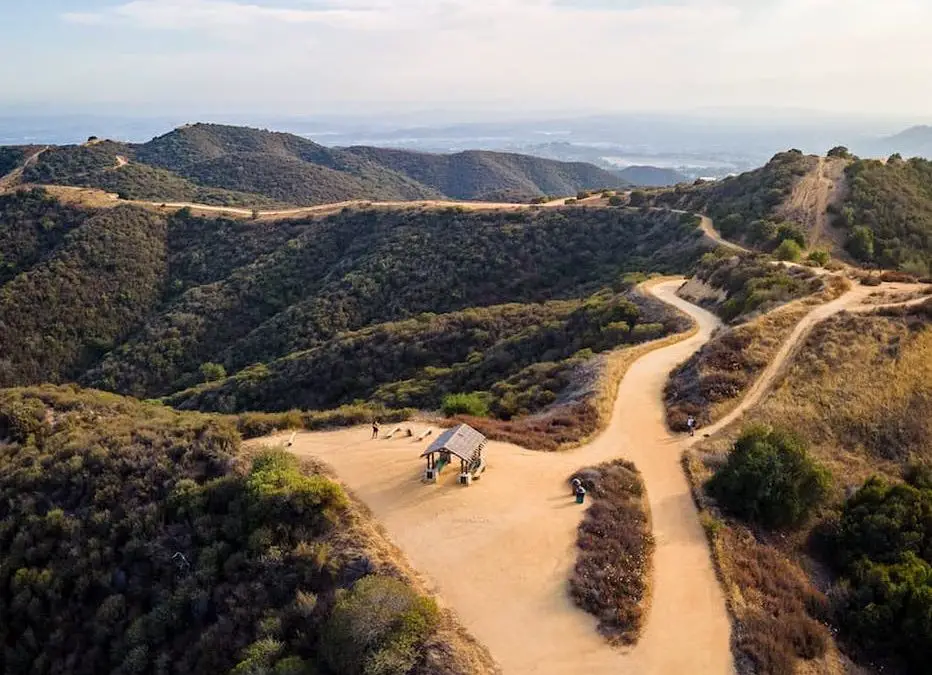
About 1 mile into the hike, we made it to the benches and the lookout.
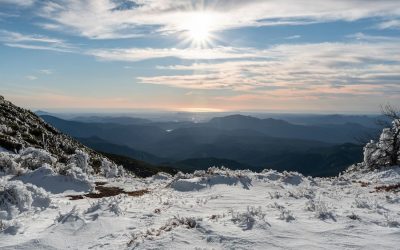
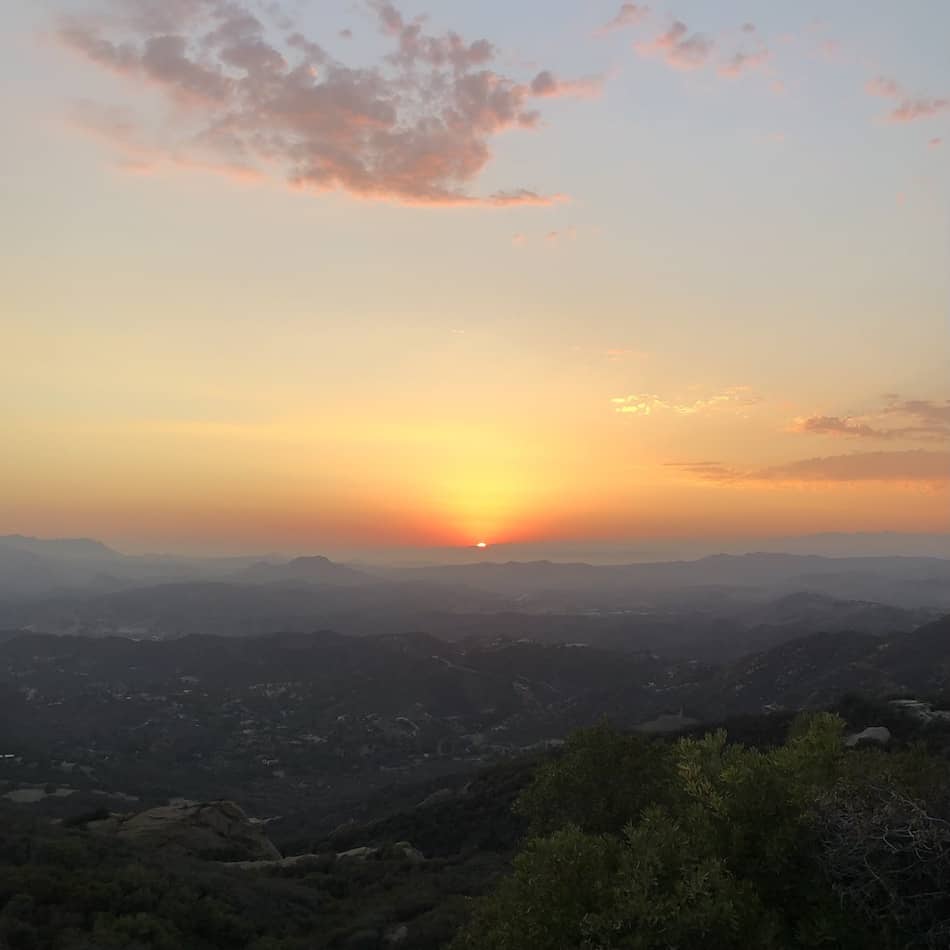
Take a look at those ariel views! The sunsets are beautiful from this location.

This is the perfect spot to take in the views and mountains. I love that it’s shady!

We can see the Cleveland National Forest in the distance.

My favorite shot of the day! I love how the area looks so peaceful.
More benches. It’s a great spot to see the city lights glisten in the evening.

After taking in the views, we were ready to finish the last 2-2.5 miles left of the hike!
This last section was beautiful and quite shady.
Overall, I definitely enjoyed this hike! It was beautiful and the 5 miles felt a lot shorter than I thought they would.

You can recognize them by their red wings, and because their long hind legs literally make them look like fairies flying around you.
They hold the title for the most painful wasp sting, and the most painful insect sting in North America, but luckily they rarely sting humans.
The tarantula hawk earns its name because it hunts and eats tarantulas.
The wasp paralyzes the spider by stinging it, then proceeds to drag it into its den where it lays an egg that hatches into a larva and devours the spider over the course of many weeks. The helpless spider remains alive throughout the entire time that it’s being eaten.
2.53 Miles
Easy
All Year
8AM – 8PM
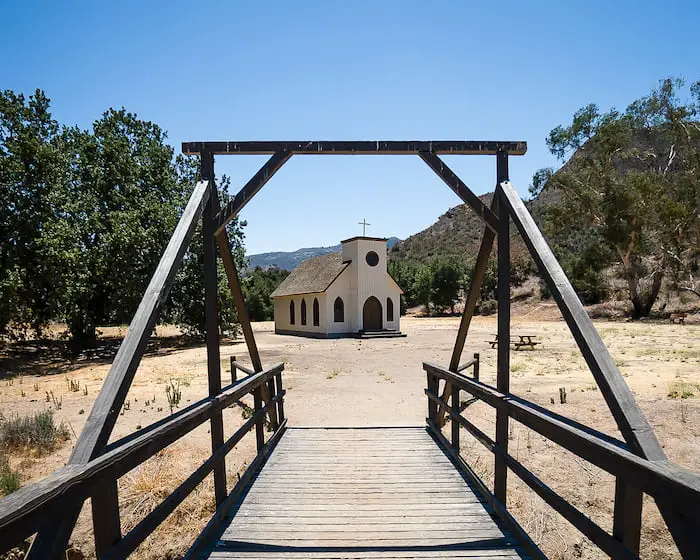
One of the most “LA” things you can do is visit an old movie set. Paramount Ranch is definitely one you’ll want to check out. Tons of classic movies and popular TV shows were shot in this Western Town, such as Westworld!
Paramount Ranch Loop Trail is a 2.1-mile hike located in Agoura Hills, within the Santa Monica Mountains. It features a Western Town movie set and multiple hiking trails. It’s open from 8 A.M. to 8 P.M. Parking and visitation are free.

Fun Fact: Some of the trails are named after one of the shows or movies shot here!
Paramount Ranch is located at 2903 Cornell Rd, Agoura Hills, CA.
For directions to Paramount Ranch, click here.
There is a parking lot with plenty of spaces. Parking and visitation are free!
Other hikes in LA you’ll like!
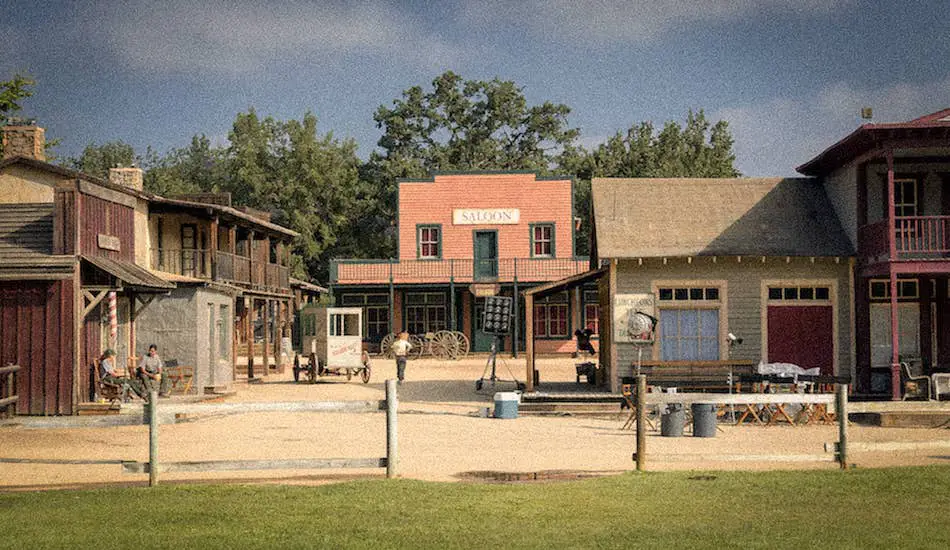
Paramount Ranch’s Western Town used to have tons of buildings and “saloons” Unfortunately, a majority of it was burned down back in 2018 by the Woolsey Fire.
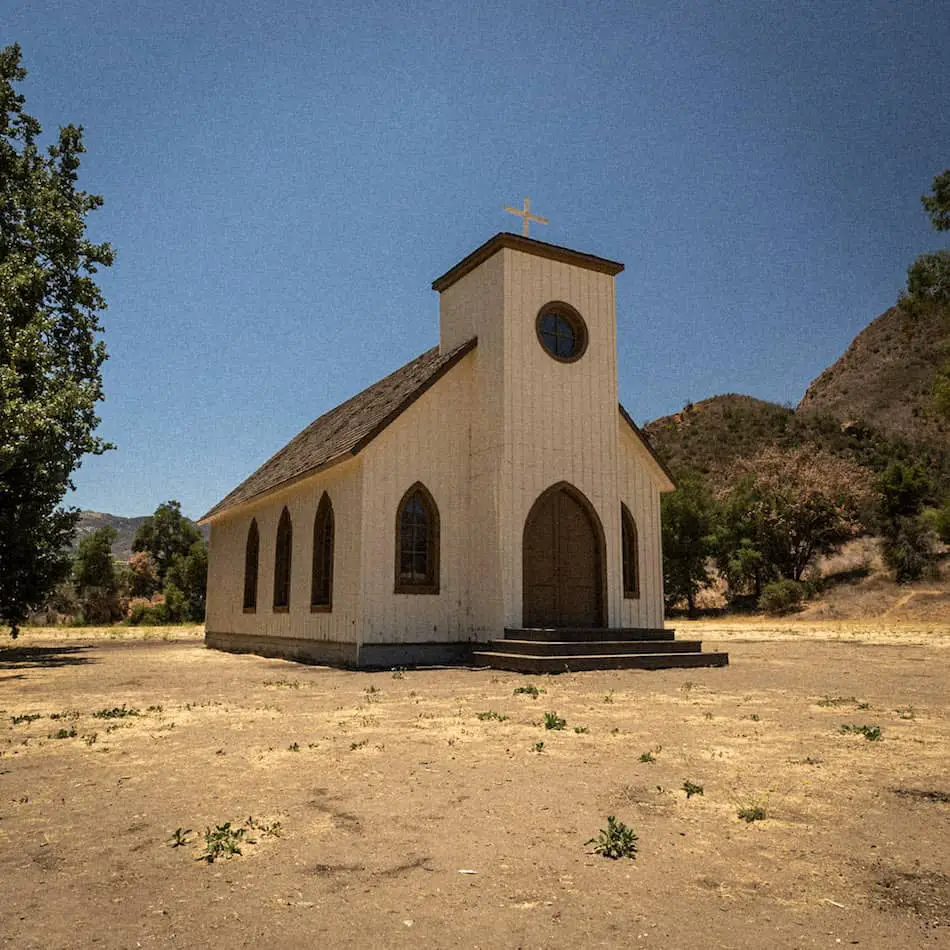
There are now two buildings left- the church and train station. Rumor has it that this place is going to be rebuilt!
As soon as you enter the ranch, you’re greeted by the old church.
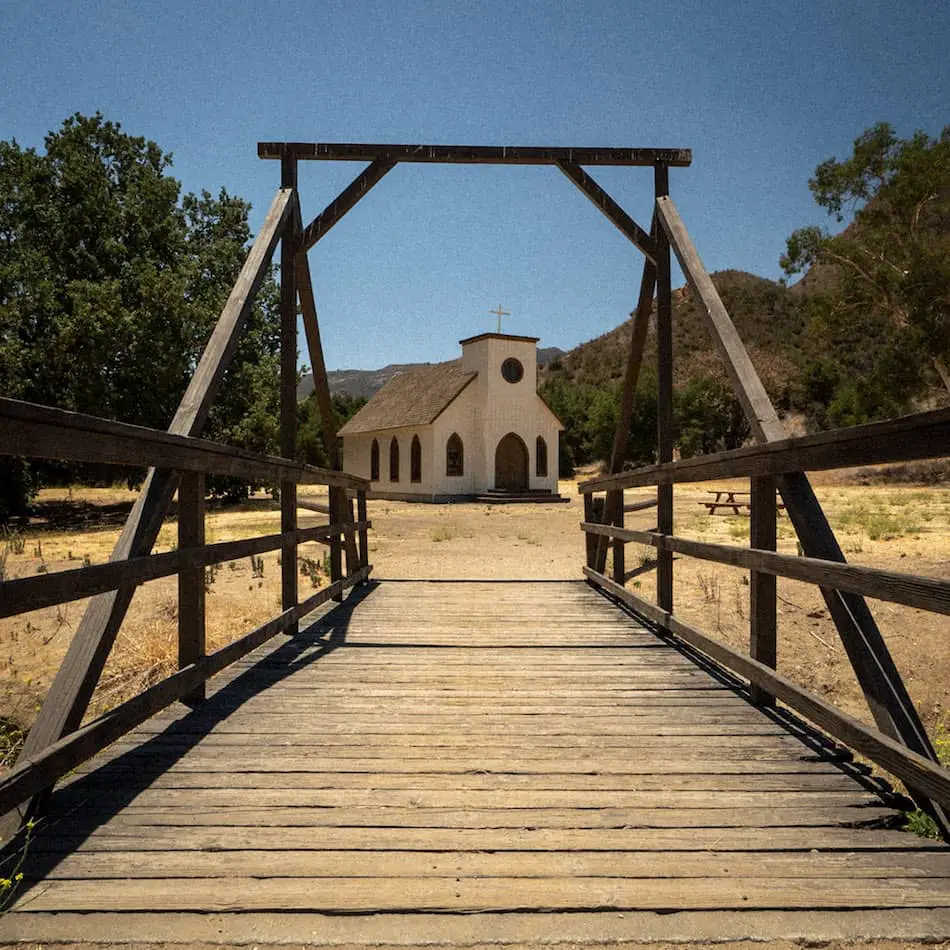
It’s perfect for photos and really looks like you’re on a prairie.
Here’s the back of the church. Do you spot the train station from the picture below?

Here’s how the inside of the church looks. It’s not accessible, but you can peek through the windows.

The second and last stop- the train station. All aboard!
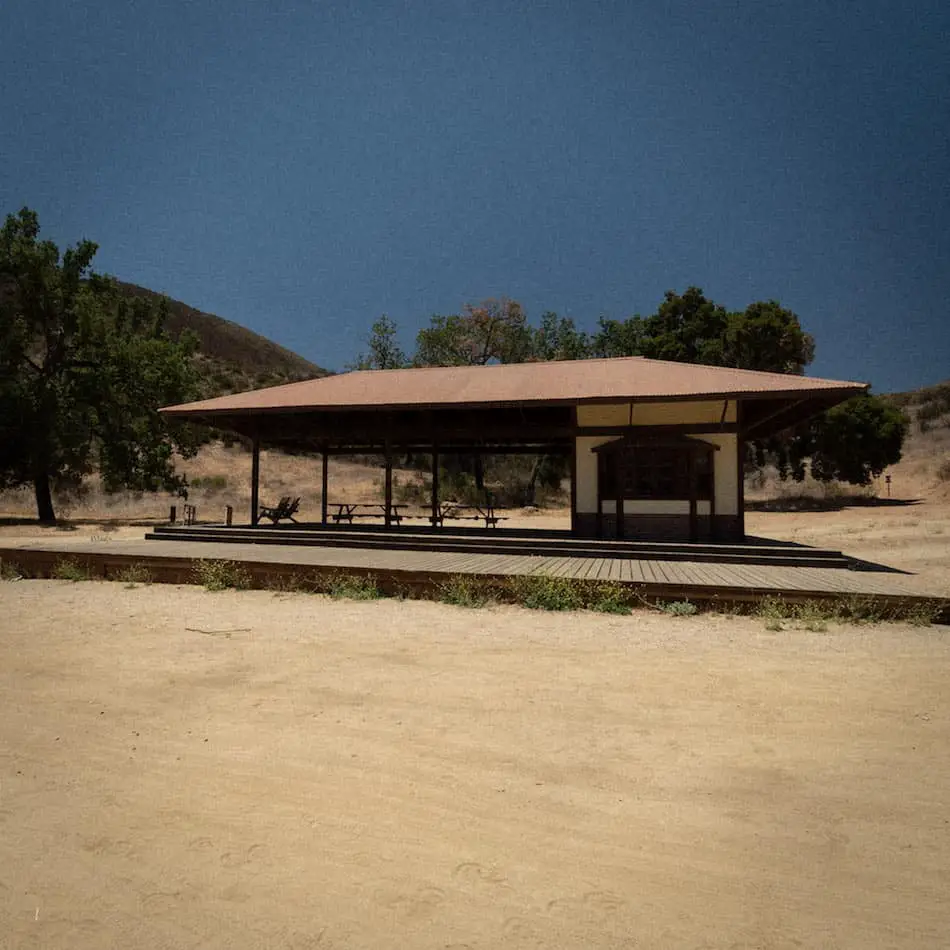
I can picture some cowboys sitting on the chairs chewing on wheat stalk.
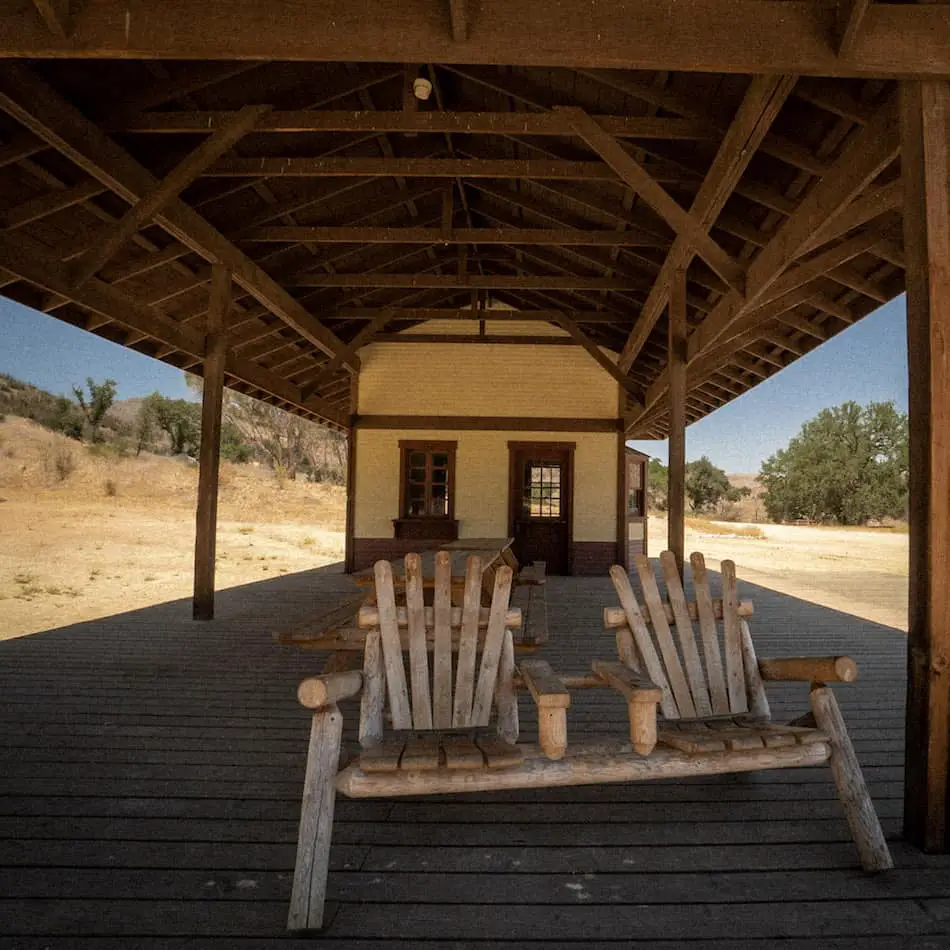
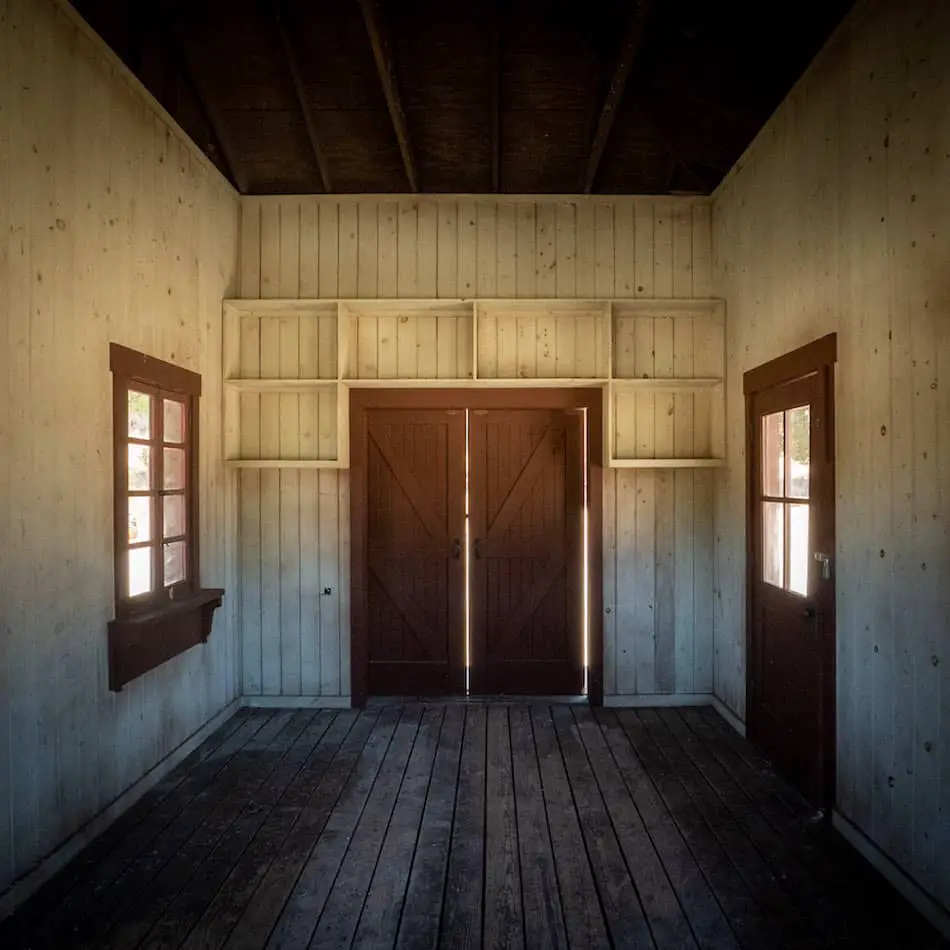
Here’s the inside of the ticket booth.
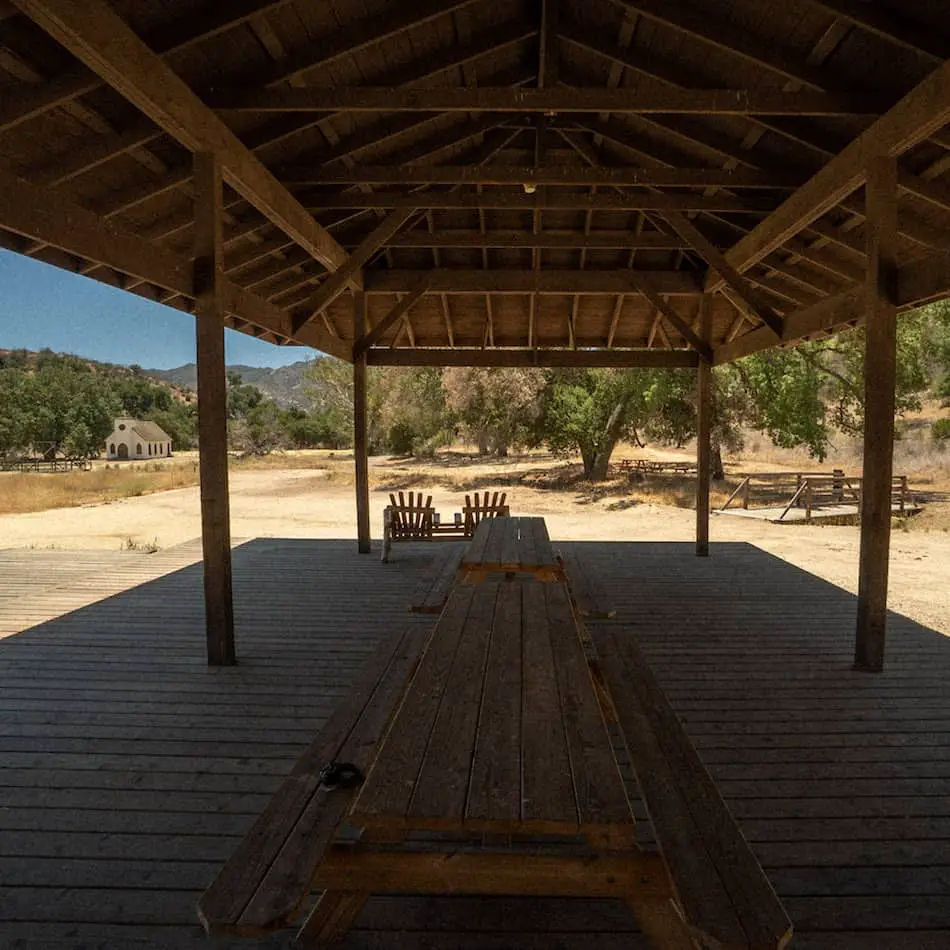
There are some picnic tables here and plenty of shade from the hot sun if you choose to take a break.
Can you imagine what this place looks like during filming? I wish I could see that in action!
Although these last two buildings remain, it’s an awesome opportunity to visit such a set that has been around for decades.
The movies and shows that have been shot here bring a warm feeling of nostalgia!
Just be sure to bring your cowboy boots and hat for a “hog-killin’ time”, as the cowboys used to say.
These are just some of the hundreds of shows and movies that have been shot at this location.
Paramount Pictures first leased the land back in 1923. Since then, it has undergone so many changes and given the illusion of time traveling to various locations and eras.
In its early days, this was a place where Hollywood stars practiced their acting and where popular films were made at the time.
There was a halt in filmmaking at the location during the 1930s when they were forced to sell the ranch.
A western fanatic by the name of William Hertz bought the property and revived it. he essentially built the permanent Western Town.
The property was sold and bought a few more times until it was bought by the National Park Service in 1980.
From there many hit T.V. series and movies, such as Dr. Quinn, Medicine Woman, and Westworld made good use of the land.
Sadly, a majority of the buildings burned back in the 2018 Woolsey Fire. Not to worry, they plan on rebuilding the old Western Town very soon!
I was told that this place was rumored to have been a “hangout” spot for the infamous criminal known by the name of Charles Manson.
There isn’t any evidence to confirm this, but it isn’t hard to believe since the Charles Manson family resided on another movie ranch known as Spahn Ranch.
I guess he had a thing for movie sets…?

What used to be a general store is now a full-on restaurant and dining experience. They offer classic American food in a rustic and western environment. It’s an absolute MUST to eat here after visiting Paramount Ranch.
3.4 Miles
~2.5 Hrs
Moderate
All Year
836 Ft
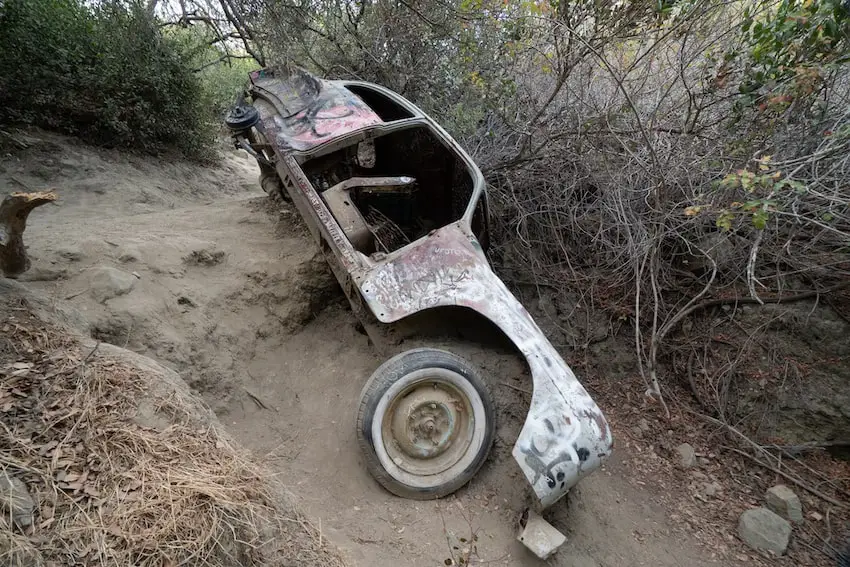
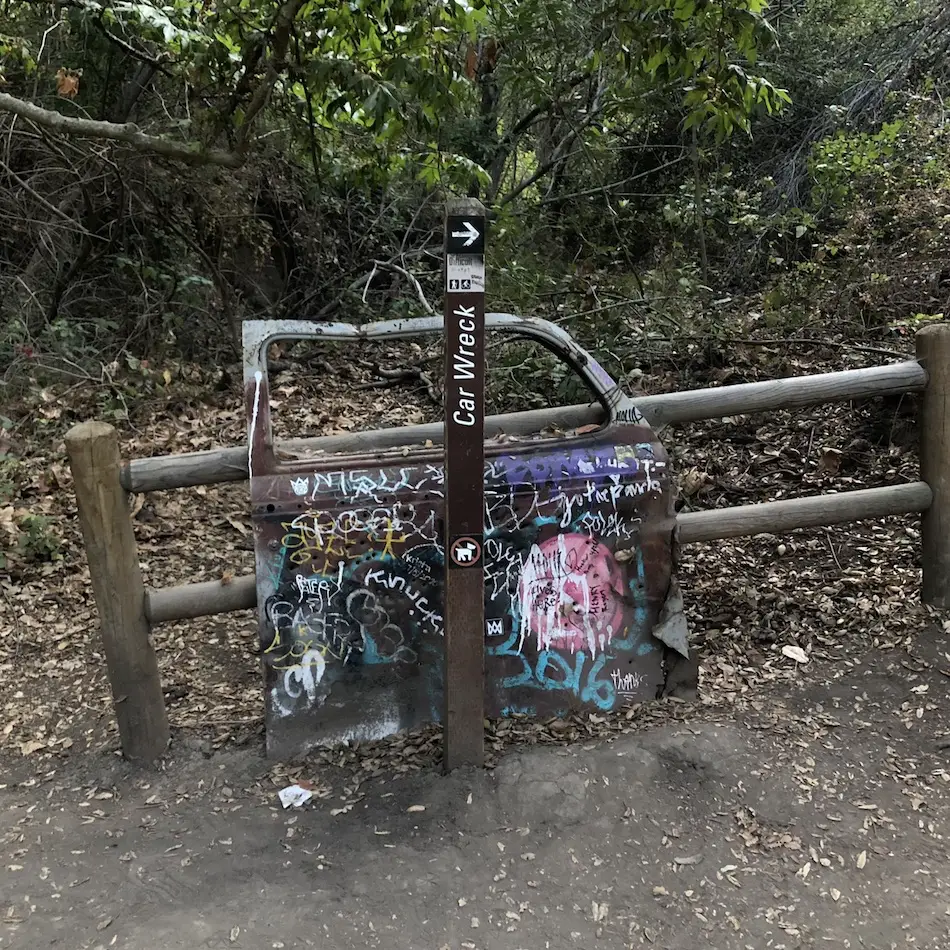
Looking for an interesting and cool hike to beat the summer heat? Car Wreck Trail takes you to an abandoned car wreck deep in the woods where deer and coyotes run wild.
Car Wreck Trail is a 3.4-mile loop trail located within Aliso and Wood Canyons Wilderness Park in Laguna Beach, CA. The hike is rated as moderate because of steep and rocky sections. Bathrooms are located at the trailhead in Alto Laguna Park’s parking lot. Dogs are not allowed on this trail. Not recommended for young children.

For directions to Car Wreck Trail’s trailhead and parking lot click here.
Parking is available at the Alta Laguna Park. Restrooms are available at the park.
Looking for more hikes in OC? Check these out!
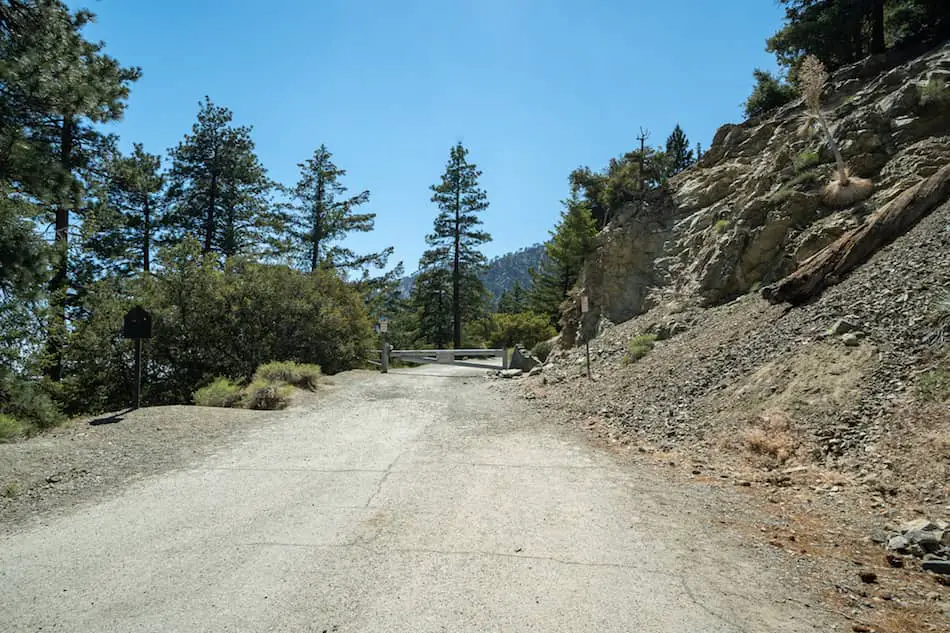
The hike begins at the Alta Laguna Park.
I think you’ll be happy to know this trail is much cooler than most hiking trails in Southern California. Therefore, if you enjoy hiking year around, I recommend you save this one for the summer!
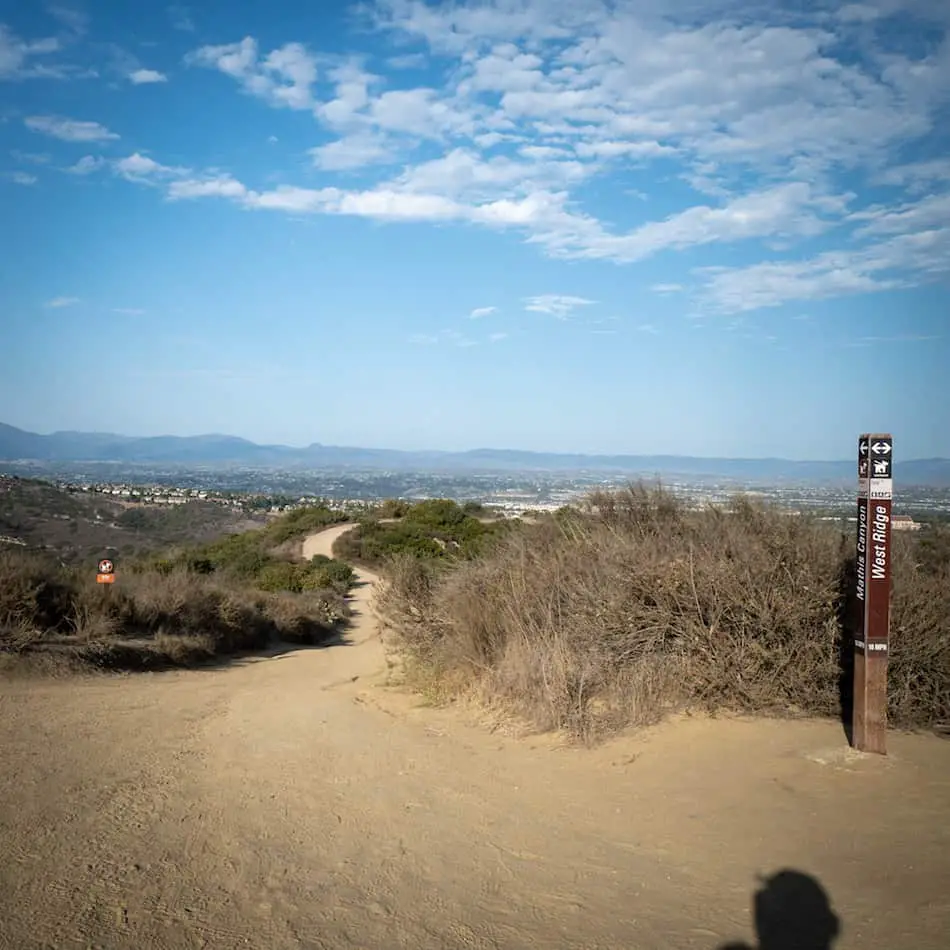
The Top of the World hike is located at the beginning of the Car Wreck Trail. Feel free to swing by and enjoy those amazing views!
The first portion of the hike includes descending into the canyon via a dirt road called West Ridge, which has very little shade. Hence, I highly suggest bringing a hat and plenty of water.
Little sandstone caves are located throughout Aliso Canyon, but I wouldn’t recommend veering off the dirt road to check them out, as we were told by a local that the Rangers give citations for doing so.
However, if you want to visit a big cave in these woods without worrying about a citation, checkout the Dripping Cave Trail.
Read More: Dripping Cave: Secret 1800’s Hideout
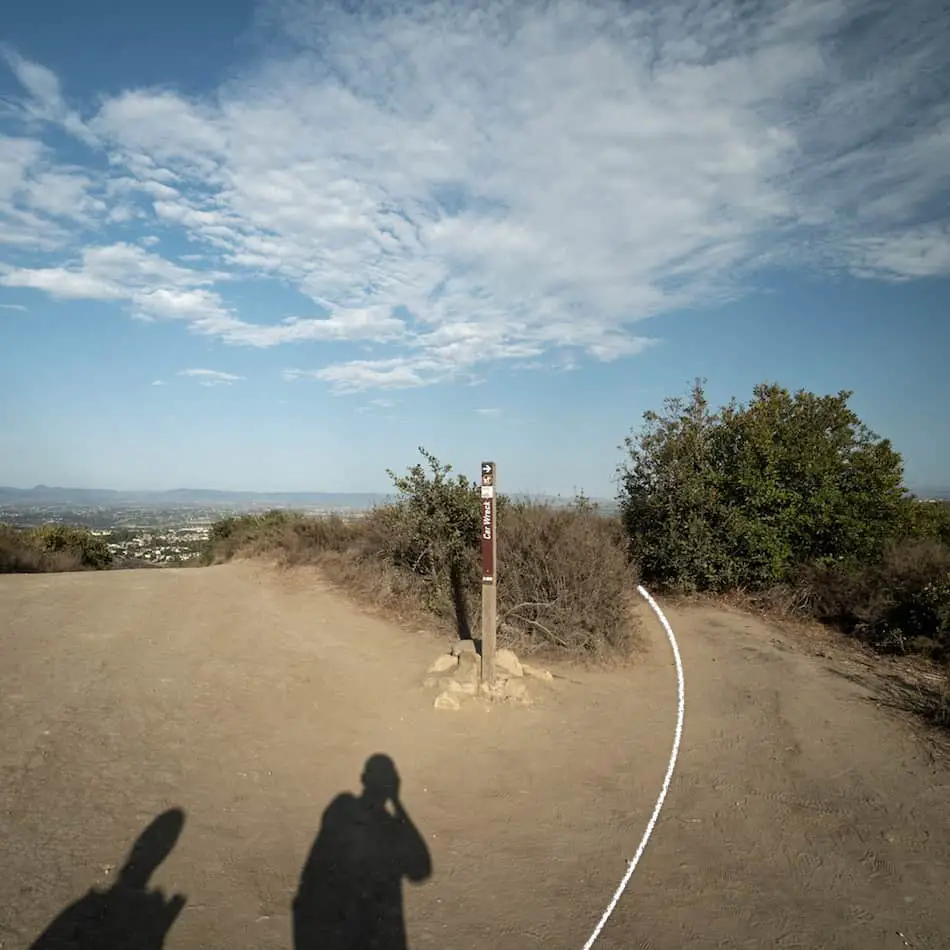
Keep trekking straight at the fork to continue on West Ridge.
Make a right at the second fork and brace yourself for the much steeper and rocky section.
Car Wreck Trail is also a mountain biking trail, so be very aware of mountain bikers speeding down!
Read More: 7 Best Hikes in San Diego You NEED to Explore
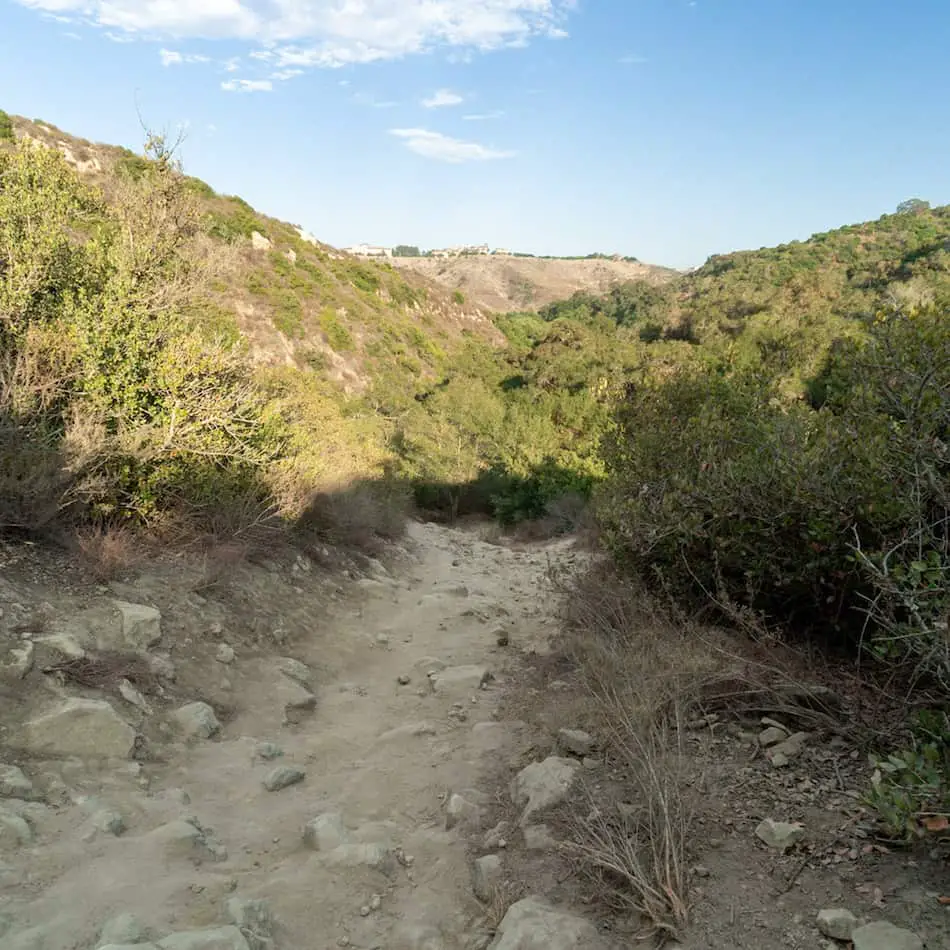
After descending the rocky section, you will arrive at the car wreck. The vegetation here is much more abundant, and the shade feels pleasant after having the sun beat down on you.
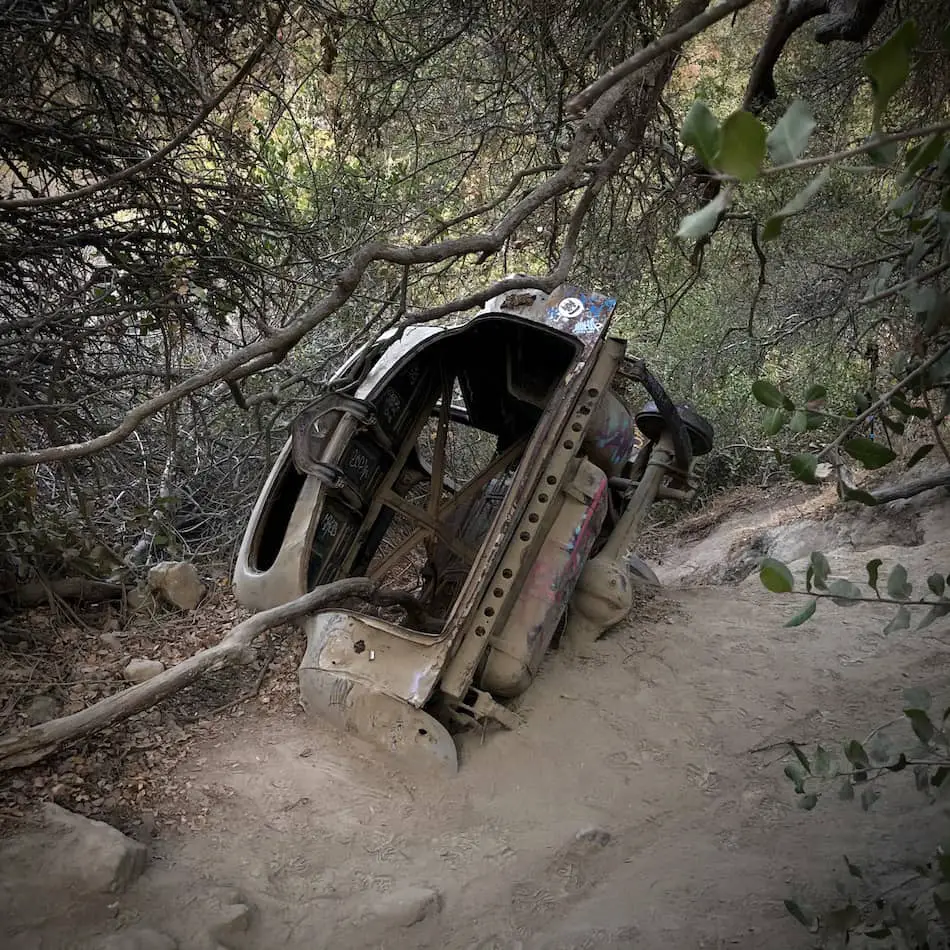
This car is believed to be a 1946 Dodge Coup that fits about 5 passengers.
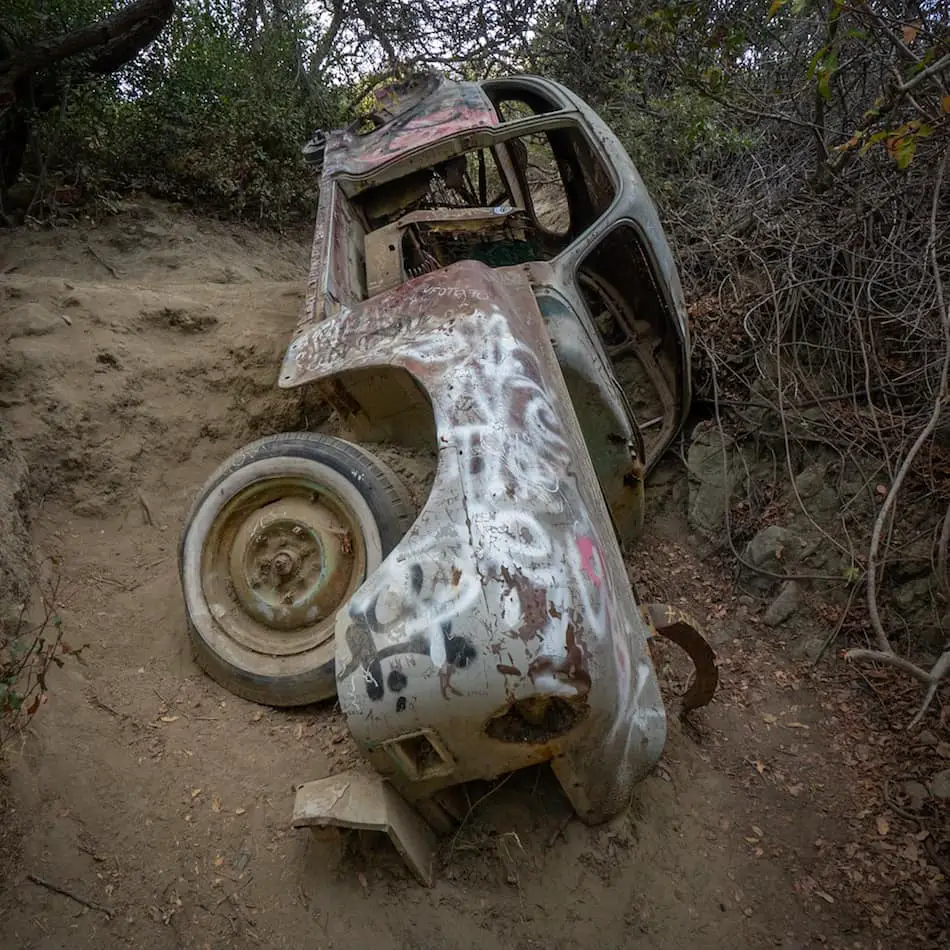
Here’s a closeup of what used to be a fully intact engine.
Read More: 3 Best Hikes in Laguna Beach

Peering inside the car, you can see the dash and springs, which at one point used to be the seats.


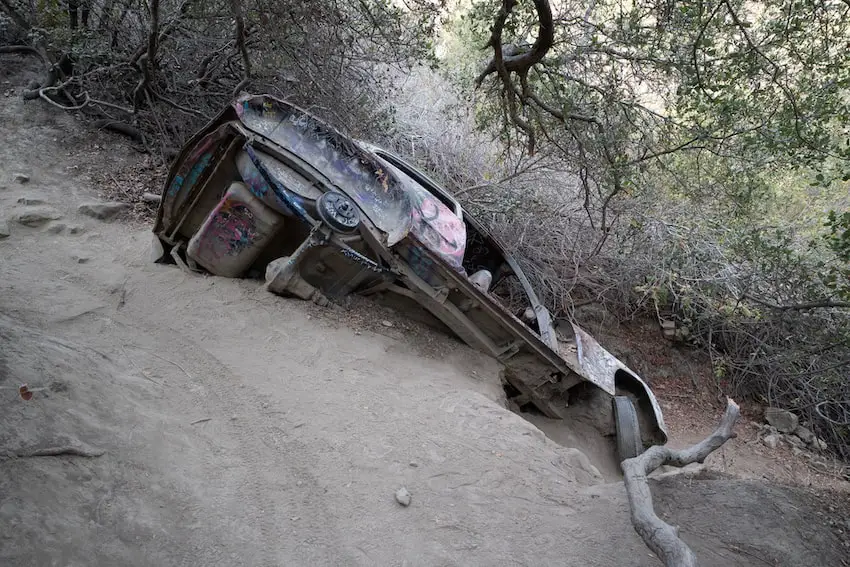
No one knows exactly why or how this classic car made its way down to the canyon. However, there are a few theories, which you can read about in the following sections of the post.
Once you’re done exploring the car wreck, continue down the trail through the canyon floor.
It definitely doesn’t feel like you’re in Laguna Beach. The serenity and quietness makes you feel like you’re far away from any beach or suburbs.

After passing the bridge, you’ll make your way through a clearing, followed by a “u-turn” to begin ascending up a long and steep road towards the trailhead.
You’ll really enjoy the Car Wreck trail. It’s a great summer hike.
From ocean views to caves and shady canyons, you’ll get to experience the different environments that Laguna Beach has to offer.
Read More: 5 Best Hikes in Los Angeles: Bonus Secret Waterfall
There are a few legends or theories as to how this car ended up here.
Legend #1 is that some crazy drunk teenagers stole the vehicle and took it for a spin but ended up driving it off and abandoning it.
Legend #2 is that flash floods washed the vehicle down. There’s evidence of some strong flash floods in the 60s within the Laguna Beach area.
Whatever the case is, we can only speculate who the owner was and how it ended up in such an unlikely place.

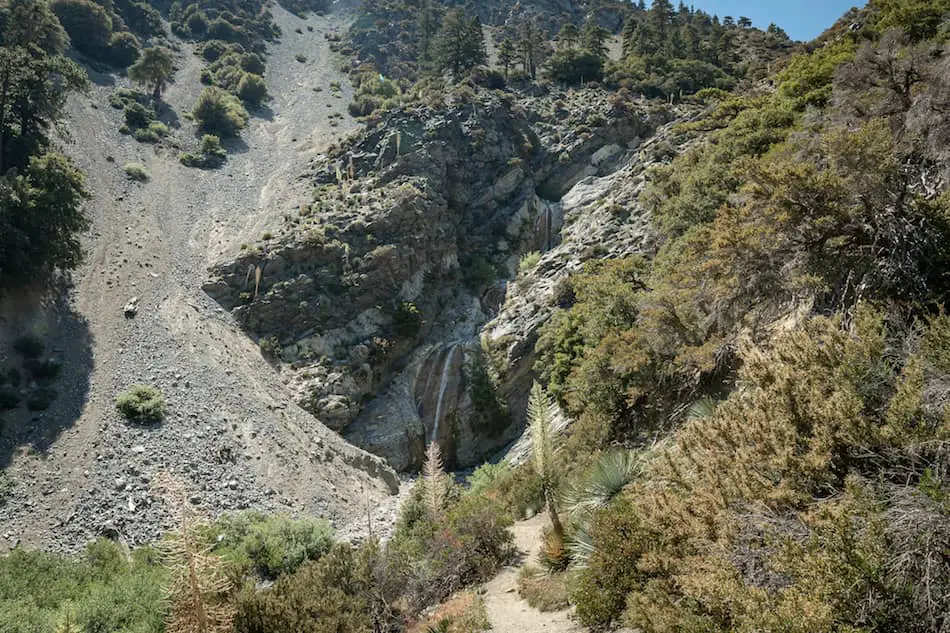
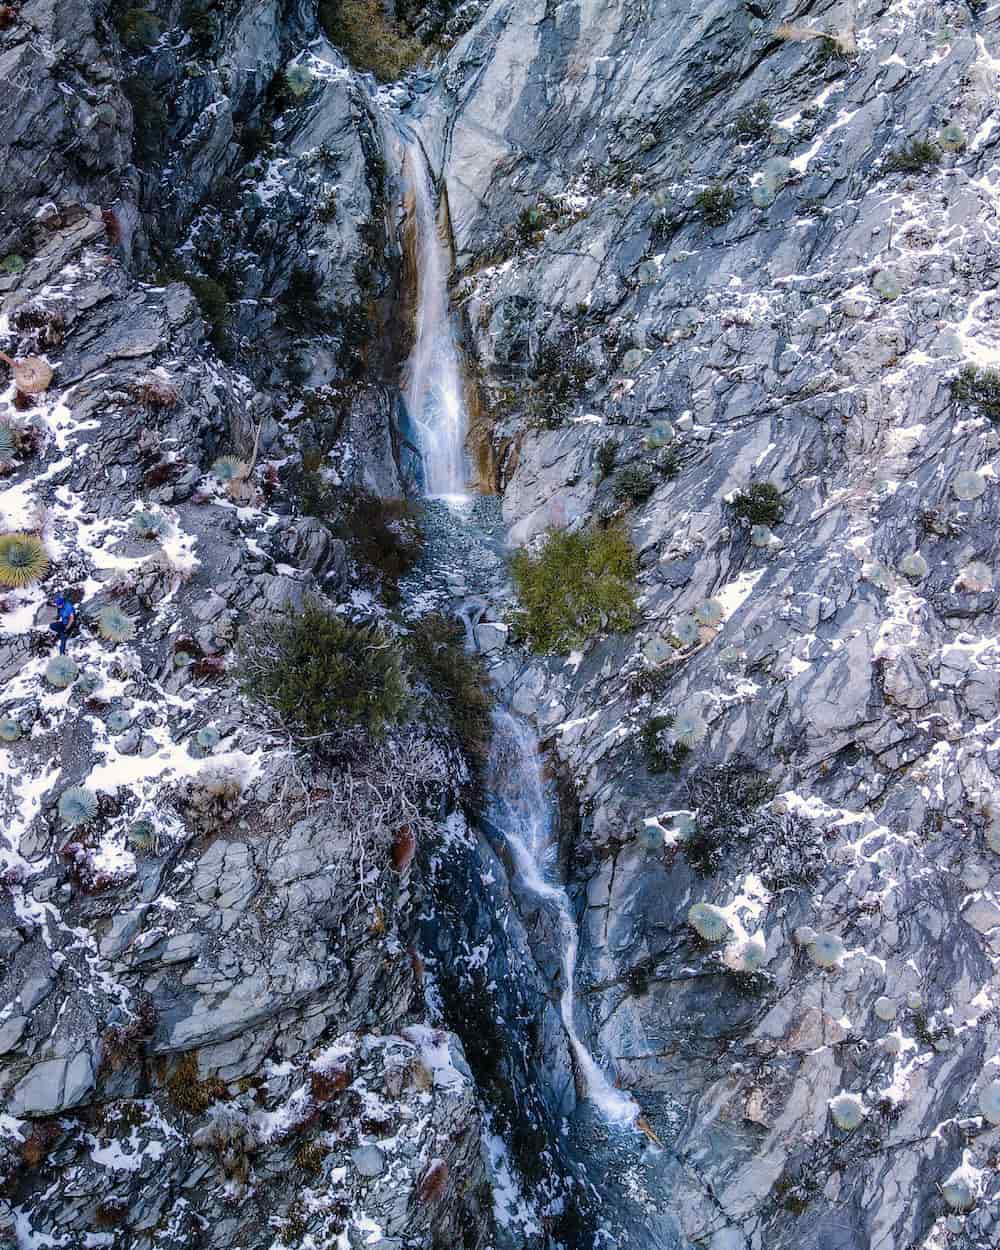
Looking for an easy weekend adventure? Visit the enormous San Antonio Falls in the Angeles National Forest! Most guides online claim the falls is only 75 ft high, but I believe that only applies to the bottom tier. The video below shows how much larger it actually is.
The trail at San Antonio Falls totals 1.3 miles roundtrip, and mostly consists of a concrete road leading hikers past beautiful pine trees, mountain cabins, and ending at a huge multi-tiered cascade at the base of Mount Baldy. The best time to visit is in the late winter to early summer months. Since the trailhead begins at a high elevation, snow can be expected during the winter months.
San Antonio Falls is both one of the best hikes and best waterfalls in all of SoCal. Check out the other trails by viewing the posts below:
Best Hikes In Southern California

To be redirected to the trailhead via Google Maps, click the following link: 993 Falls Rd, Mt Baldy, CA 91759
SoCal Adventure Pass (required for parking in CA mountains)
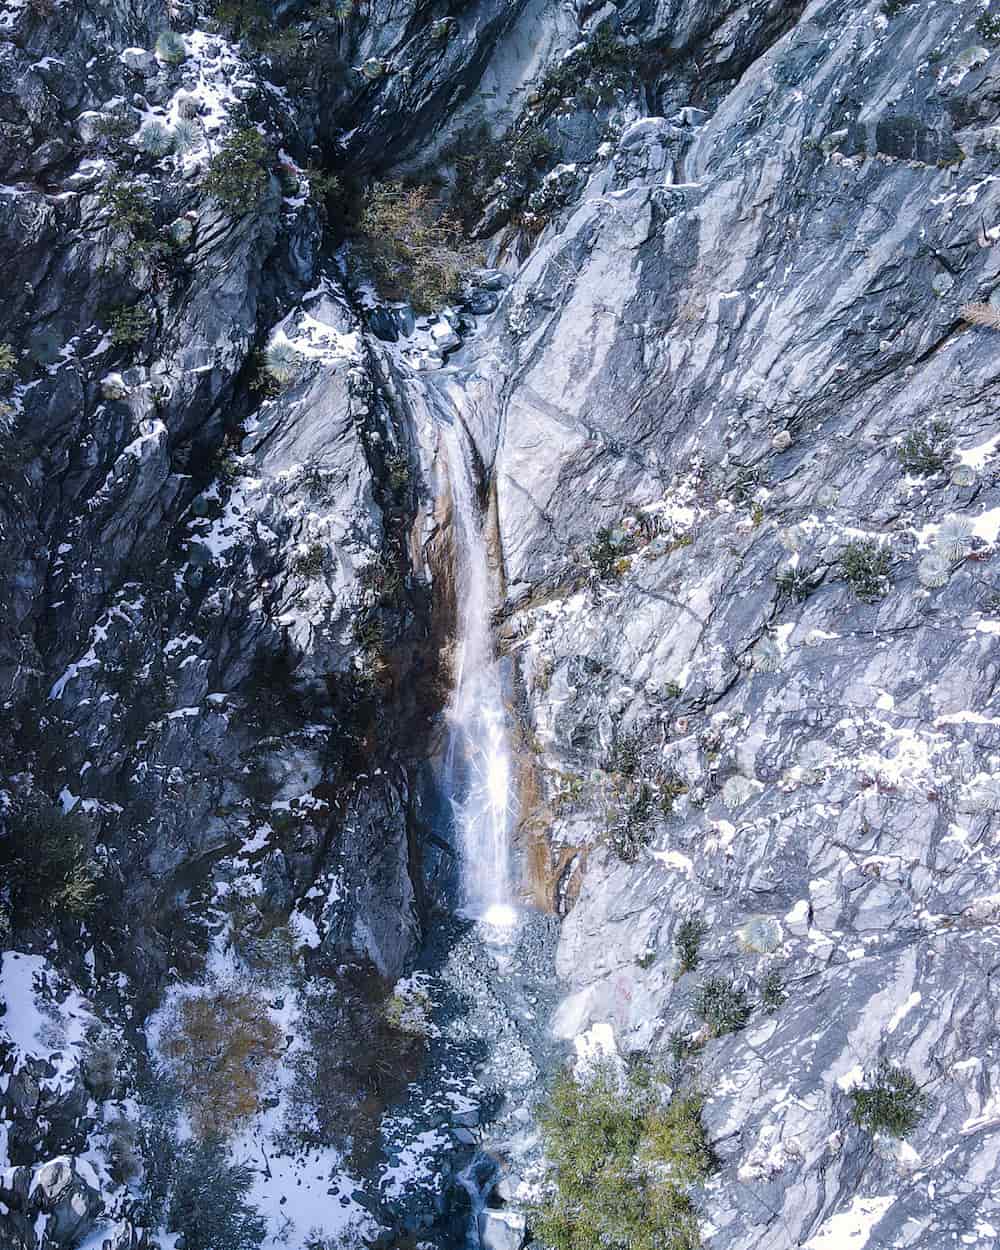
I hiked San Antonio Falls (sometimes referred to as the Mt Baldy Waterfall) in early June and was pleasantly surprised to see a decent amount of water.
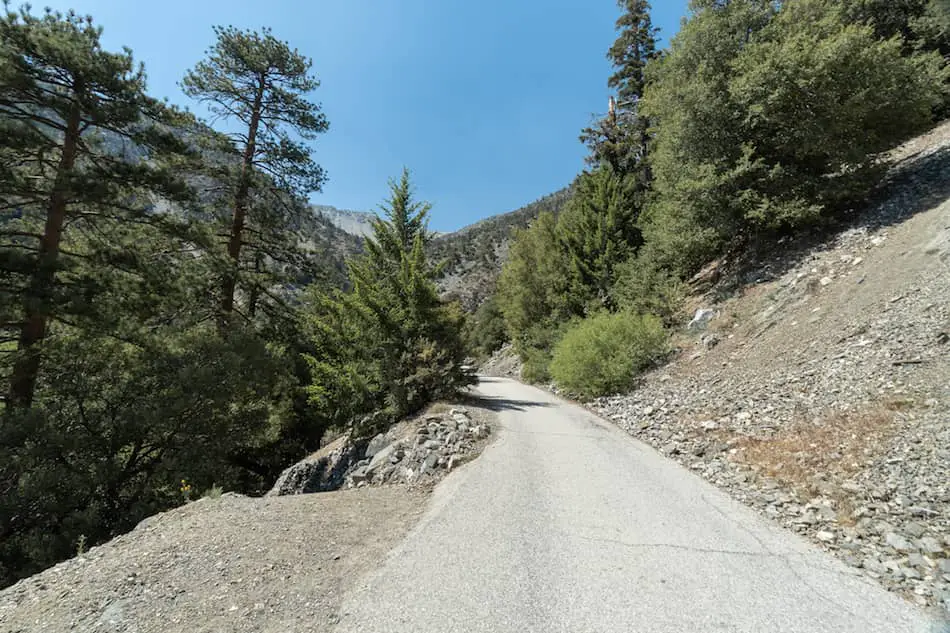
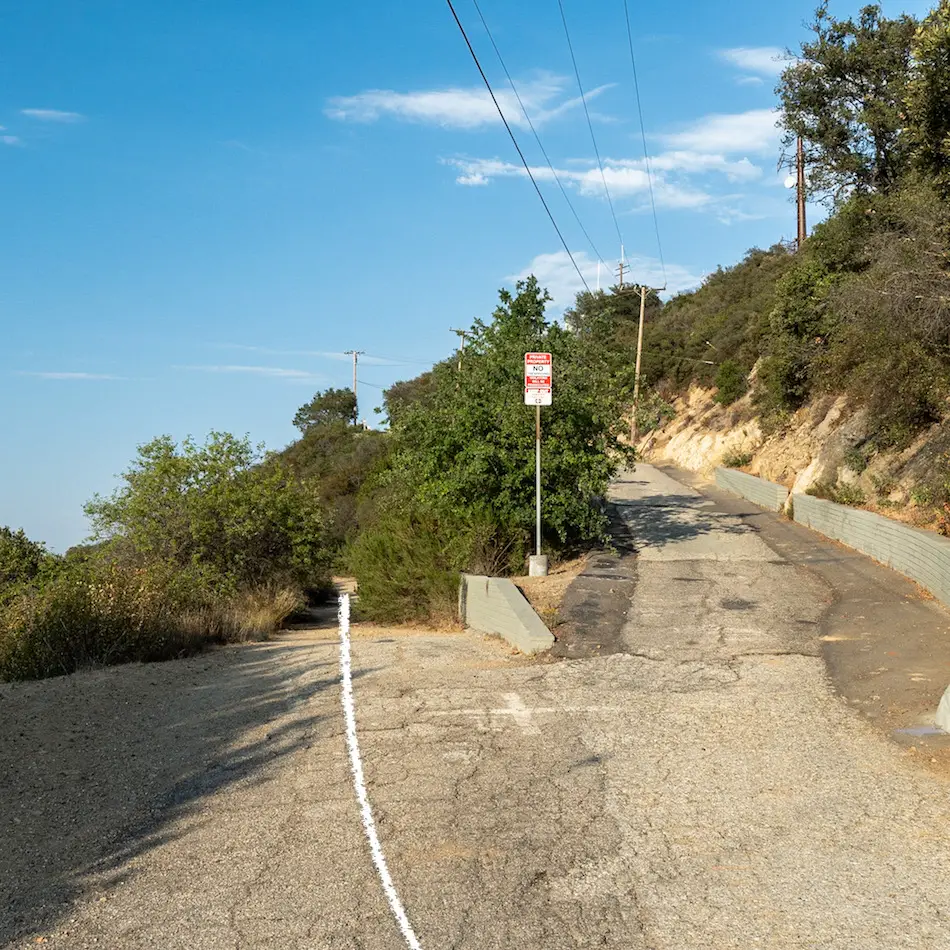
I began the hike by walking past the gate, and heading up a concrete road called Falls Rd.
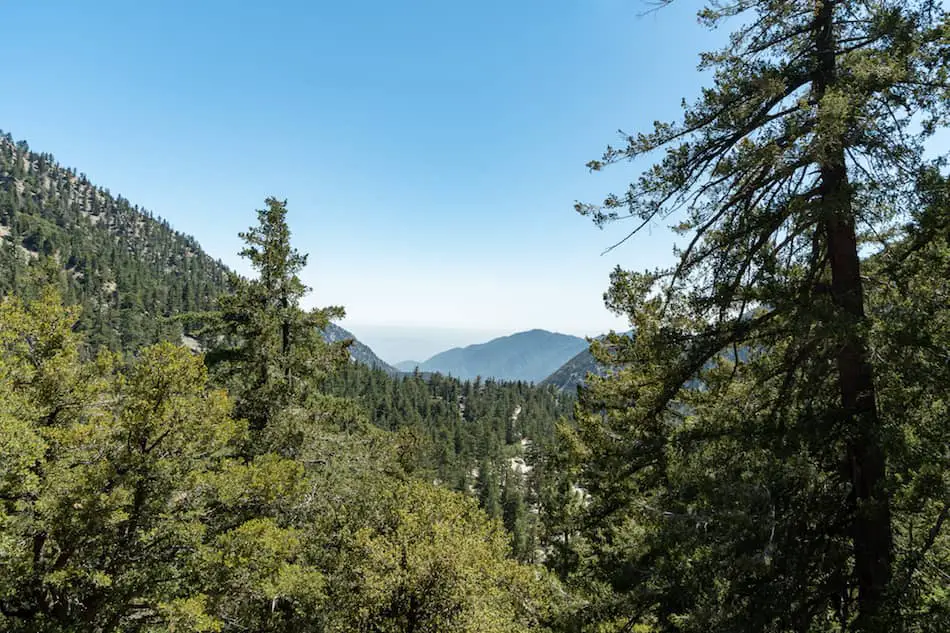
Shade is scarce, and the temperature can get pretty warm, so I suggest bringing some shorts, a hat, and sunscreen! I was surrounded by a sea of pine trees, peaks, and breathtaking views.
If you enjoy bagging peaks, San Antonio Canyon has a plethora of enticing summits with breathtaking views.
Some, such as San Antonio Peak, are better suited for advanced hikers, but others, including Sunset Peak and Stoddard Peak Trail, located just down the road, are only moderately difficult, yet still provide great views.
When I arrived at the first fork, I stayed on Falls Rd. The road to the left is a driveway leading down to privately owned cabins. Please do not enter.
The paved road makes this trail very kid-friendly. For more family hiking adventures, view my post on the best SoCal hikes for kids, which includes waterfalls, caves, slot canyons and more.
Before switching from Falls Rd to a dirt trail, I noticed a wall made of short vertical logs.
This area is a viewpoint that offers a view of the waterfall’s many tiers, the surrounding canyon, and the creek. It’s the best view the hike has to offer.
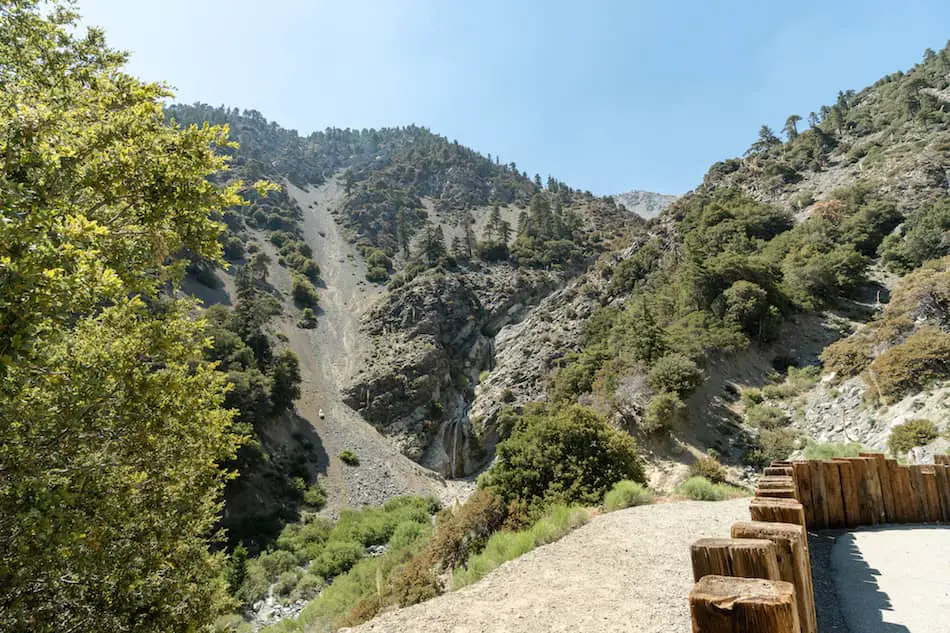
A dirt trail leads from the viewpoint to the canyon floor near the base of the falls. This is the only somewhat difficult section of the hike, as the dirt is very loose.
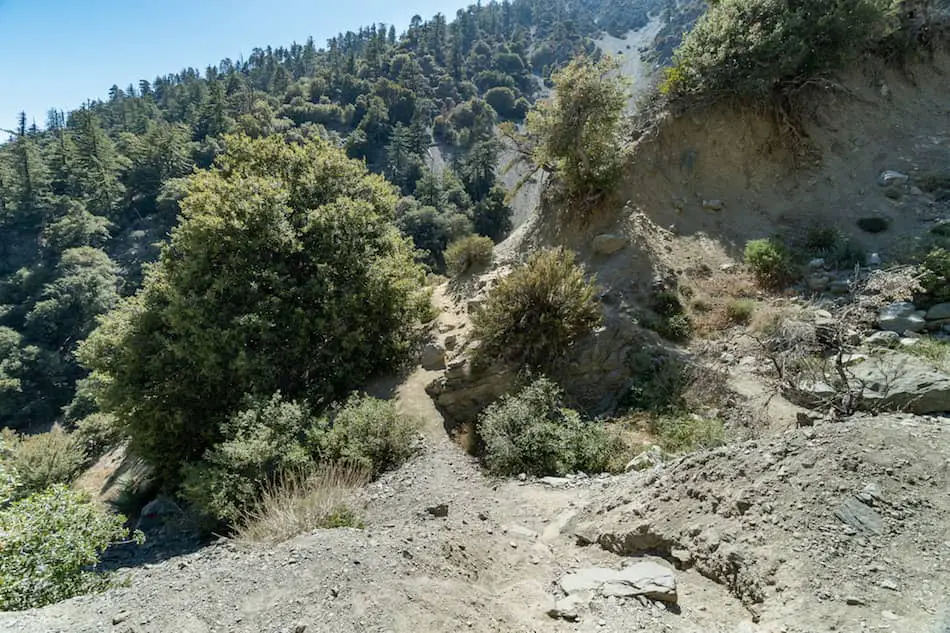
Almost there!
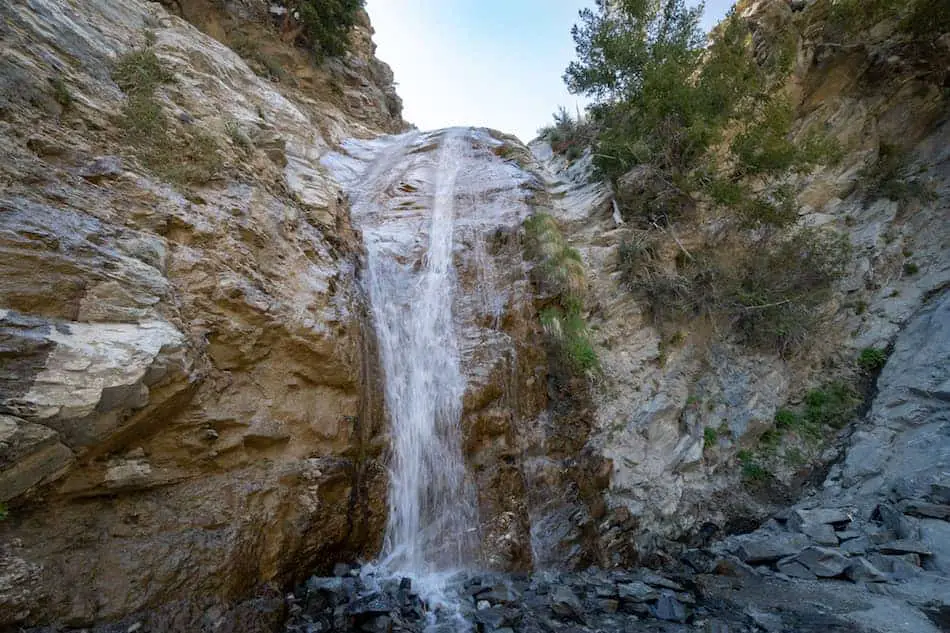
After trekking only 0.6 miles from the trailhead, I made it to San Antonio Falls!
The crystal clear water was pleasantly refreshing, and the mountain breeze felt amazing.
Everywhere I looked I was surrounded by pine trees and canyon walls, just like the waterfall in Crestline, a mountain town deep in the San Bernardino Mountains.
I expected a waterfall of this size and beauty to be the most popular hike in San Bernardino County, but that wasn’t the case. Etiwanda Falls hike is the most popular, and is located just a few miles down the 210 Fwy from San Antonio Falls.
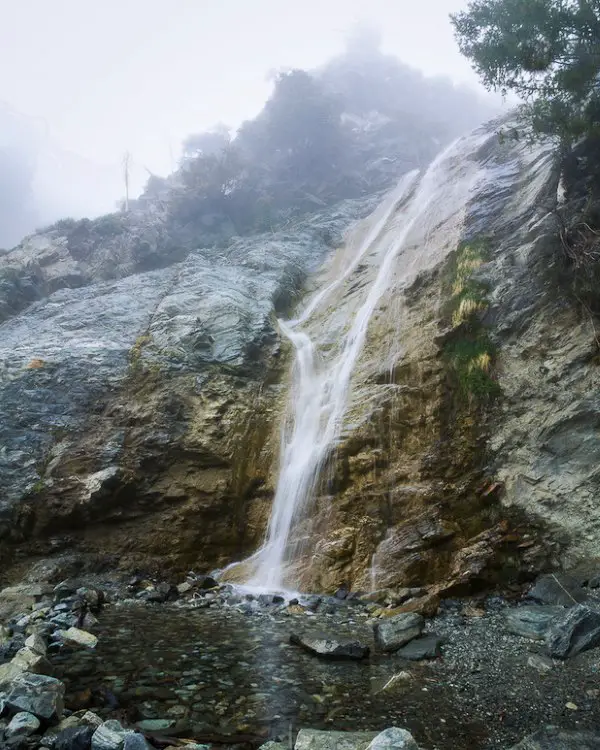
Below is a picture of my very first visit to the falls. I clearly remember it was a very foggy day, and I had no idea more tiers existed above the bottom two.
Below is a picture including all of the waterfall’s tiers. Although the waterfall is enormous, it’s dwarfed by 500 ft Big Falls, the largest waterfall in Southern California, which also happens to be located in San Bernardino County.
Update: I visited San Antonio Falls on Nov 9, 2022 a day after it snowed. Needless to say, I was blown away. If you like the snow, check out this post I wrote on the best winter hiking trails in SoCal.
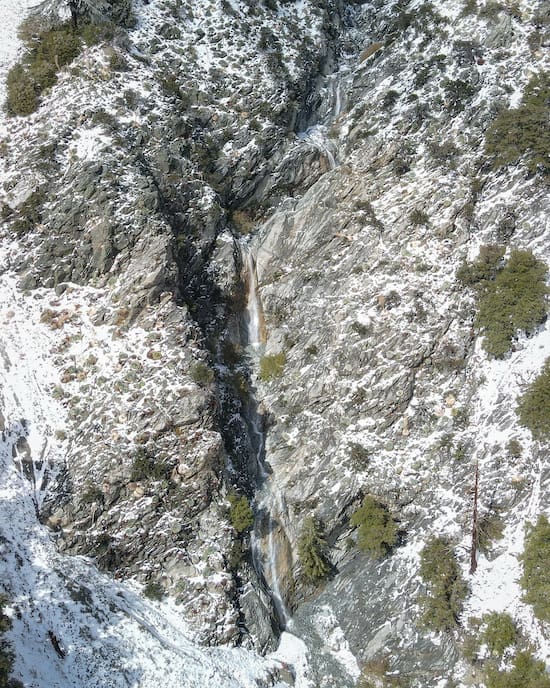
Can you spot the guy in blue in the image below?
Speaking of blue, Stoddard Falls, located just down the road from San Antonio Falls, has the bluest water I’ve ever seen, plus a natural rockslide and swimming hole! It’s only 0.75 miles roundtrip, meaning you can easily hike both waterfalls the same day.
The middle tier shown below reminds me a bit of 495 ft Bonita Falls, the second largest SoCal waterfall, in the sleepy mountain town of Lytle Creek. If you haven’t already, go check it out. It’s an easy and short hike, and the bottom tier alone is a colossal 100 feet tall.
For those who crave more adventure, there is a way to get up to the top tiers, but I’ll let you figure that one out yourselves as it’s not very difficult 😉
Not feeling this hike? Check out the following link to view the best waterfalls in and near Los Angeles
No, there is no swimming hole deep enough to swim.
It’s rated a 4.5 stars from 56 Yelp reviews.
San Antonio Falls is kid-friendly, as the majority of the trail consists of a paved road. Only the last section, a dirt trail, gets a little slippery and steep. However, venturing down the dirt trail is not necessary to view of the waterfall.
Yes, there is a section of the trail that overlooks the waterfall.
San Antonio Falls gets snow every winter.
San Antonio Falls’ bottom tier is 75 feet tall. If all the tiers are included, however, the waterfall is somewhere around 200 feet high.

Summer nights call for breathtaking sunsets! This short hike in the Santa Monica Mountains takes you to a ledge where you’ll get insane aerial views and the best cotton candy skies!
Topanga Lookout Trail is a 2.2-mile, roundtrip hike to a graffitied ledge in Topanga, located within the Santa Monica Mountains. This easy trail is child-friendly and dog-friendly. The total elevation gain is around 348 ft.
I enjoyed the views from the Topanga Lookout so much that I added it to my list of best SoCal hikes. The list also includes abandoned gold mines, SoCal’s largest waterfalls, and caves! Click the link below to choose your next adventure:
Best Hikes In Southern California

For directions to the Topanga Overlook trailhead and parking area, click here.
A small parking lot is located on Stunt Rd. You can always park along the street, just be aware of parking limitations with times.
SoCal Adventure Pass (required to park in SoCal mountains)
I arrived on a Thursday evening to avoid the summer heat during the day. Plus, I wanted to get those amazing sunset views!
The entire trail will be on the Topanga Tower Mtwy road, so be sure to stick to the left once you get to the split.
The road is mostly flat and curves. There really isn’t much shade, but the sun isn’t as harsh in the evenings.
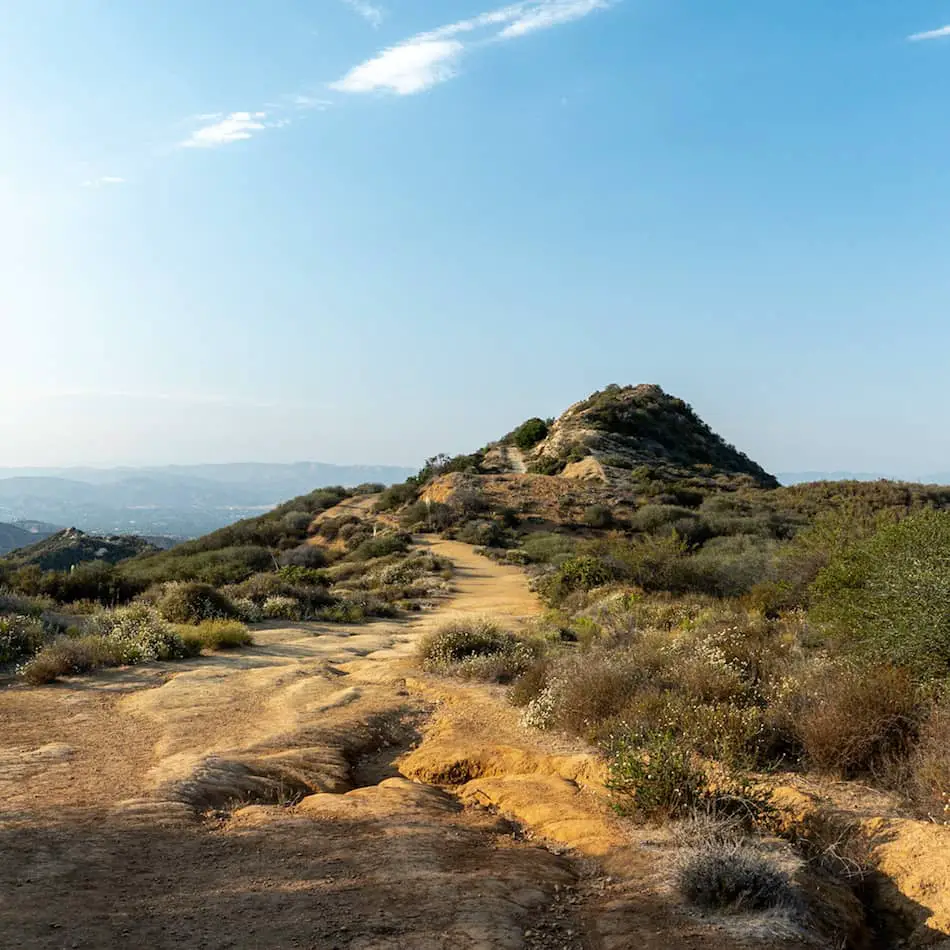
One short mile later, I was at the ledge!
This ledge used to be a fire tower, but it is now a popular place for sunsets and 360-degree views!
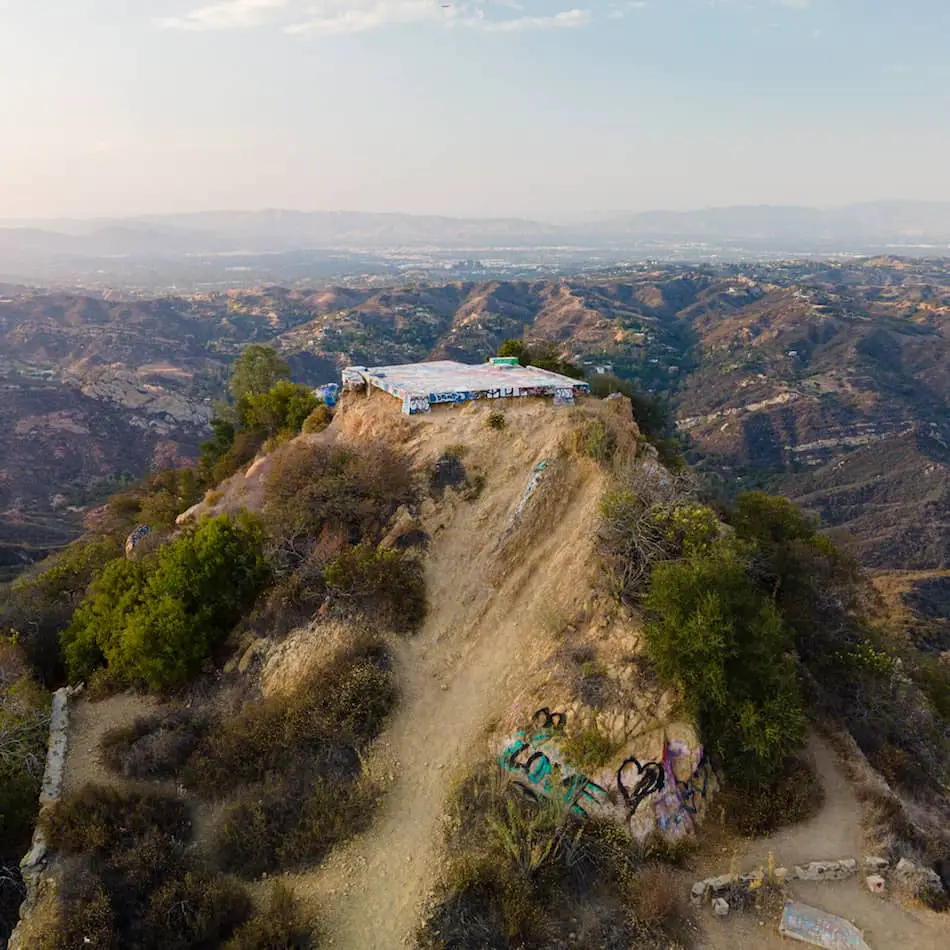
There are some stairs to the right which actually lead you to a slim pathway back to the trail.
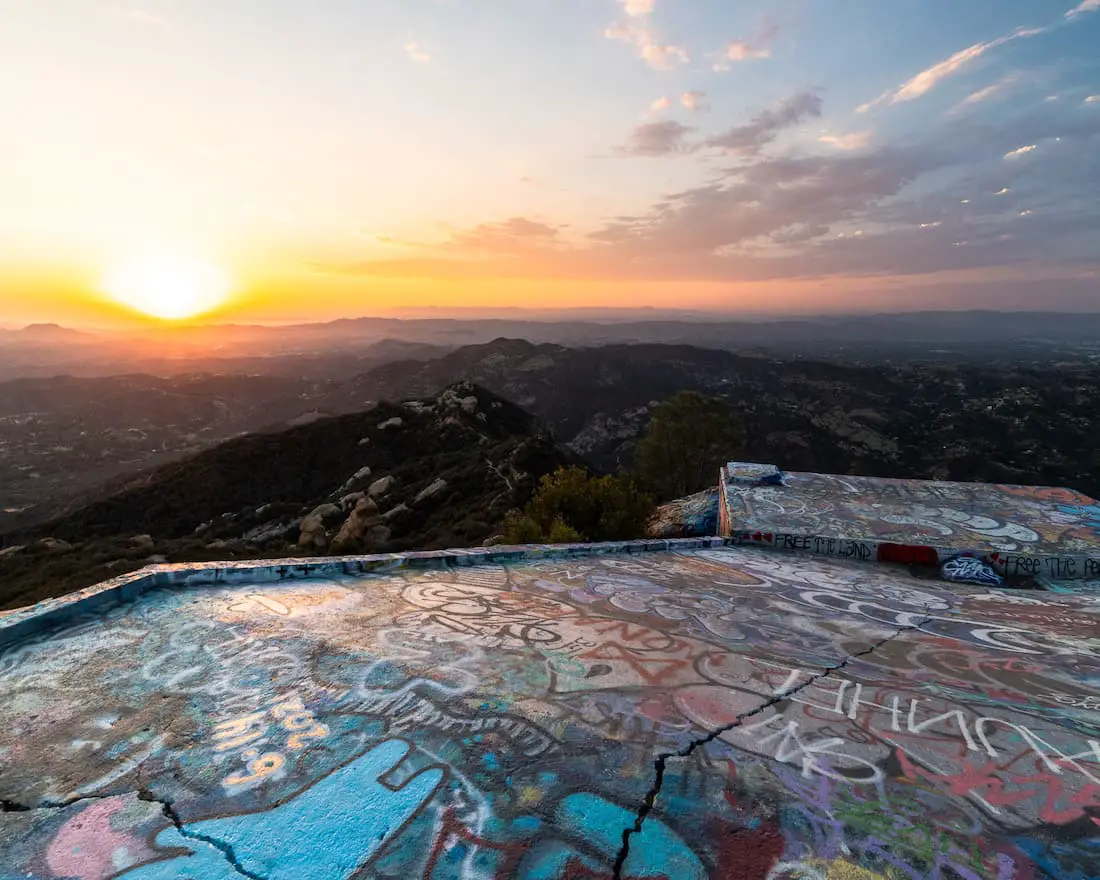
These are some absolutely amazing aerial views from our drone!

Do you spot the “all-seeing” eye?
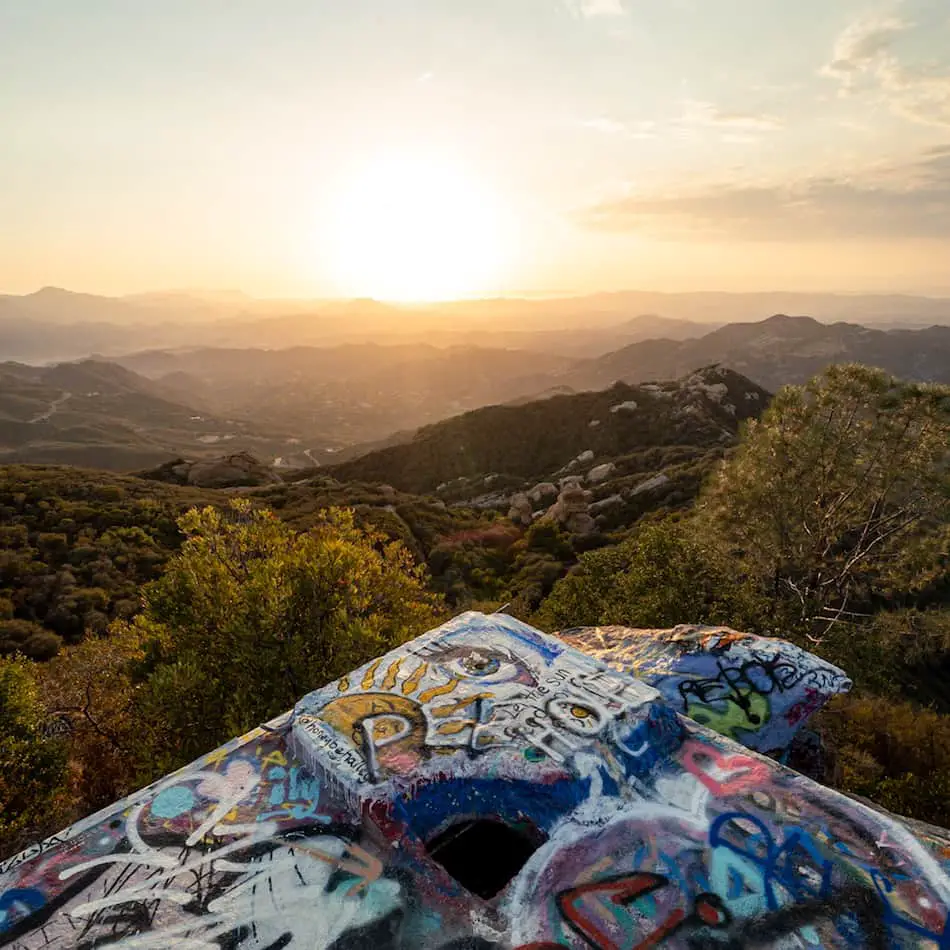
This beautiful sunset gave us a gorgeous show with cotton candy skies!
Just wait until blue hour hits and the city lights begin to twinkle.
I really recommend bringing your family, friends, or even just yourself. You’ll enjoy this summer night hike, or enjoy it all year-’round.

3.39 Miles
~1.5 Hrs
Moderate
Oct – Early June
1245 Ft
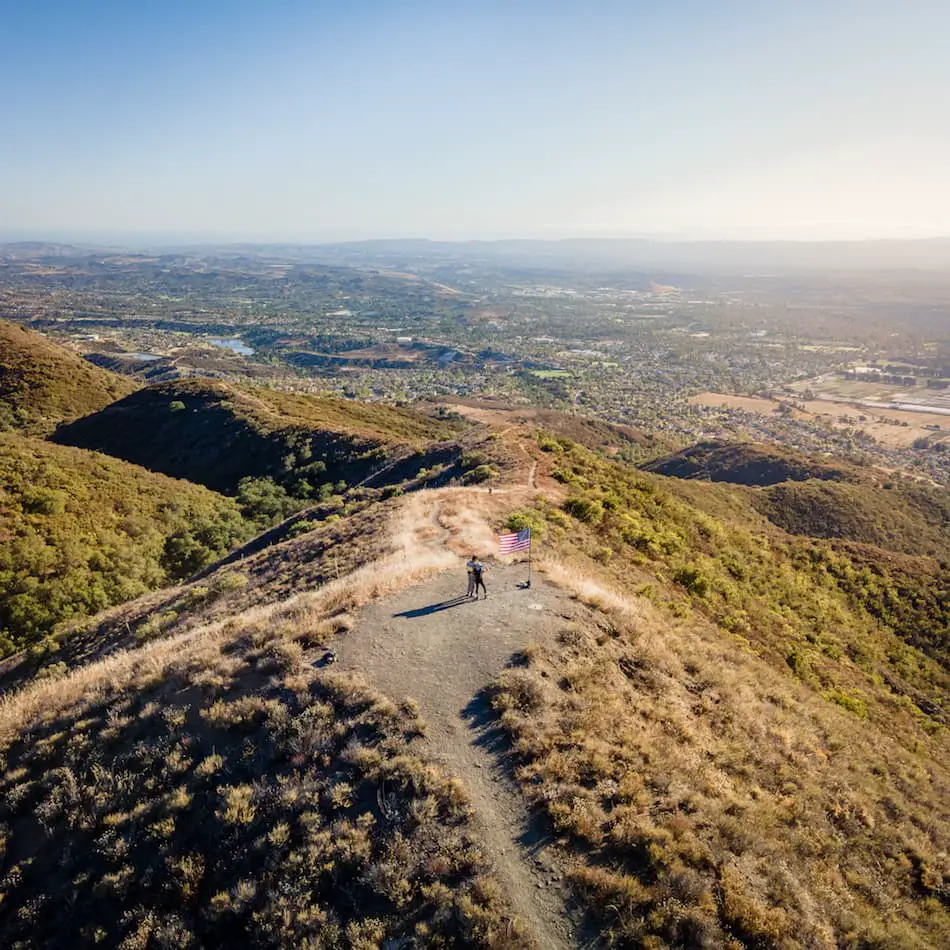
My experience at Bell View Trail was one of peace and solitude. We only encountered two groups of people, granted it was during the week. Although it’s not a very grandiose peak, the views are nevertheless amazing. I was able to see the golden hour sun rays reflecting off the beautiful Pacific Ocean and larger mountains towering over us.
The Bell View Trail to Flag Summit is a moderately difficult 3.39-mile roundtrip hike located in Trabuco Canyon within the Santa Ana Mountains. Most of the trail consists of a sunny dirt road with a decent elevation gain of 1245. Dogs are allowed, but must be on a leash.

For directions on your Google Maps, click here.
The trailhead is on Robinson Ranch Rd, near Trabuco Canyon and Rancho Santa Margarita. There is no parking lot, but there’s plenty of parking along the street.
Here are more OC hikes you’ll love!
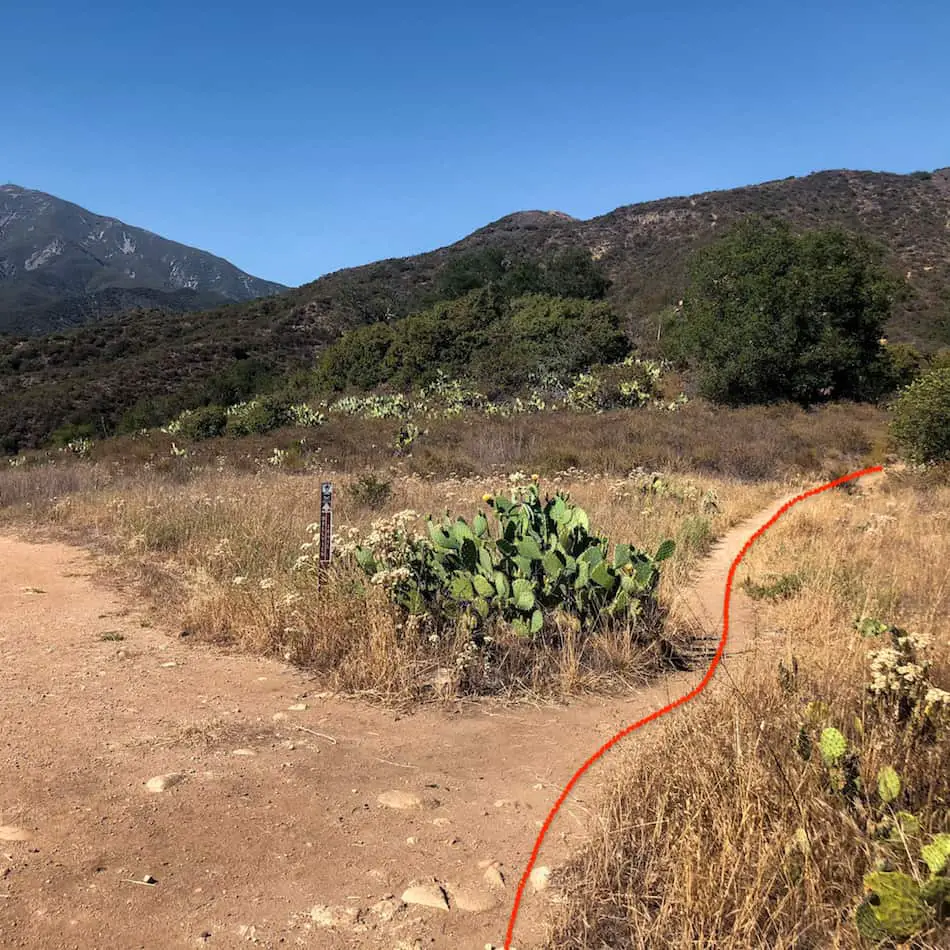
The hike begins in a tiny green park on the side of the road. Parking on the street is allowed. You’ll see two trailheads so make sure to take the one on the left.
The majority of the hike will consist of a dirt road but don’t underestimate this road as it can get pretty steep in some sections as you get closer to Flag Summit.
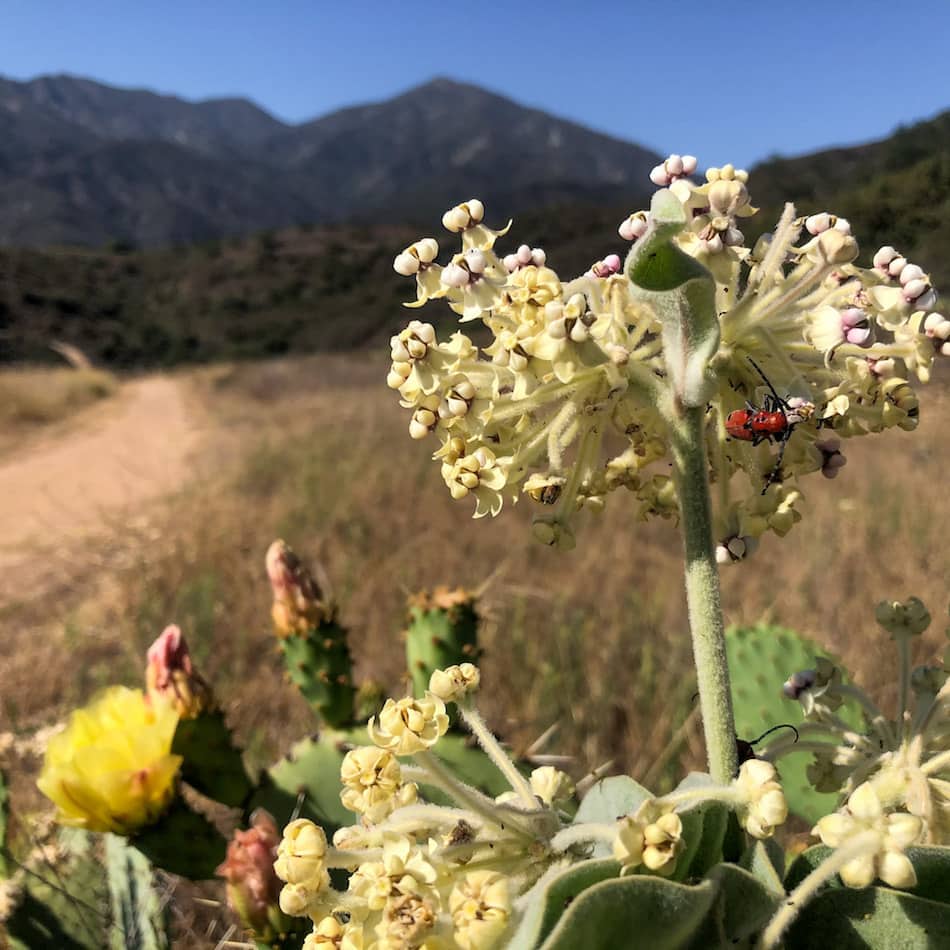
There are tons of cacti and succulents along the trail. Definitely keep an eye out for some unique-looking plants and insects.
I’ve yet to see any like the ones here at Trabuco Canyon. We spotted giant red beetles and bright purple flowers to name a few! (More on those flowers later).
After the two big “switchbacks” you’ll come to a road split. You can head either left or right, but I highly recommend taking a right because this section of the trail becomes a single track with a bit more shade.
You can take the route to your left on your way back from the summit. (Need help? Check out our Map!)
The single track is denser with vegetation. Hence why it’s a more interesting route.
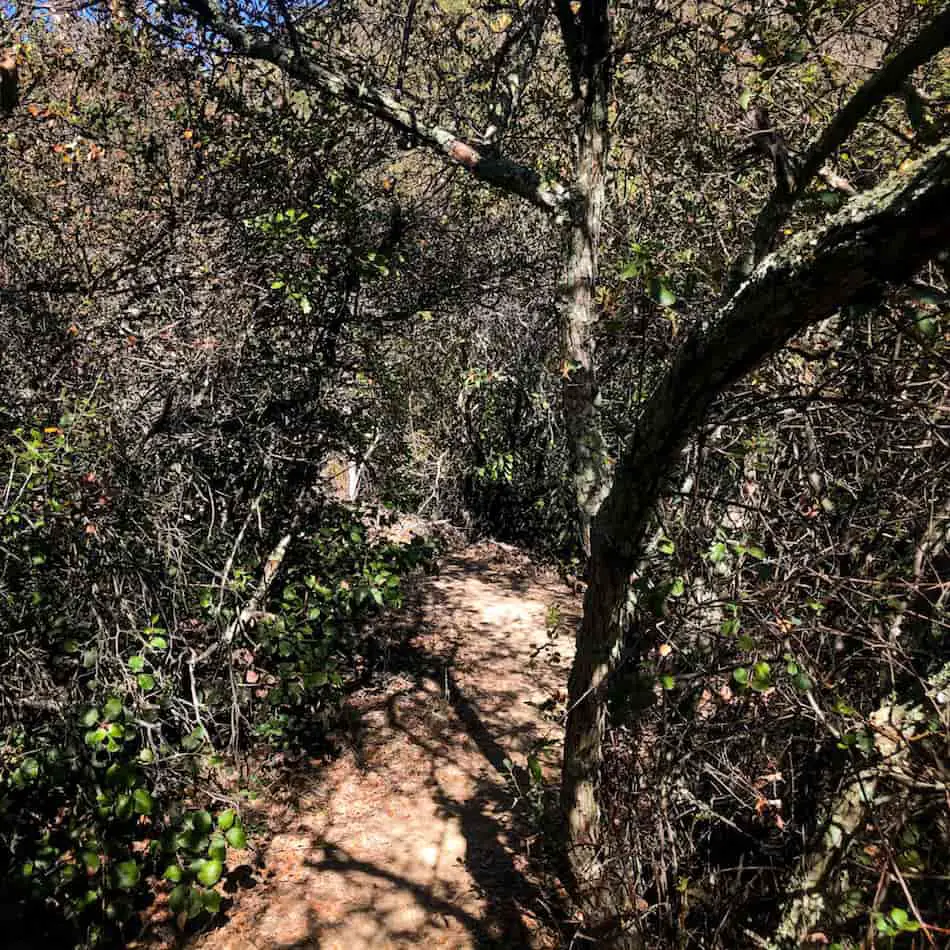
The single track comes to an abrupt end by merging with the dirt road from the first section of the hike.
You should be able to clearly see the flag from this point.
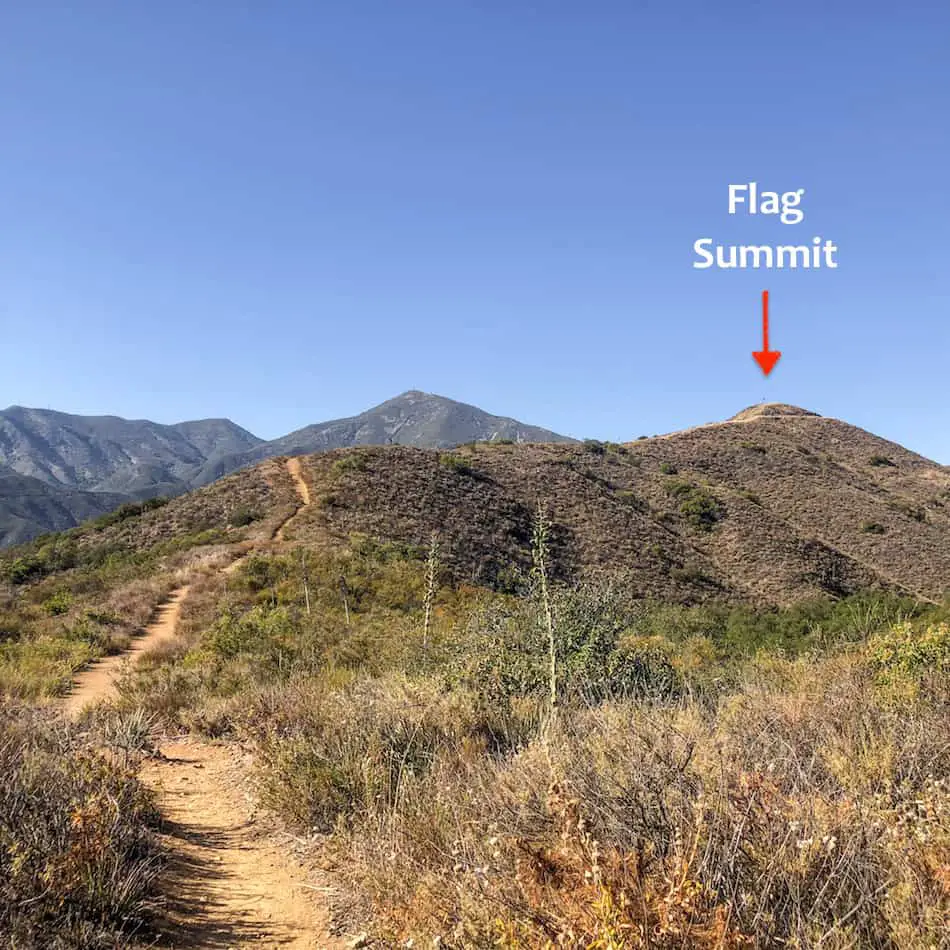
Almost there, just one last stretch!
The view at the top is breathtaking, to say the least. Even on a hazy day, you can clearly see the ocean and the cargo ships making their way to the Long Beach Port.

If you turn your back to the sea you’ll find yourself face to face with a majestic mountain range towering over you. You can’t get enough regardless of where you look.
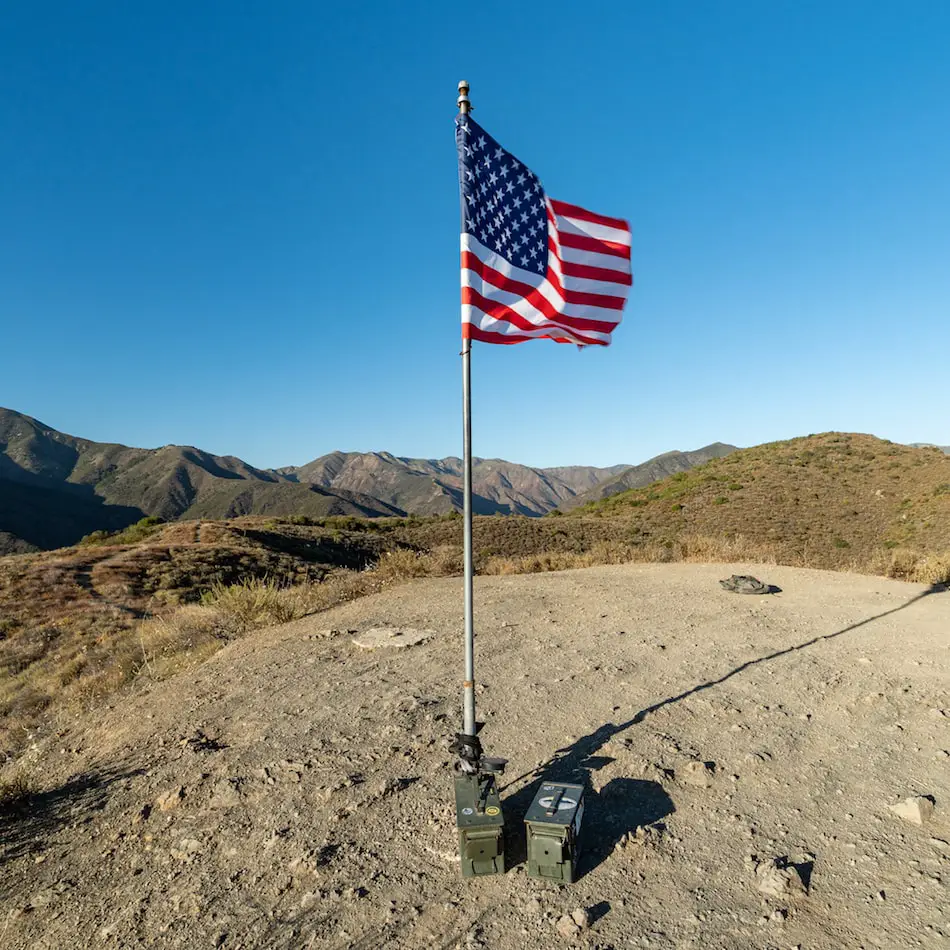
One last aerial shot of the summit. Look at that beautiful golden sunset.
I really enjoyed this hike in Orange County. There were tons of beautiful and unique wildflowers and nice views.
This is a great hike if you’re looking for something a little more patriotic around Independence Day!
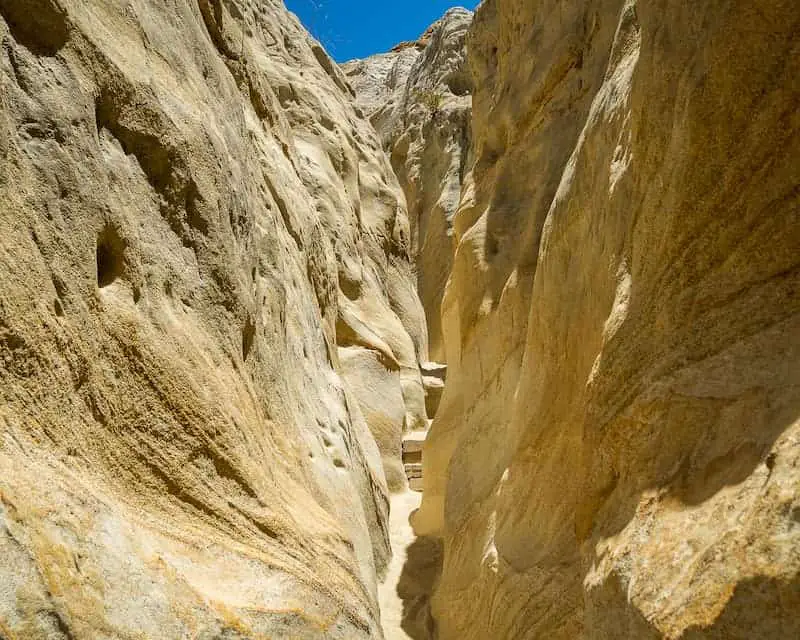
Take your family on a fun hike featuring a slot canyon and epic sandstone formations. The slot canyon is located in San Elijo Lagoon Ecological Reserve, and is so narrow you sometimes have to turn sideways to get through the whole thing. The last part requires climbing up a steel ladder!
Annie’s Slot Canyon Trail is an easy 1.3 mile roundtrip hike near Solana Beach. Much of the sunny trail is decorated with vibrant wildflowers, stunning ocean views, and of course, a fun and exciting slot canyon waiting to be explored. Dogs are allowed on the trail, with the exception of the slot canyon.
Annie’s Canyon is one of the best hikes not only in San Diego, but also in all of Southern California. Don’t miss out. Explore the best hikes by clicking the links below:
Best Hikes In Southern California

This version of Annie’s Canyon Trail begins from Gemma Parks Interpretive Trail. It’s more scenic and cuts deeper through the preserve than other versions.
To be redirected to the trailhead via Google Maps, click the link below.
150 Solana Point Cir, Solana Beach, CA 920754
6:00 am – 6:00 pm
Sundays they stay open until 8:00 pm.
Once you arrive at the dead-end, the trailhead will be located to your right, leading away from the ocean and further into the San Elijo Lagoon Ecological Preserve.
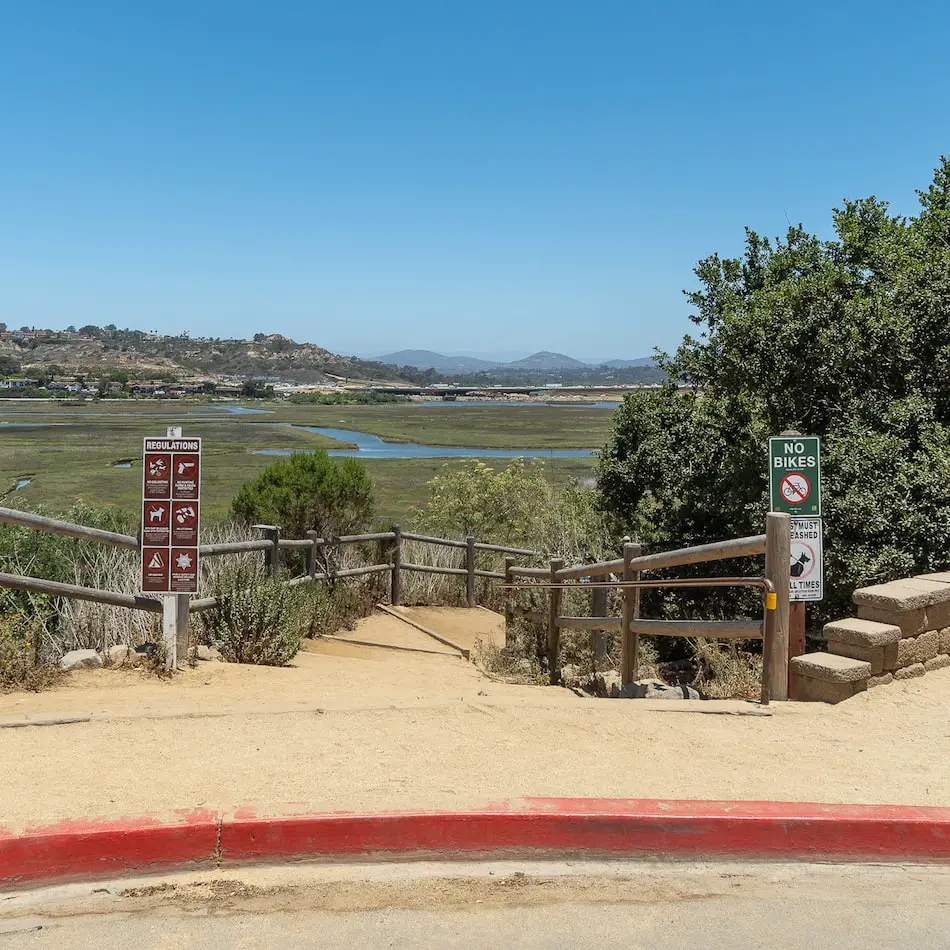
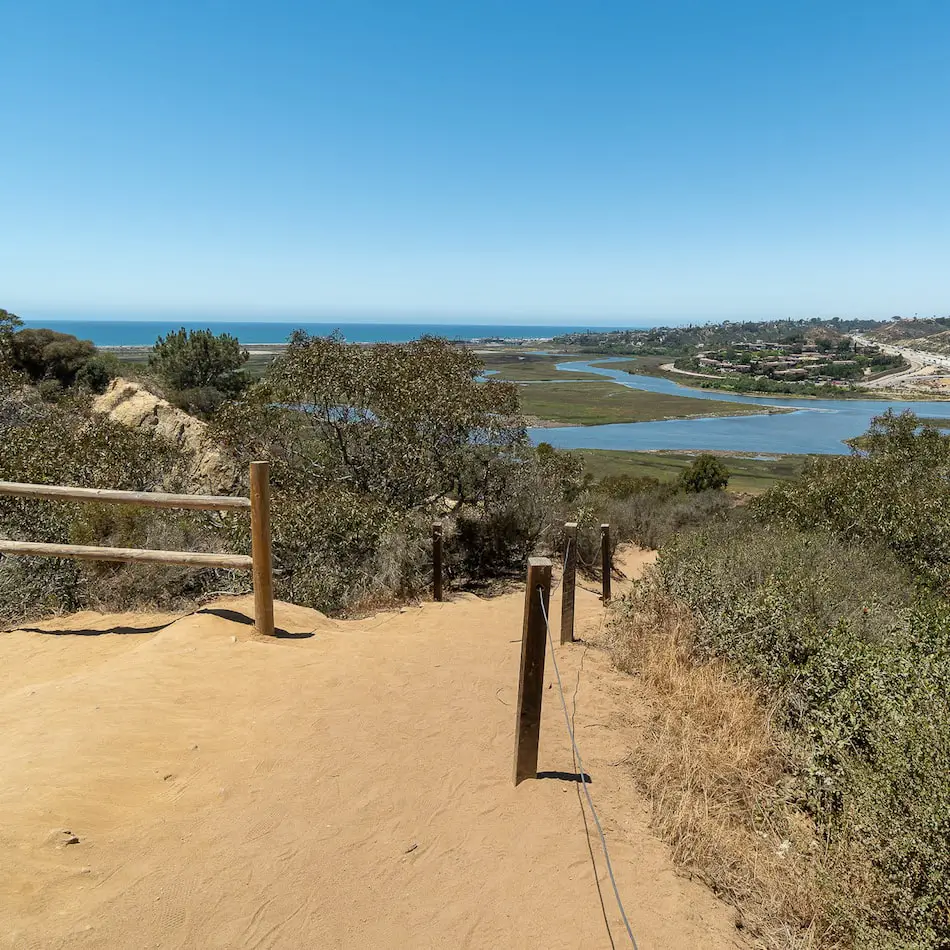
I love this trail because from the start you’re rewarded with amazing views of wildflowers, a beautiful green marsh, and a flowing creek.
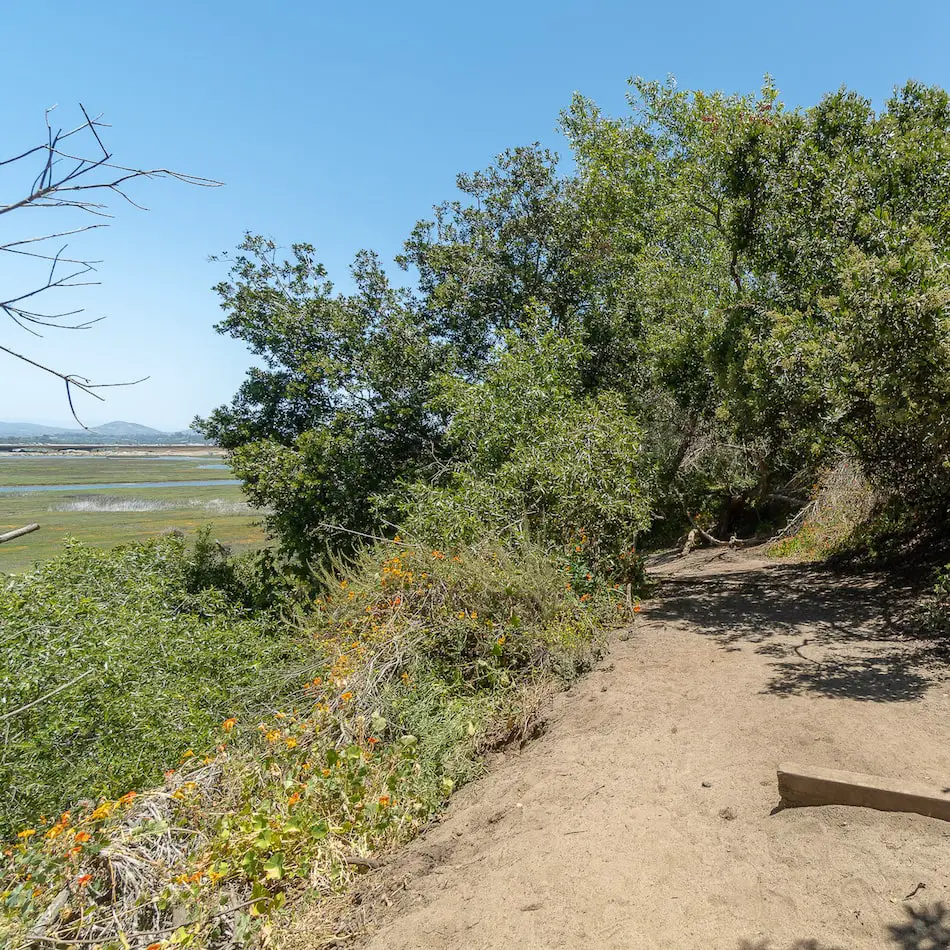
Keep an eye out for a vibrant orange plant-like substance growing on the grass and other plants.
This is a parasite known as Cuscuta California and is harmless to its host but adds to the colorful scenery of the trail.

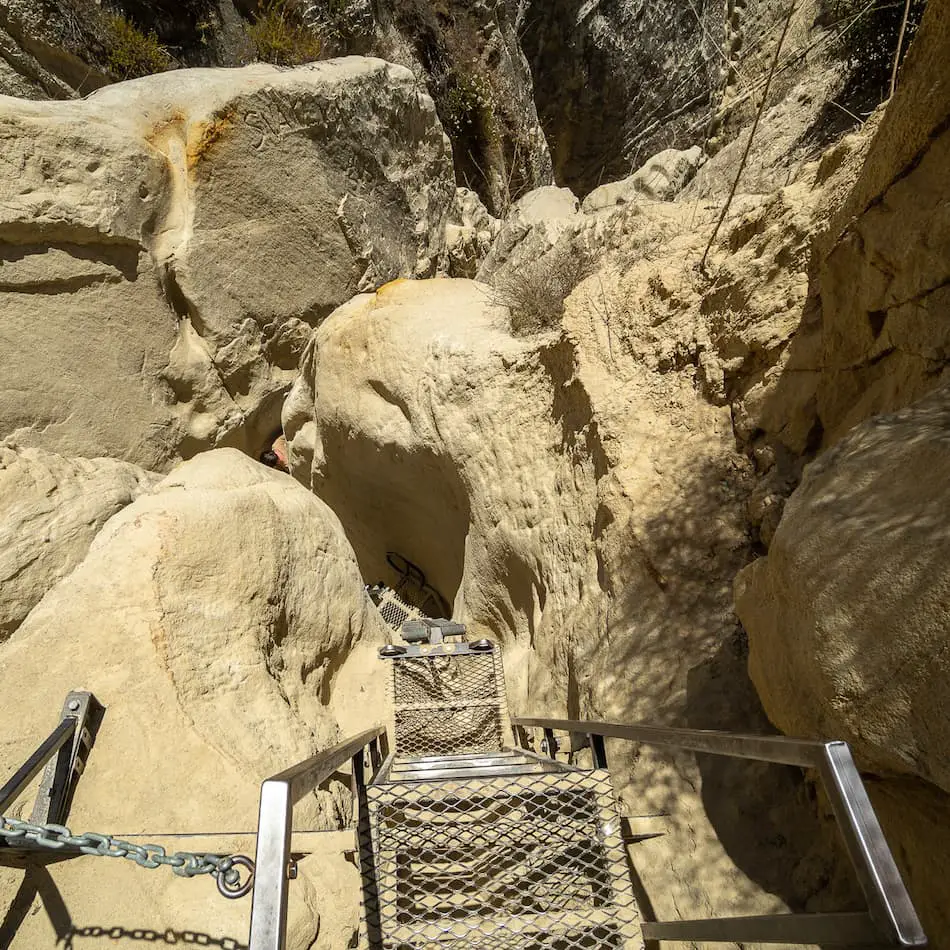
As soon as you enter the slot canyon, you’ll notice sandstone cliffs beginning to rise on both sides and the trail becoming increasingly more narrow.
Almost immediately after venturing into the narrow section of the slot canyon, you’ll see a small cave to your left, which you can explore if you’d like.
This is probably why the locals refer to Annie’s Canyon as the “Mushroom Caves.”
Read More: 80ft Cedar Creek Falls & Huge Swimming Hole in SD County
You’ll be able to see the cliffs on the opposite side of the canyon from inside the little cave. It’s a nice spot for a short break and to take in the beauty of the sandstone formations around you.
As you continue further up the canyon, the trail becomes narrower and the walls more captivating, almost as if someone carefully used brush strokes to mold the walls into their current formation.
Read More: Cowles Mountain: #1 Trail in San Diego County
There is a steel ladder about 15 feet high located at the end of the slot canyon. Unless you turn back, this is the only way out so watch your step as it’s a long way up!
Note! If you visit on a weekend, the slot canyon may be crowded from beginning to end, making it impossible to head back the way you came. Therefore, make sure everyone who enters the slot canyon can either climb the ladder on their own or be carried up.
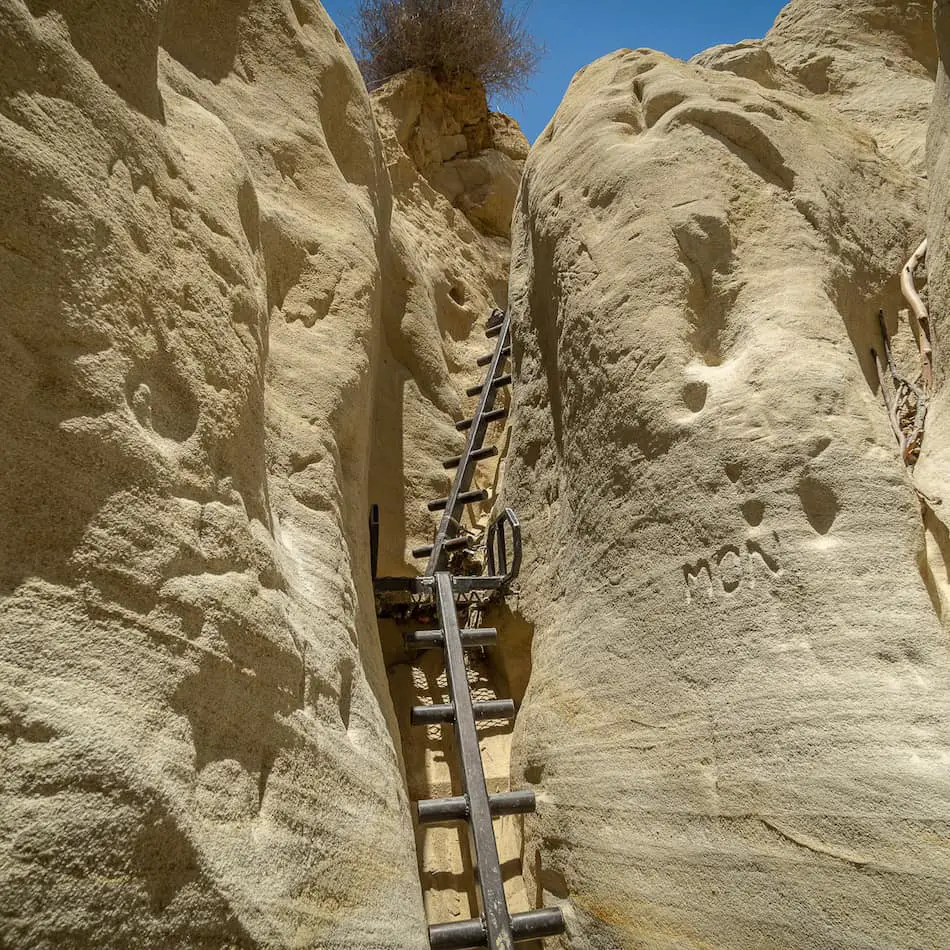
Here is a view looking down from the top of the ladder.
When you reach the top you’ll be rewarded with a view of the San Elijo Lagoon Ecological Preserve stretching all the way into the Pacific Ocean.
Want to explore a slot canyon hike with a waterfall that literally flows onto the beach? Check out the Ho Chi Mihn Trail which is also located in San Diego.
How narrow is Annie’s Canyon Trail?
The slot canyon section of the trail is about 3 feet wide on average but can get as narrow as one foot, making it very difficult for one person to pass the person in front of them.
Where does Annie’s Canyon Trail start?
Annie’s Canyon Trail actually begins in a neighborhood that is adjacent to San Elijo Lagoon Ecological Preserve.
Is Annie’s Canyon Trail good for kids?
Annie’s Canyon is a great trail for kids because it is short, easy, not steep, and fun. The only section that may prove difficult for very small children is the last part of the slot canyon, which requires climbing up a roughly 15ft steel ladder. Unless the trail is empty, hikers will not be able to turn around and head back the way they came once inside the slot canyon. All terrain strollers can be used for the entirety of the trail with the exception of the slot canyon.
How long of a hike is Annie’s Canyon Trail?
The roundtrip distance is 1.3 miles.
How did Annie’s Canyon get its name?
According to The Coronado Times, Annie’s Canyon is named after a 30 year resident of Solana Beach and active conservationist. Thanks to her more than generous donation, the San Elijo Lagoon Conservancy was able to acquire the land from private landowners. They quickly cleaned up the trash and graffiti, and opened to the public in 2016.